Admin Guide: How to Add and Customize Theme in Customer Portal?
HomeFeaturesCustomer Self-Service PortalAdmin Guide: How to Add and Customize Theme in Customer Portal?
Admin Guide: How to Add and Customize Theme in Customer Portal?
- Wavity allows administrators to create and fully customize themes in the Customer Self-Service Portal to match their organization’s branding and design requirements.
- Note: Only users with Admin privileges can add or edit themes in the Customer Portal.
Access the Customer Portal Admin Settings
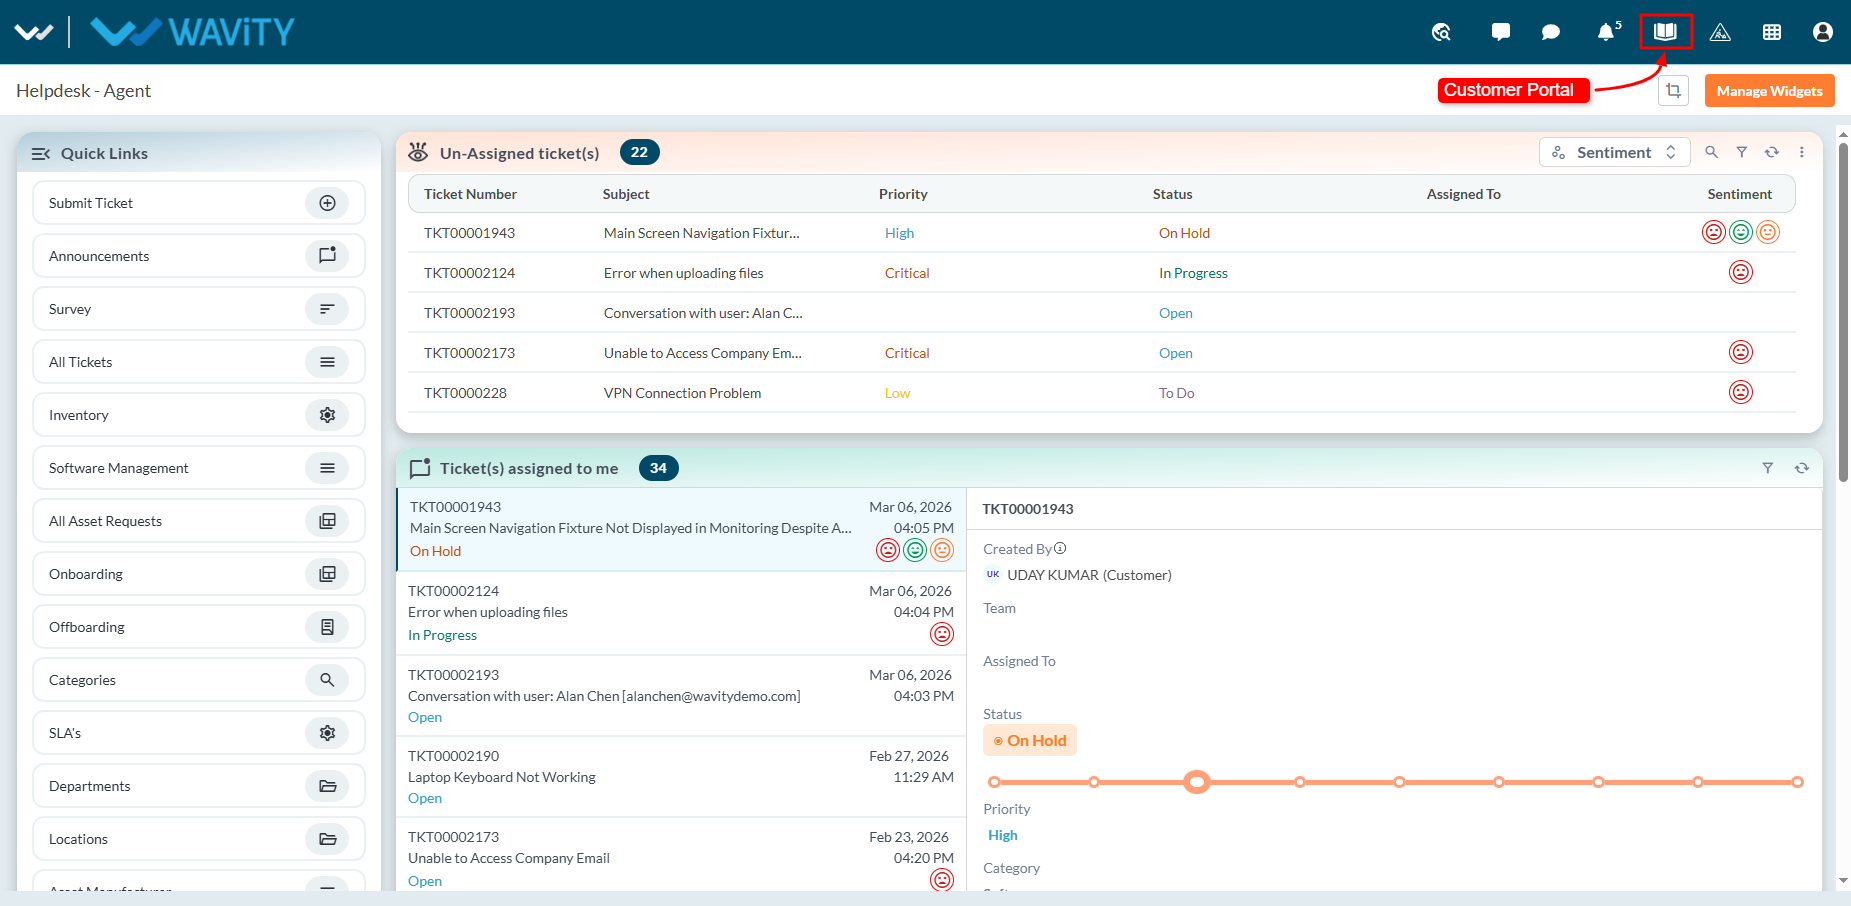
- Log in to your portal. Click the Customer Portal icon located at the top of the screen.
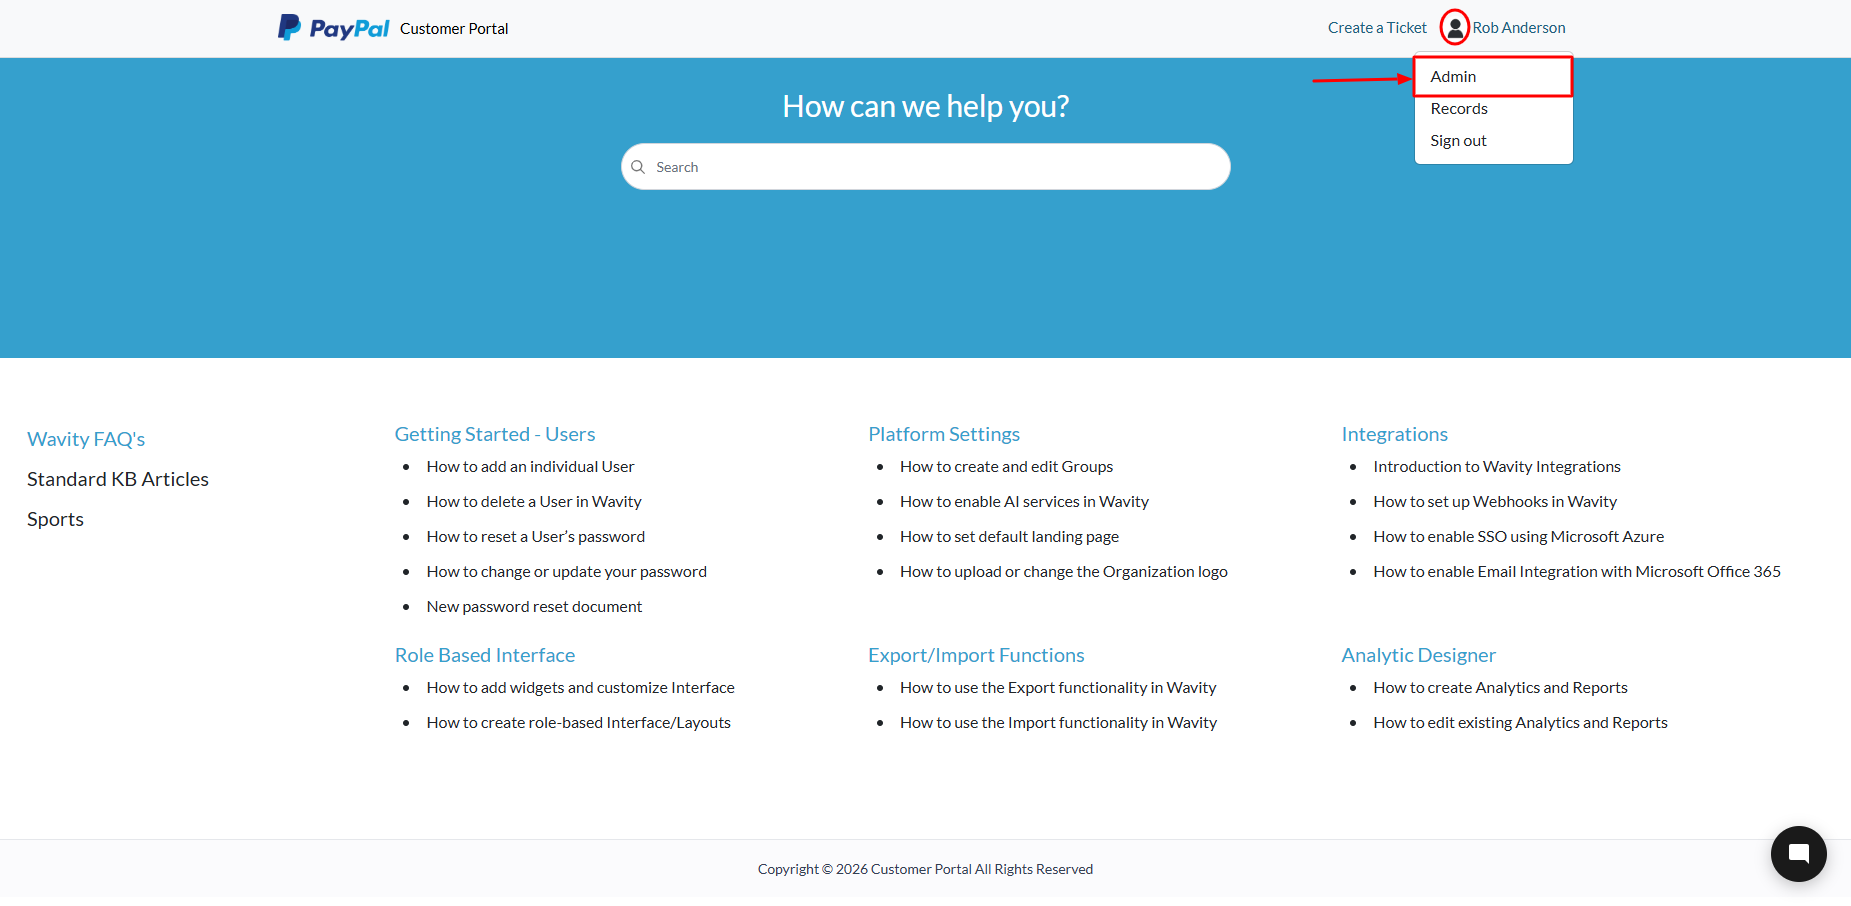
- Click Admin under your profile to open the Admin Control Panel.
Add a New Theme
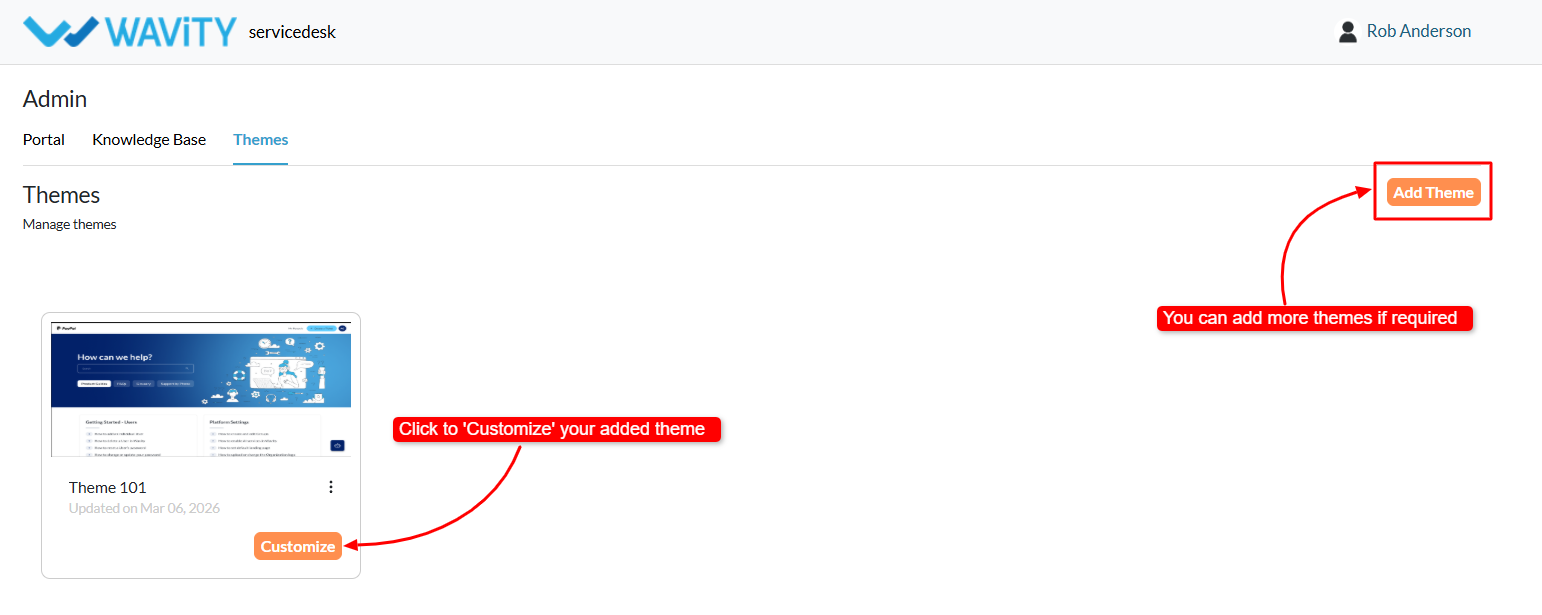
- In the Themes section, click Add Theme.
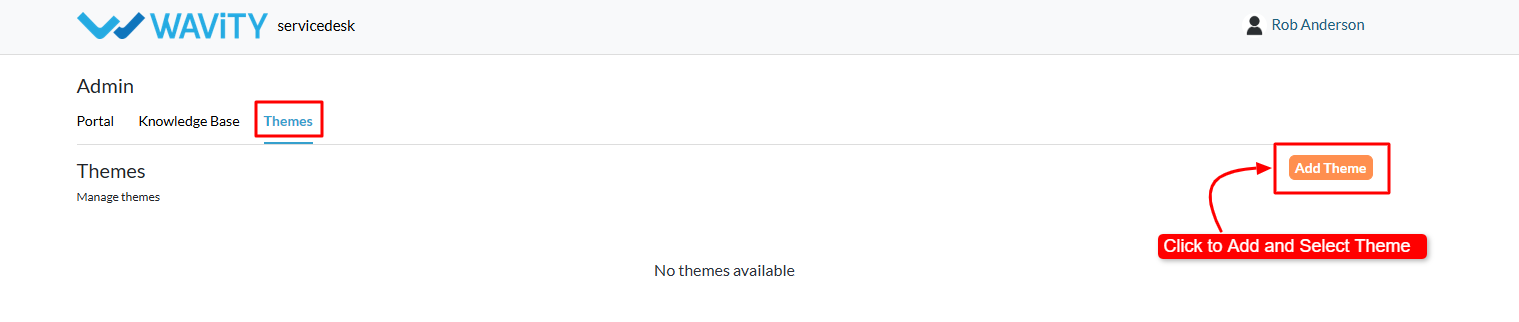
- Select the theme template you want to apply to your portal.
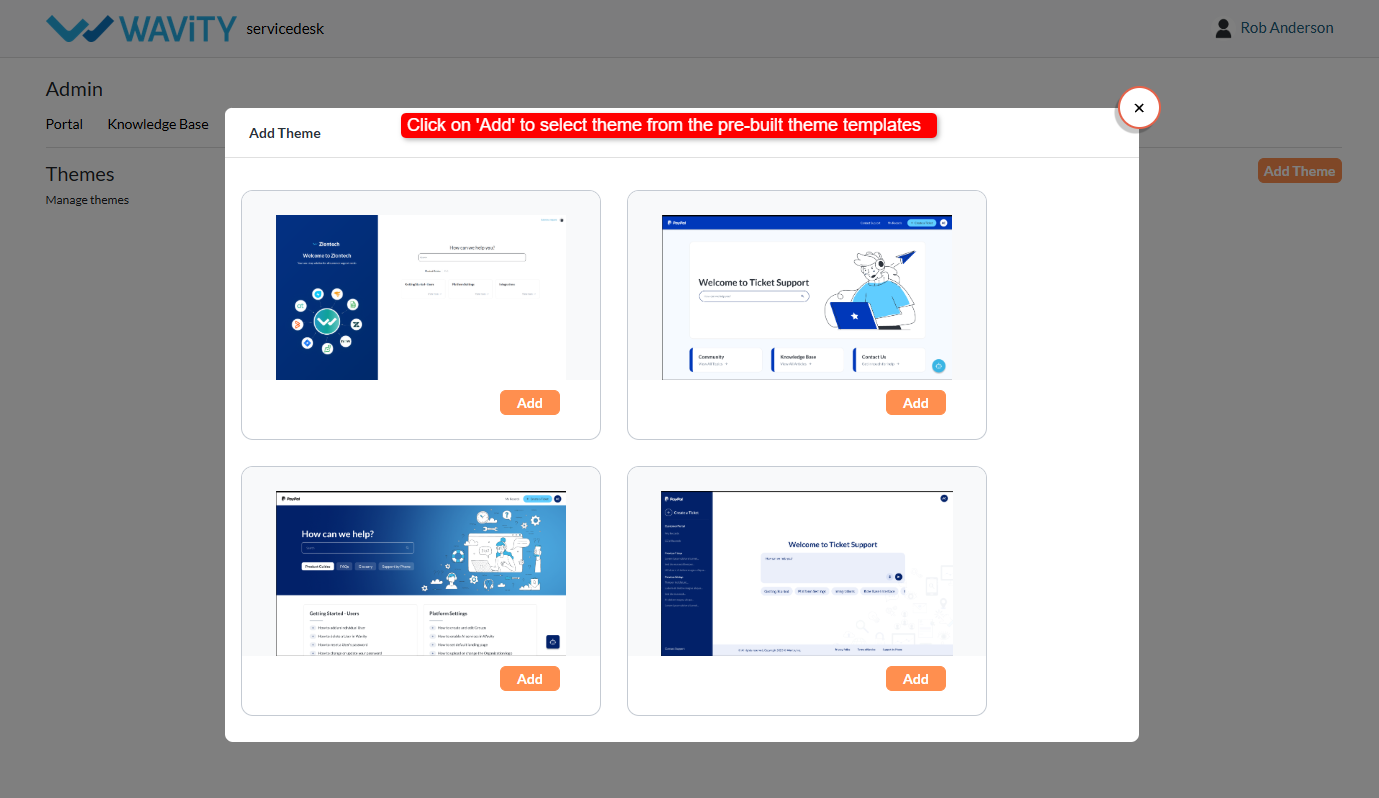
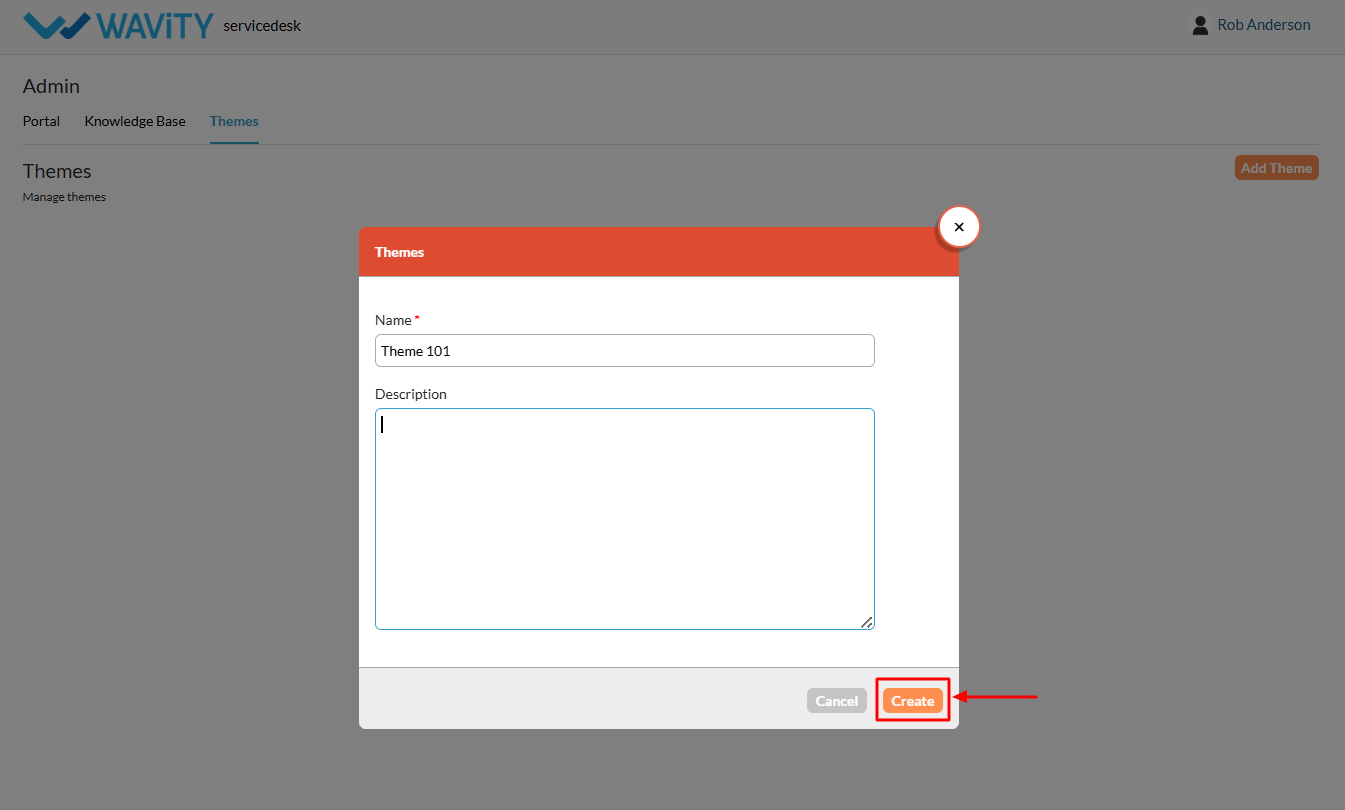
- Enter the following details such as Name: Provide a name for the theme & Description: Add a brief description (optional).
- Click Create to add the theme.
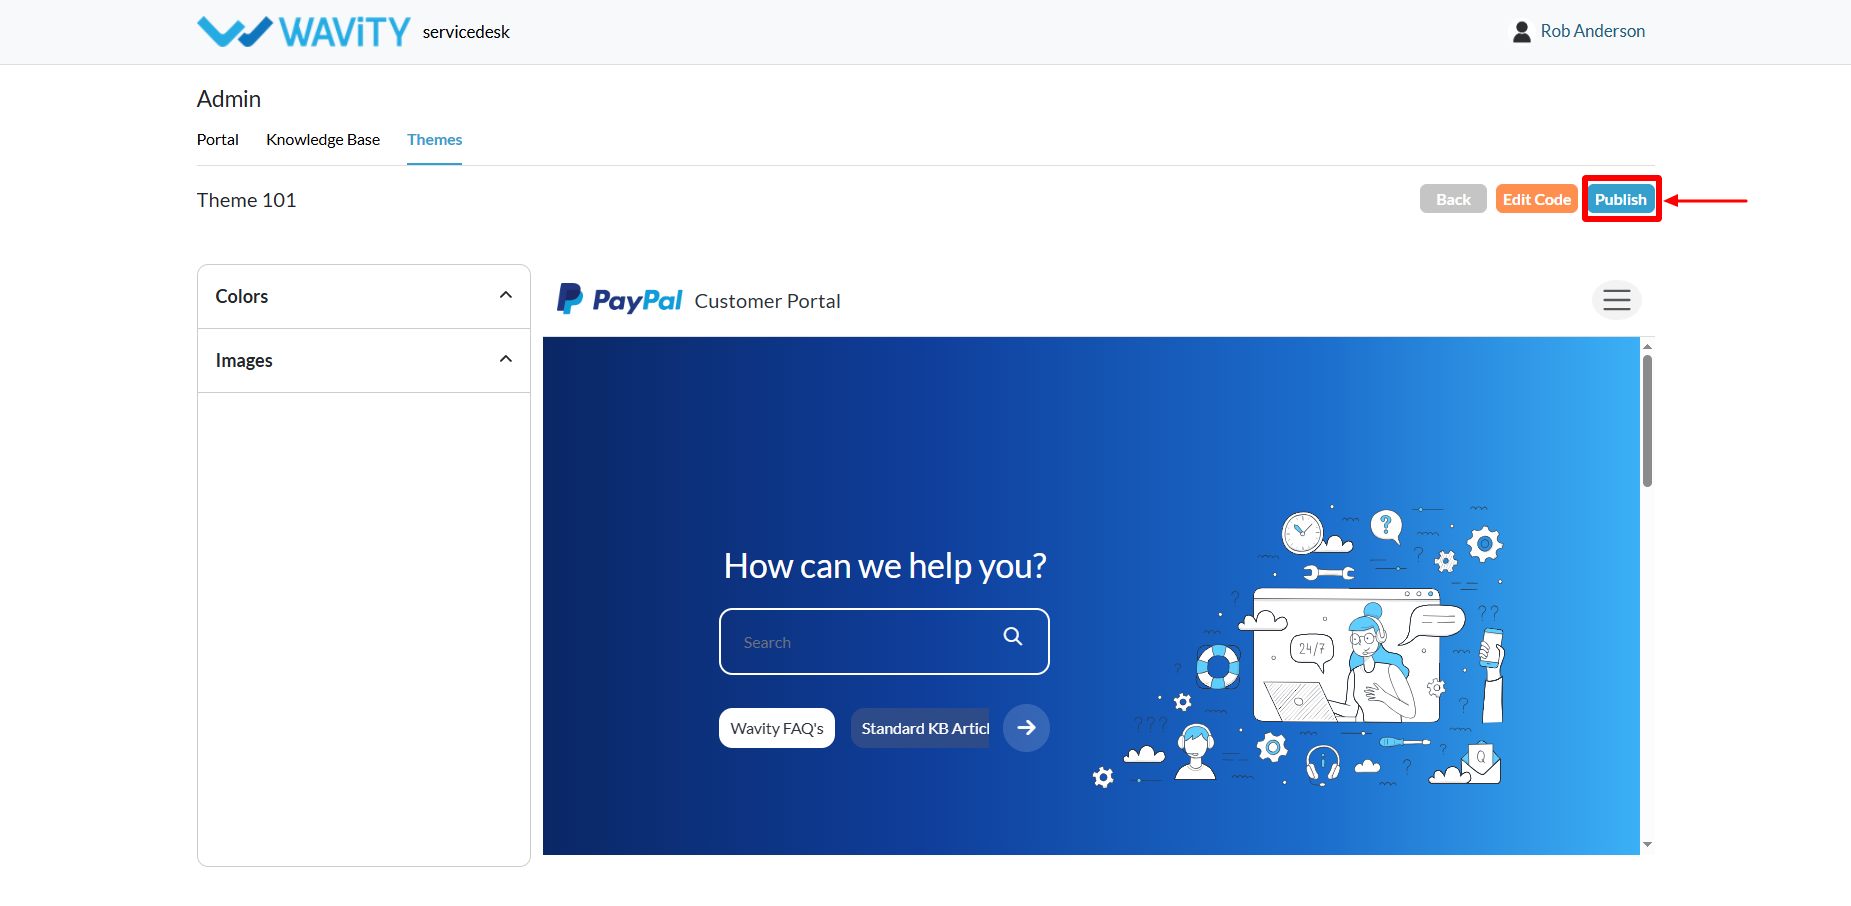
Theme Customization
- Your new theme is now created and available for customization.
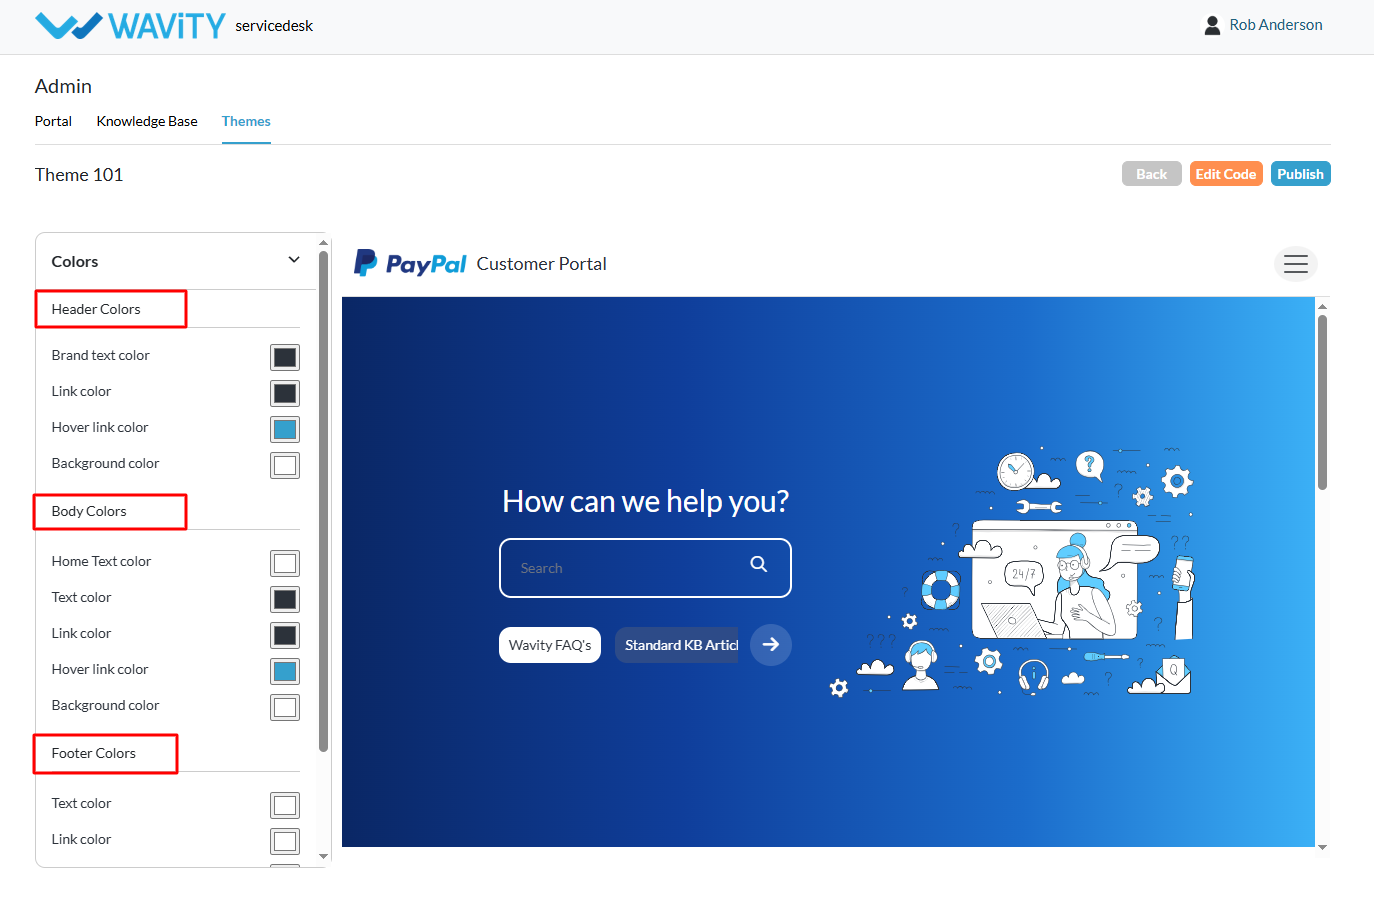
- Click Colors in the theme settings.
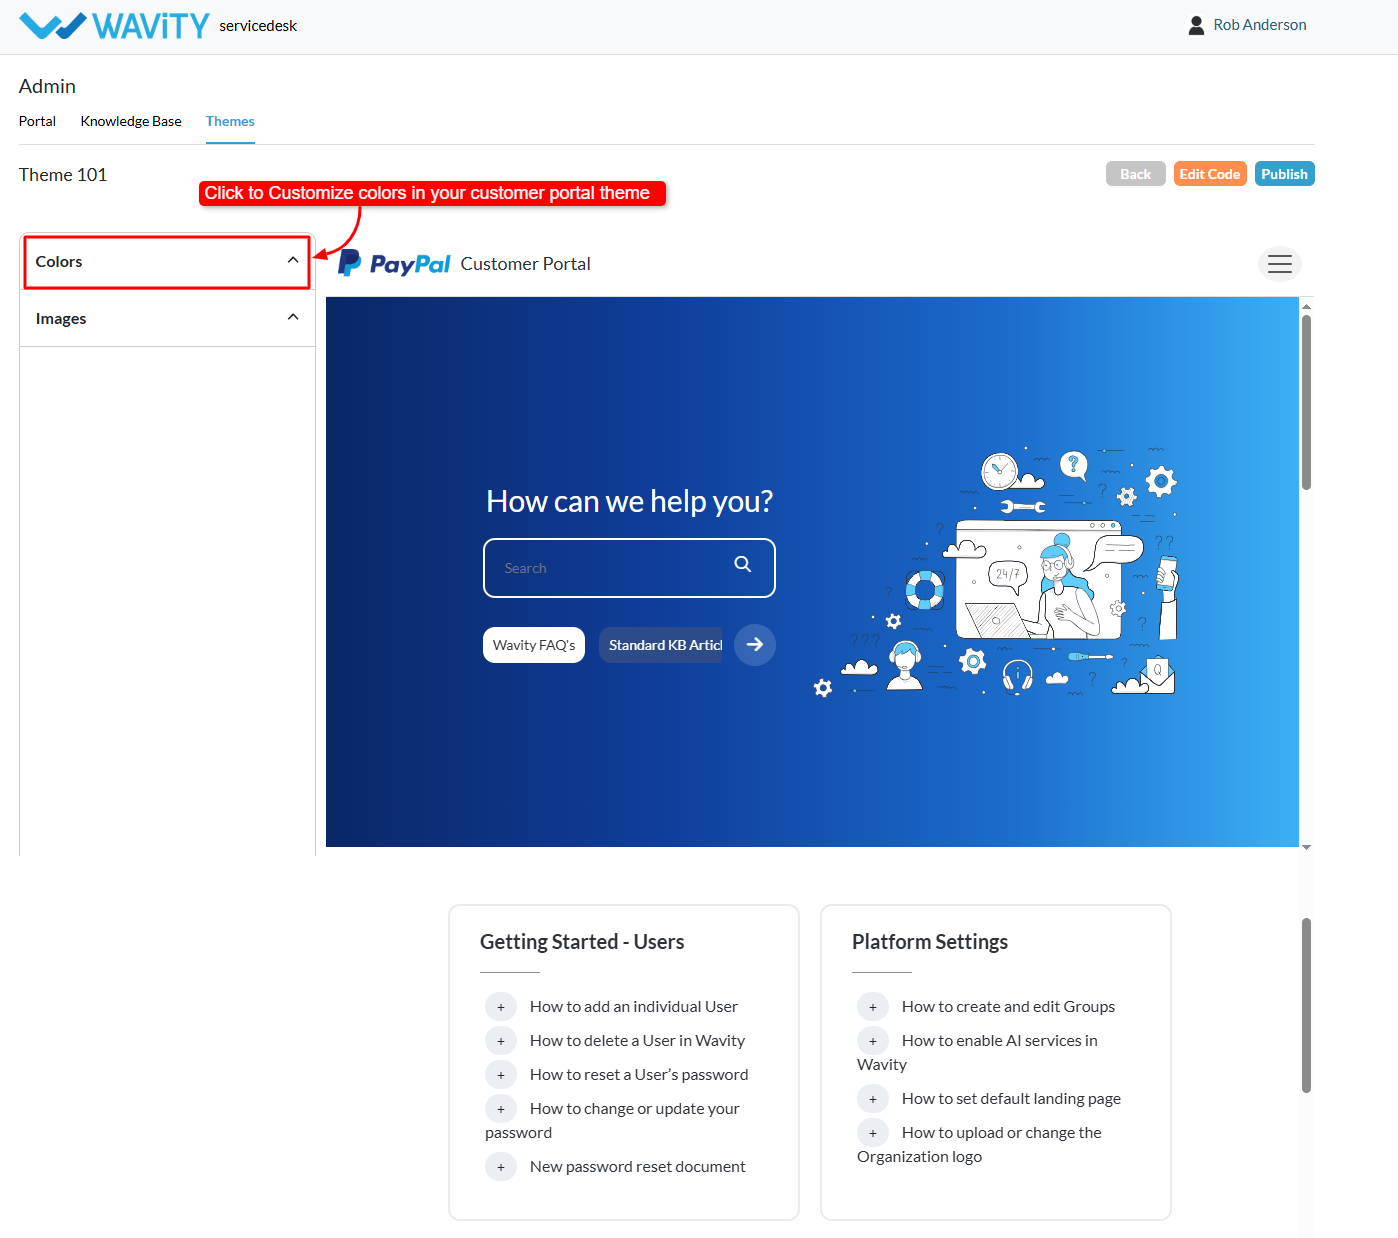
- Customize different color elements of the portal, including: Header colors, Body colors, Footer colors, Text colors, Background colors, Link colors and many more. You can adjust these settings to align with your organization’s branding.
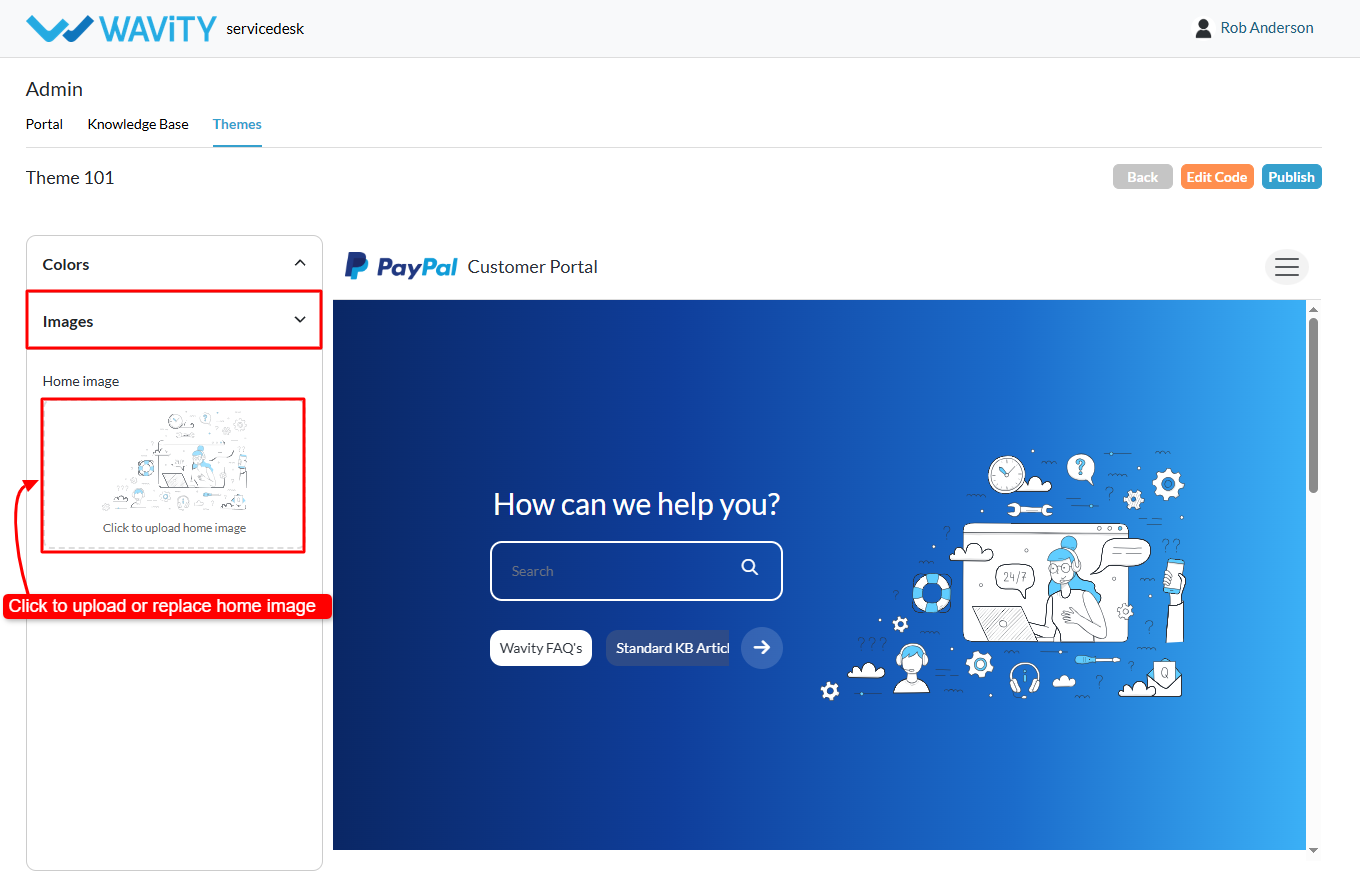
- Click Images in the theme customization options.
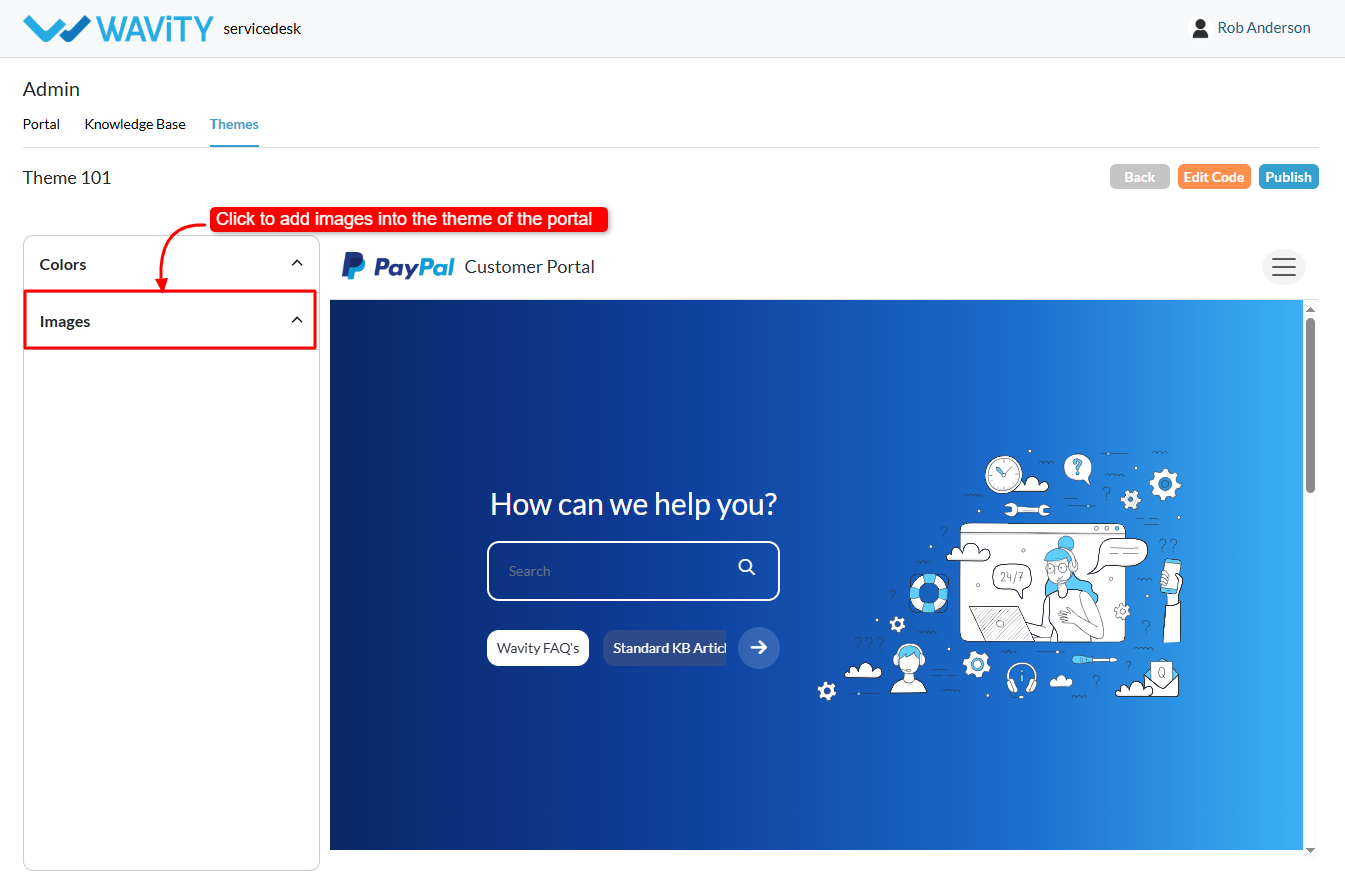
- You can now upload or replace home images in the portal.
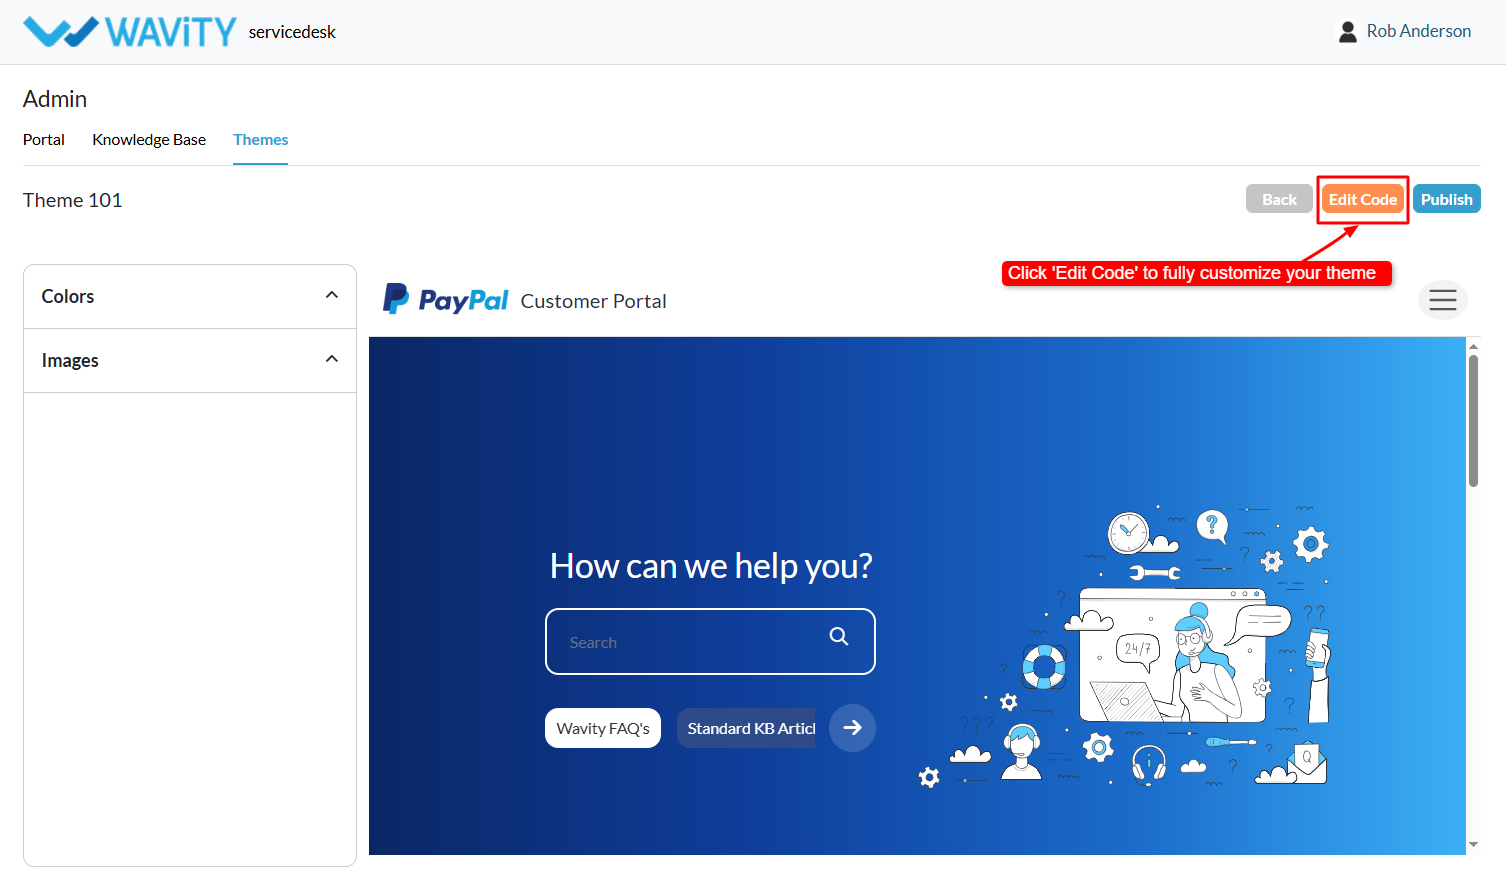
- For deeper customization: Click Edit Code. Administrators can modify the theme’s code to implement advanced design according to specific requirements.
- Once all changes are complete: Click Publish. The new theme will be applied to the Customer Self-Service Portal.