Platform Settings For Admin
Platform Settings for Admin
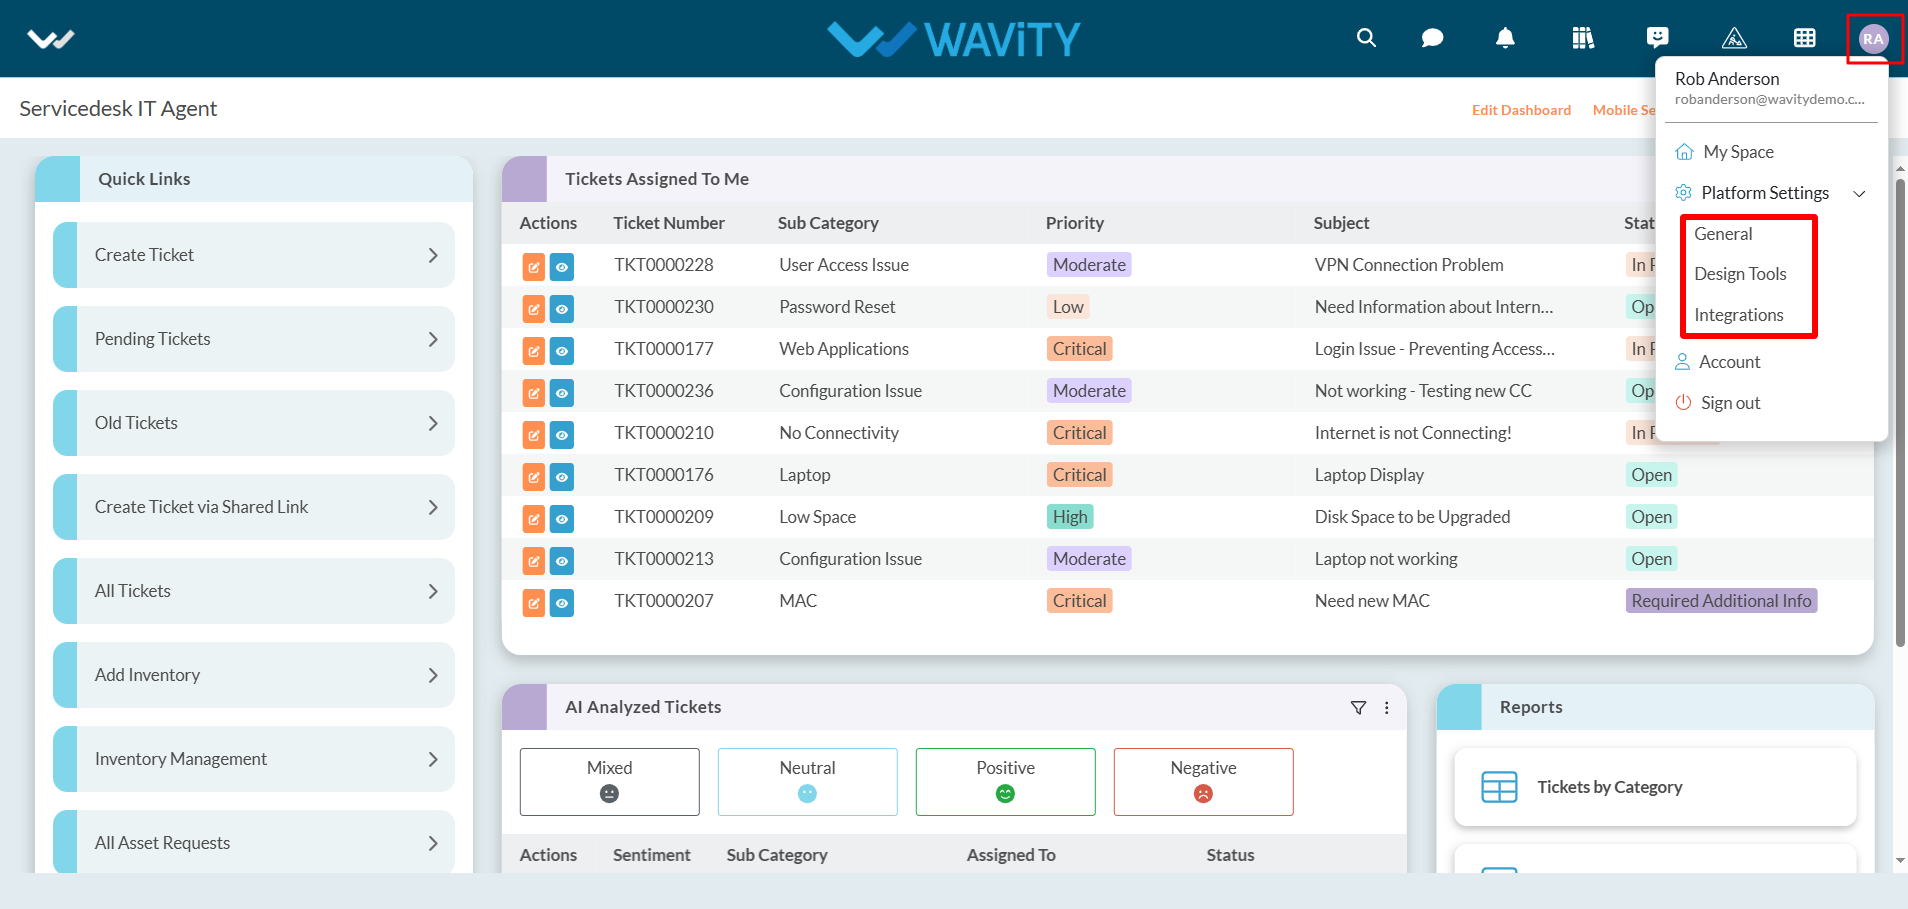
- Only Admins have access to Platform Settings within the platform. To access it, click on the ‘Profile’ icon in the top-right corner of your dashboard, as shown below.
- In Platform Settings, three options will be displayed: General, Design Tools, and Integrations.
- Click on General from the Platform Settings menu.
- In platform settings – general page, there are sections such as Users, Groups, Preferences, Geo-Fence, Mobile, Sessions, Schedulers, Work Calendar, Ticketing & Asset Discovery. Basic functions of each section are shown below.
- Users: To add Users in the platform
- Groups: To edit groups and add users in an individual groups.
- Preferences: It contains provisions to update logo of the tenant, set time zones, set data restrictions, set landing pages and set password preferences.
- Geo Fence: It contains provisions to enable Geo-Fence to enable/restrict usage of platform based on geographical locations.
- Mobile: It contains provisions to enable mobile restrictions for individual users or groups.
- Sessions: It will display currently logged users in the platform.
- Schedulers: It contains provisions to enable or disable schedulers. Schedulers shall be used to generate regular follow-up emails which will be triggered automatically based on required details and conditions.
- Work Calendar: It contains the provision to set your working hours of an organization. It will enable automation emails to be triggered based on work calendar settings.
- Ticketing: It contains options to set up and define Macros, Auto signature, AI Chat bot settings.
- Asset Discovery: It contains options to configure inputs for Network based Asset Discovery tool.
- Formore details, please refer the following link: Help Docs | Resources | Wavity and navigate to the ‘Platform Settings’ section under ‘Getting Started’ section.

- Click on “Design tools” as shown below.

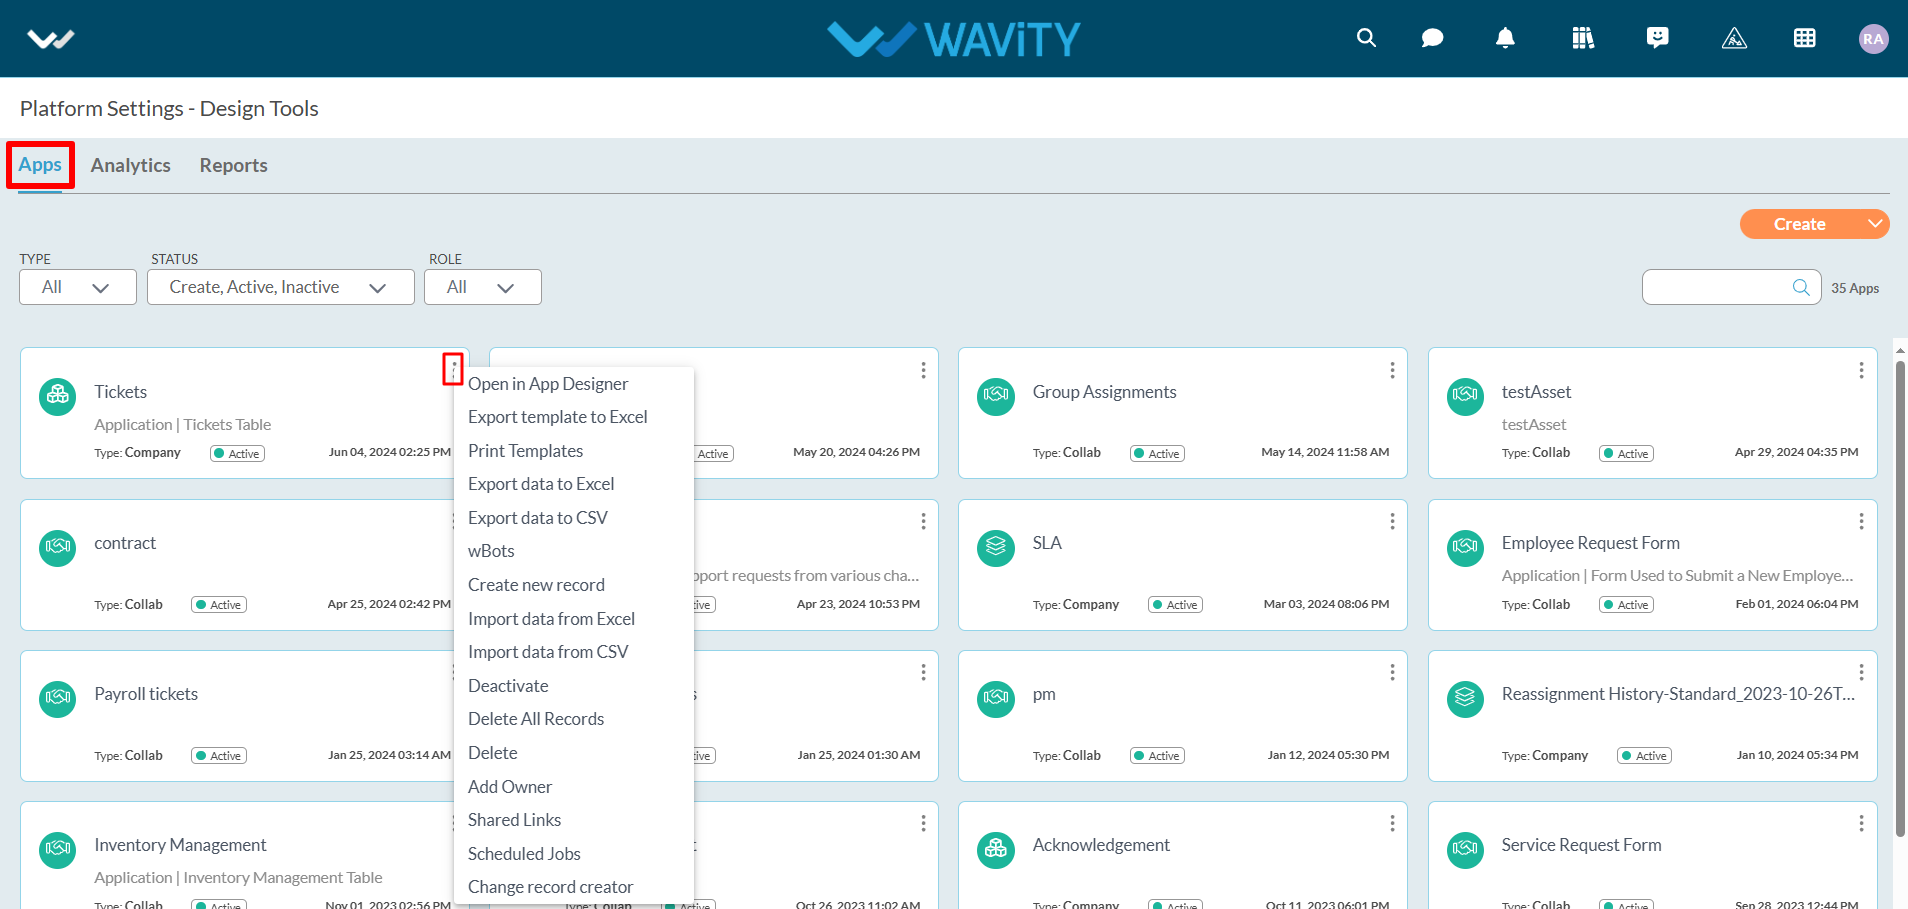
- In “Apps” section, All the existing applications of the platform will be displayed for the admin.
- Click on “3 dots” icon to carry out multiple functions of the application as shown below.
- Click on “Create” button as shown below to create a new application. It will display 3 options such as New App, From Excel and From Template.
- New App: It will create new application from scratch. Click on the following link for more information: How To Create A New App From Scratch? | Wavity
- From Excel: It will create new application from excel sheets along with data. Click on the following link for more information: How To Create A New App From Excel? | Wavity
- From Template: It will create new application from excel sheet template. It will ignore the data in the excel sheet. Click on the following link for more information: How To Create A New App From Template? | Wavity

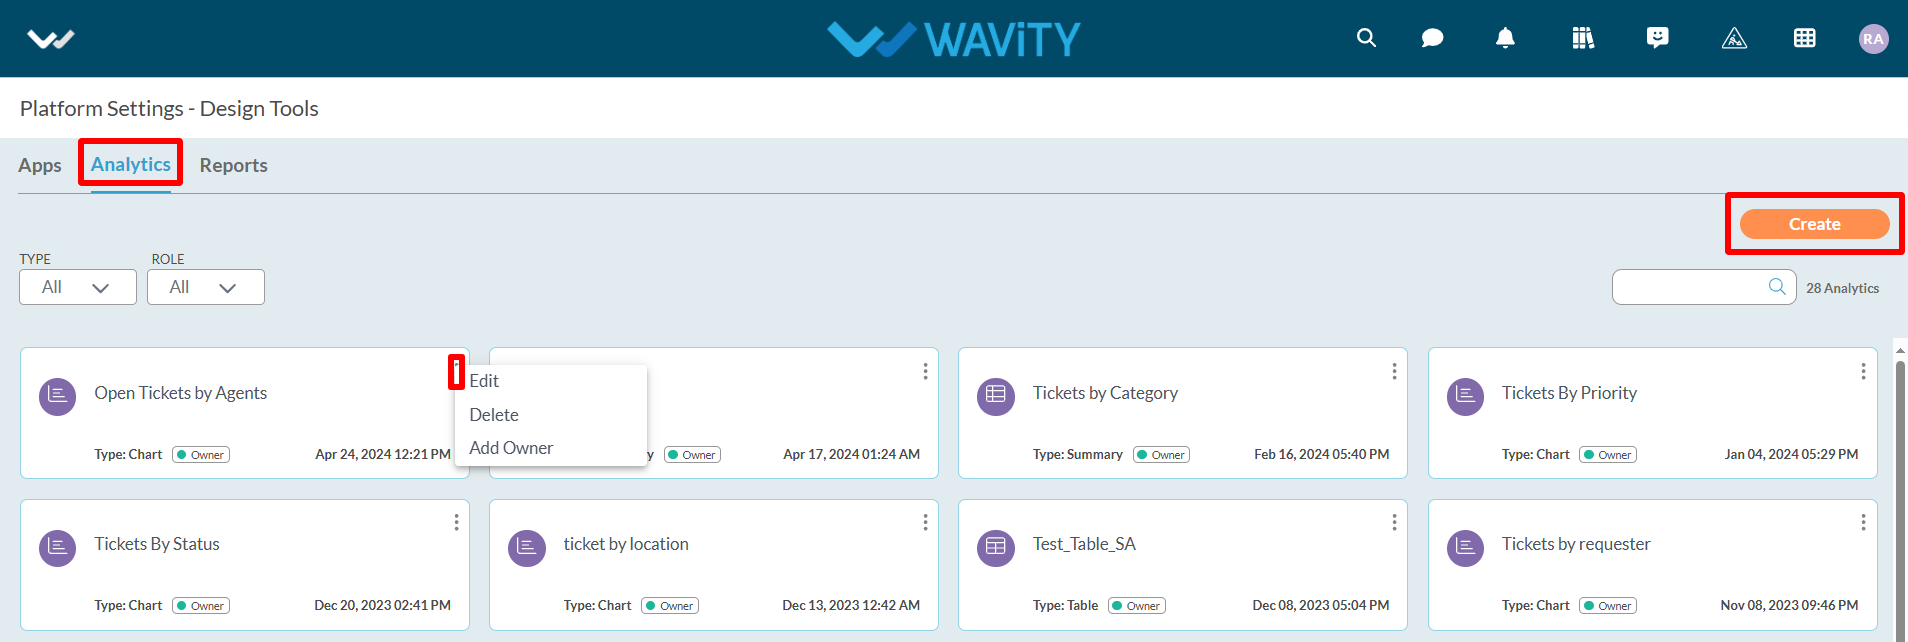
- By clicking on “Analytics” section, It will display all the existing Analytics of the platform.
- Click on “3 dots” icon to edit, add owner and delete existing Analytics.
- Click on “Create” button to generate new Analytics in the platform.
- Under Platform settings, Click on “Integrations” as shown below.
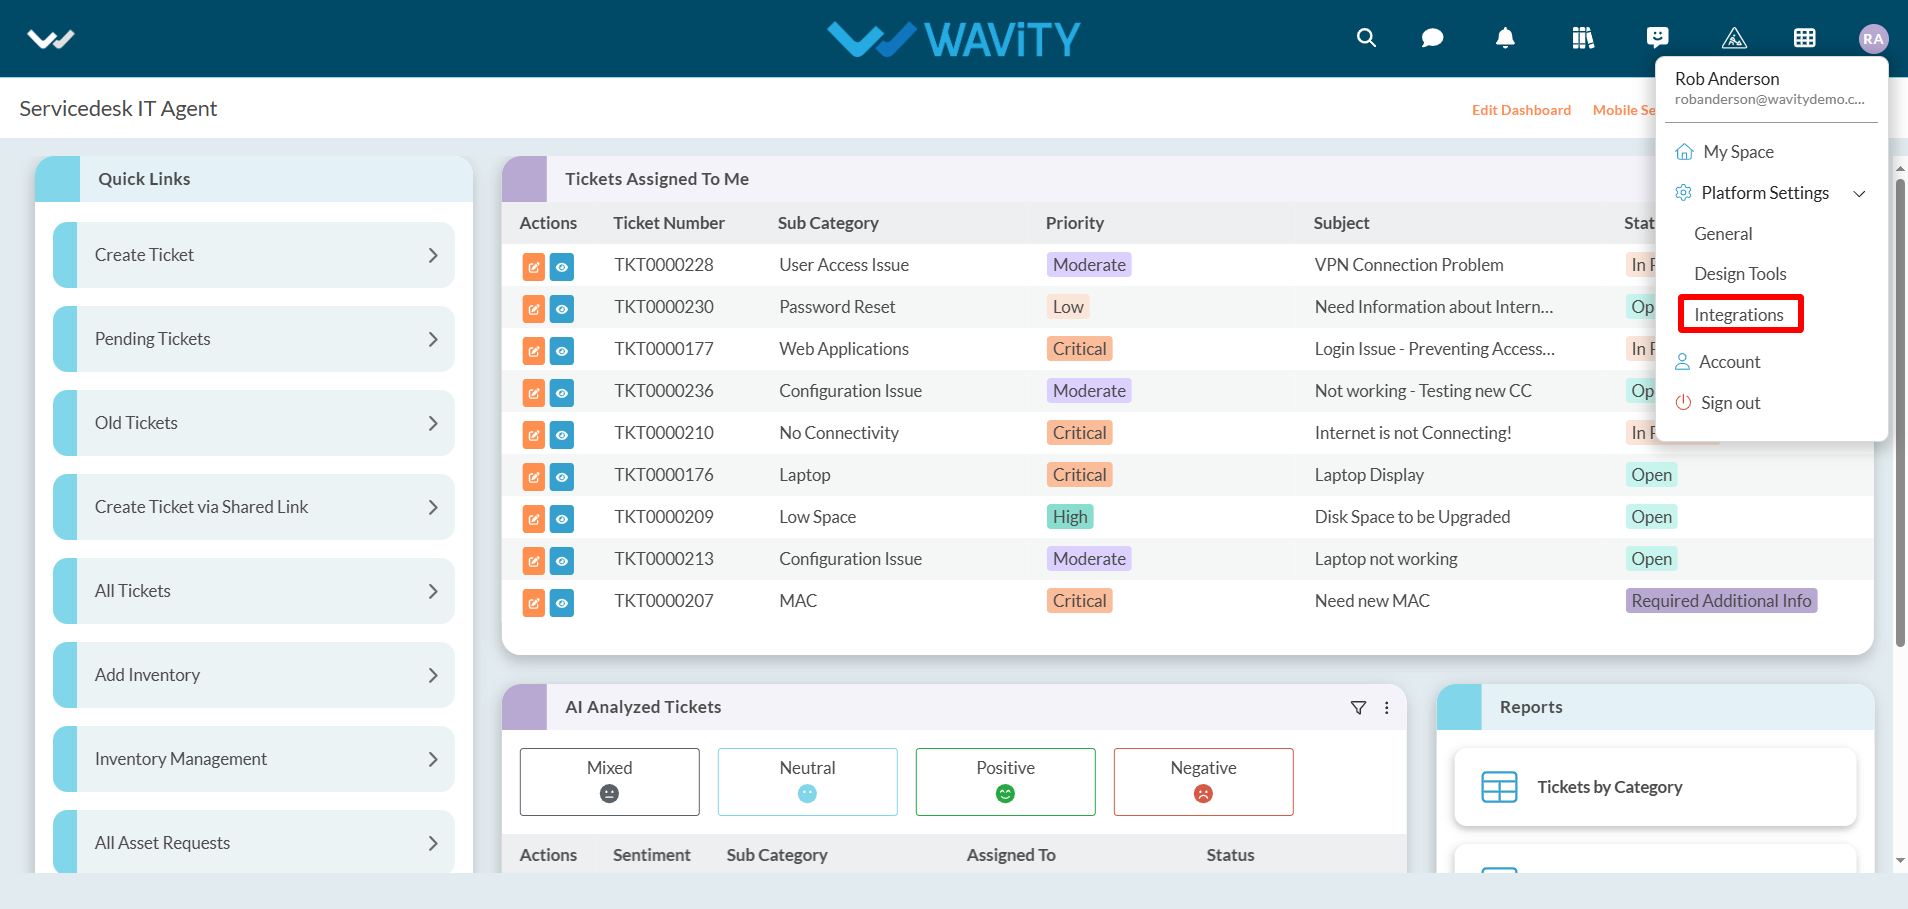
- It will display all the integration options in your tenant. Integration types such as SMS, SAM integration for Single-Sign-On (SSO), Calendars, Drives, Email Integration, Slack Integration, AI, Webhooks, OAuth, Schema, Open API, Rest API, Tokens and Microsoft Teams.
- For more details, please refer the following link: Help Docs | Resources | Wavity and navigate to the ‘Integration’ section under ‘Getting Started’ section.
