How to Sync Azure AD (Users and Groups) via SCIM
- Wavity supports integration with Microsoft Azure Active Directory (Azure AD) to enable seamless synchronization of user and group attributes through SCIM (System for Cross-domain Identity Management). Follow the steps below to configure the synchronization process.
- Only an Admin user in your organization can set up and configure Azure AD SCIM integration in Wavity.
- You’ll need access to both the Wavity platform and the Azure portal using administrator credentials.
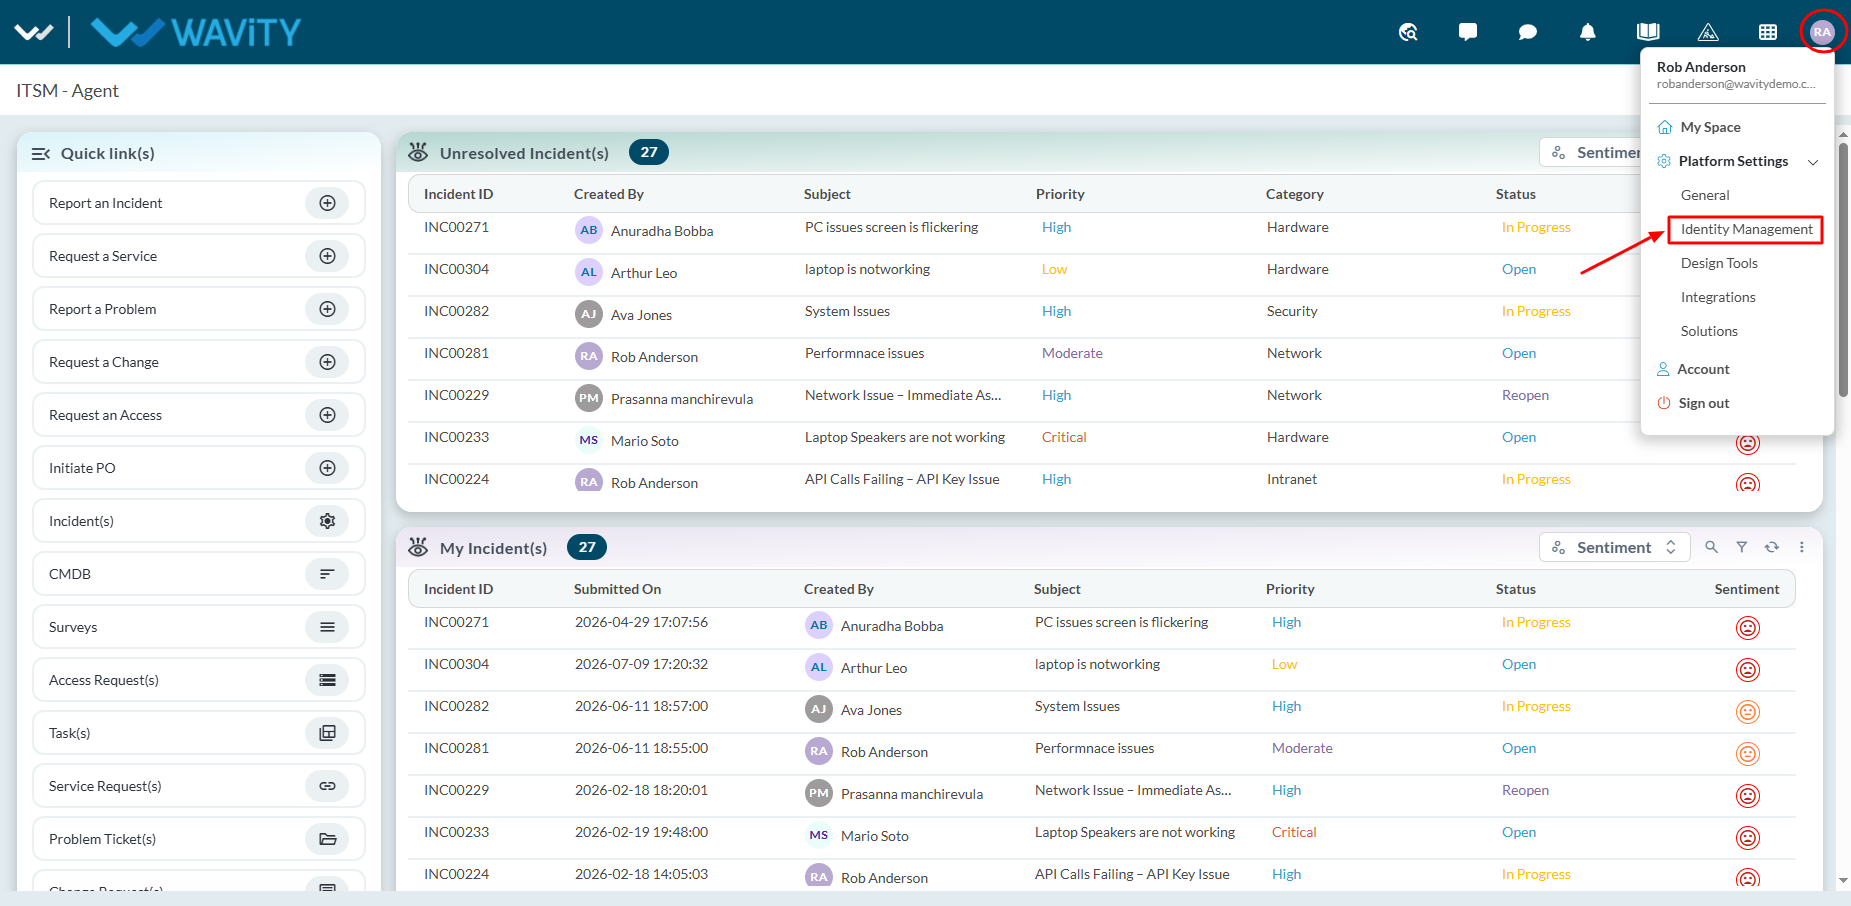
- Login with admin credentials and navigate to Identity Management page as shown in below image.
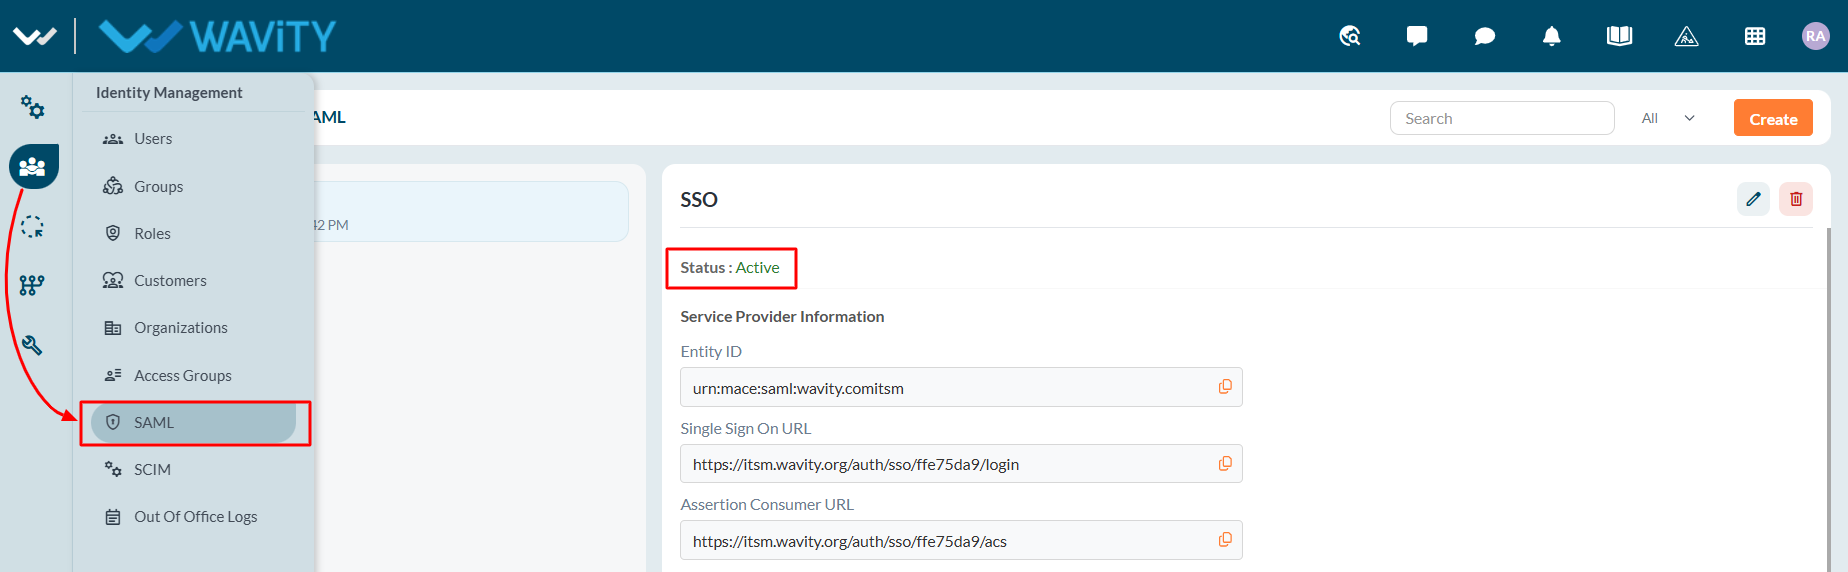
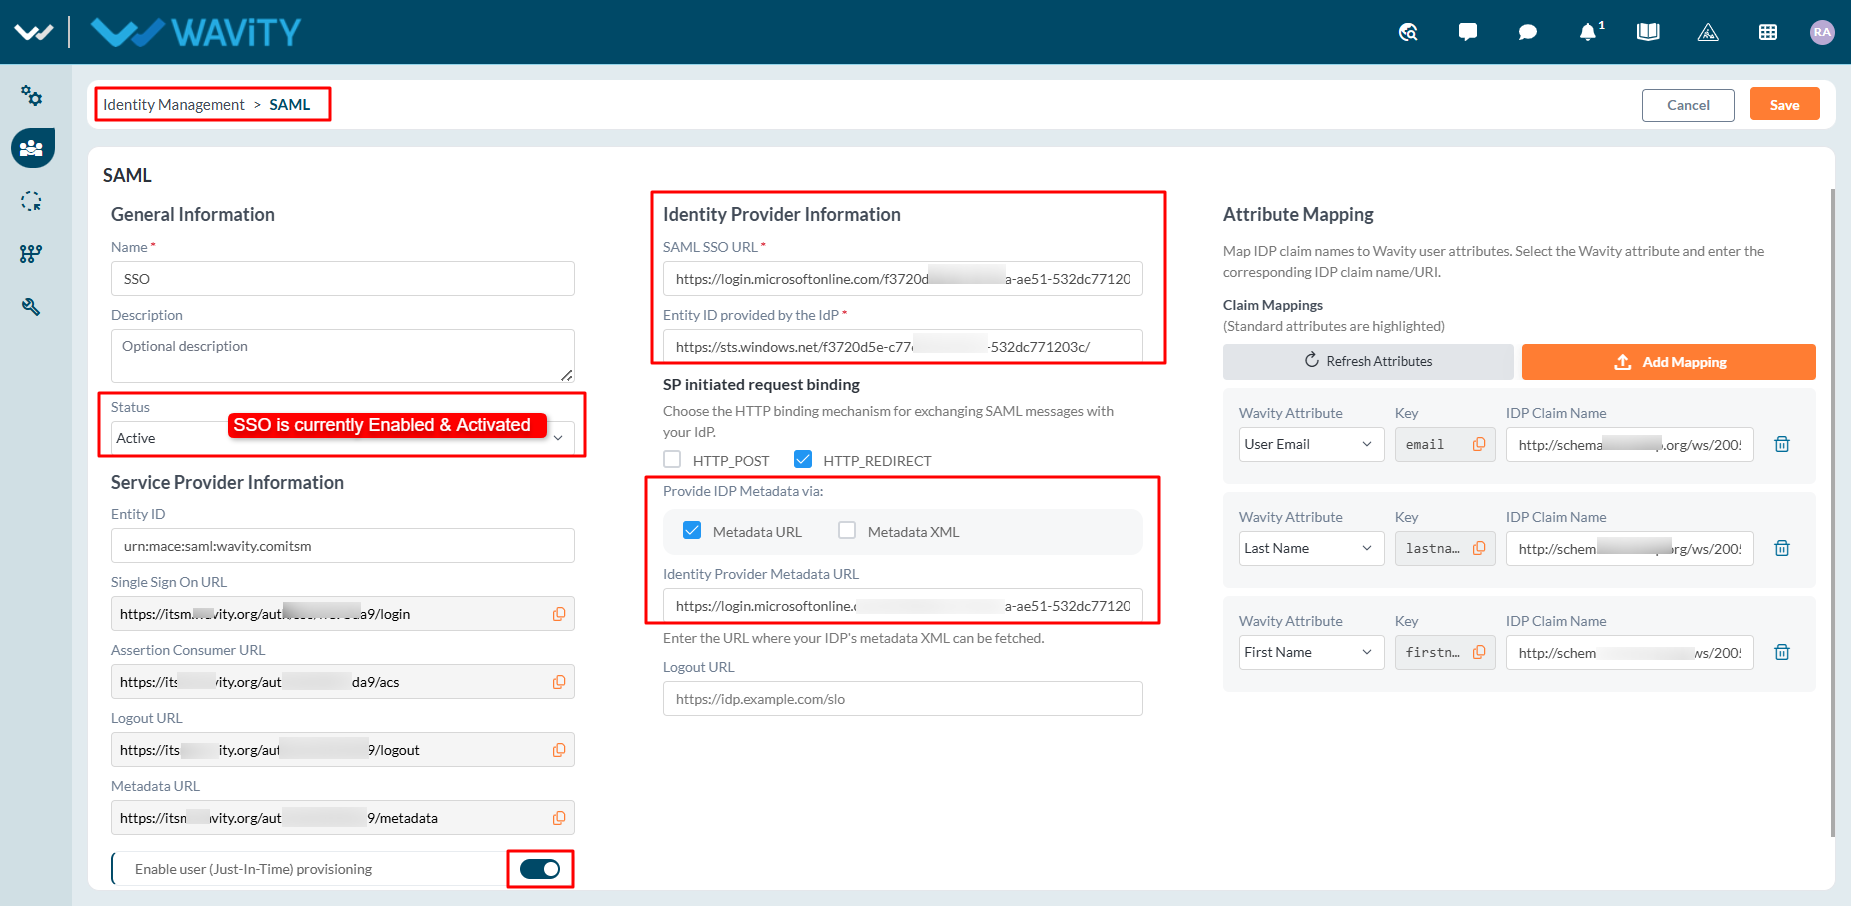
- Navigate to SAML settings page by using the left navigation panel as shown in below image.
- Click on Edit to view the current SSO Configuration
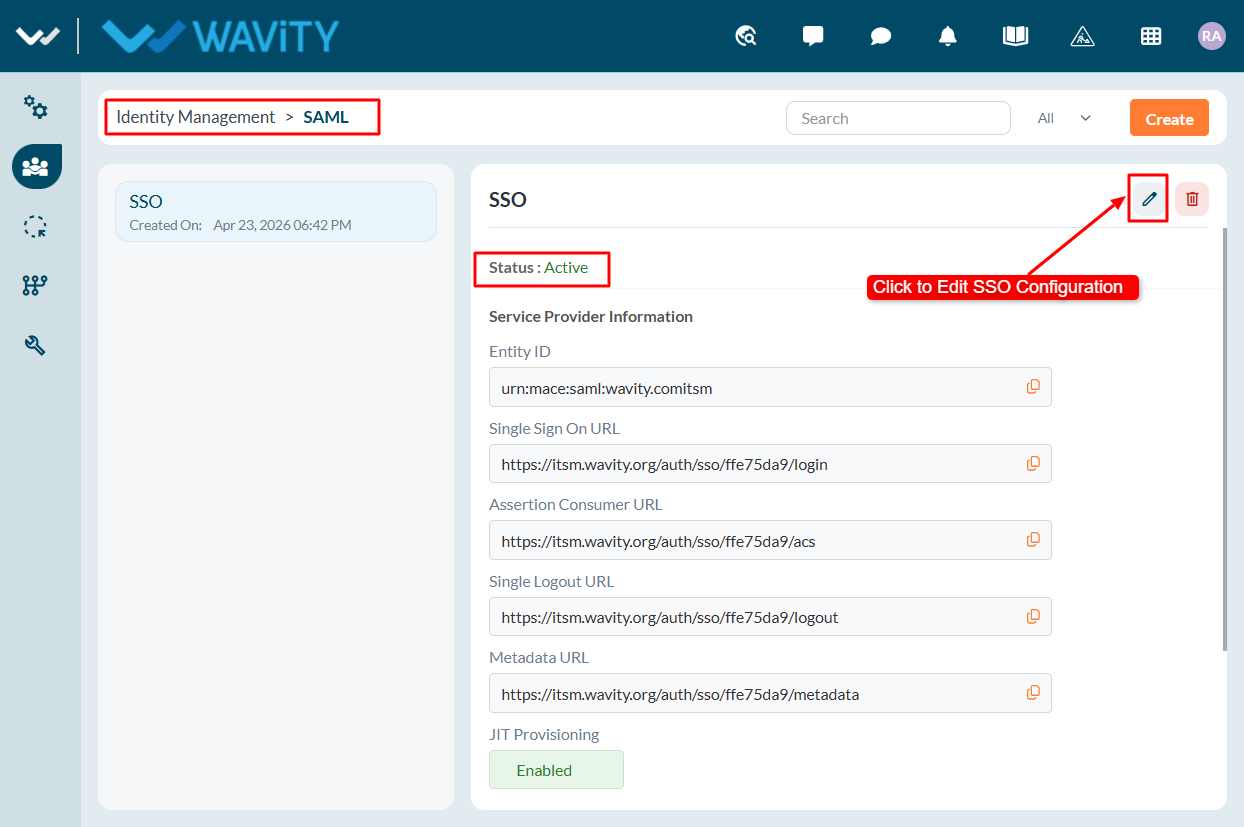
- Before setting up SCIM synchronization, Single Sign-On (SSO) must be enabled using Microsoft Azure.
- Generate a Token in Wavity
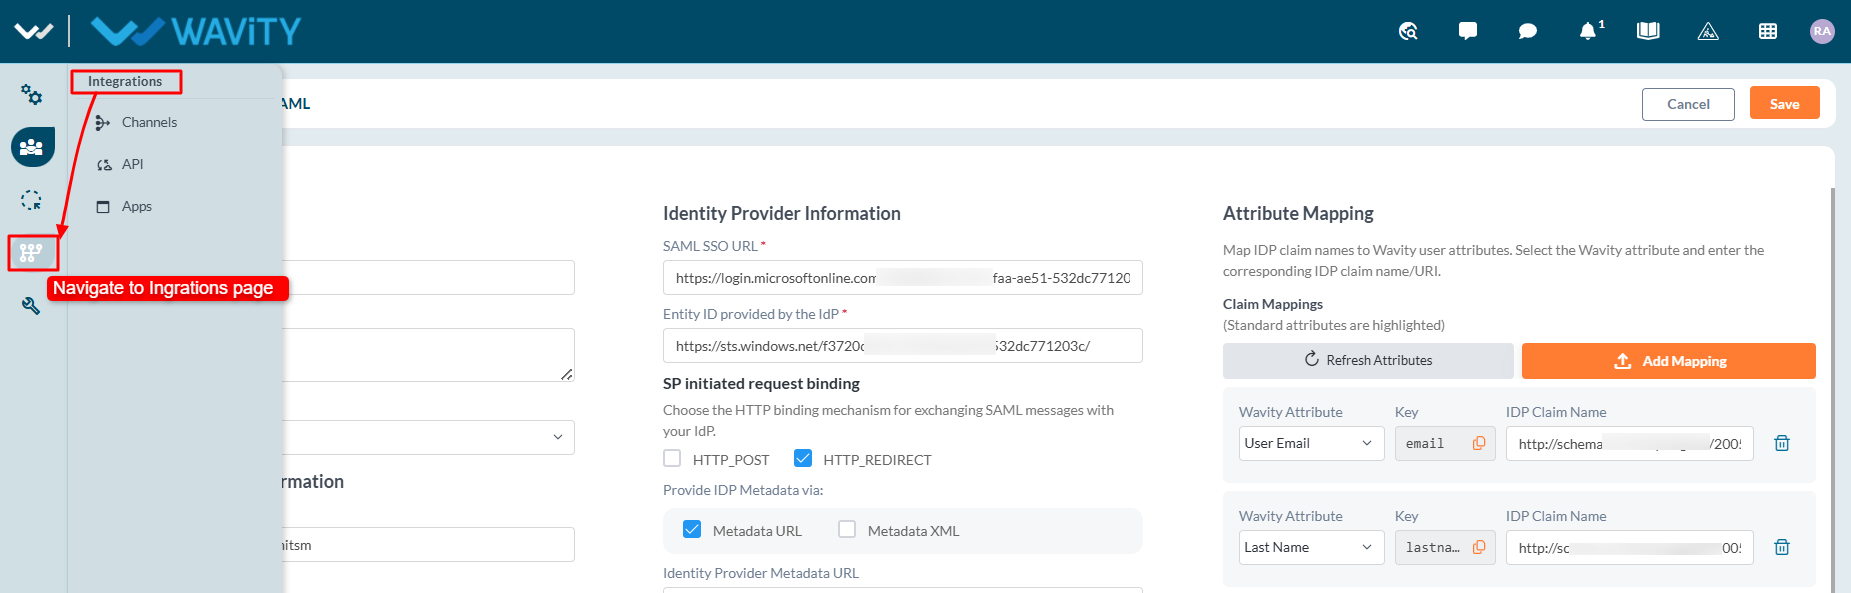
- To navigate to tokens page: Firstly, Use the left navigation panel to navigate to Integrations page.
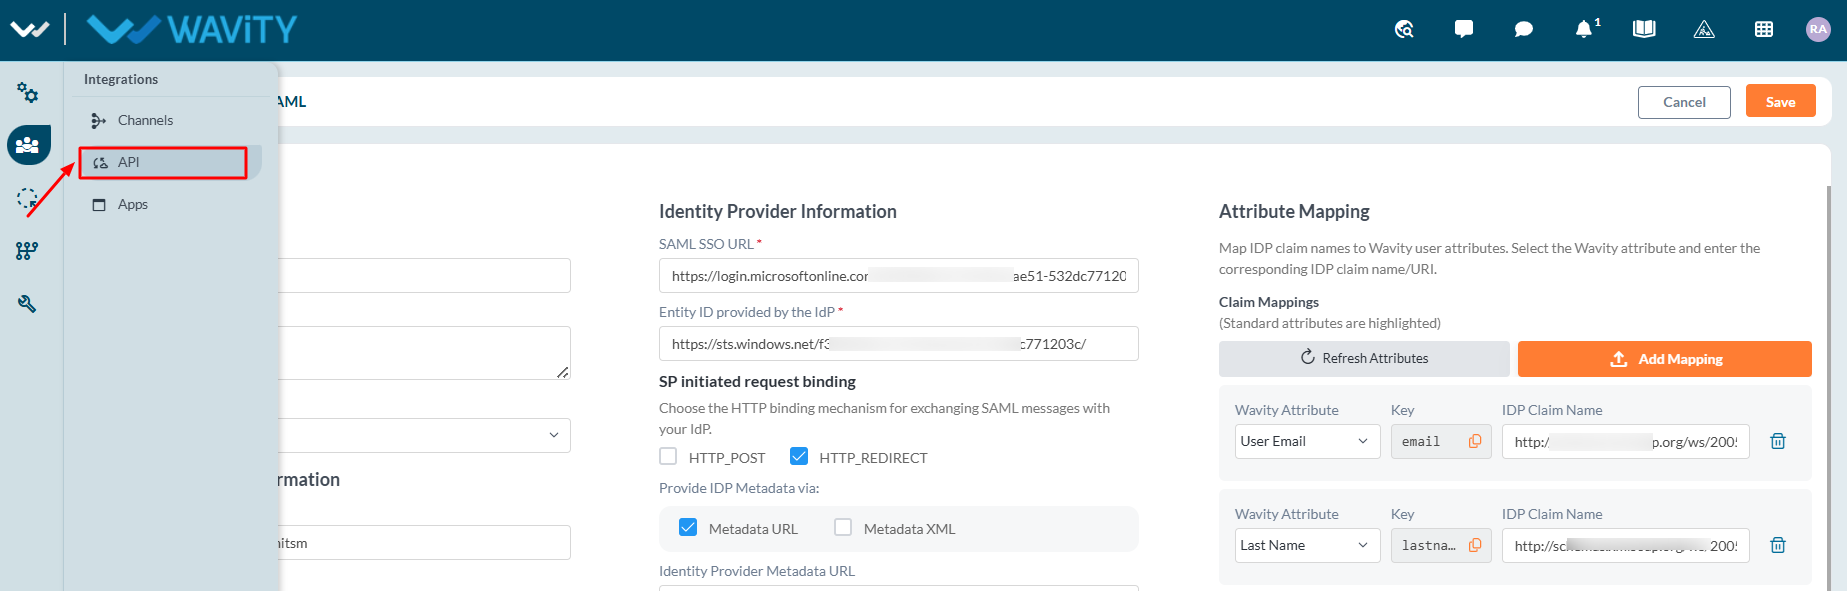
- Now, Click on 'API' in the left navigation panel.
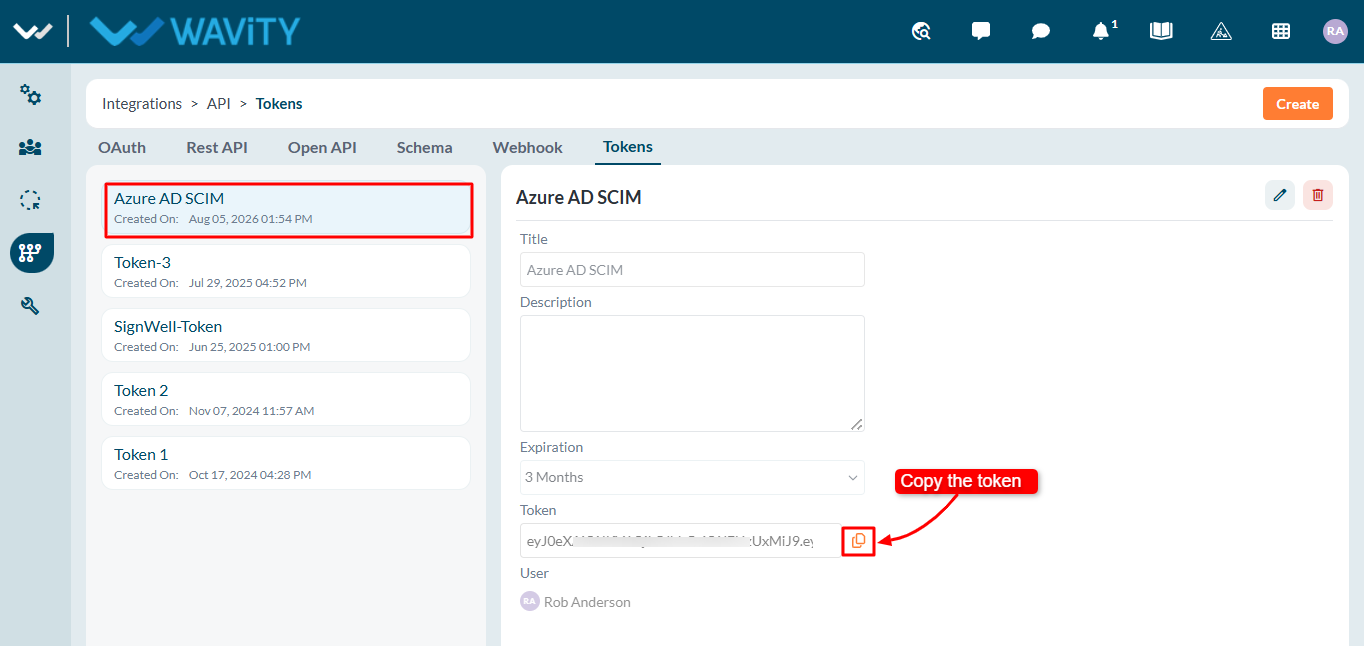
- Click on ‘Create’ button to generate a new token.

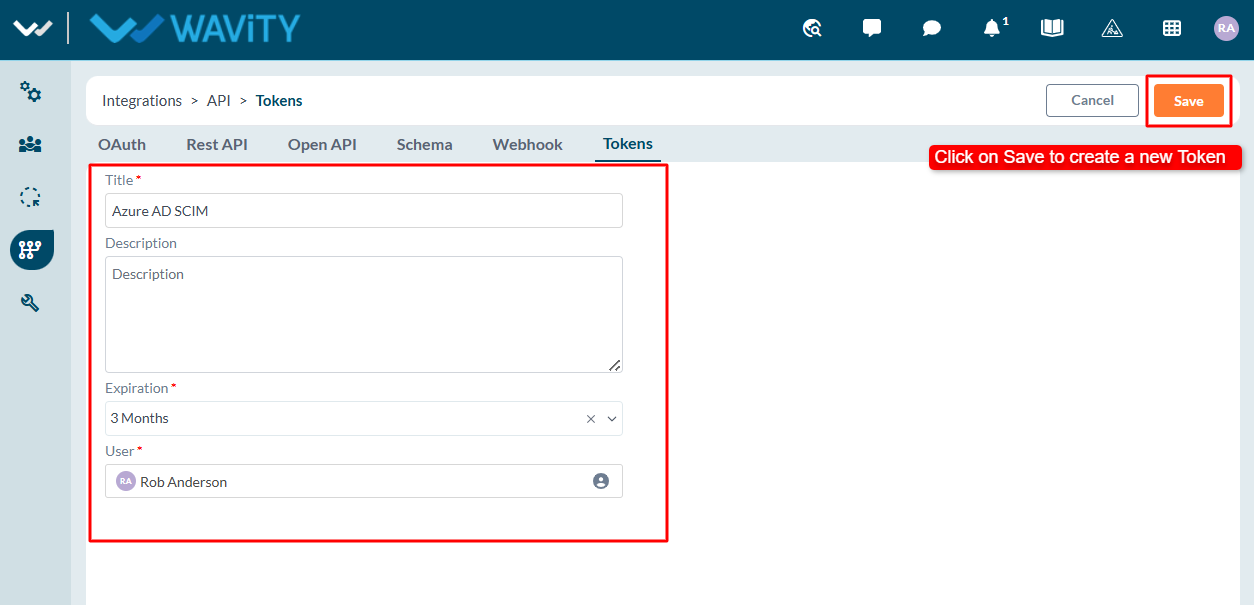
- Fill in the token details:
- Title and Description
- User (preferably the Admin user)
- Expiration Period
- Click ‘Save’ as shown in below image.
- Copy the generated token – you’ll need it during the Azure configuration.
Configure SCIM Provisioning in Azure AD
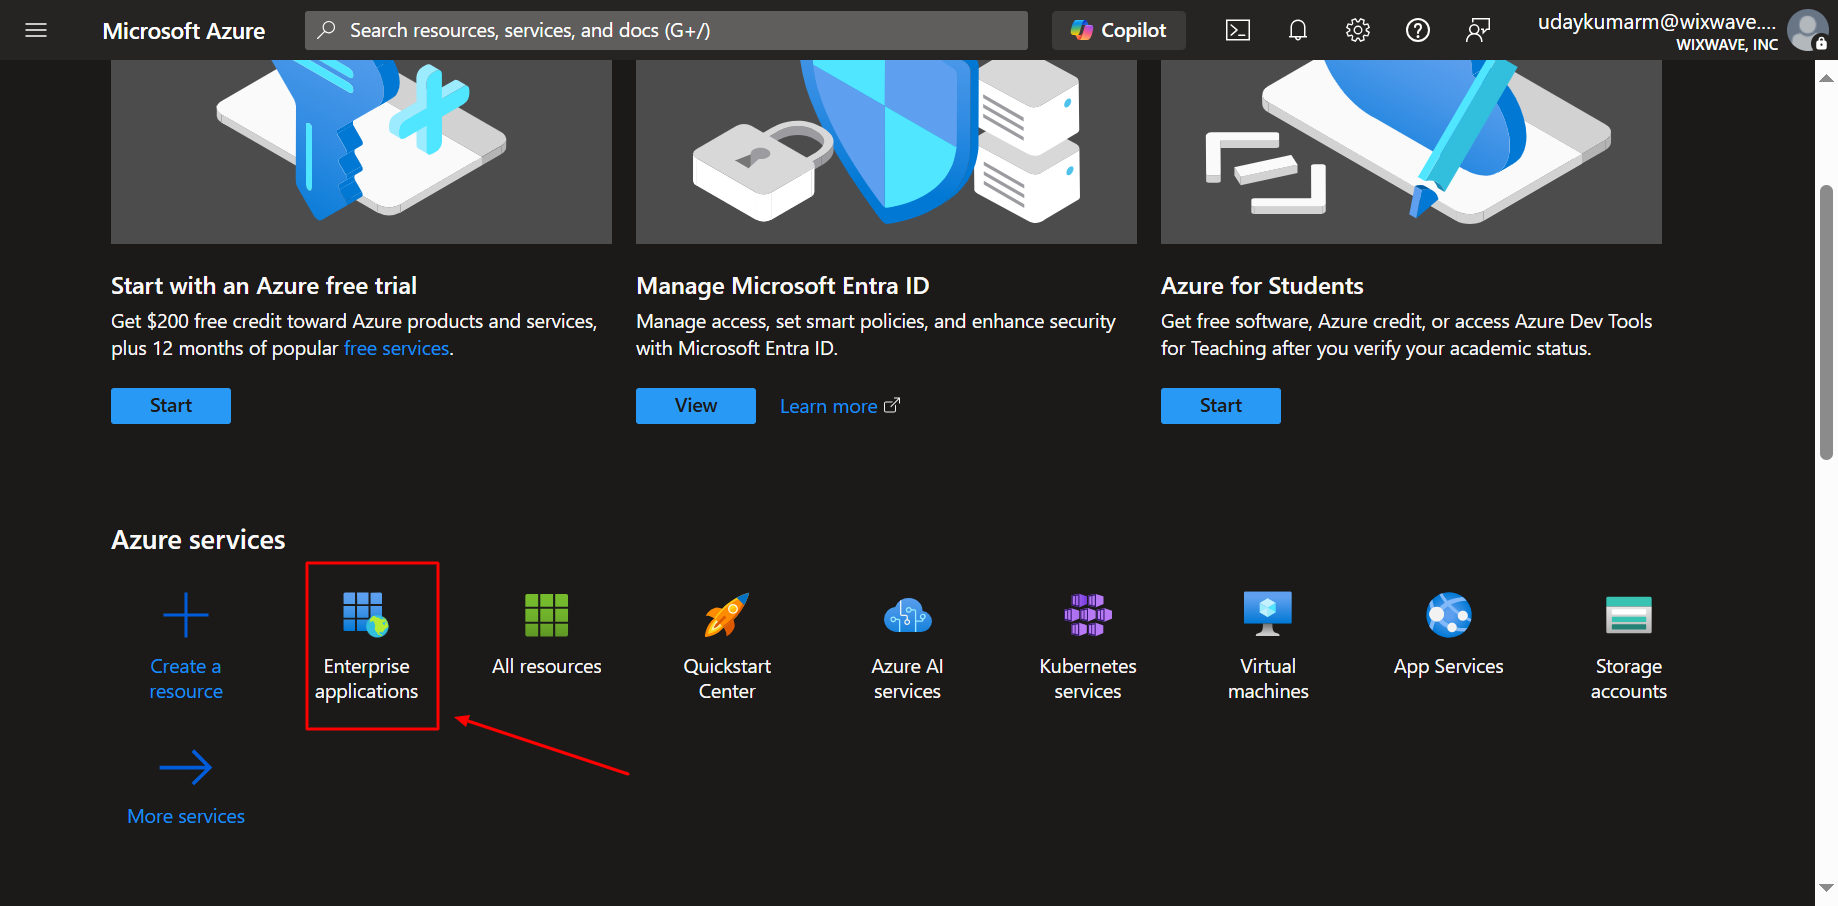
- Log in to the Azure Portal with admin credentials. Navigate to Azure Active Directory → Enterprise Applications.
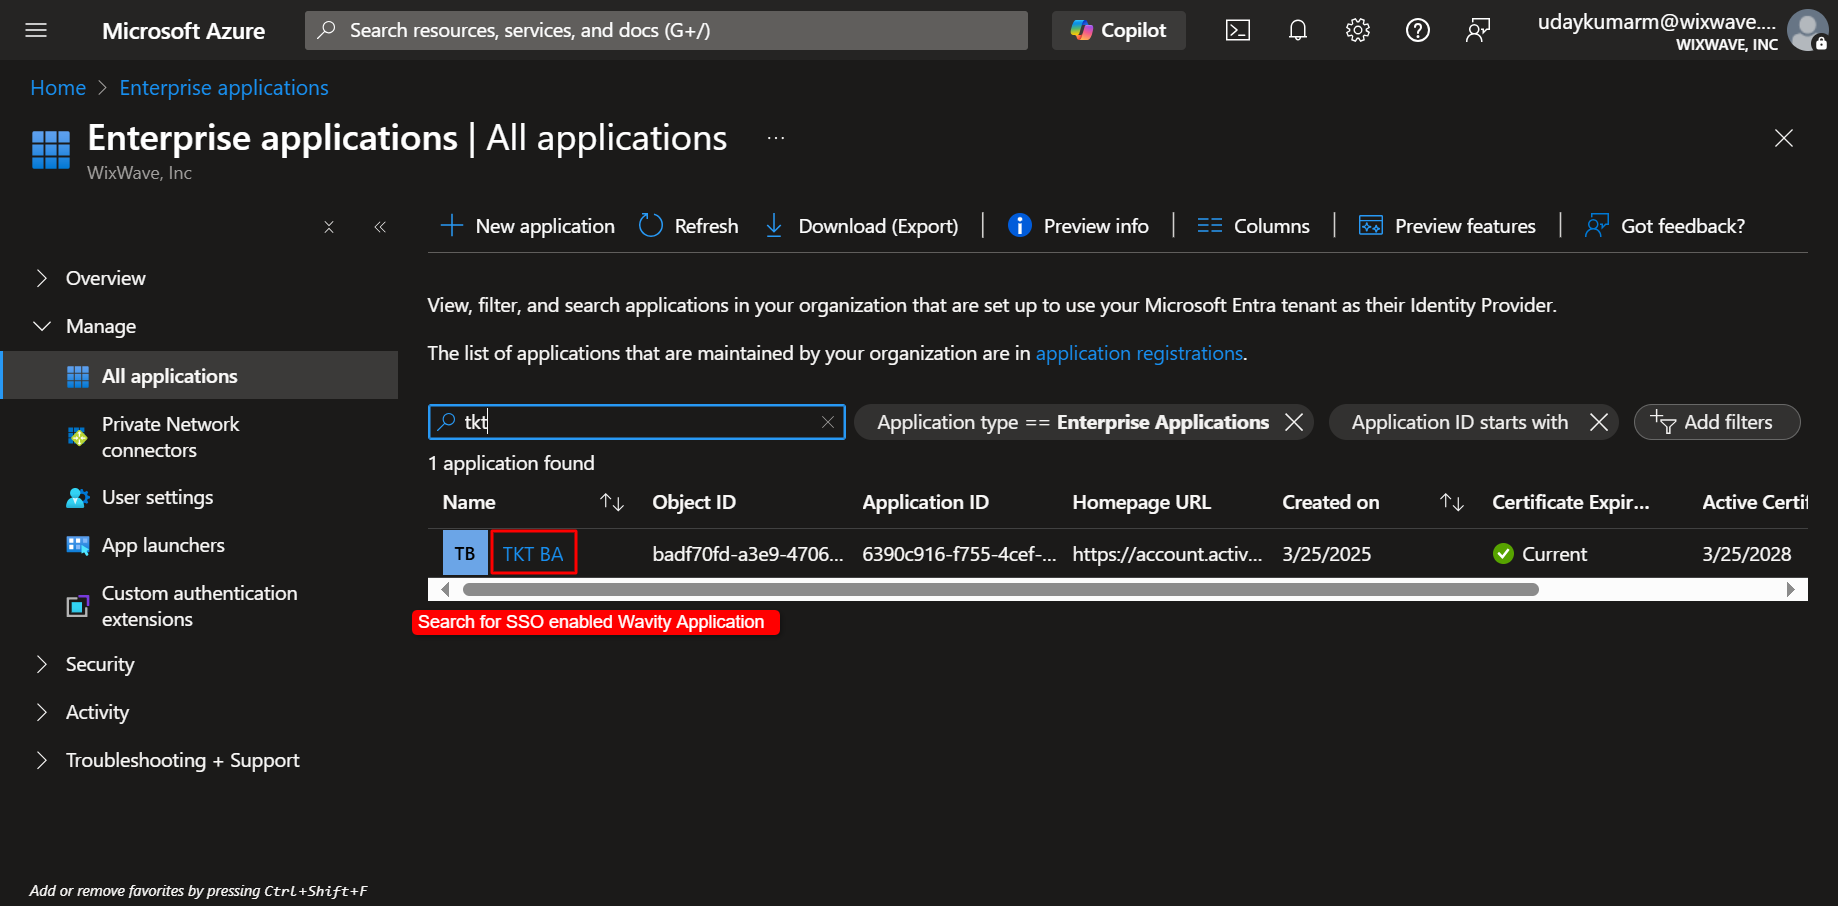
- Search for and select your SSO-enabled Wavity application.
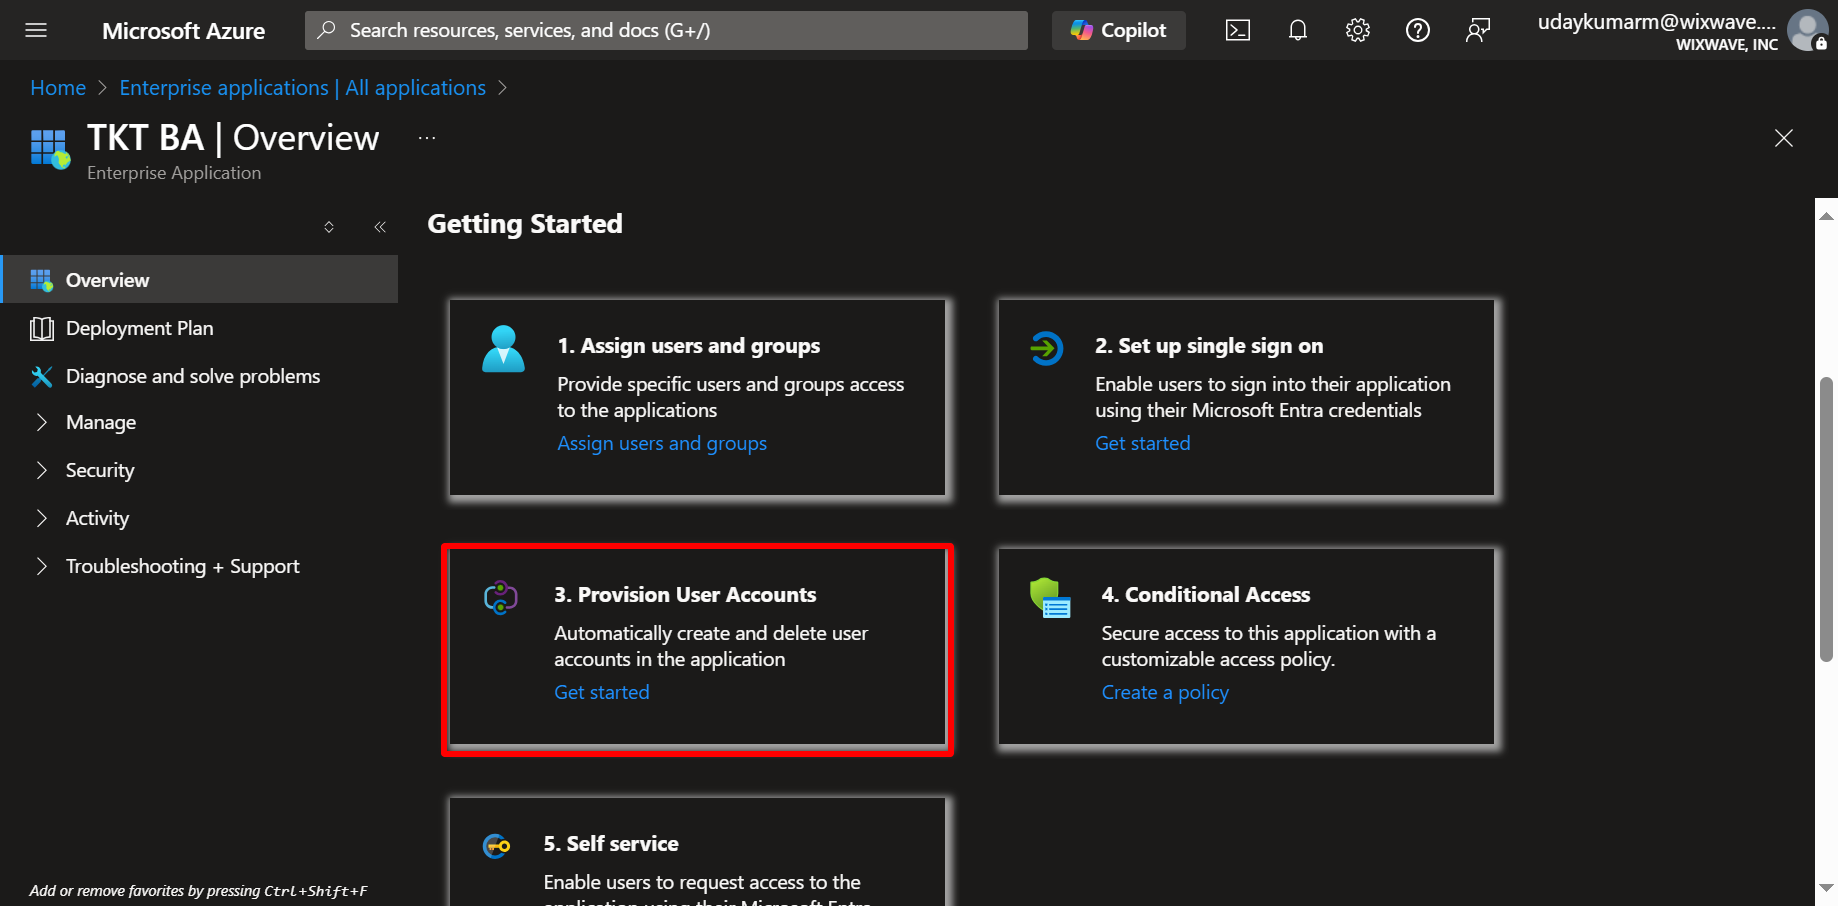
- Click on ‘Provision User Accounts’.
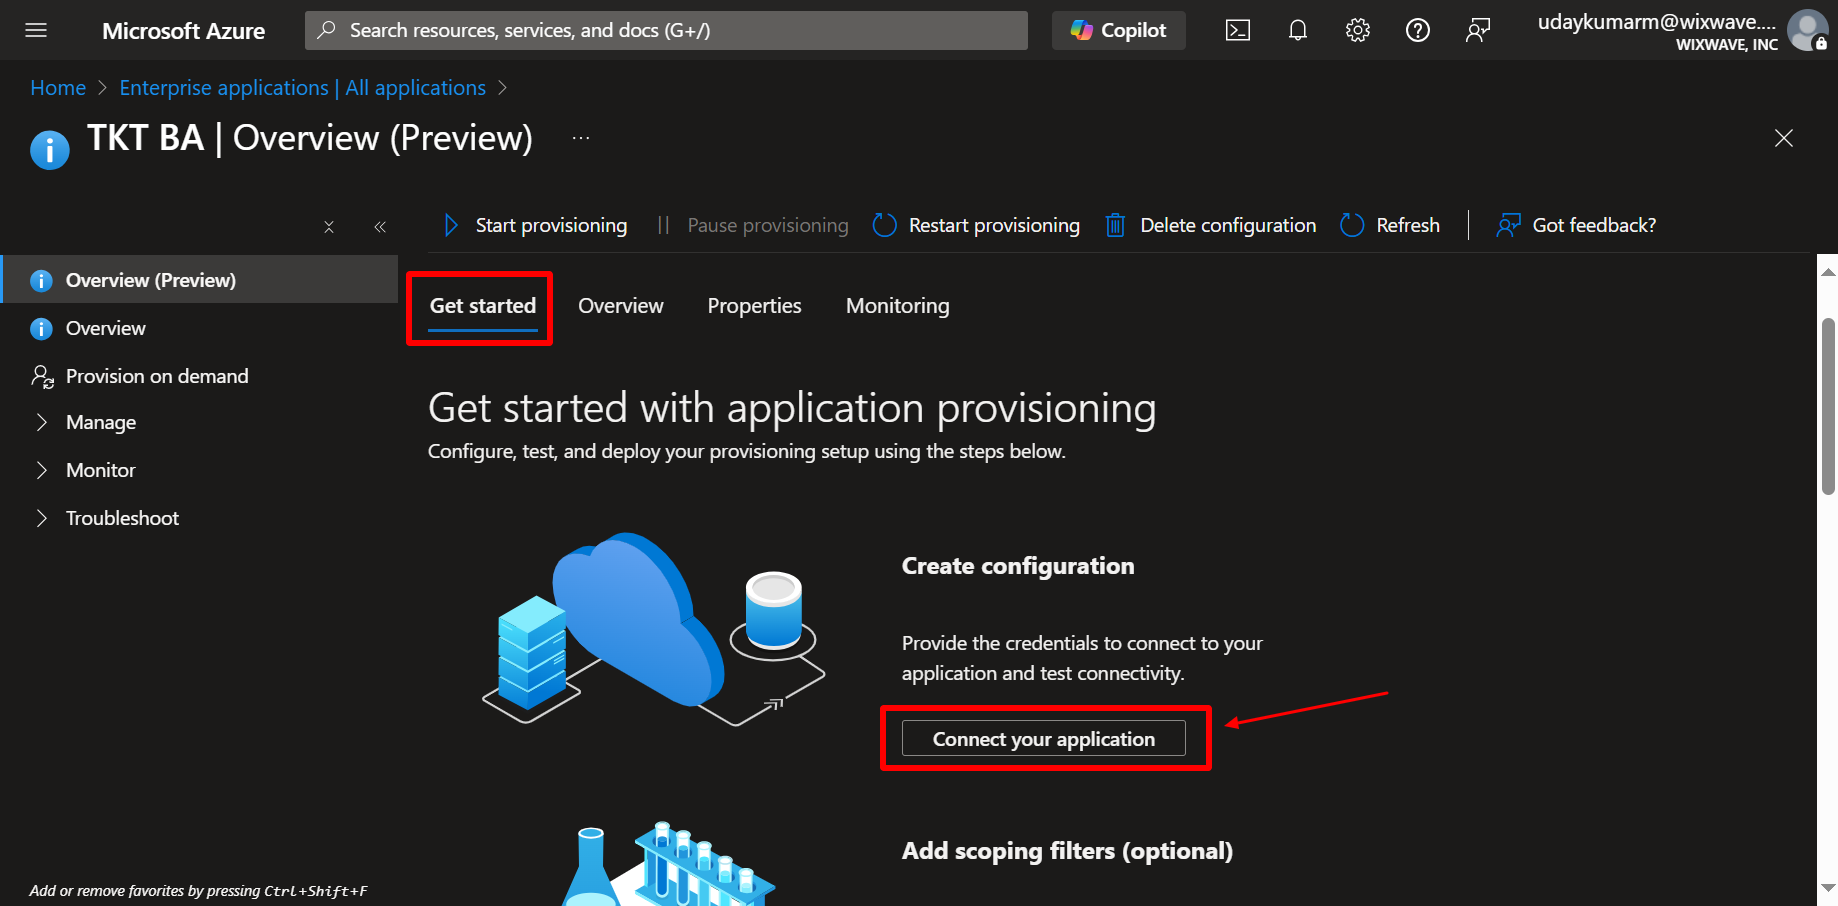
- On the Get Started page, click ‘Connect your application’.
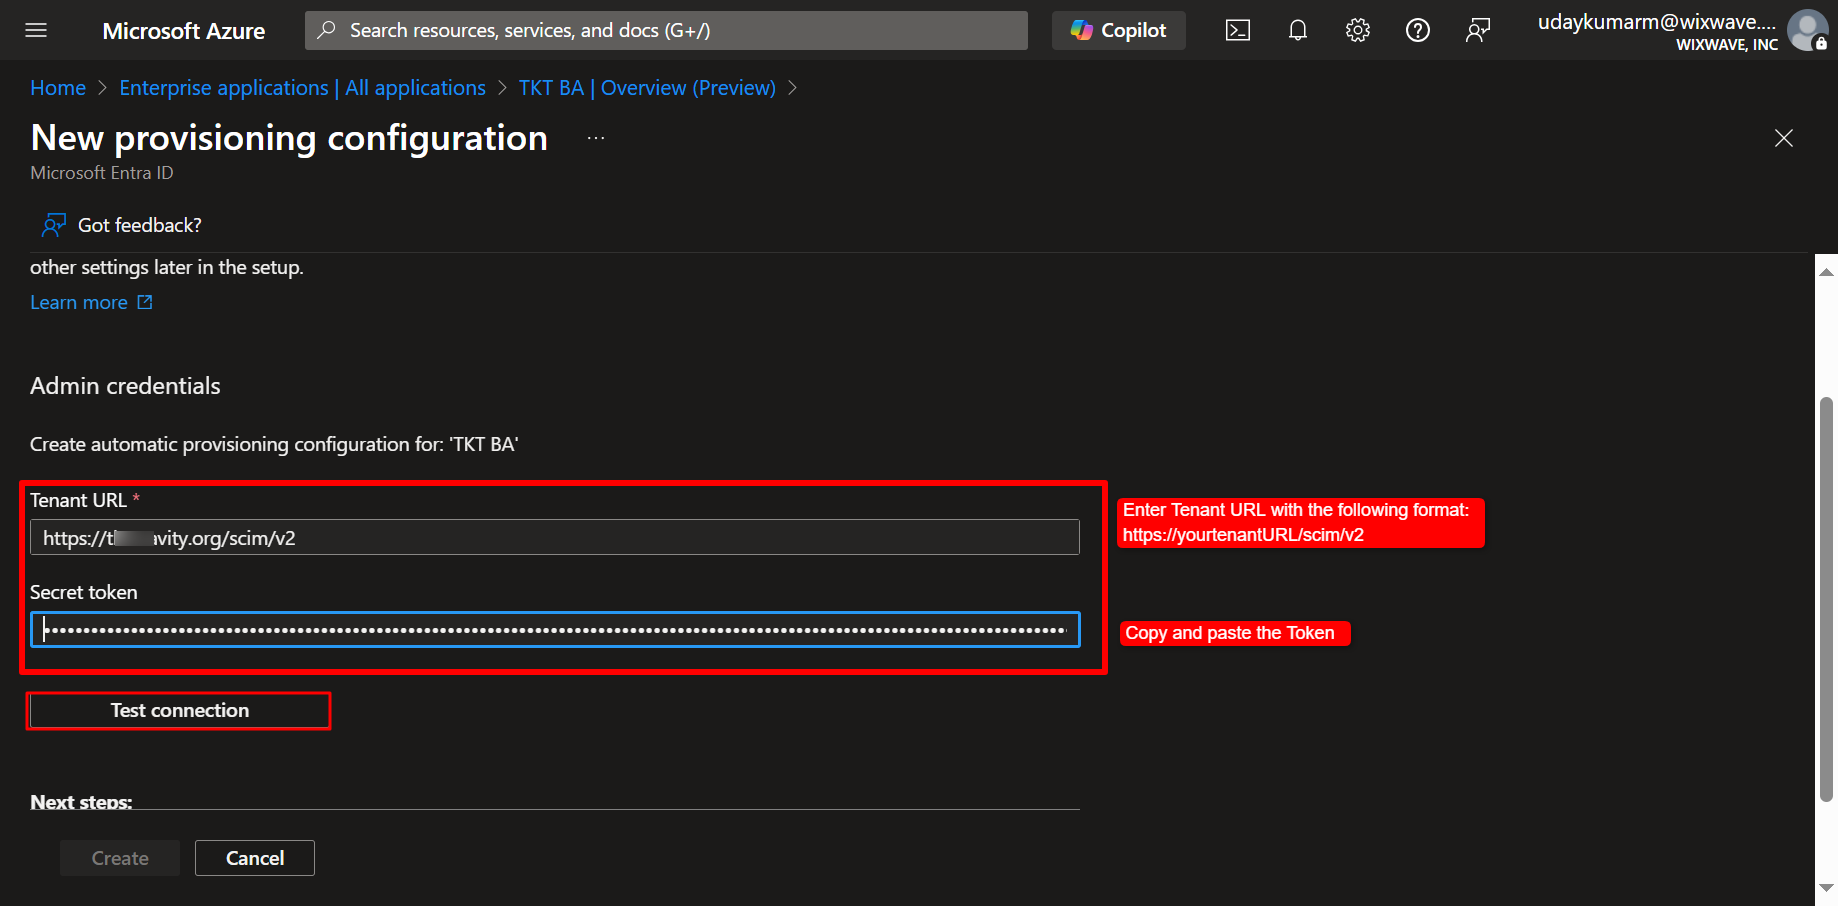
- Provide SCIM Endpoint and Token: Enter your wavity tenant URL with the following format: https://<yourtenentURL>/scim/v2
- Paste the token which you had generated earlier in Wavity platform.
- Click on ‘Test Connection’
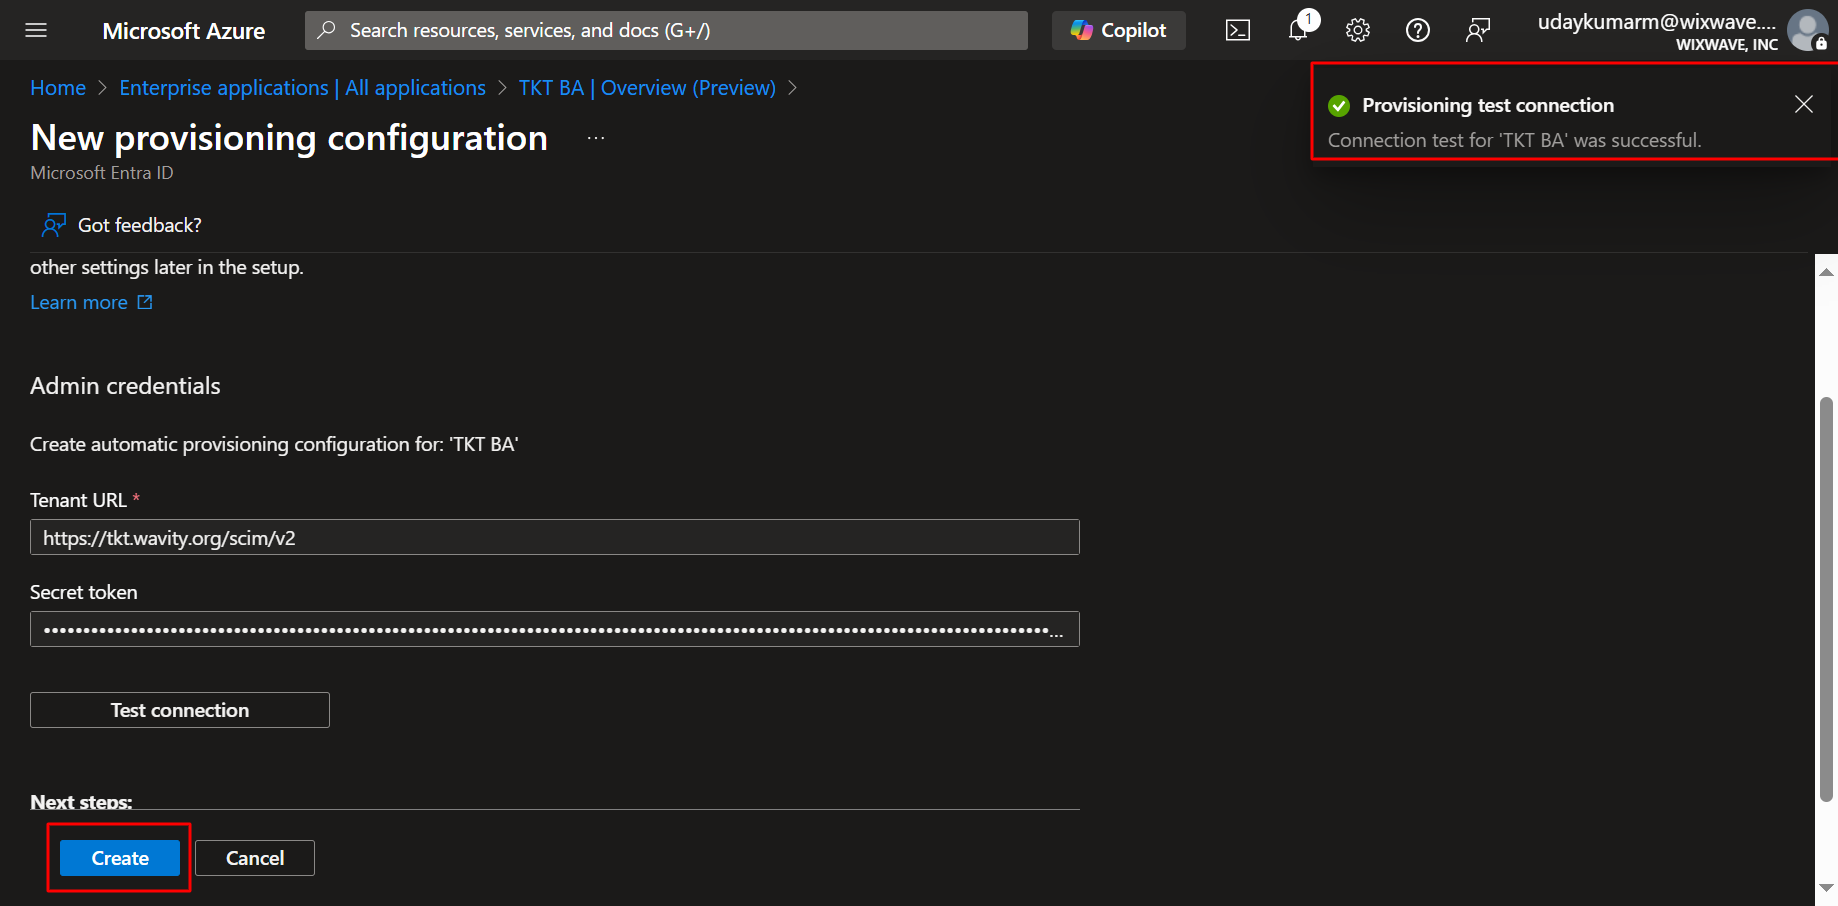
- A confirmation popup should appear indicating that the provisioning test connection was successful.
- Now, click on ‘Create’
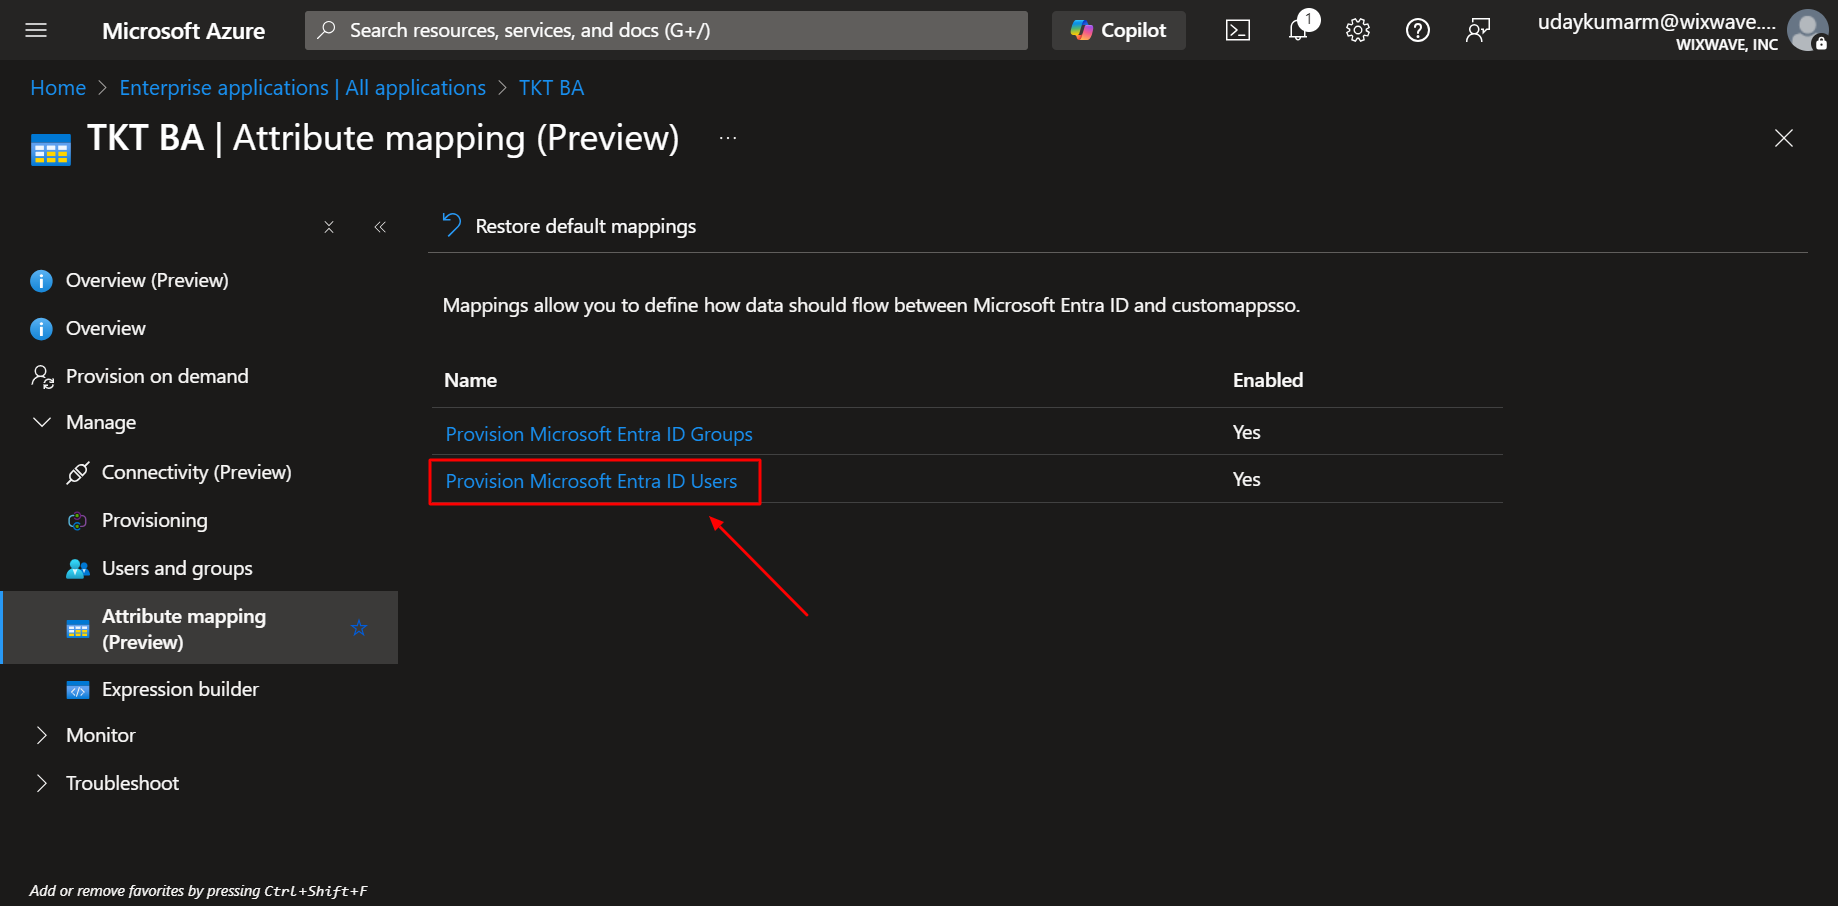
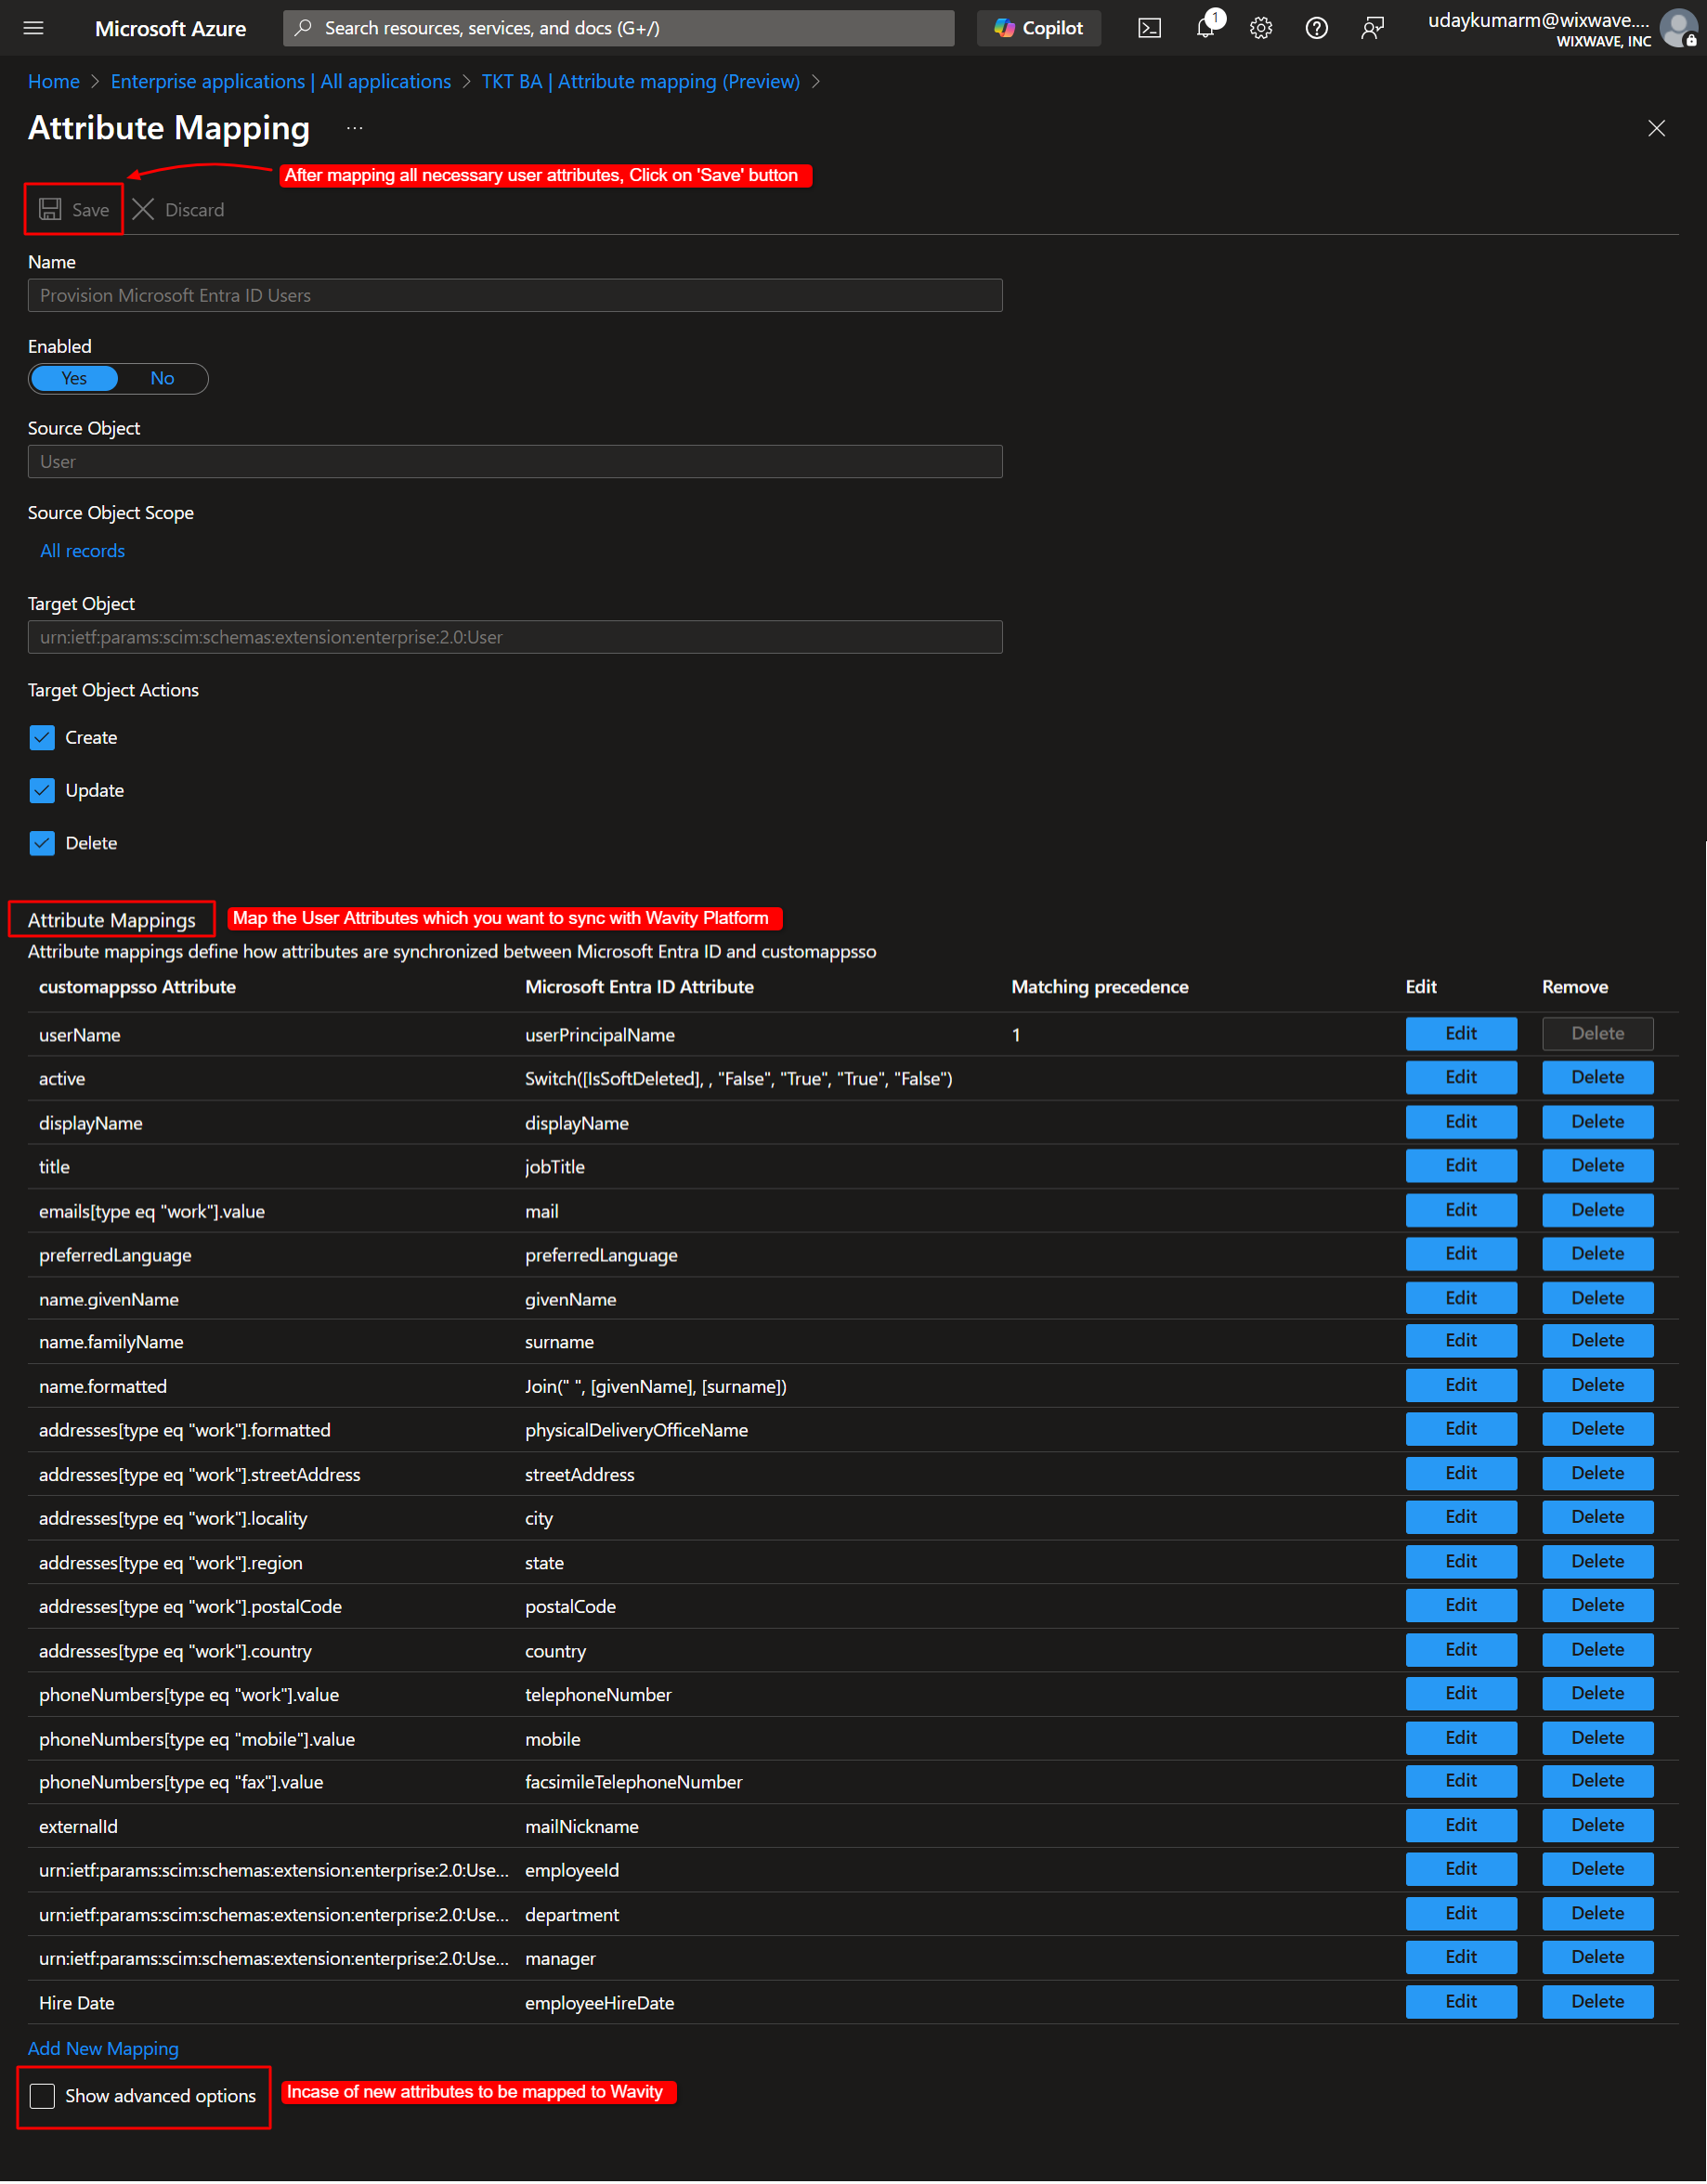
- To Map User Attributes: Go to the Attribute Mapping (Preview) section on the ‘Provision on demand’ page.

- Click ‘Provision Microsoft Entra ID Users’.
- Review and map the necessary user attributes to sync with Wavity.
- Click ‘Show advanced options’ to map any custom attributes.
- Click ‘Save’ when done.
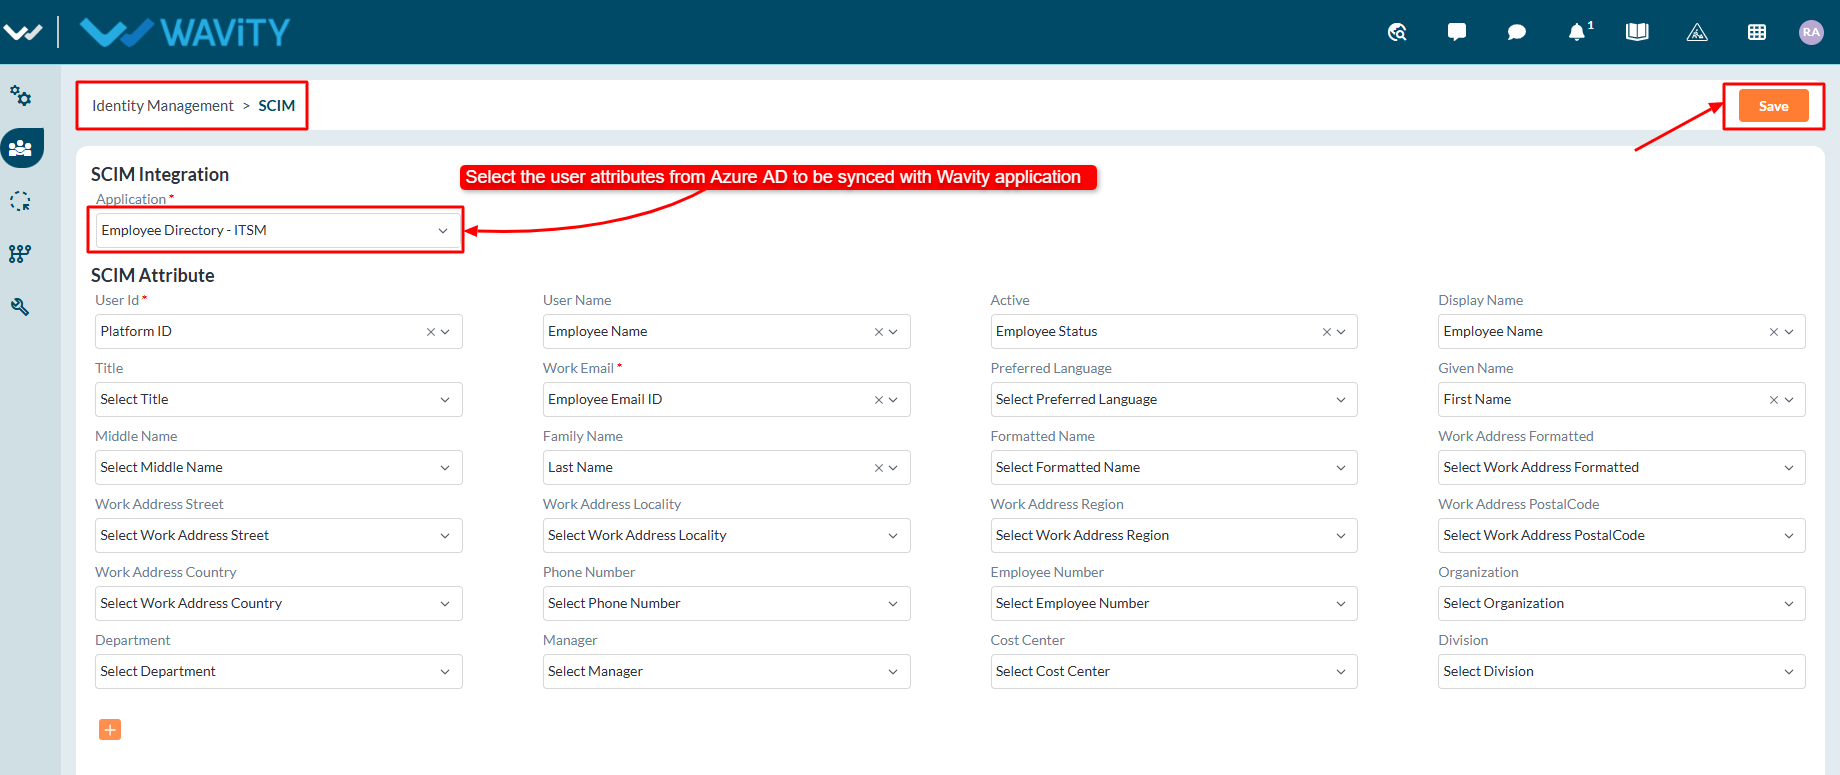
- To Finalize SCIM Setup in Wavity: In Wavity, go to the SCIM settings page. Select the corresponding Wavity application for syncing user attributes. Click on ‘Save’ button once done.
- To Assign Users & Groups in Azure: In Azure, navigate to the Users and Groups section of the Wavity application.
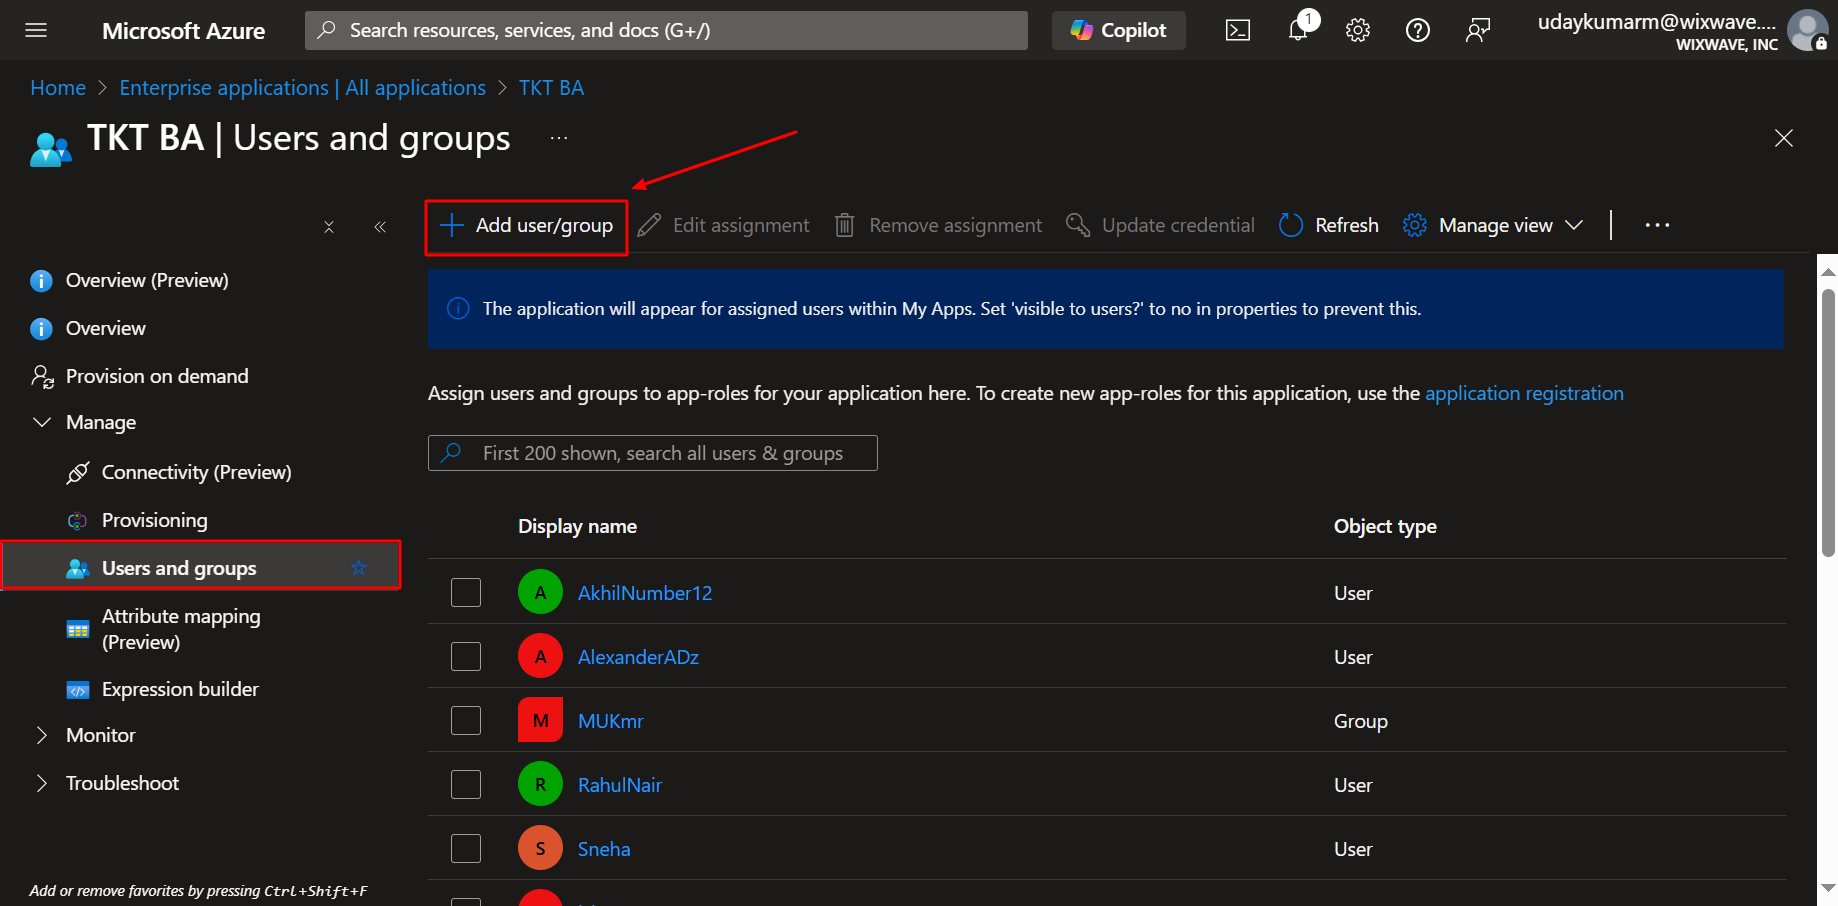
- Click ‘Add user/group’ → then ‘None selected’.
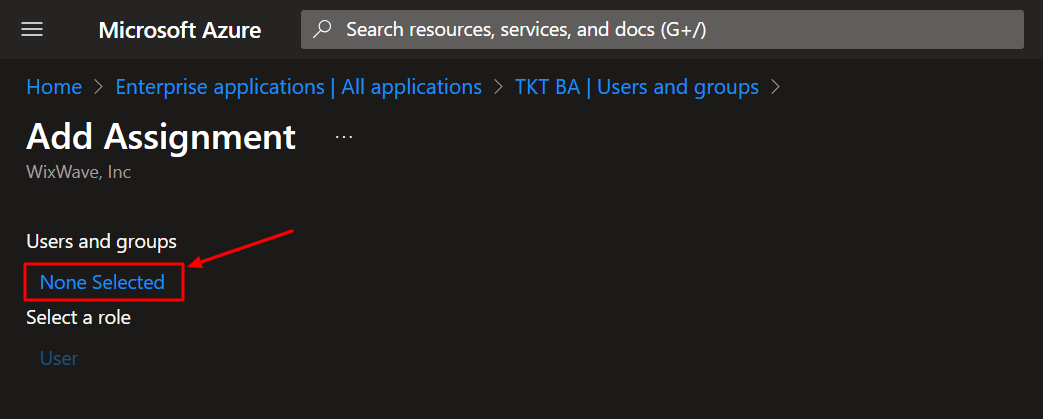
- Select all the users and groups for which data attributes will be synced with Wavity platform.
- Once done, click on ‘Select’ button and then on ‘Assign’ button.
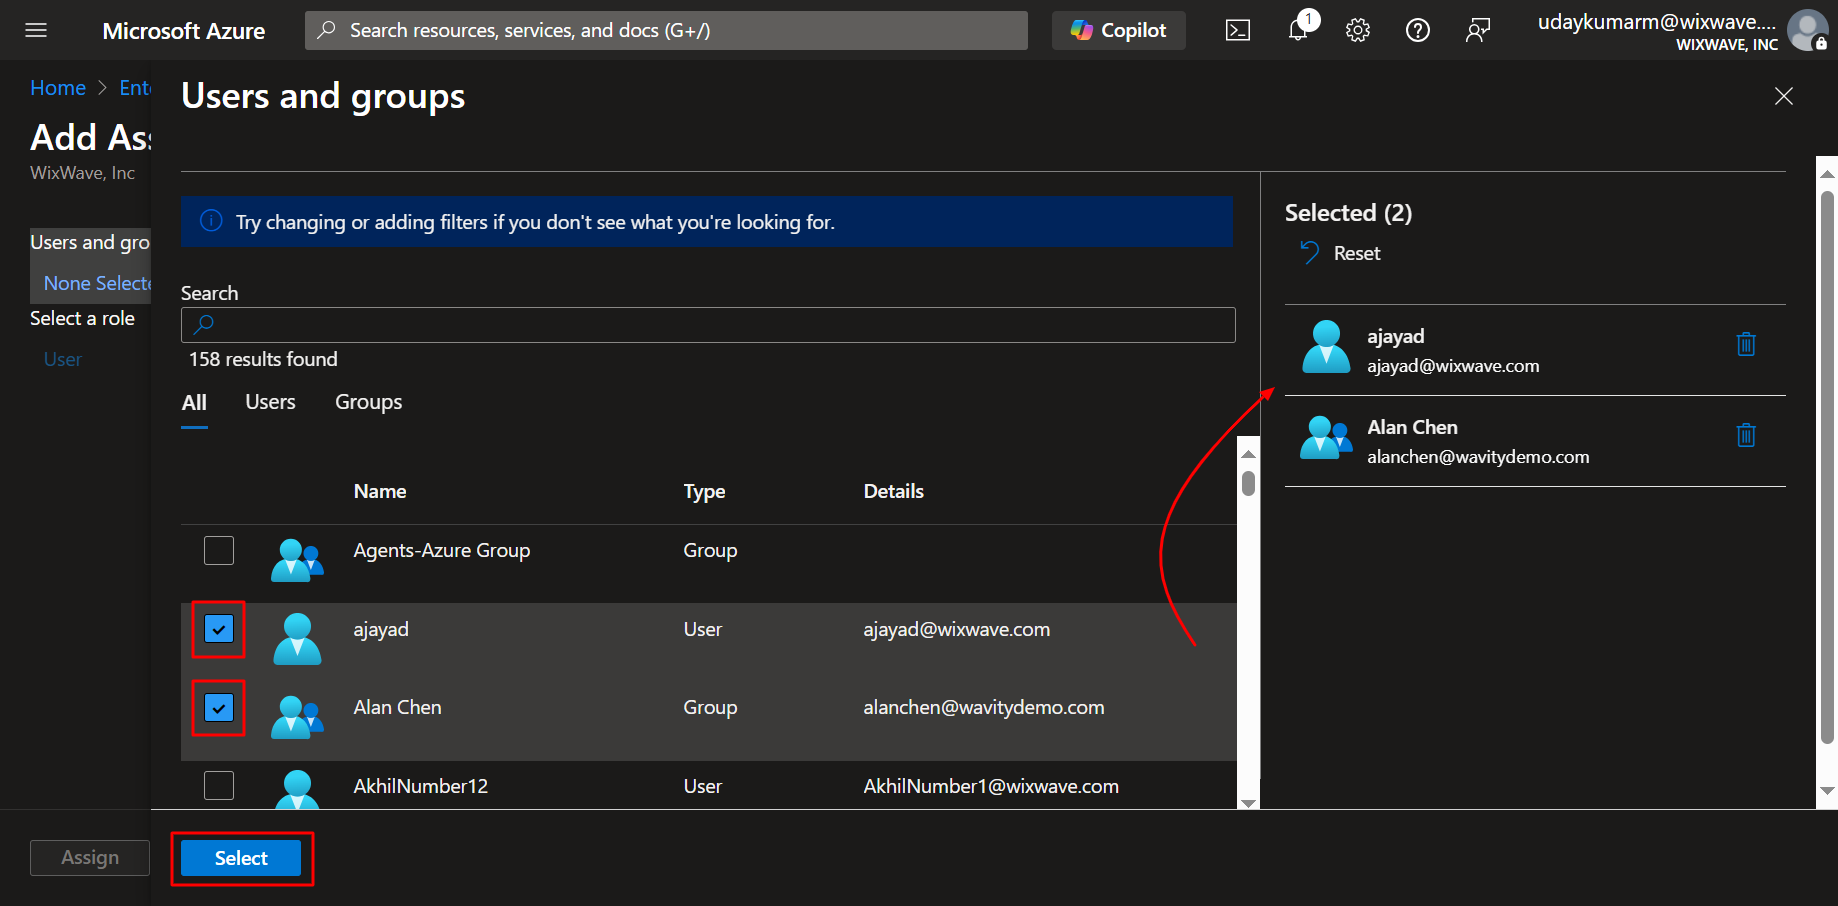
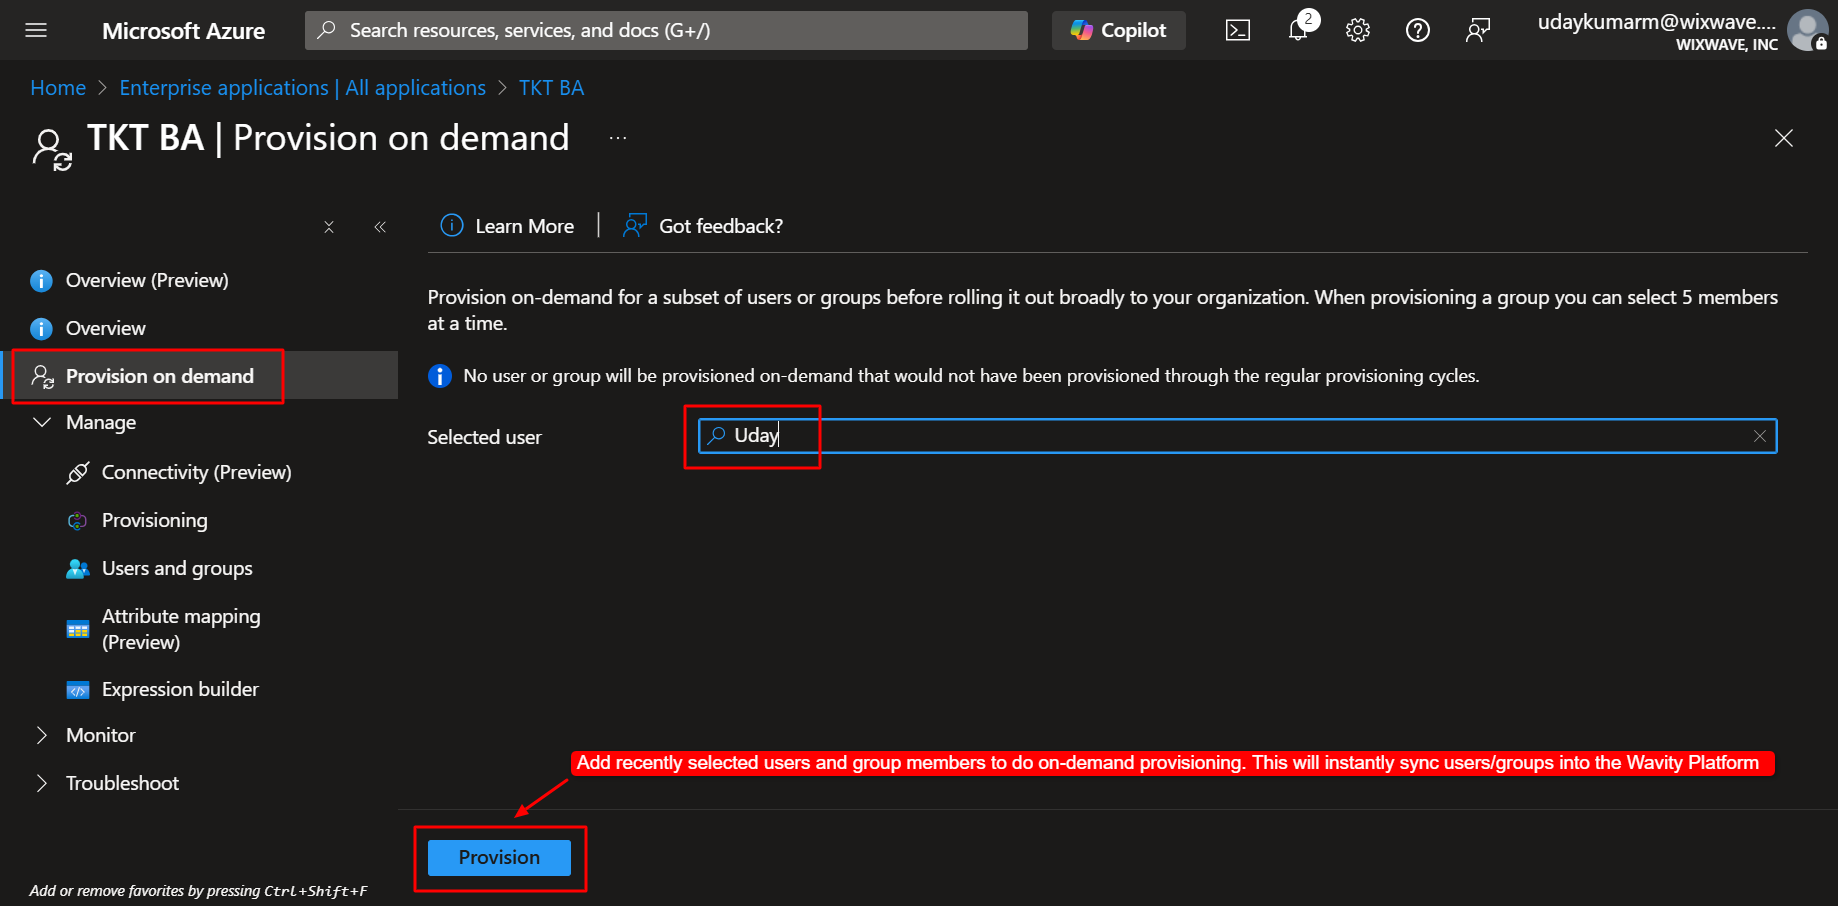
- To Perform On-Demand Provisioning: Navigate to the ‘Provision on demand’ page in Azure. Add a user in the ‘Select user’ dropdown.
- Click on ‘Provision’ to add recently selected users and group members to do on-demand provision. This will instantly sync users/groups into the Wavity platform.
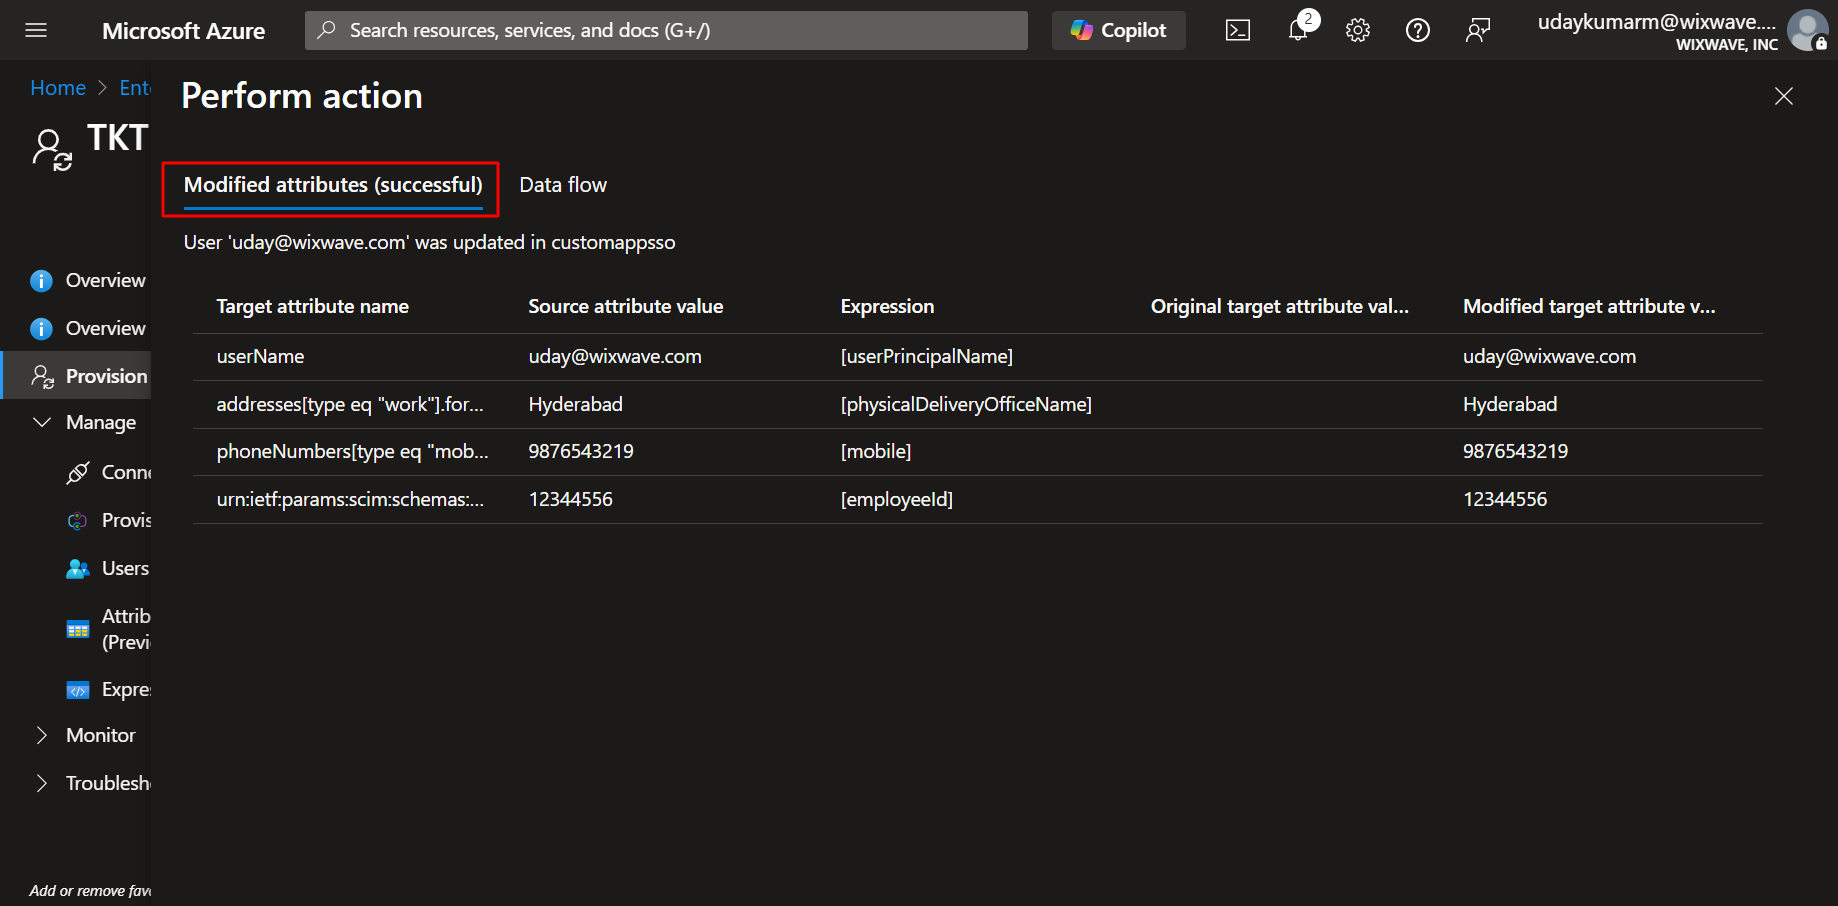
- Review the displayed user attributes as shown in below image.
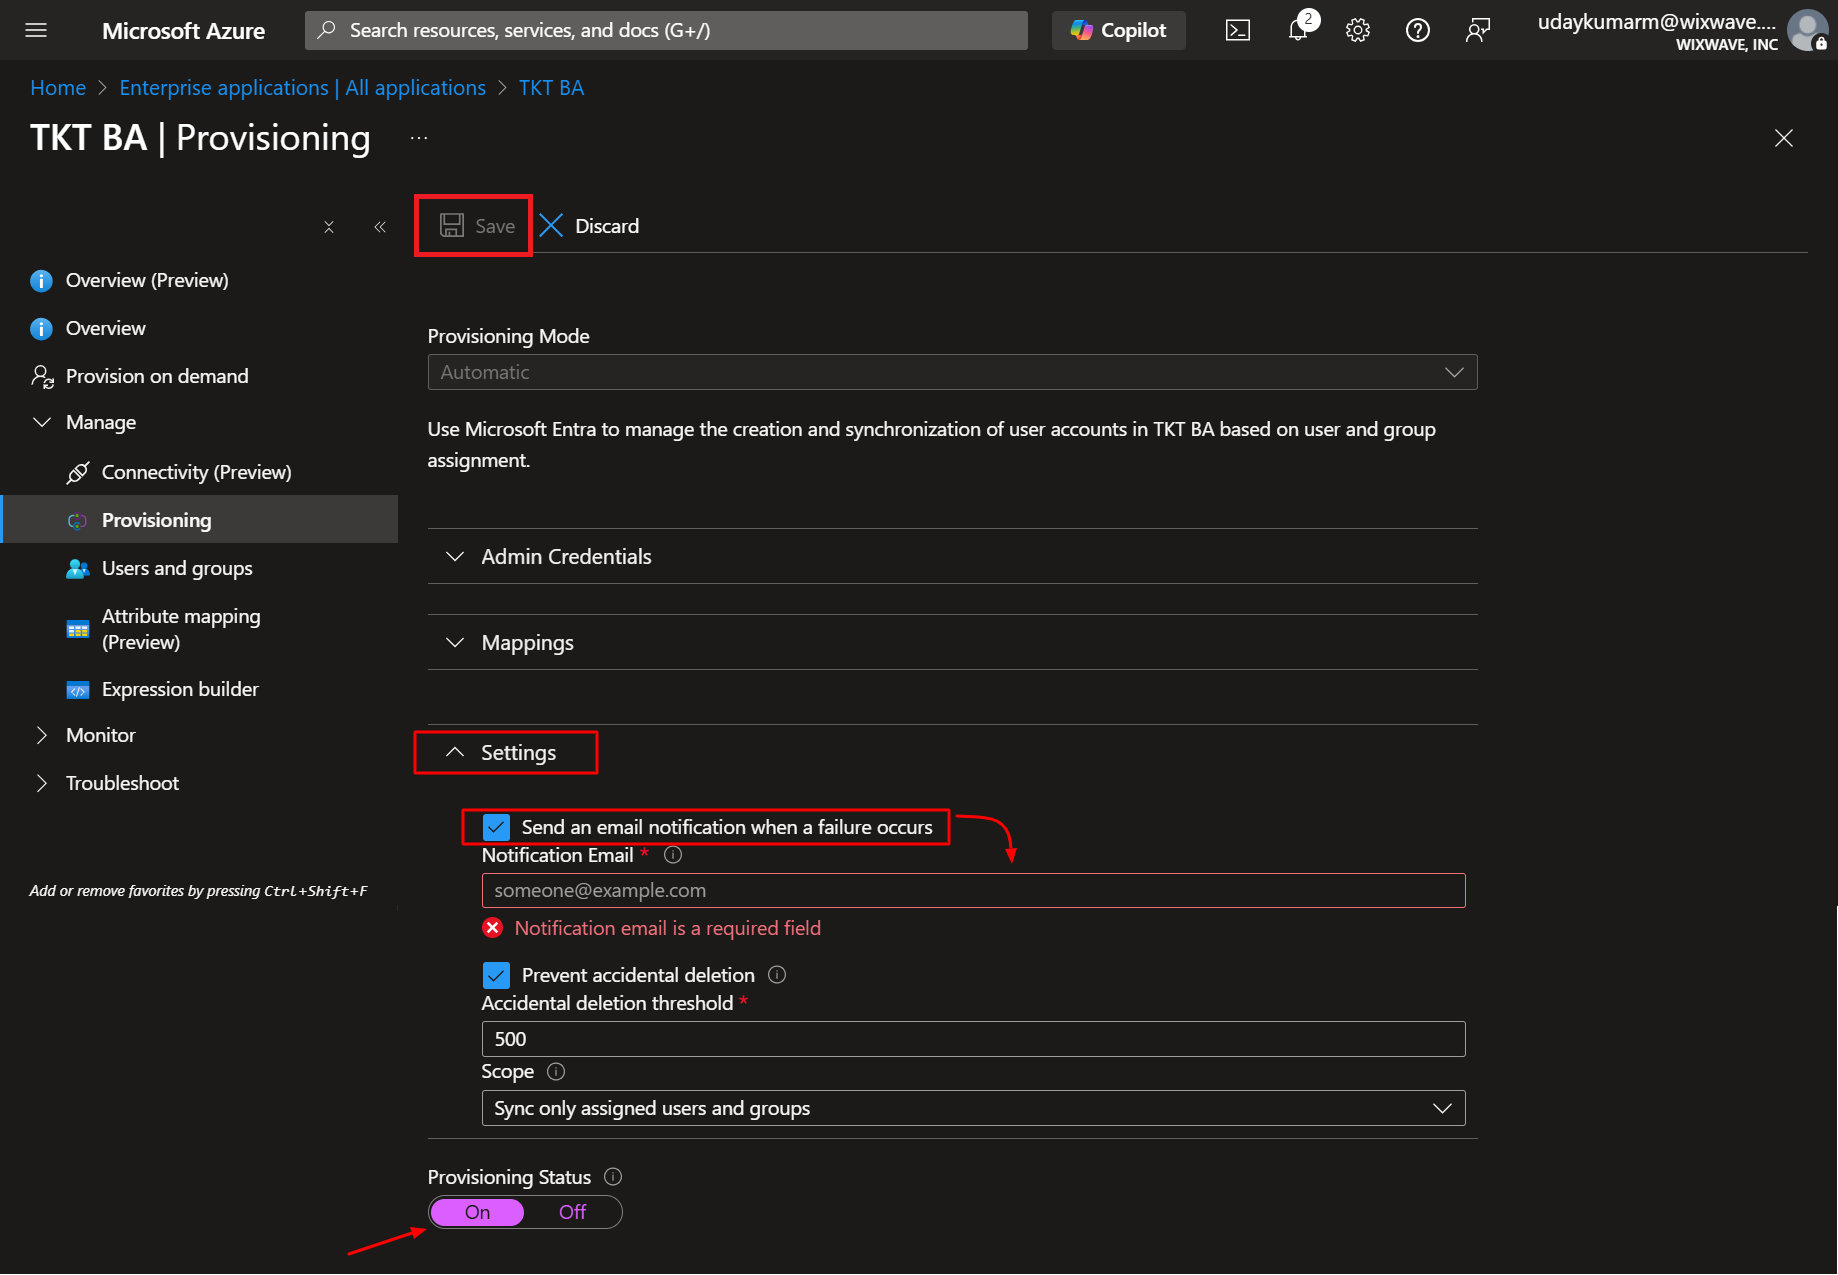
- To Activate Automatic Provisioning: Return to the Provisioning settings in Azure. Set Provisioning Status to On. Add an email address for failure notifications. Click ‘Save’.
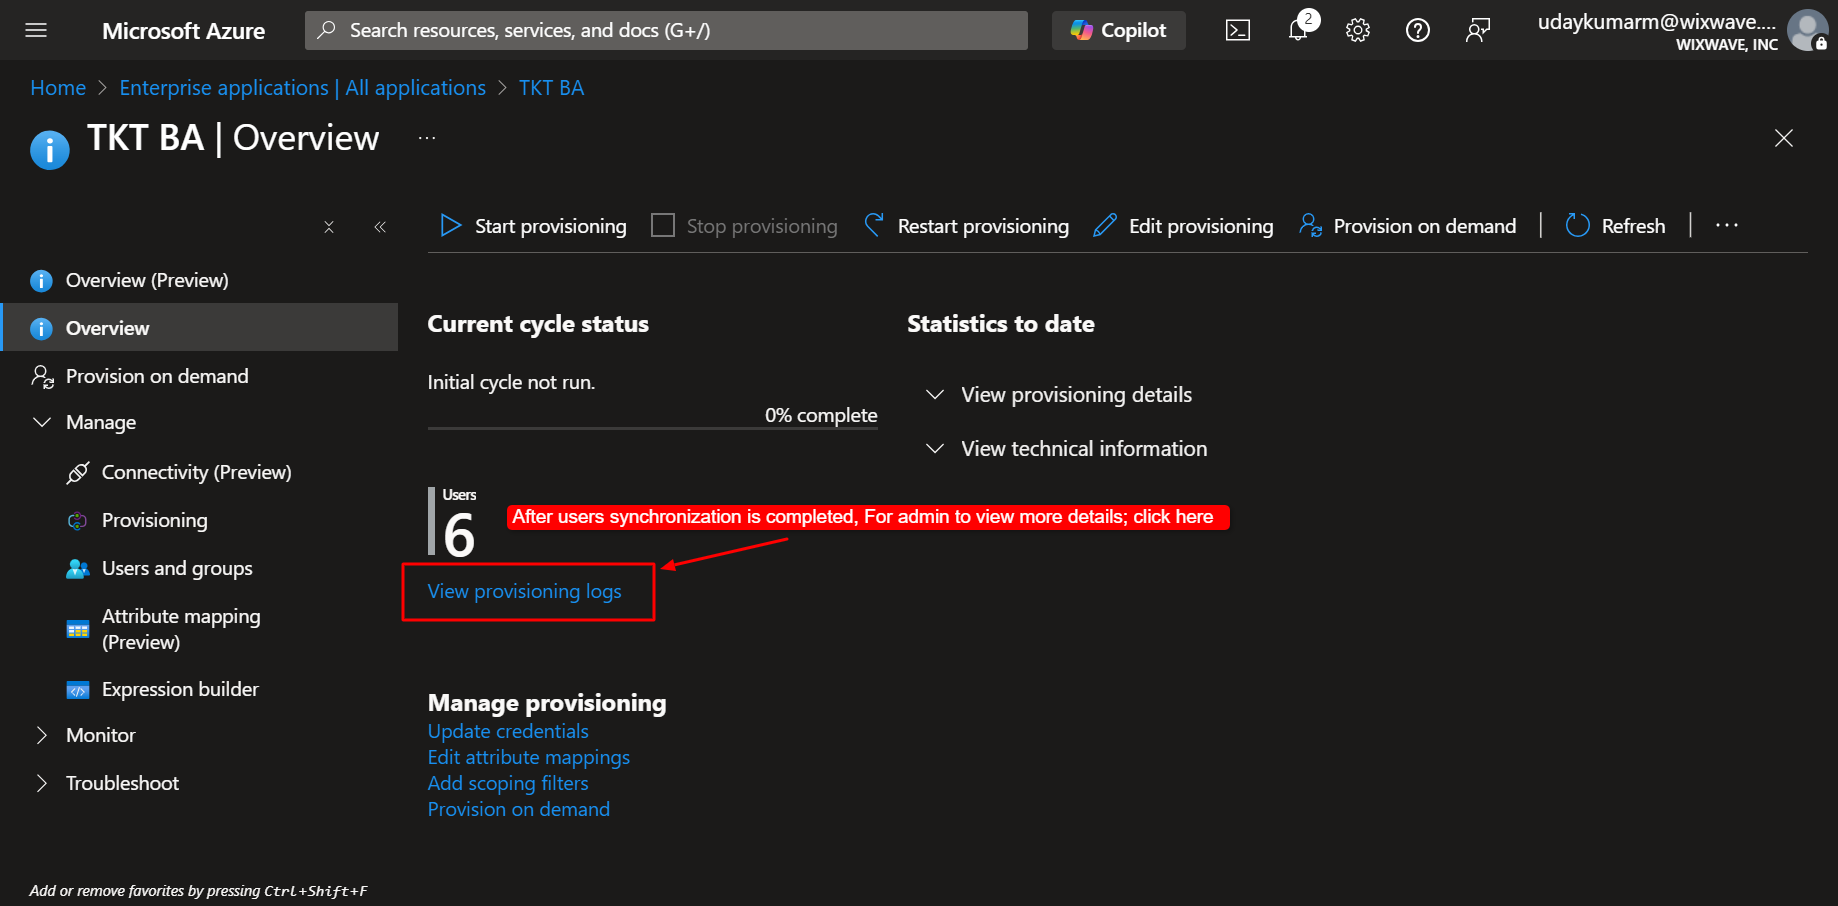
- To Monitor Provisioning Status: Go to the Overview page of the Azure Wavity application. Click ‘View provisioning logs’ to verify synchronization activities and confirm successful user provisioning.