How to enable SSO with SAML in Wavity
- SSO with SAML allows users to sign in to a platform like Wavity using their organization's existing login credentials, eliminating the need to create and manage a separate username and password.
- Allows users to sign in once using a central identity provider like:
- Microsoft Azure AD
- Okta
- Google Workspace
- To enable the SSO with SAML in Wavity is a straight forward method. Only Admin will have the access to enable the SSO with SAML.
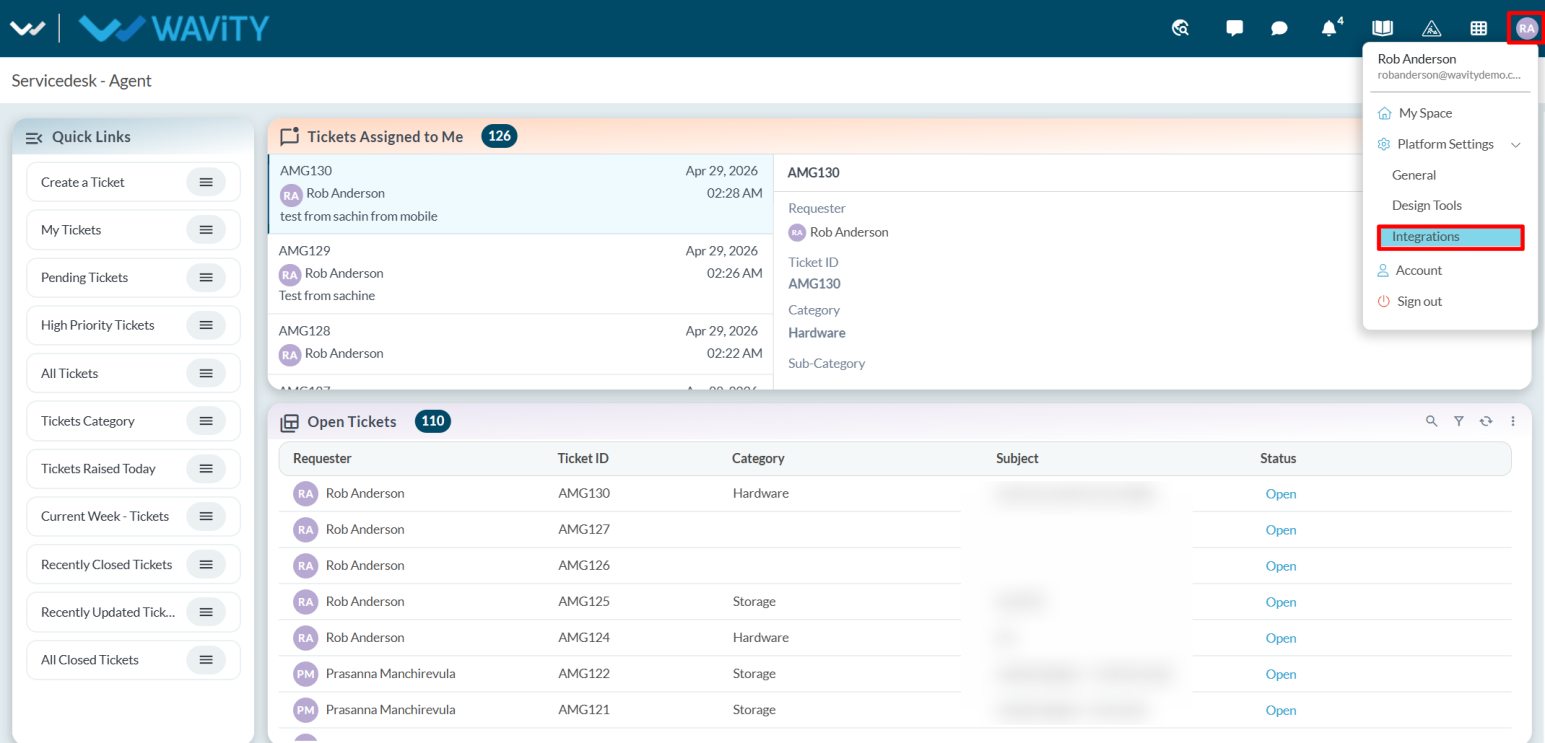
- Click on the profile icon and select the Integrations options.
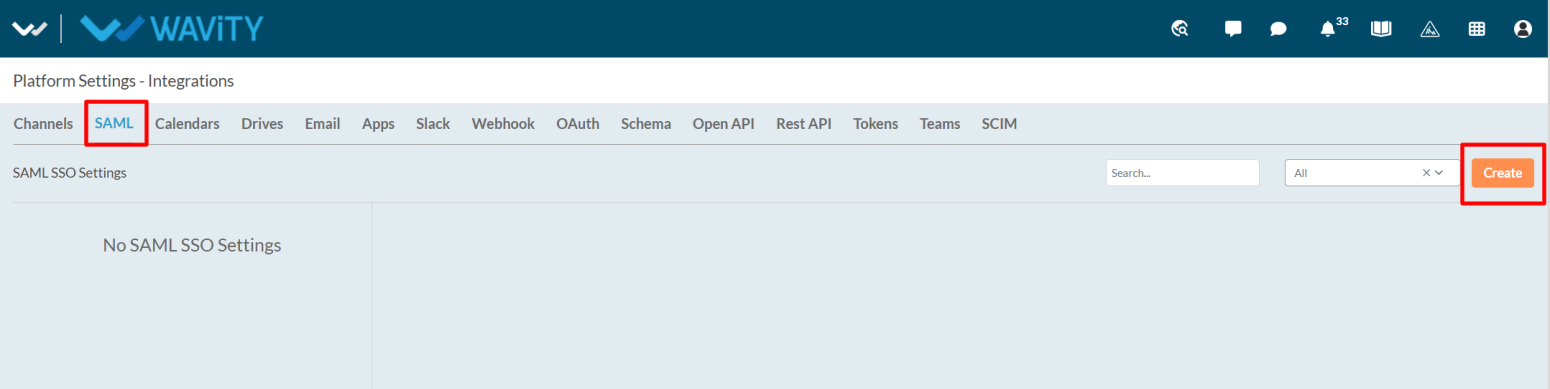
- Select the SAML and click on the “Create” option to create the SAML.
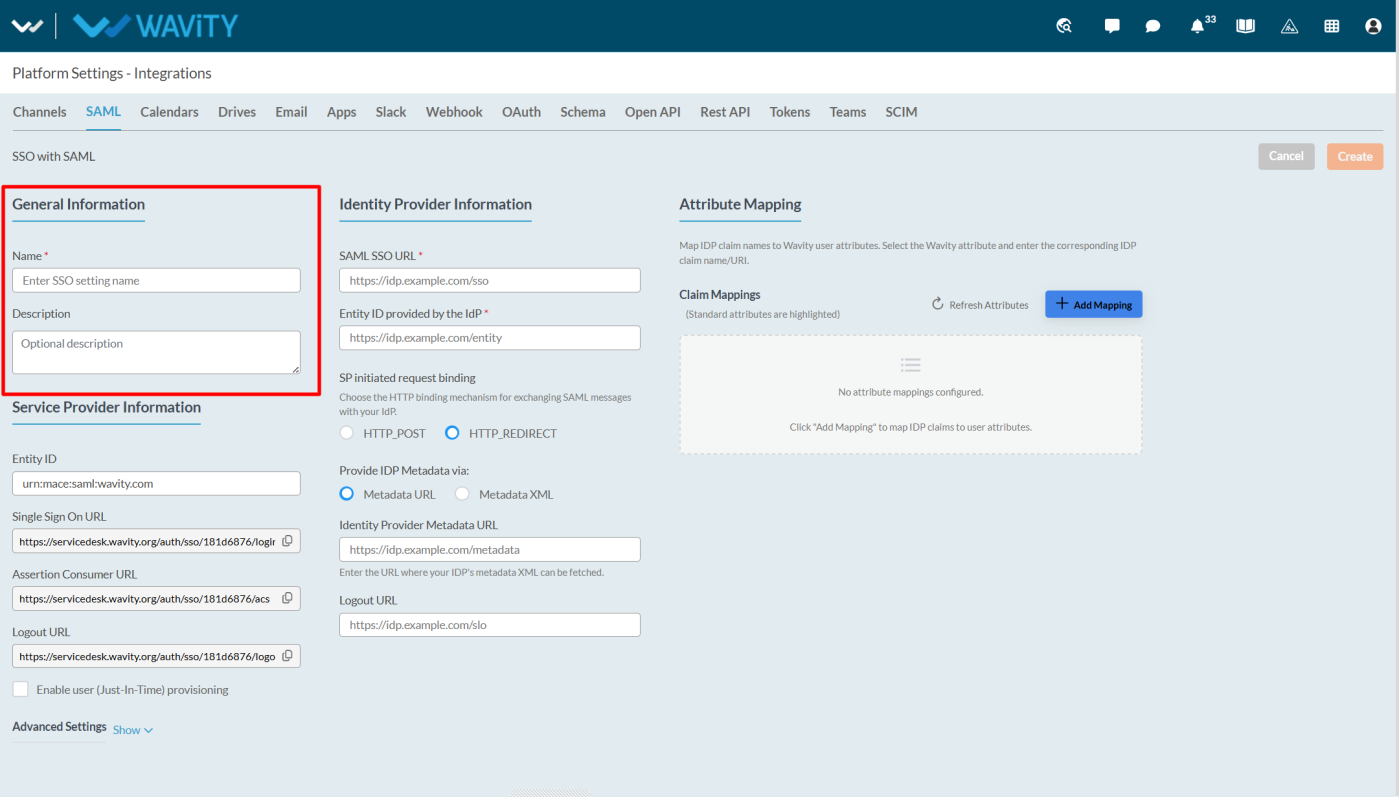
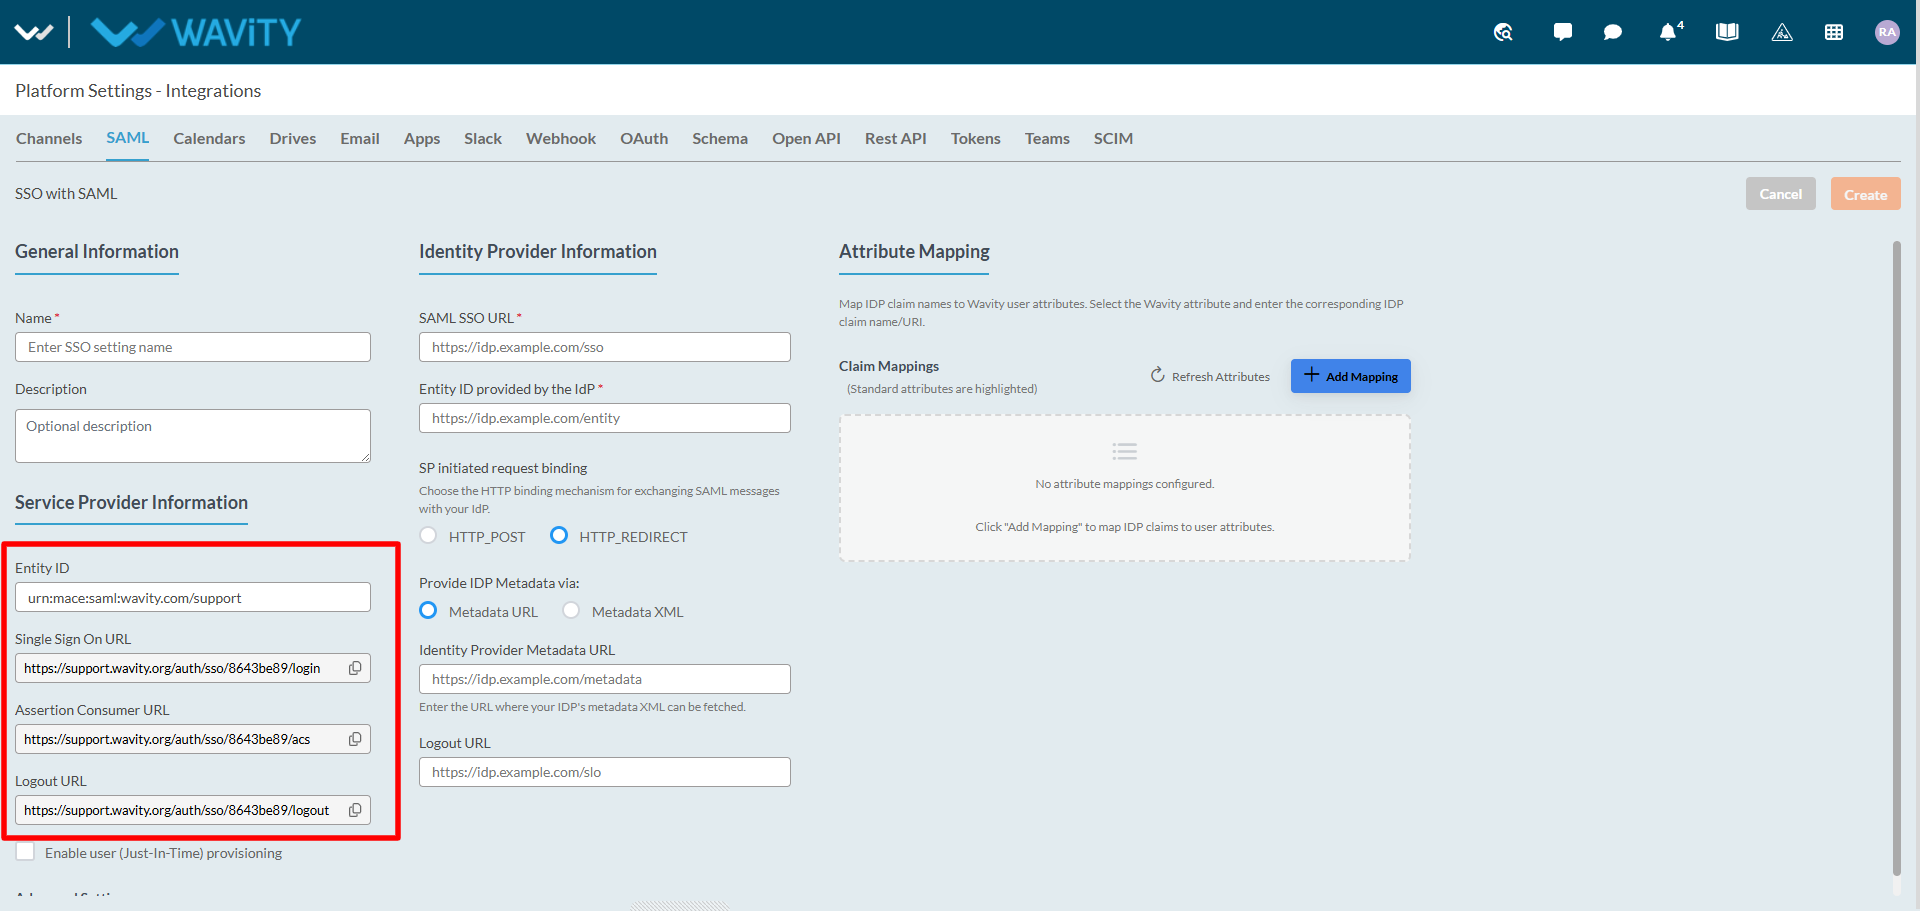
- In the “General Information” enter the Name and Description.
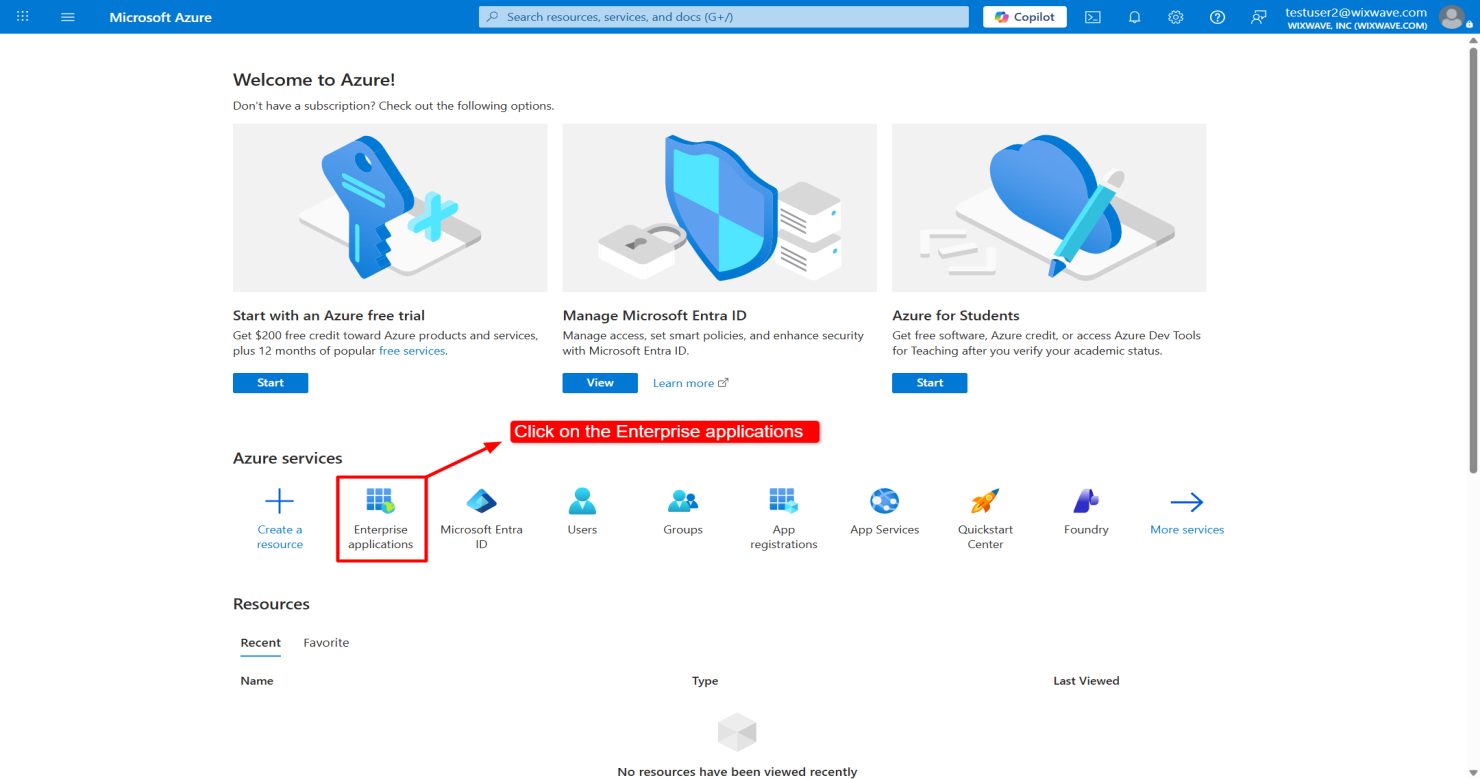
- Now login into the azure portal and select the “Enterprise Applications”
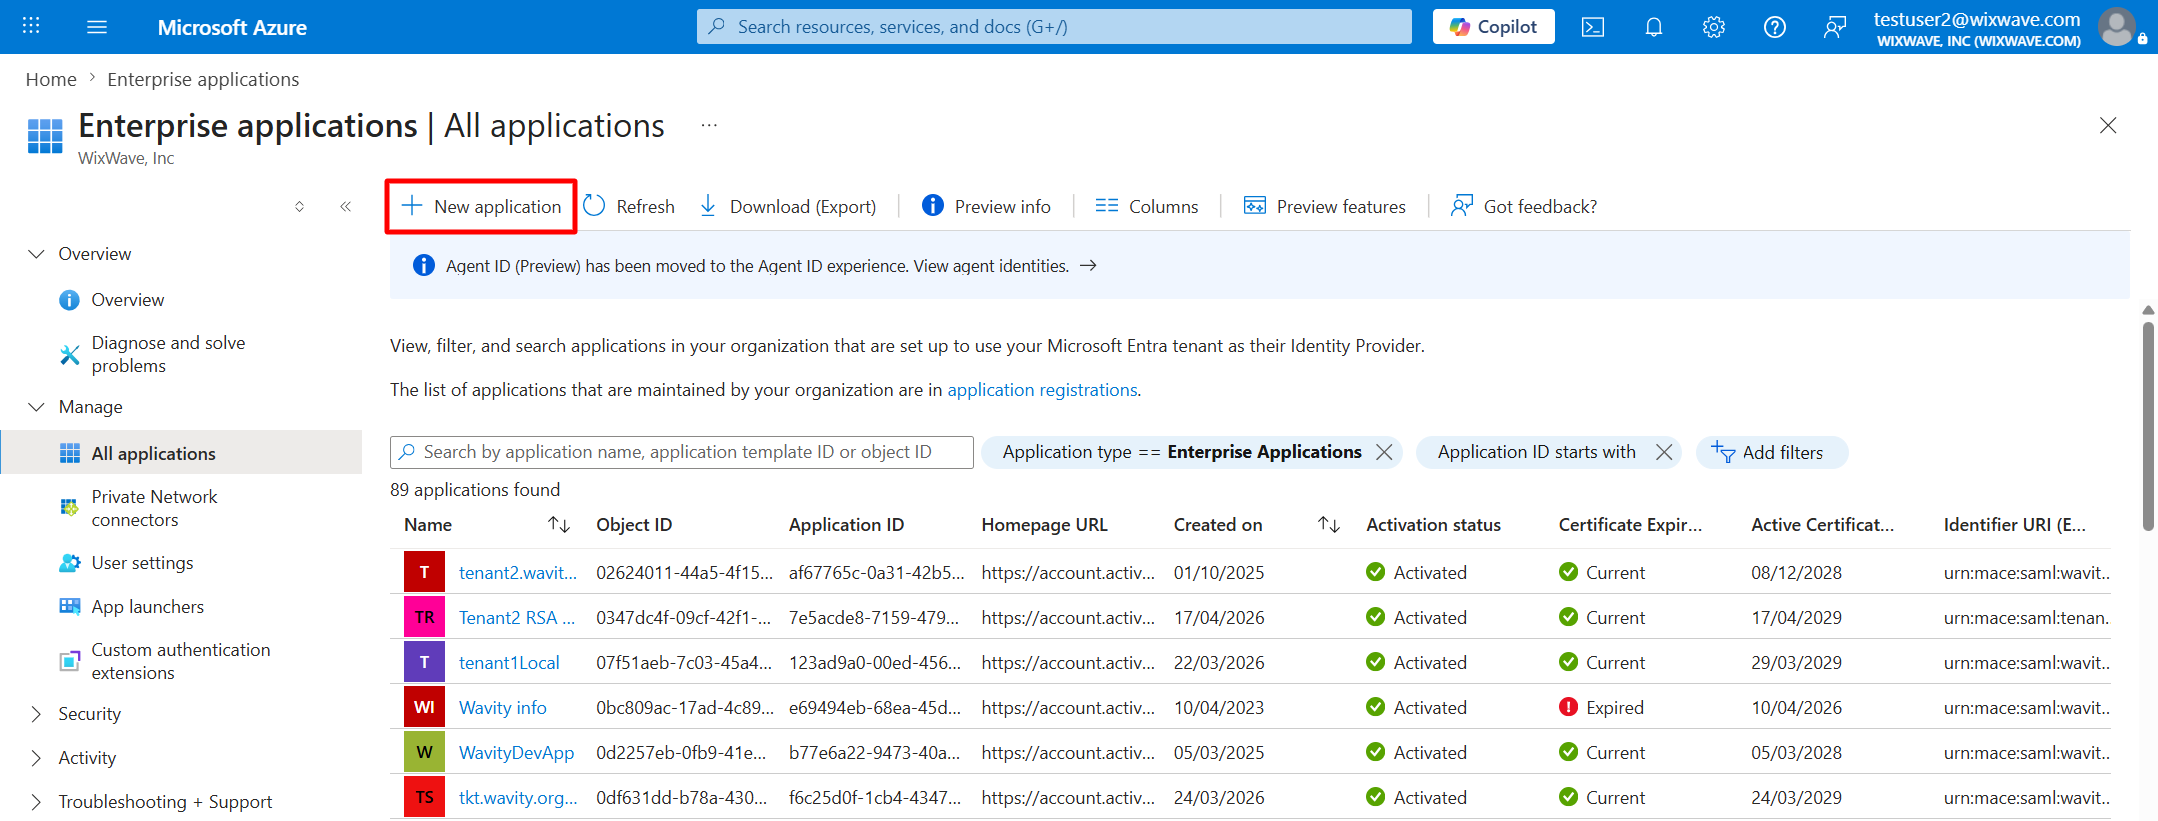
- Click on the “New Application”
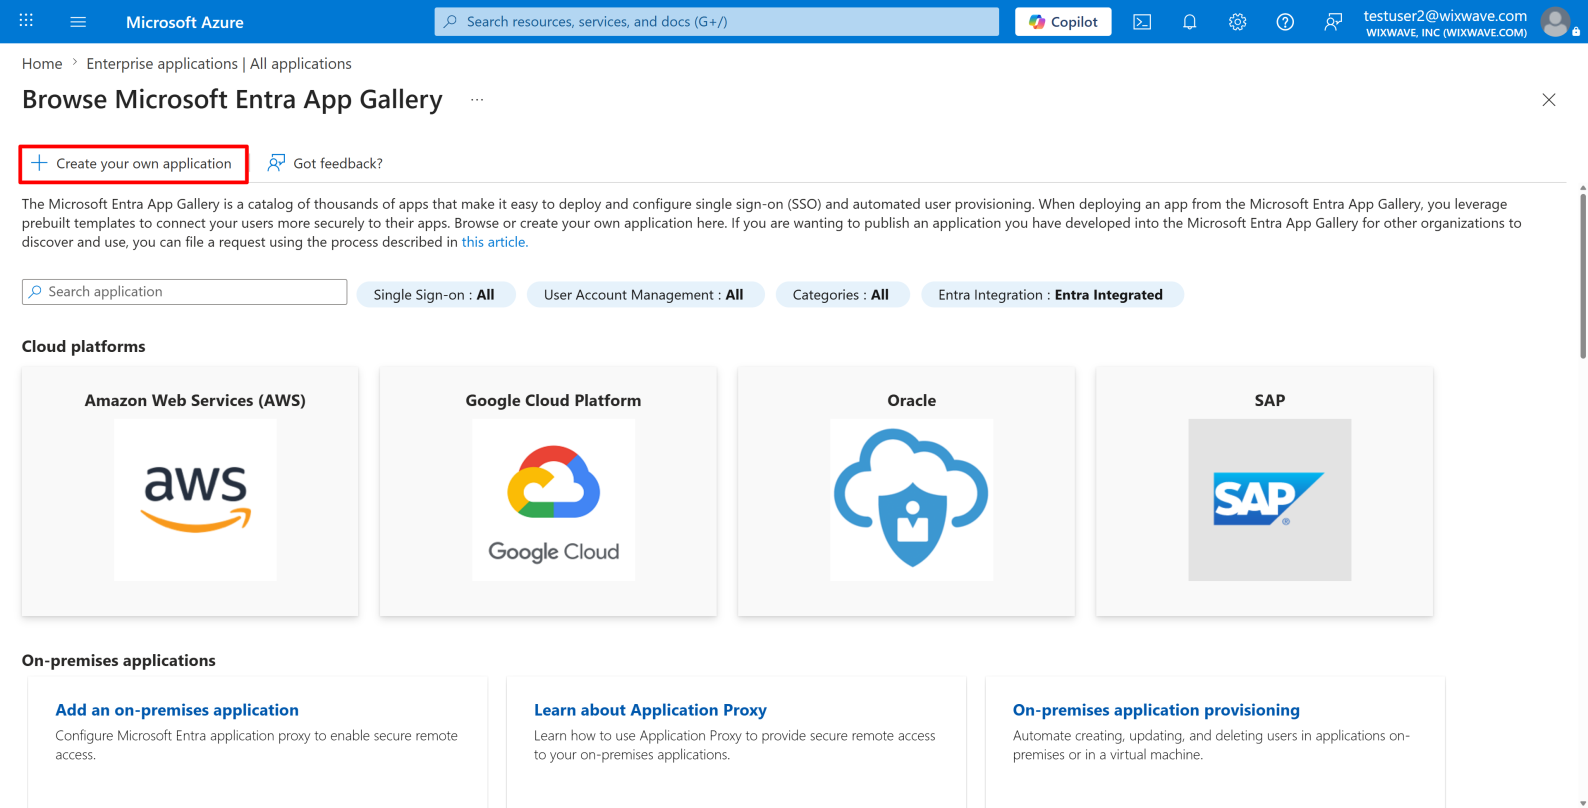
- Select the “Create your own application”
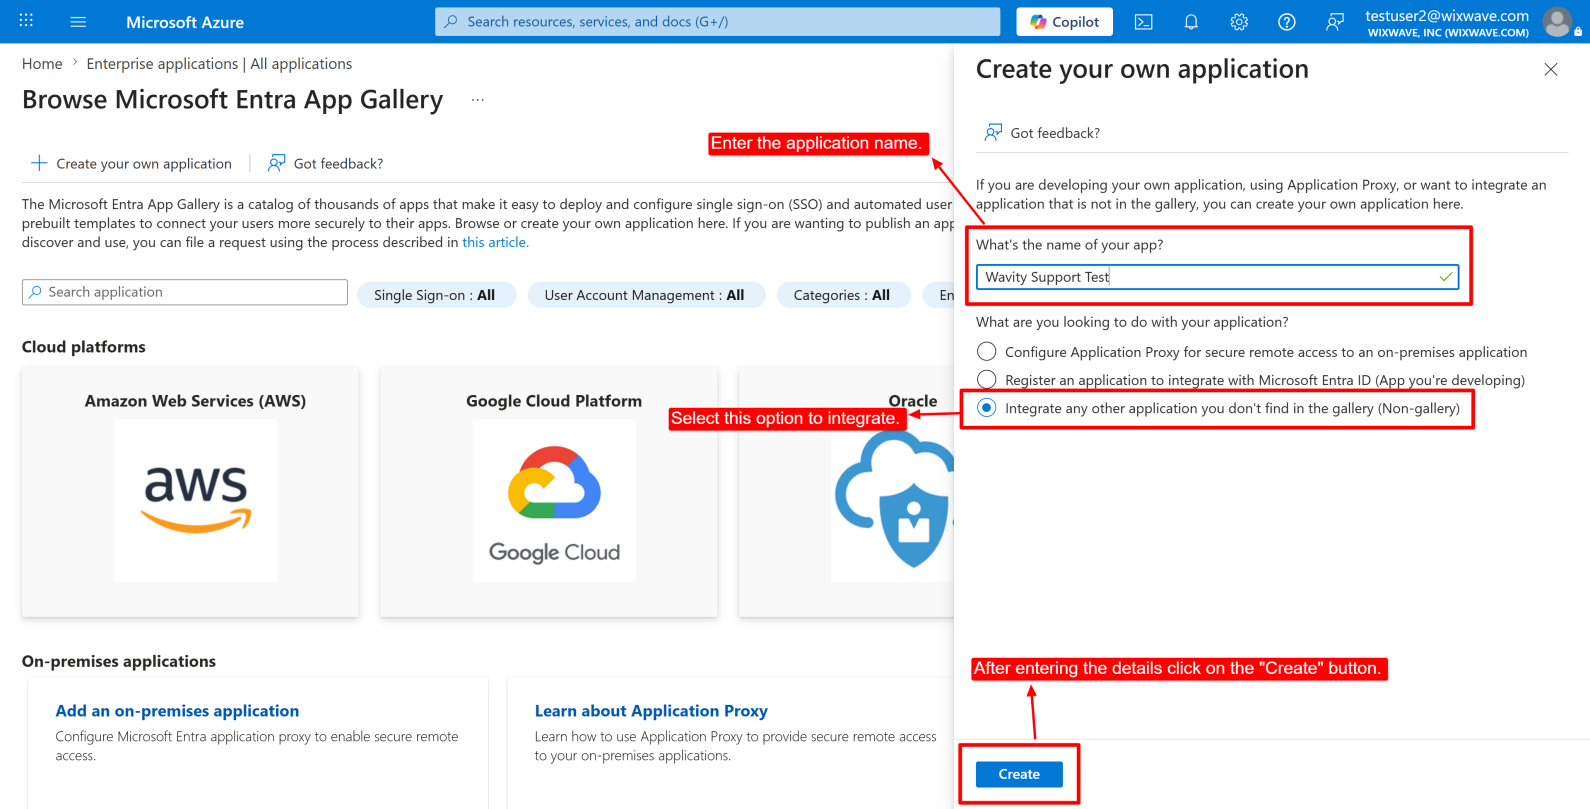
- Enter the application name and select the third option to integrate an application that is not available in the gallery.
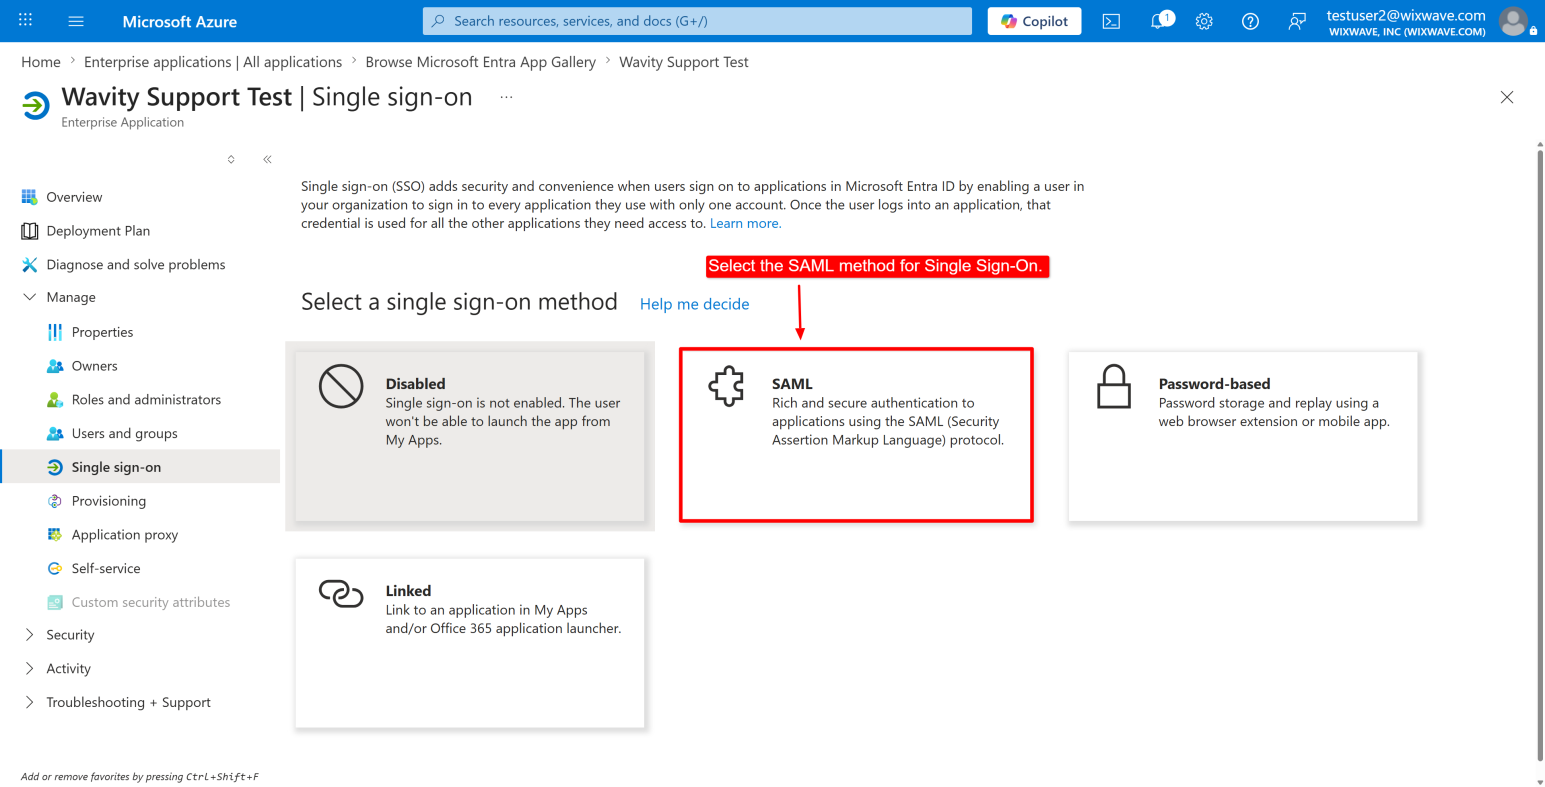
- The application has now been created. Click on “Get Started” under “Set up Single Sign-On”.

- Select the SAML method for Single Sign-On.
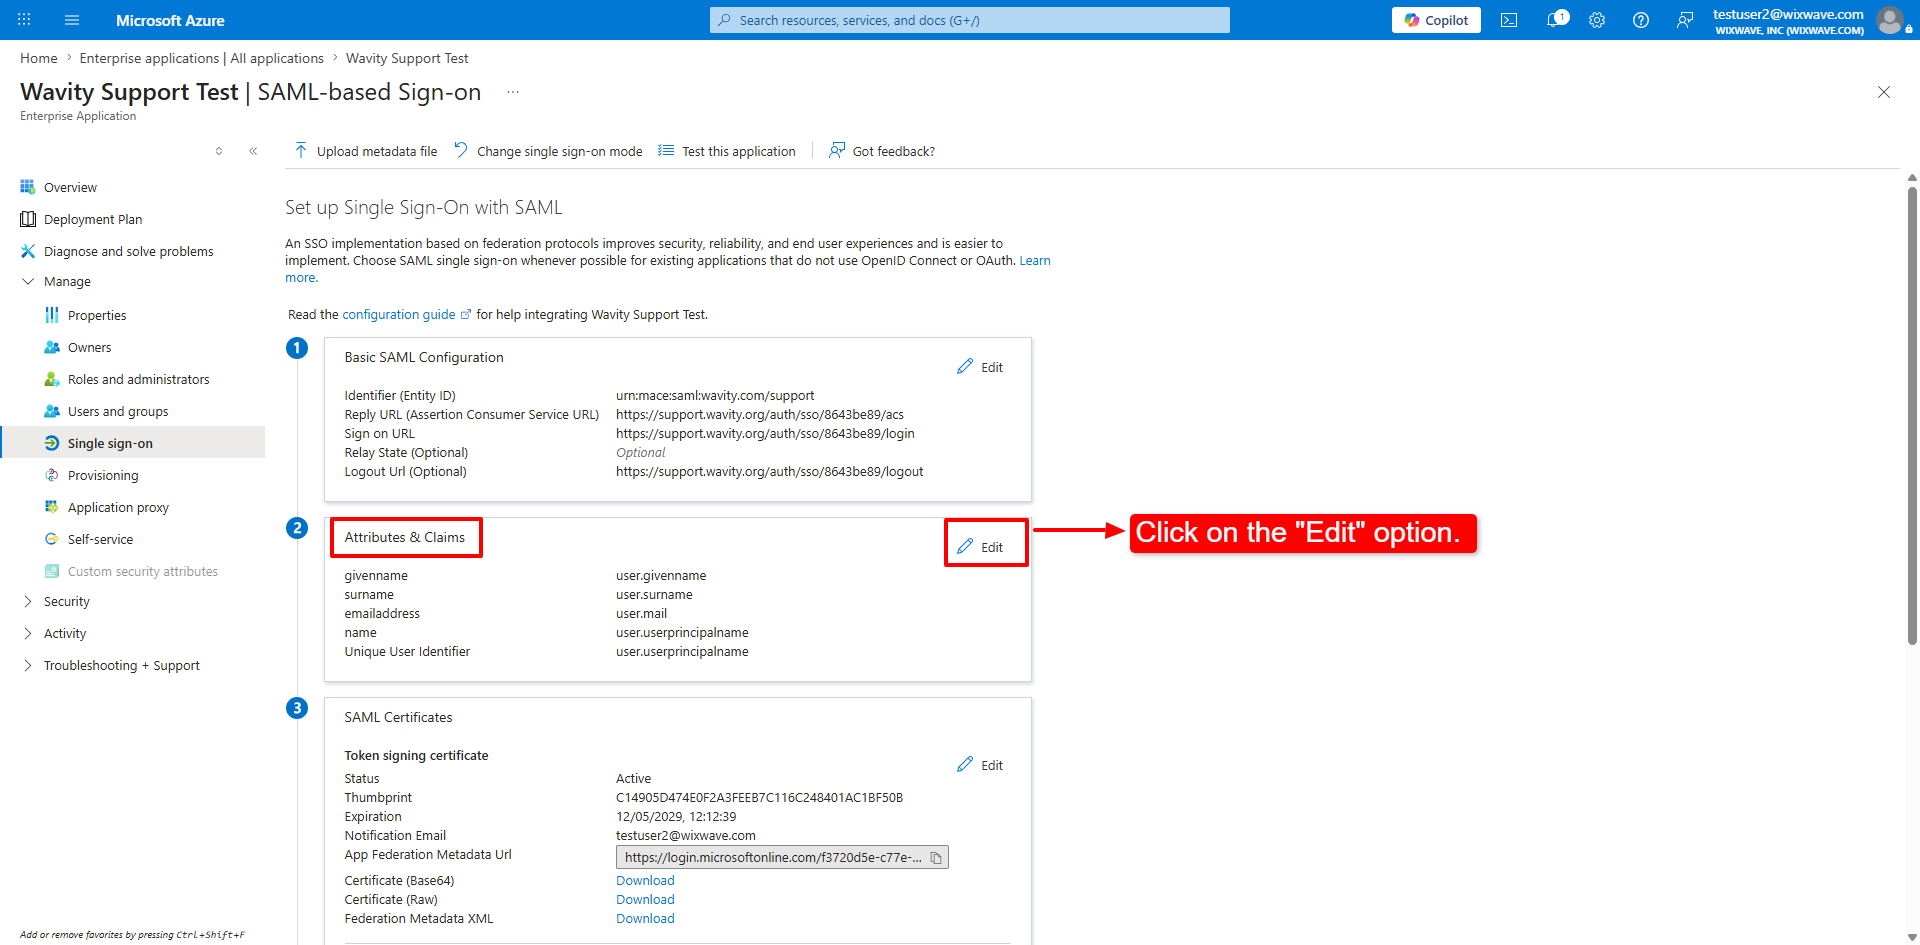
- Now the admin will be navigate to the “Set up Single Sign-On with SAML” page. Click on the “Edit” option in “Basic SAML configuration”.
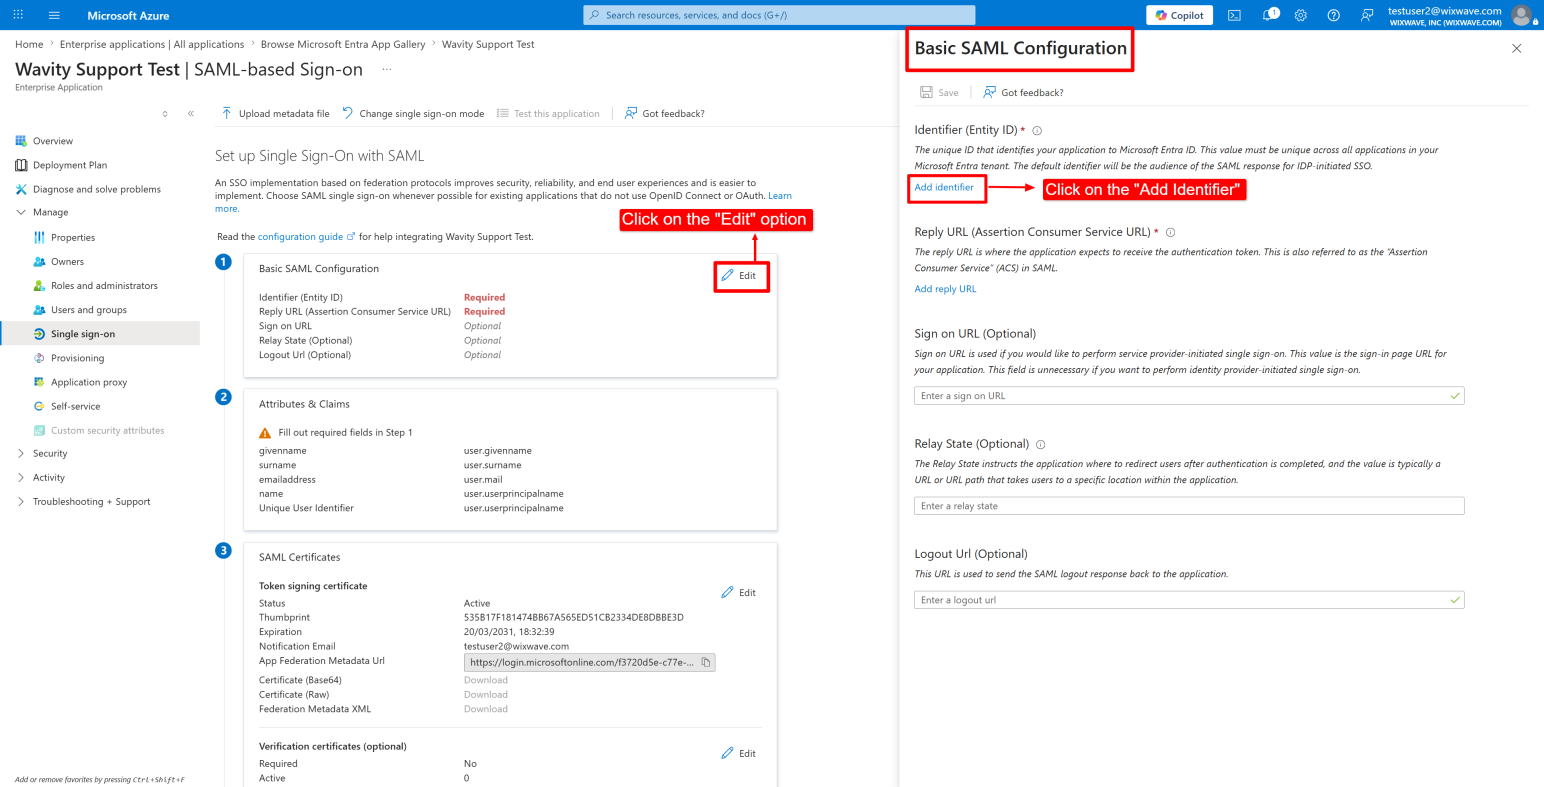
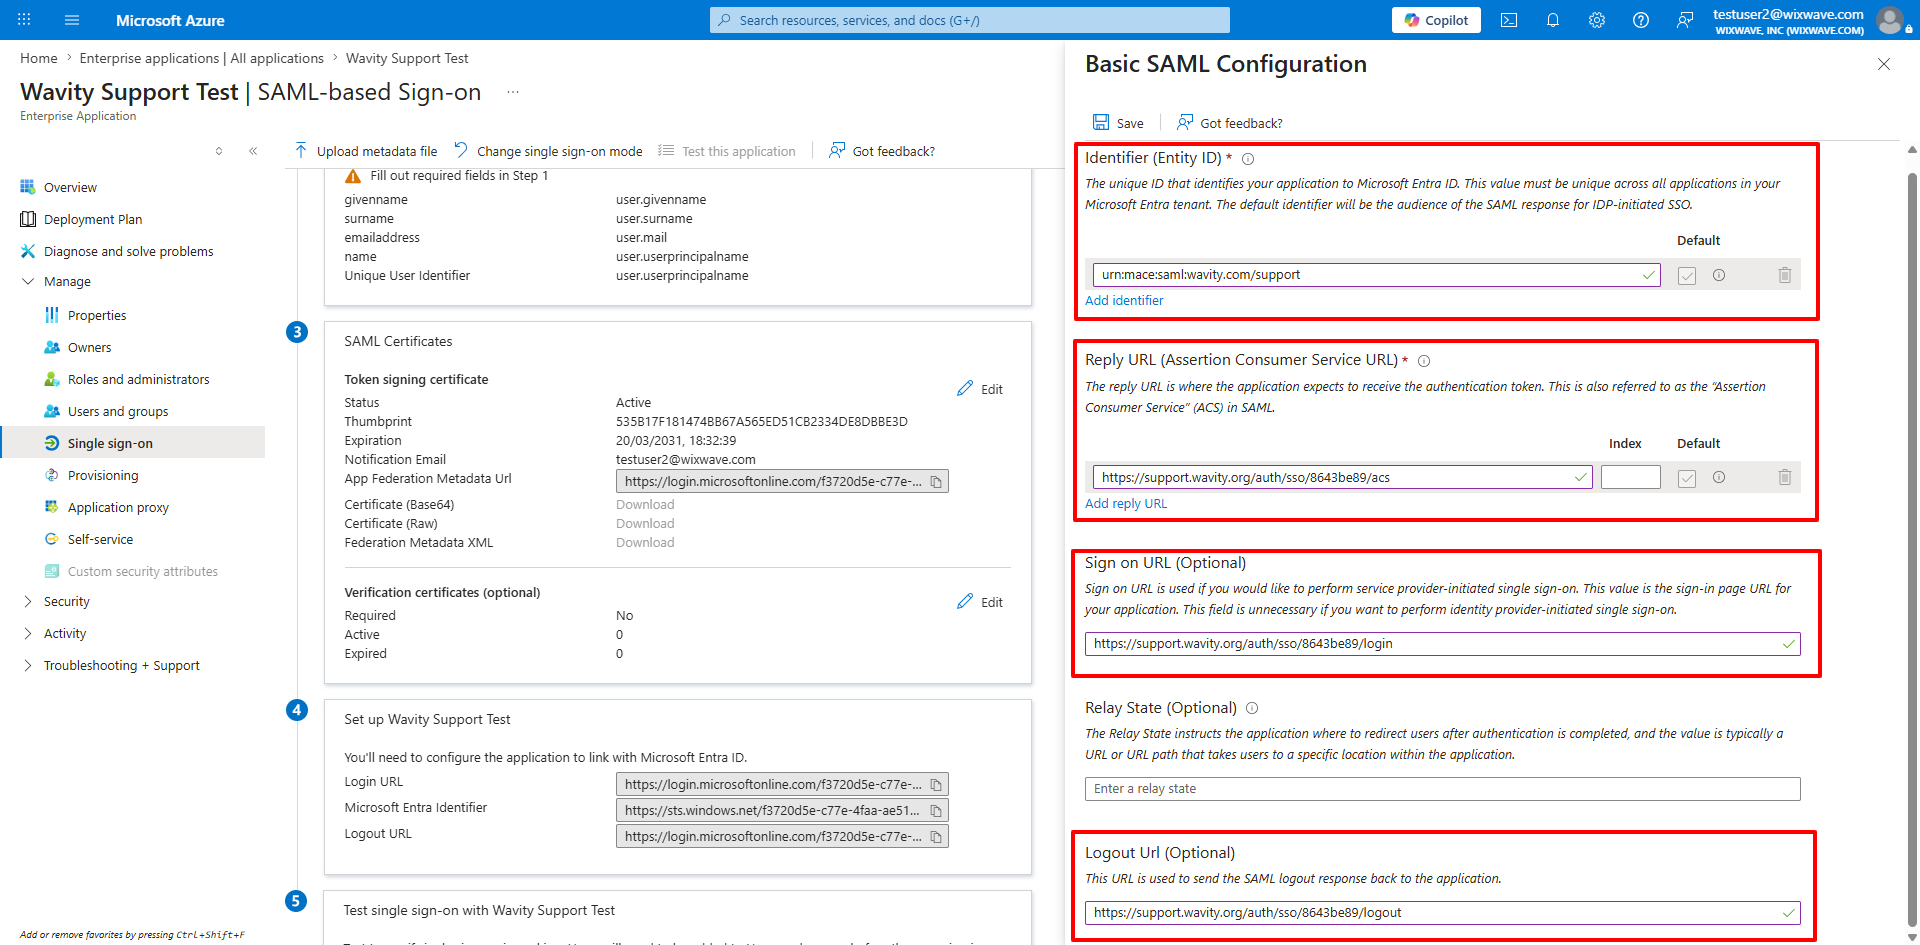
- Copy the Entity ID from Wavity and paste it into the Identifier (Entity ID) field. Admin can also append a unique identifier to the Entity ID using “/name”.
- Copy the Assertion Consumer URL and paste it into the Reply URL (Assertion Consumer Service URL) field in azure.
- Copy the Single Sign-On URL and paste it into the Sign-on URL field in azure.
- Copy the Logout URL and paste it into the Logout URL field in azure.
- After the Basic SAML configuration , In the Attributes & Claims click on the “Edit” option
- In the Attributes and claims and select the Claim name and copy the “Namespace” URL.
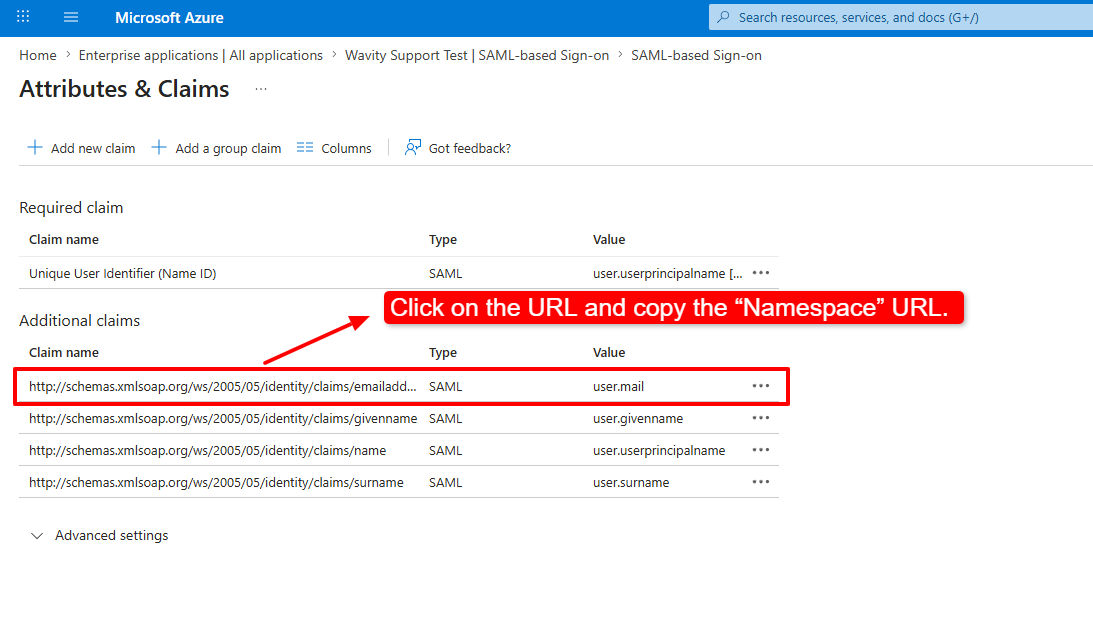
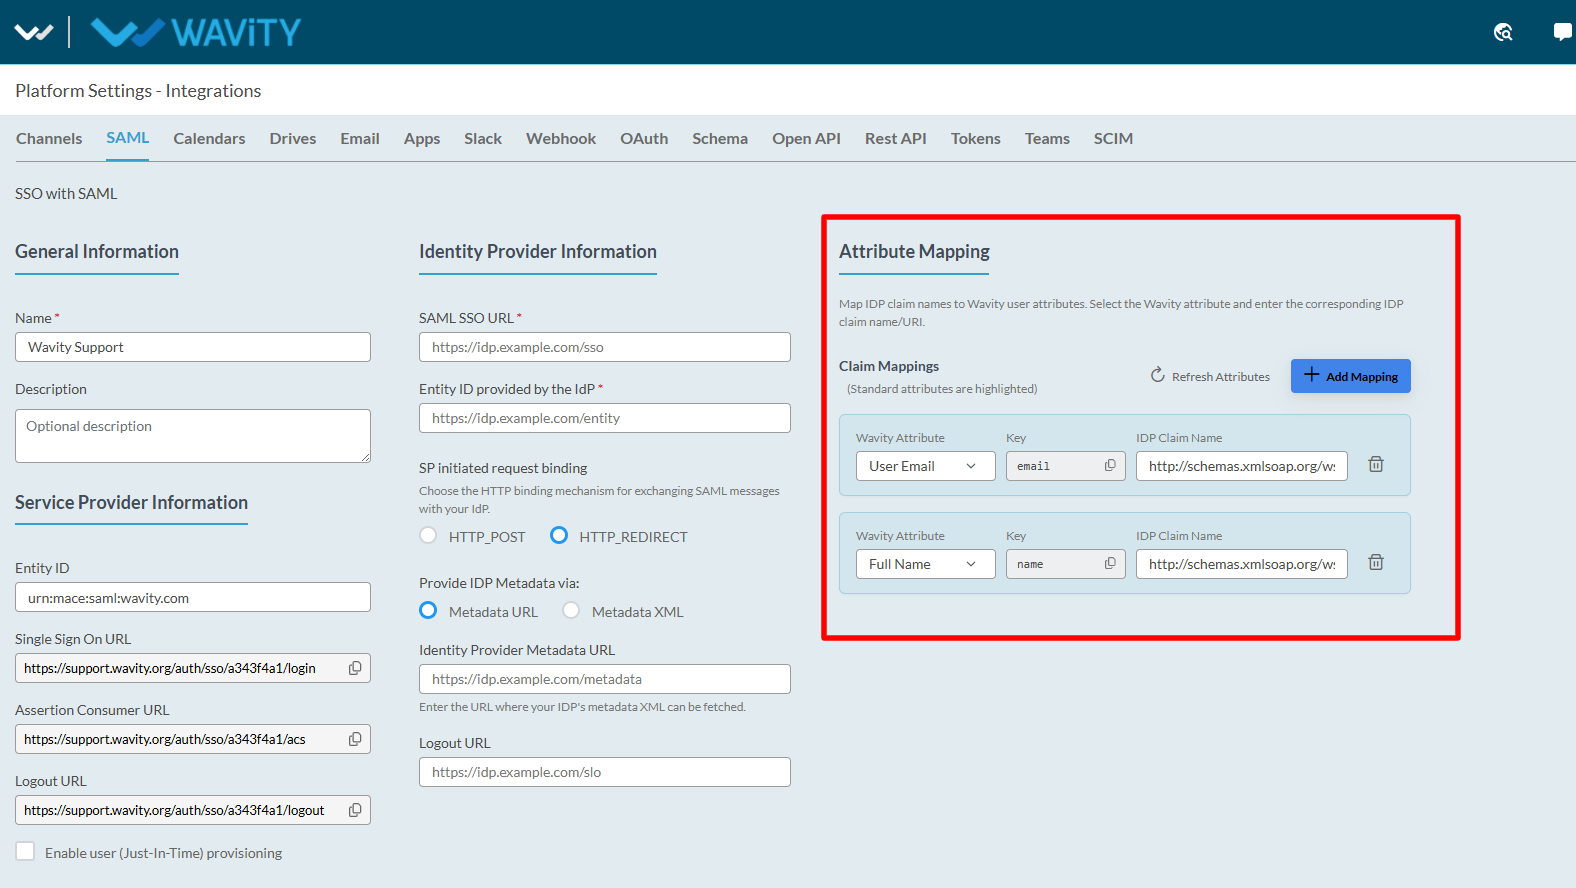
- In the Wavity platform, under Attribute Mapping, click on Add Mapping. In the Wavity Attribute field, select User Email, then paste the copied Namespace URL into the IDP Claim Name field.
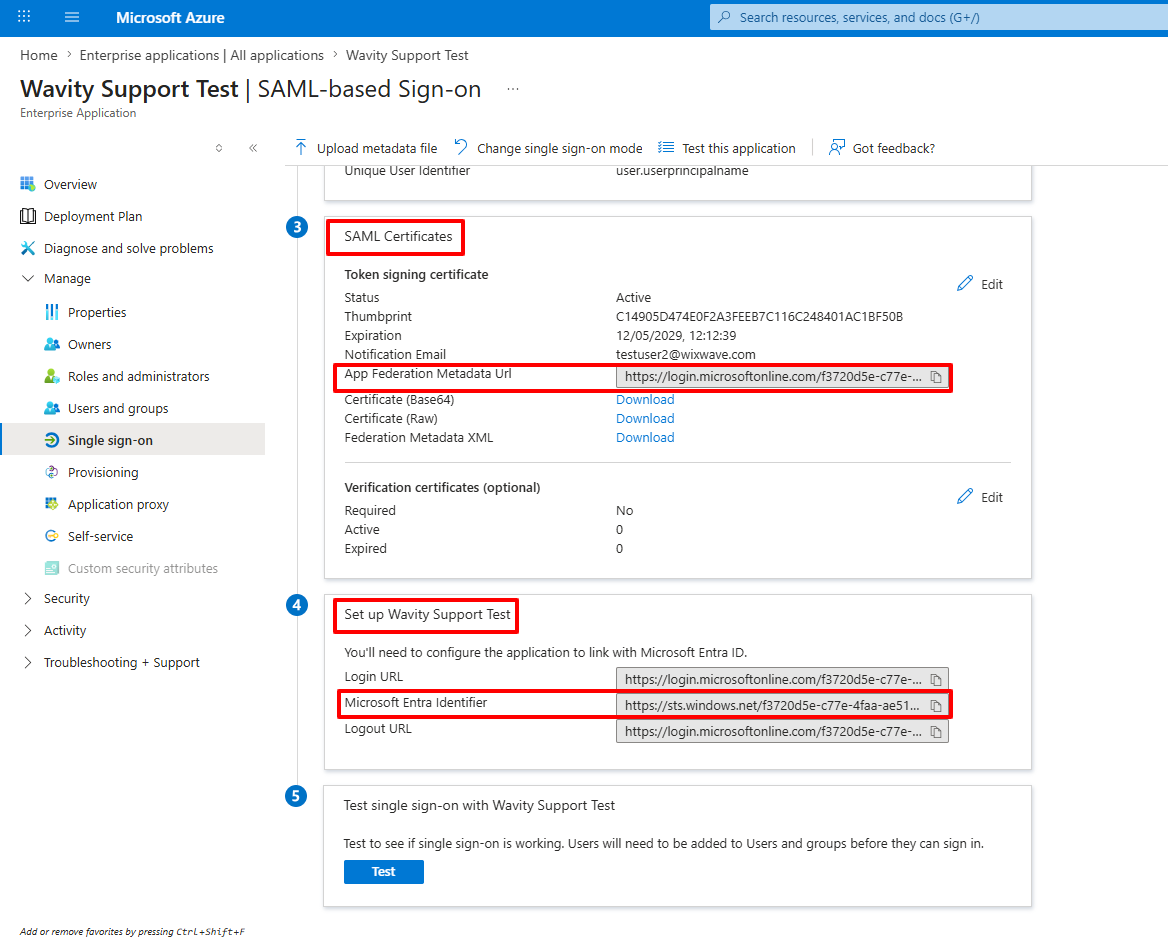
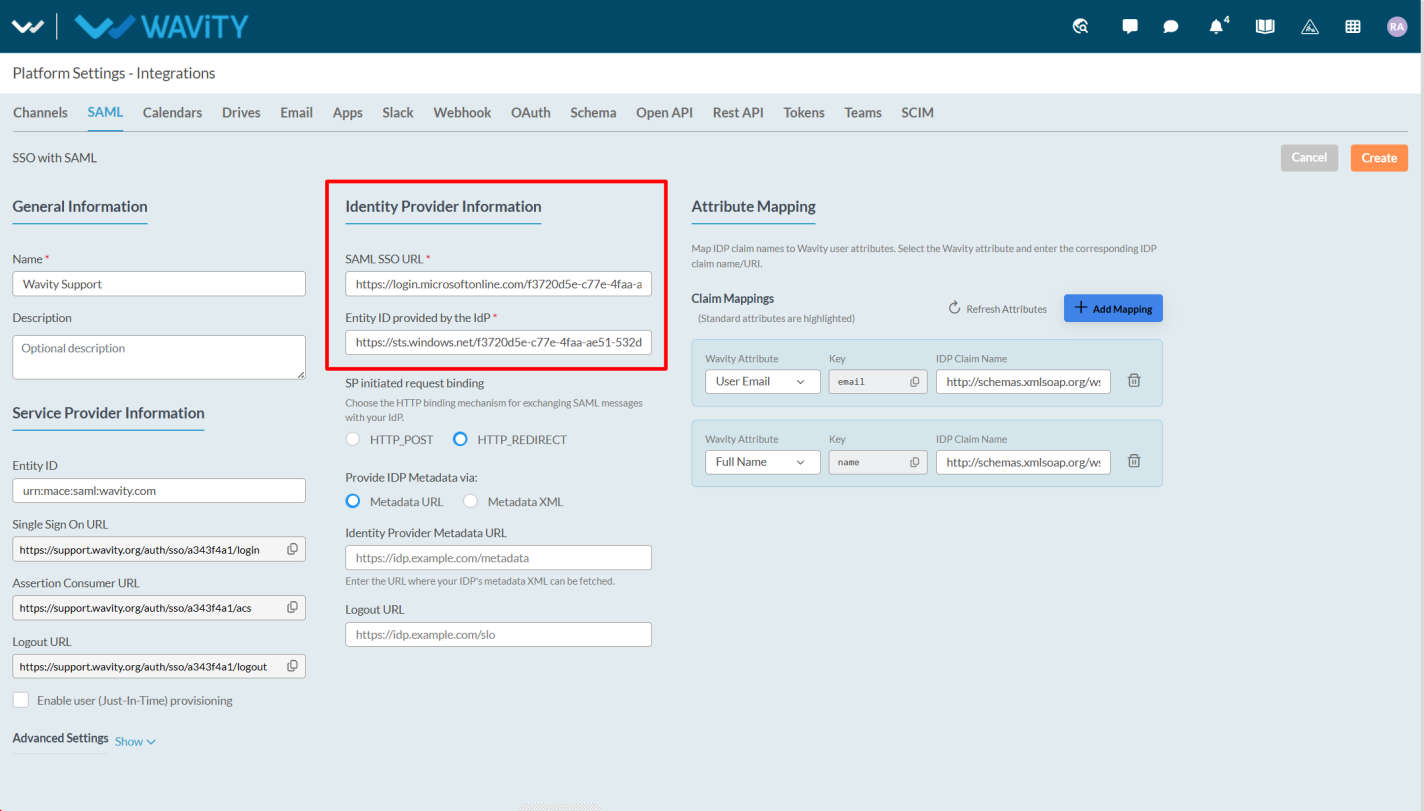
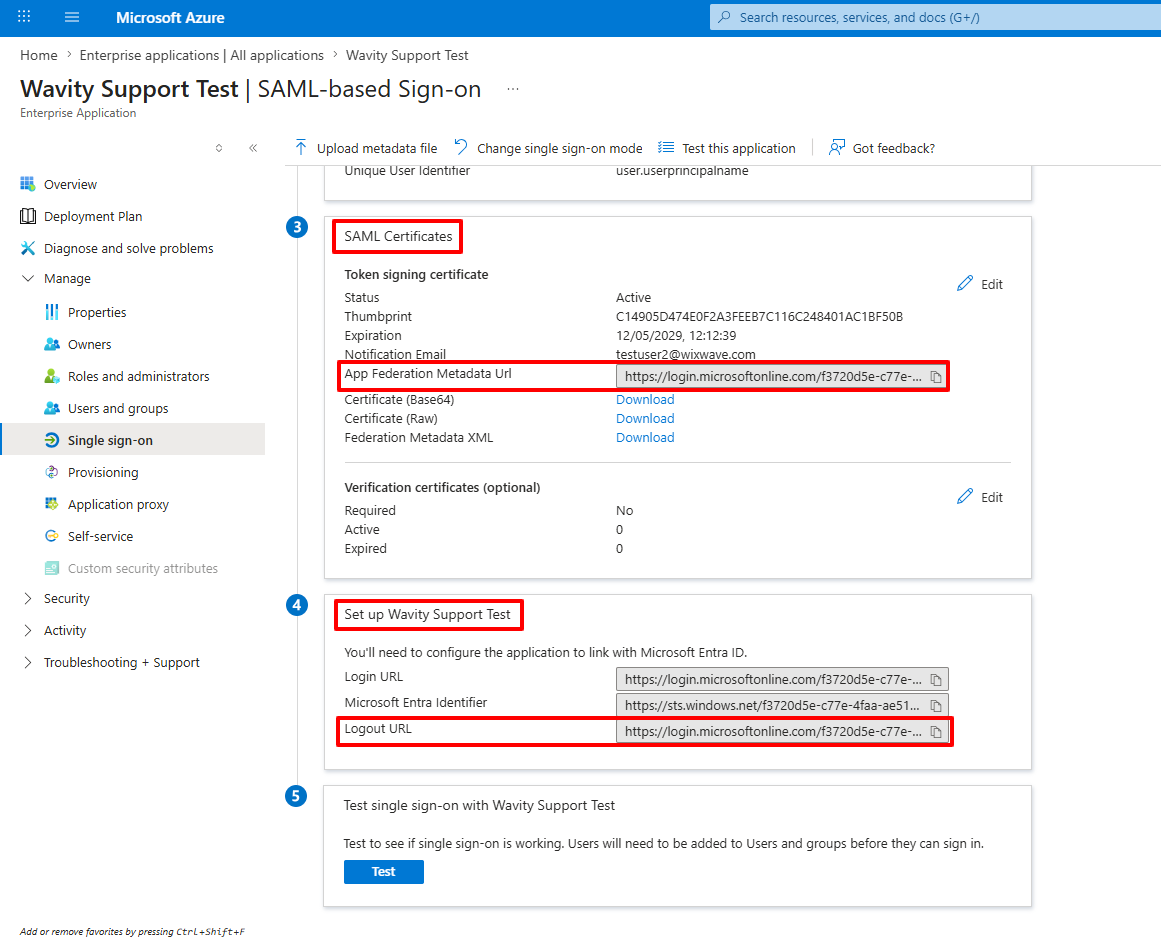
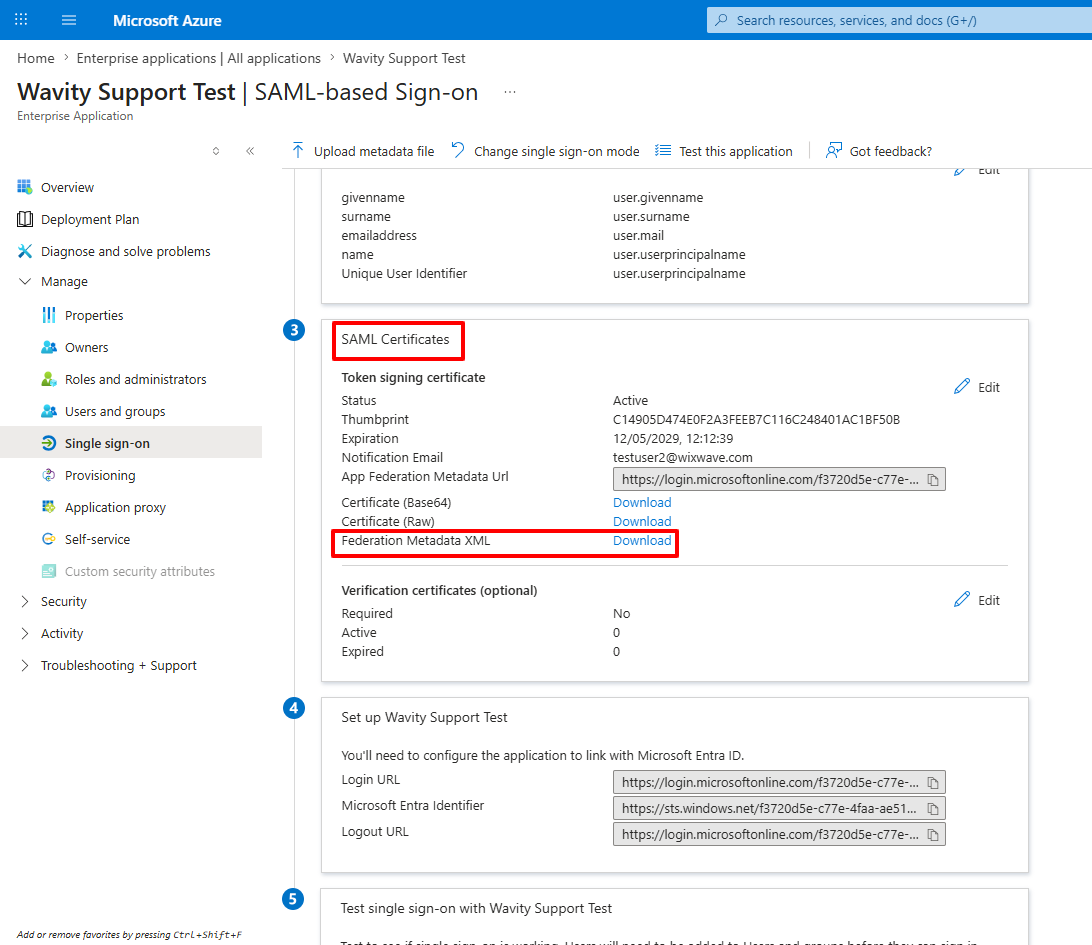
- In Azure, copy the “Federation Metadata URL” from the SAML Certificate section and paste it into the “SAML SSO URL” field in the Wavity platform.
- In Azure, go to the “Set up Wavity Support Test” section, copy the “Microsoft Entra Identifier”, and paste it into the “Entity ID provided by the IDP” field in the Wavity platform.
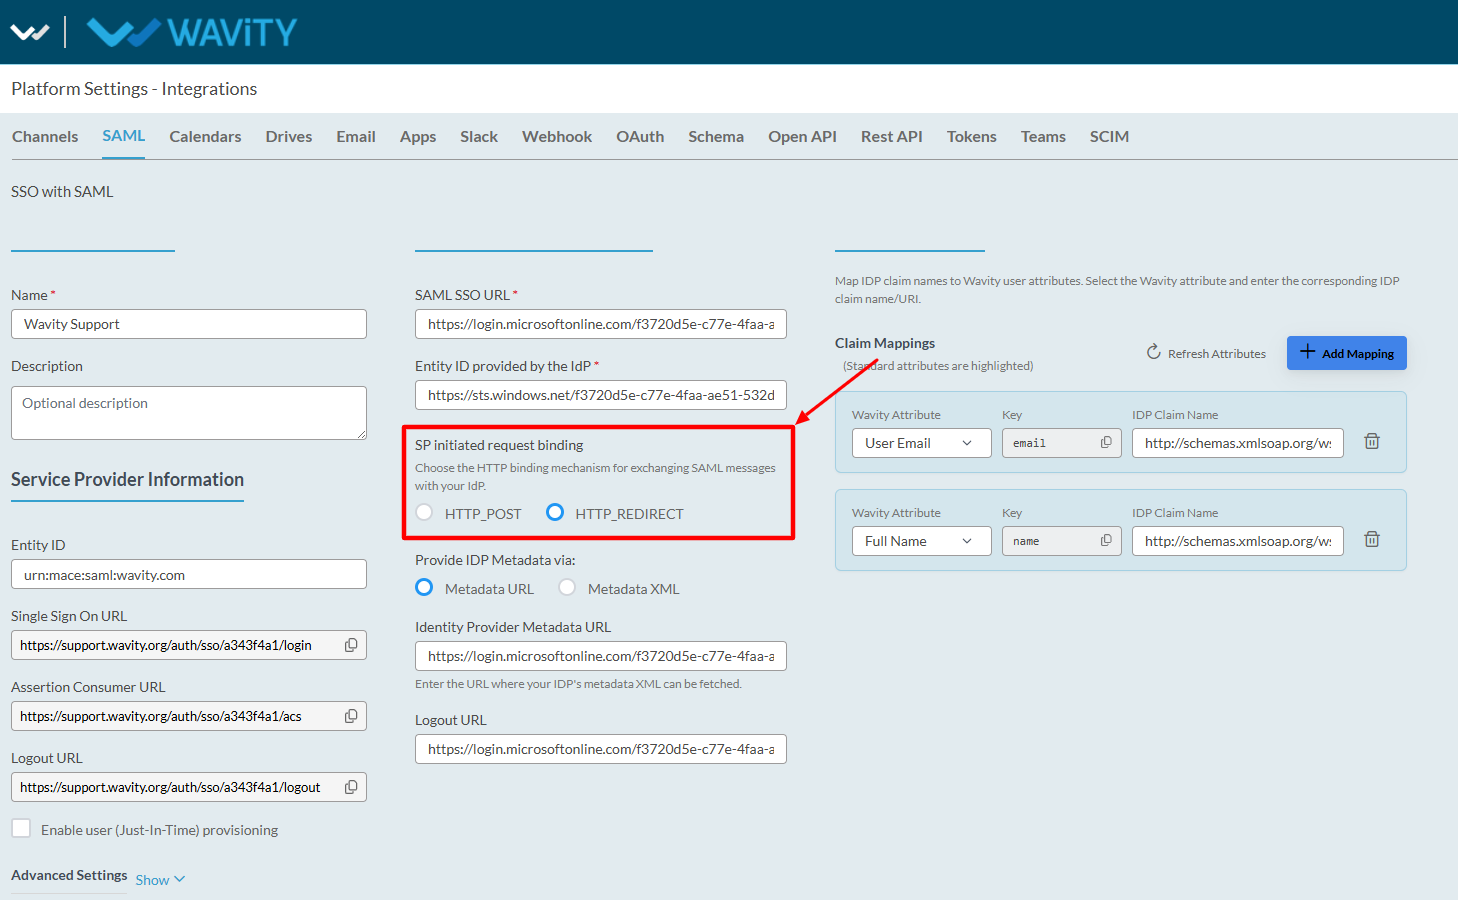
- Admin can select the HTTP_POST or HTTP_REDIRECT under the “SP initiated request binding”.
HTTP_POST
- Sends the SAML request inside an HTML form using POST method.
- Data sent in request body.
HTTP_REDIRECT
- Sends the SAML request through the browser URL as query parameters.
- Data sent in URL.
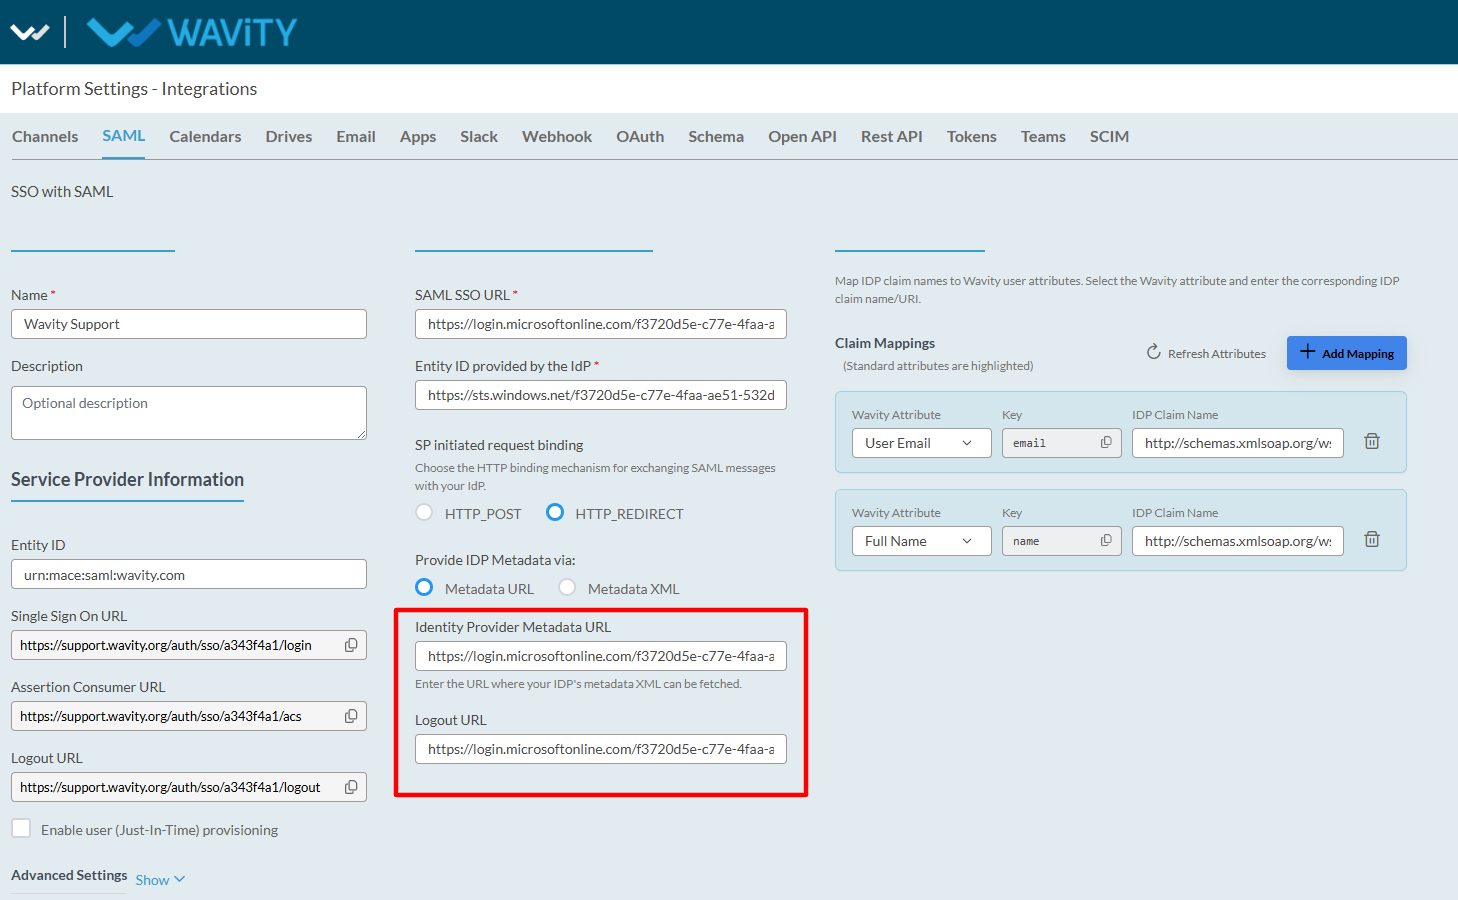
- Select the “Provide IDP Metadata URL” such as “Metadata URL” or “Metadata XML”
- Metadata URL: Wavity automatically fetches the IdP configuration from a URL.
- Metadata XML: Admin manually uploads or pastes the IdP metadata XML file/content.
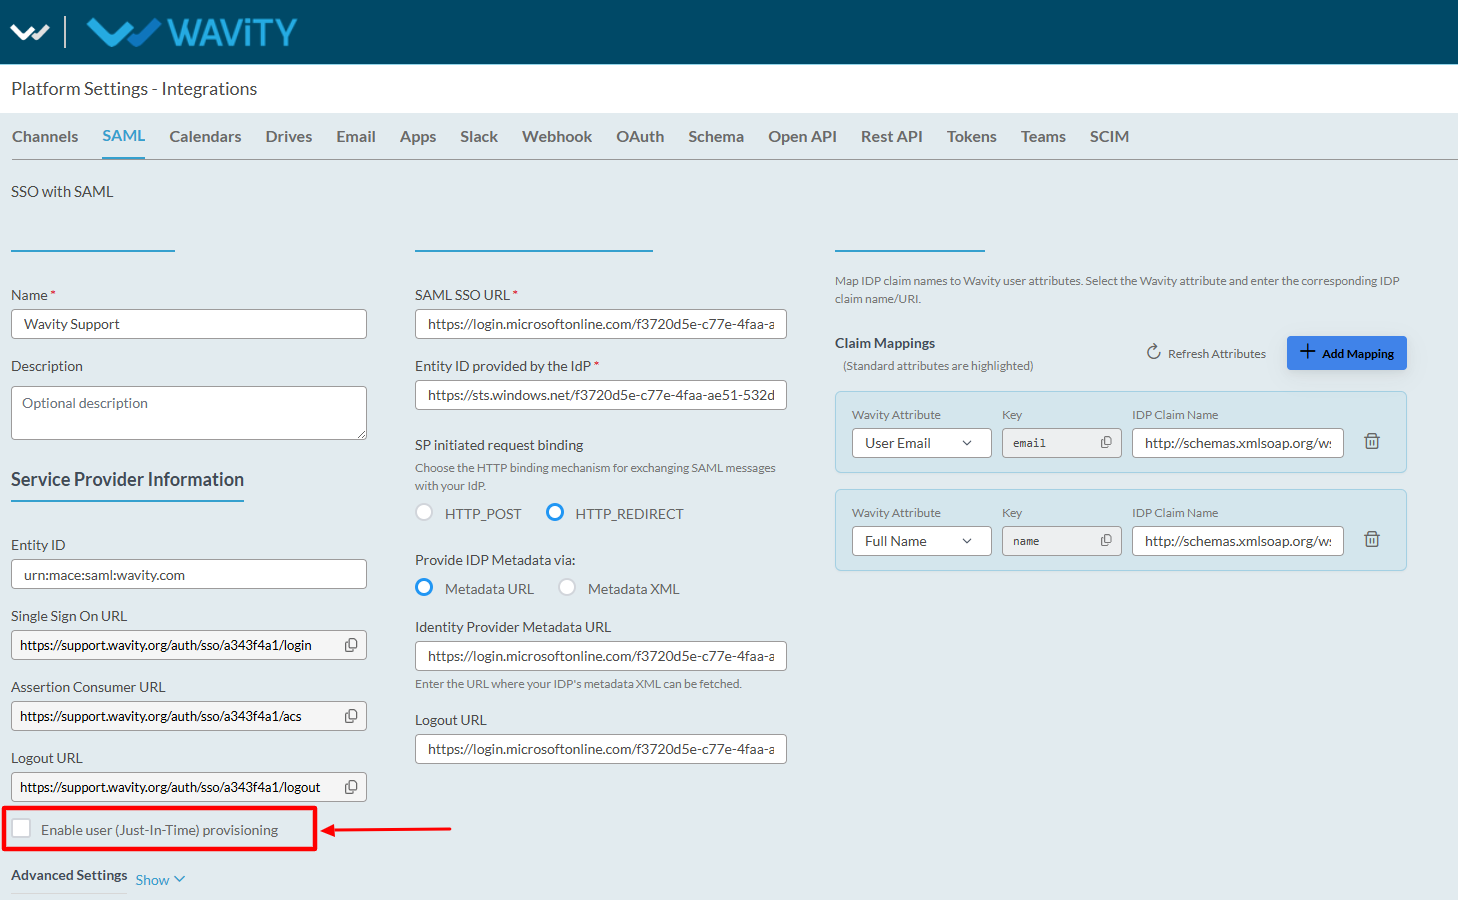
- If the admin selects the Metadata URL option in Wavity, copy the “Federation Metadata URL” from the SAML Certificate section in Azure and paste it into the “Identity Provider Metadata URL” field in Wavity. Then copy the “Logout URL” from the “Set up Wavity Support Test” section and paste it into the “Logout URL” field in Wavity.
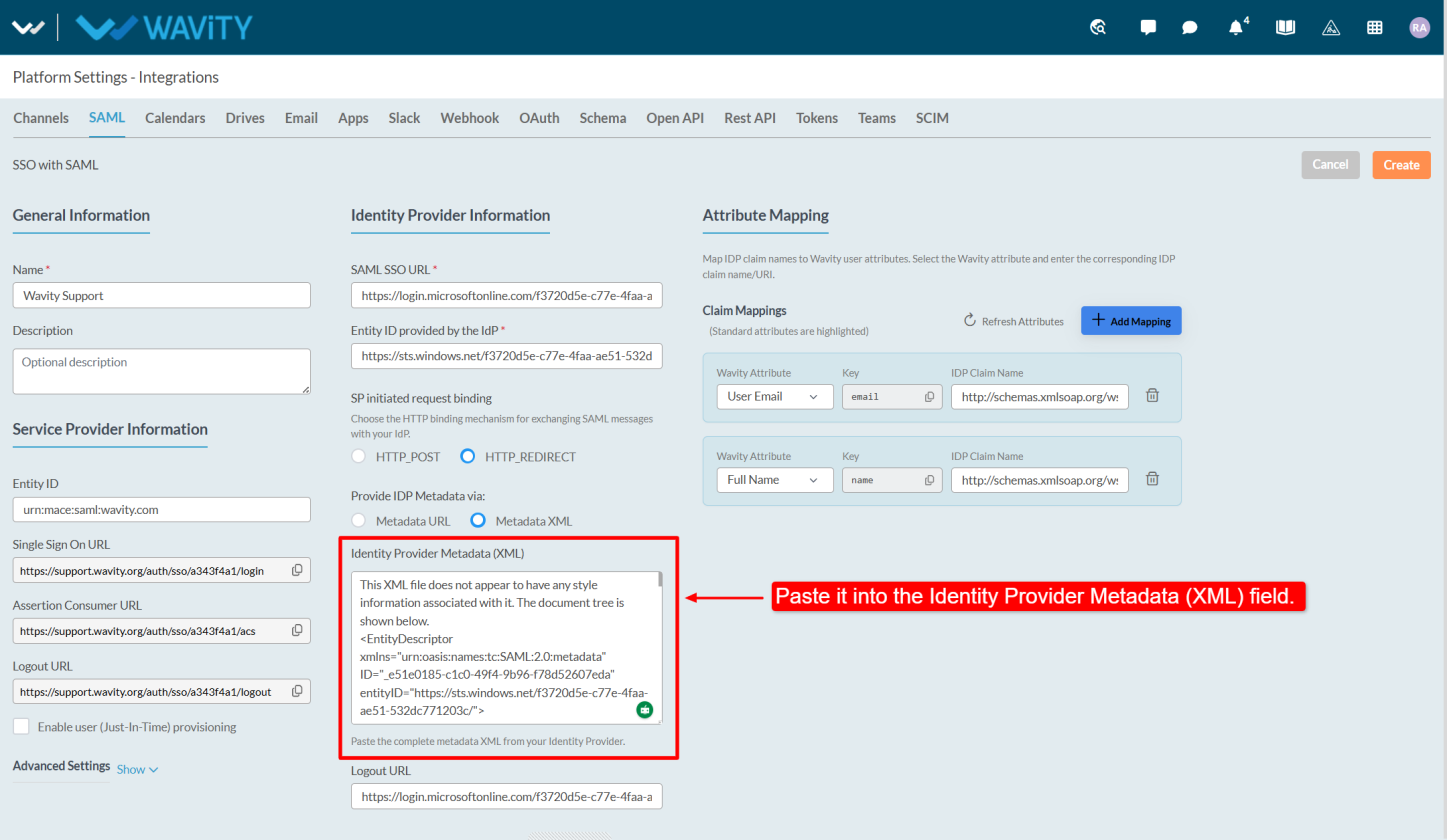
- If the Admin selects the Metadata XML and they need to download the “Federation Metadata XML” and past it into “Identity Provider Metadata (XML)”
- Users can enable Just-In-Time (JIT) Provisioning, which allows Wavity to automatically create a user account when the user logs in through SSO for the first time.
- Ensure that all the links in the Service Provider Information section match the corresponding links configured in Azure AD.
- Now click on the Create button.
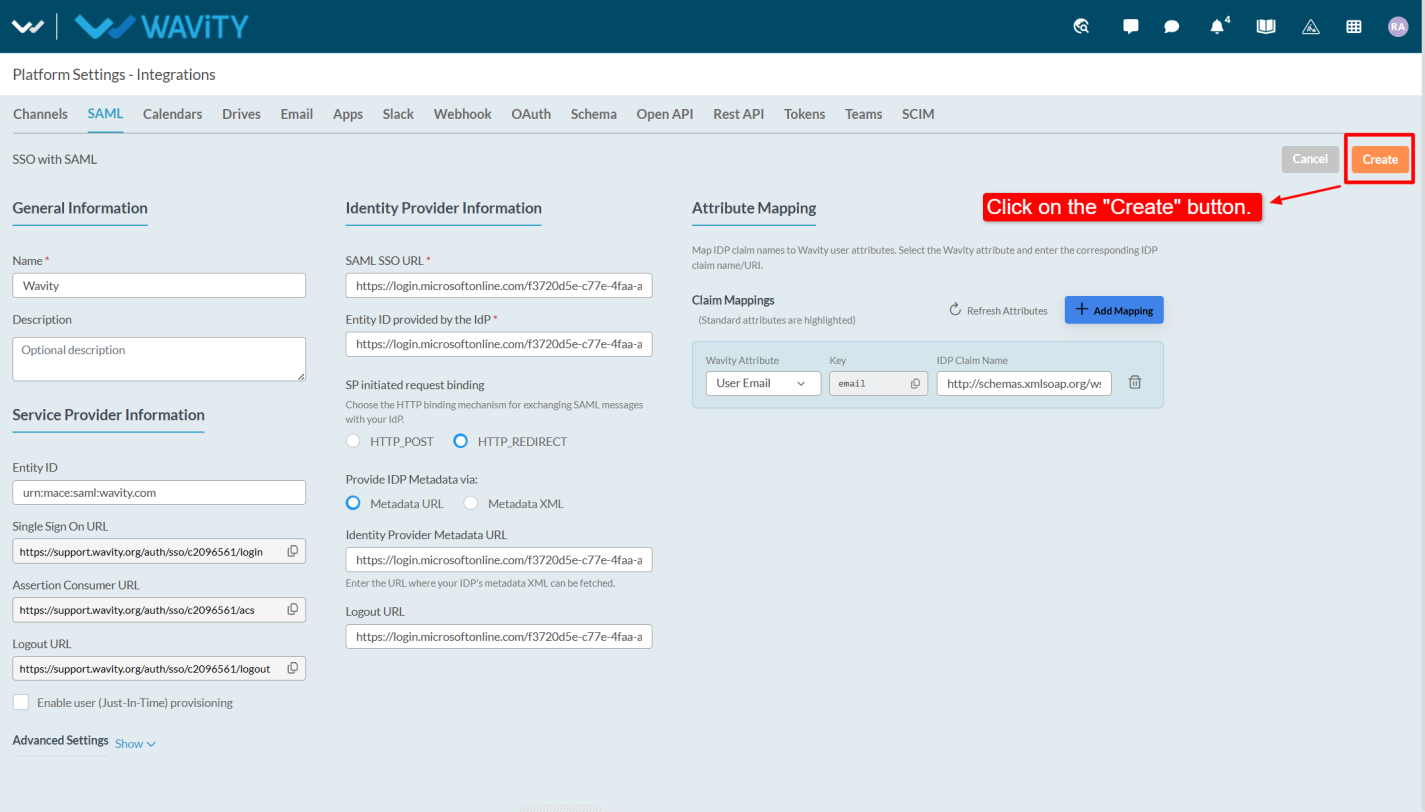
- Now the SSO –SAML will be saved and will be active mode.

- Next, to select the SAML in Wavity, click on the Profile icon and select “General Settings.”
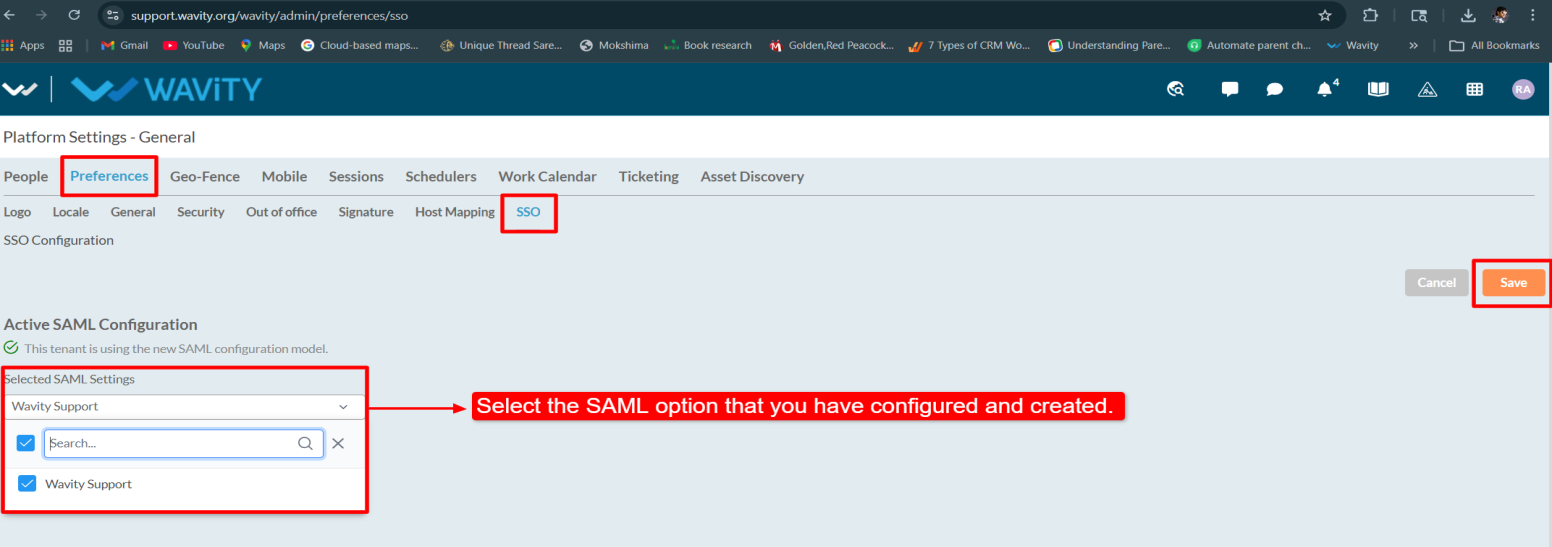
- Go to Preferences, open the SSO tab, select the configured SAML option that was created earlier, and click on the “Save” button.
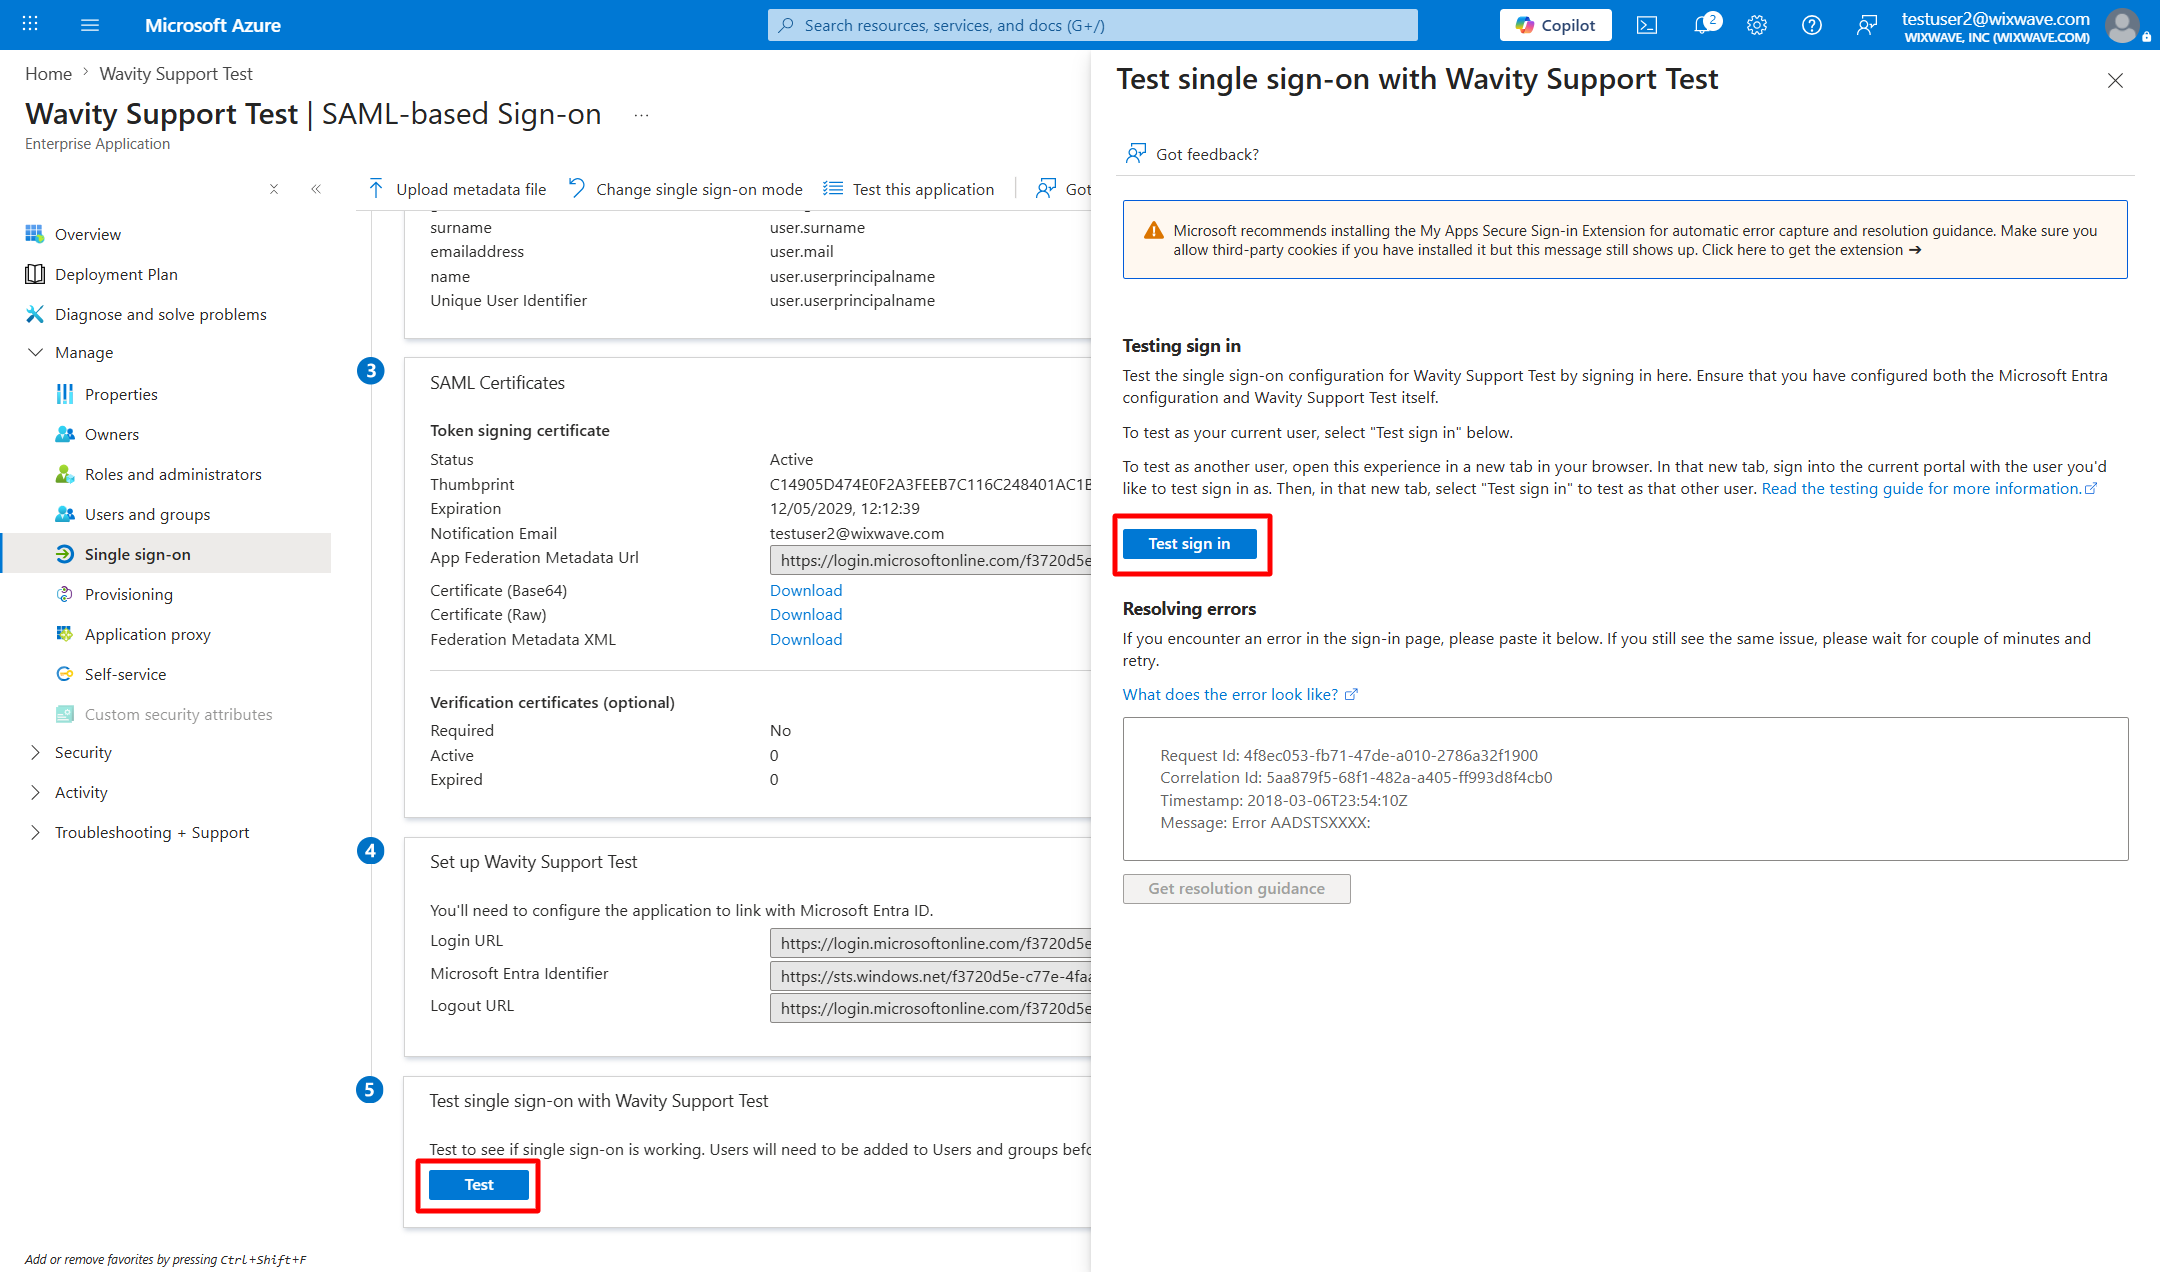
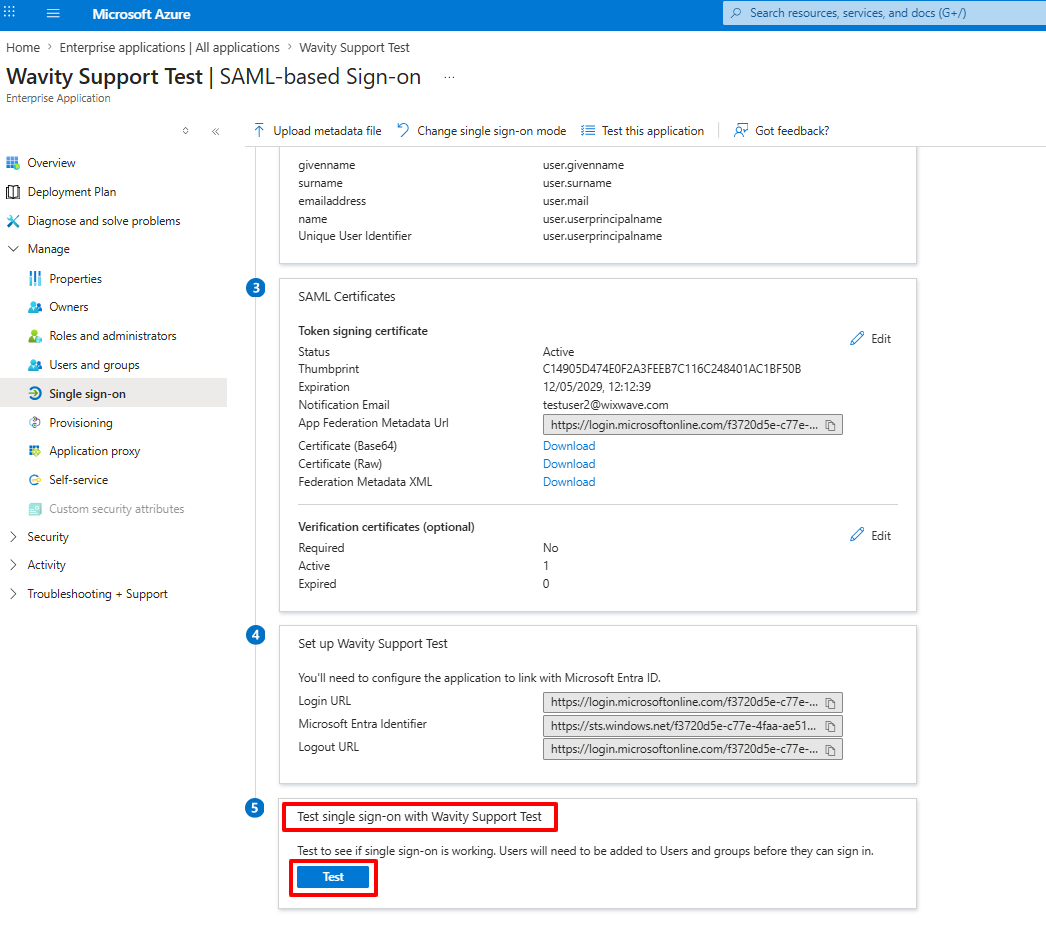
- In Azure, click on the Test button under Test single sign-on with Wavity Support Test. In the right-side panel, click on Test sign-in to verify whether the configuration is working correctly.
- After selecting it, Admin will be redirected to the Wavity tenant.
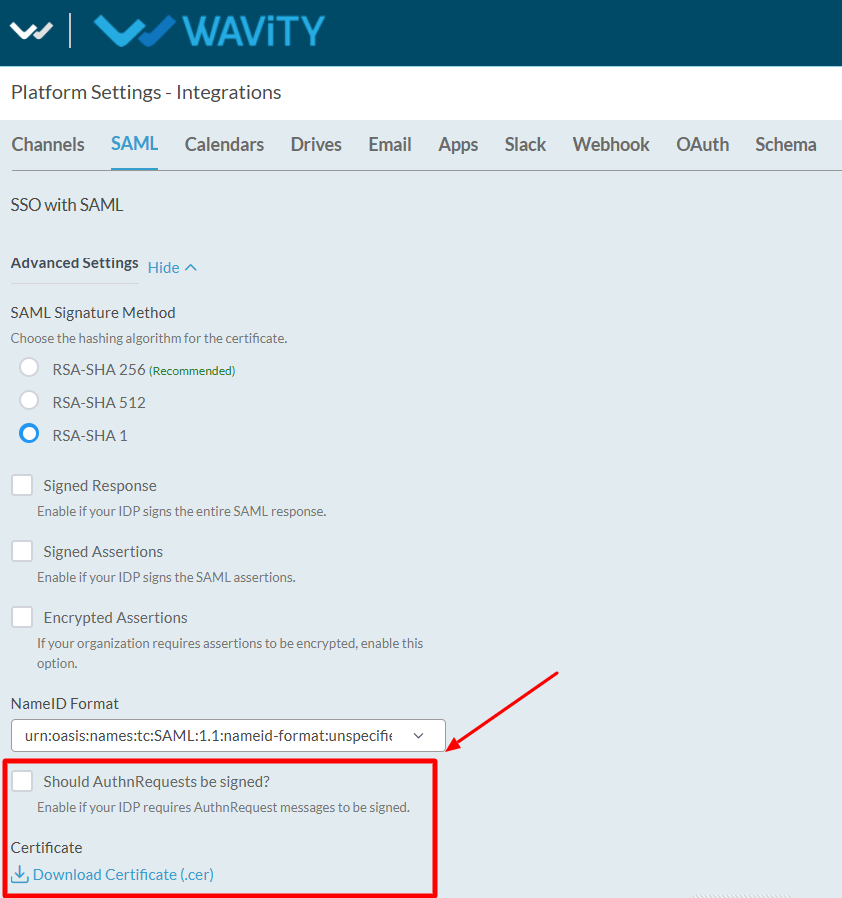
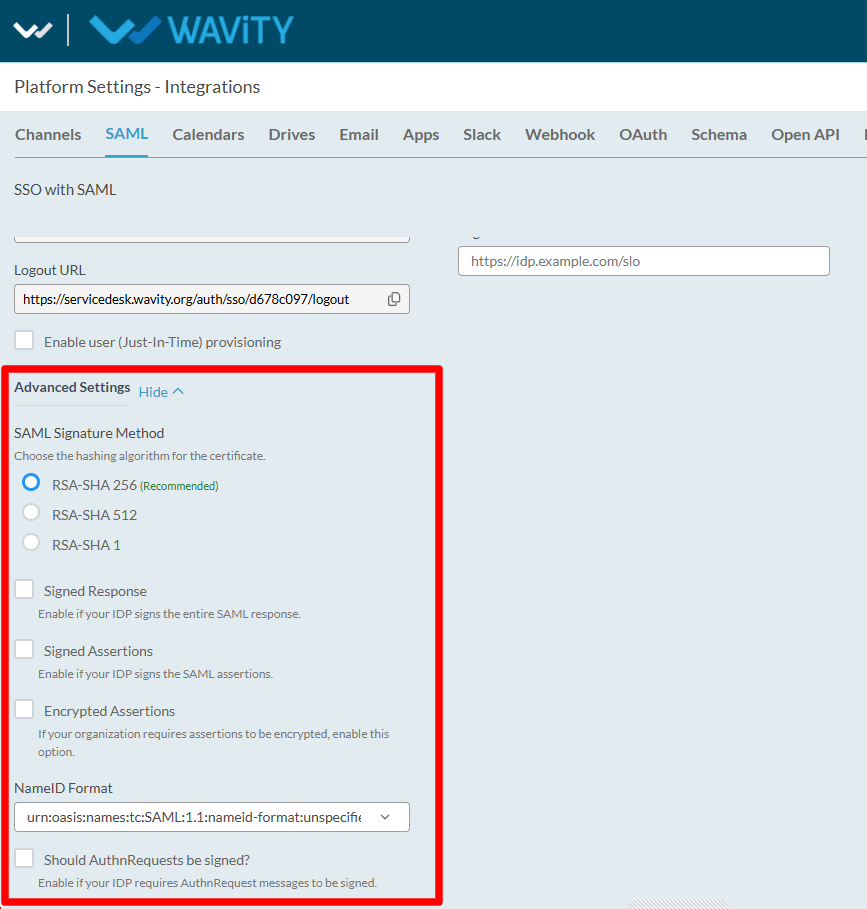
Advance Settings (Optional)
SAML Signature Method
- This defines the encryption/hash algorithm used to digitally sign SAML messages and certificates.
- This implements backend security measures to safeguard your data
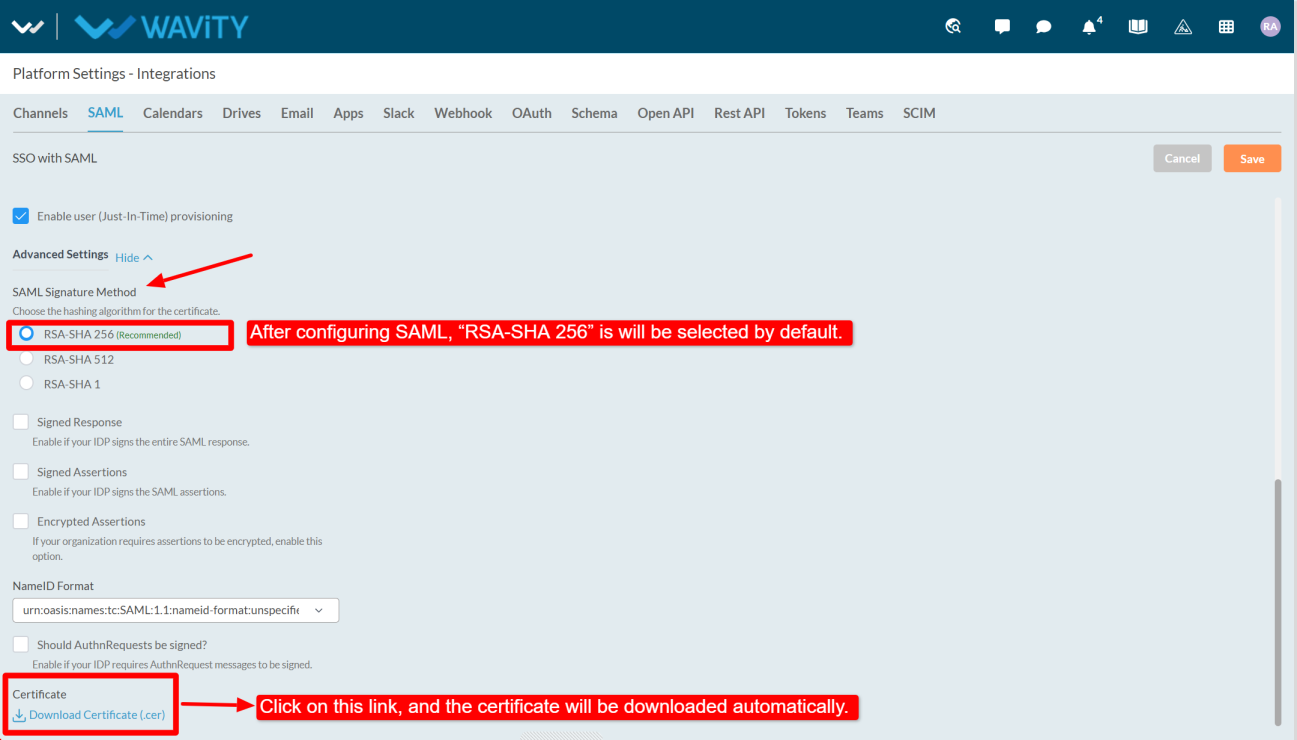
RSA-SHA 256 (Recommended)
- RSA-SHA 256 is the recommended signature method as it provides stronger security for authentication processes.
- Modern and secure standard
- Widely supported by IdPs
- If the admin selects “RSA-SHA 256”, the certificate will be generated at the bottom. Click on “Download Certificate” to download the certificate.
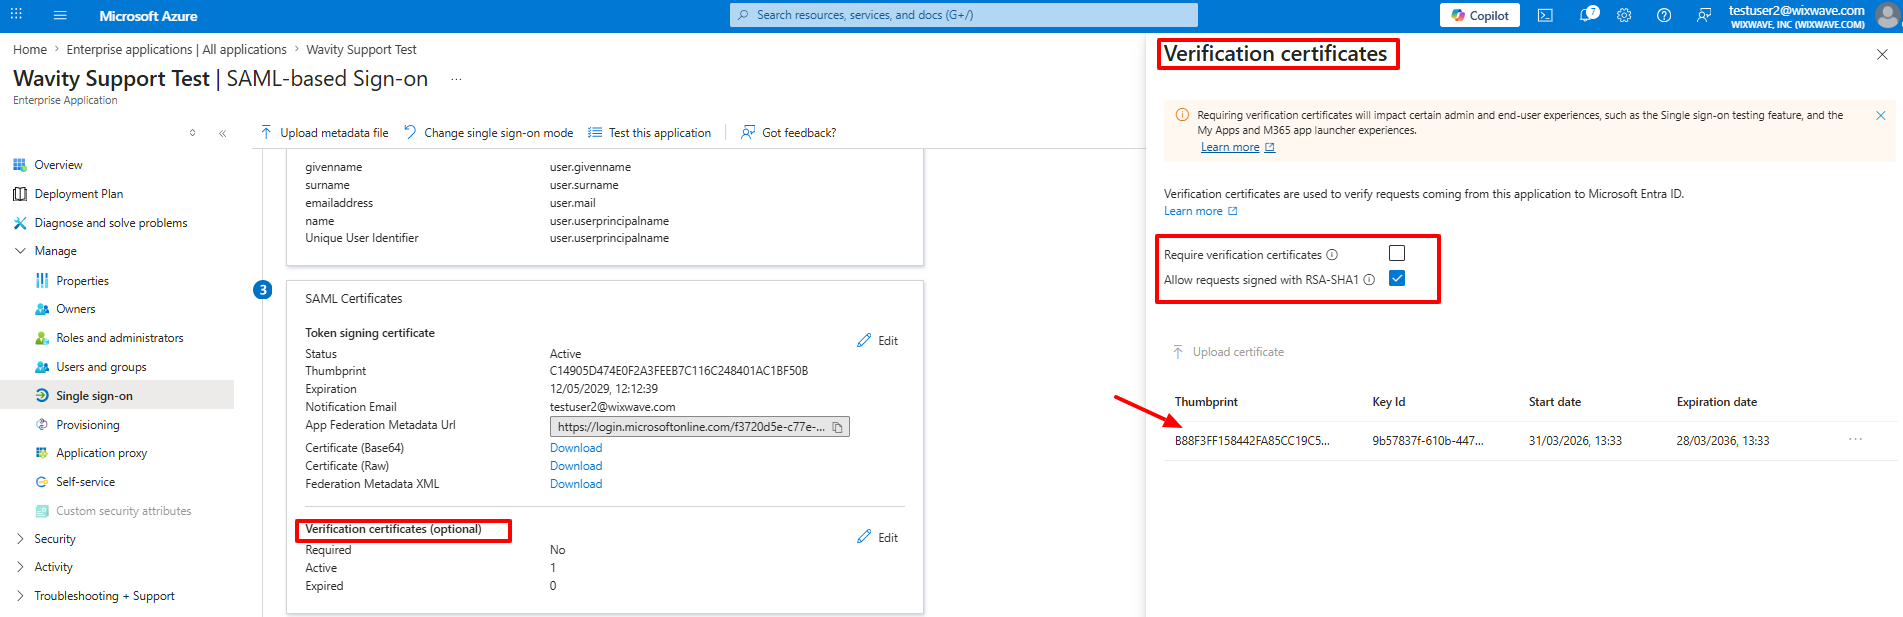
- Then, under SAML Certificates, go to Verification Certificates, click “Edit”, and upload the downloaded certificate.
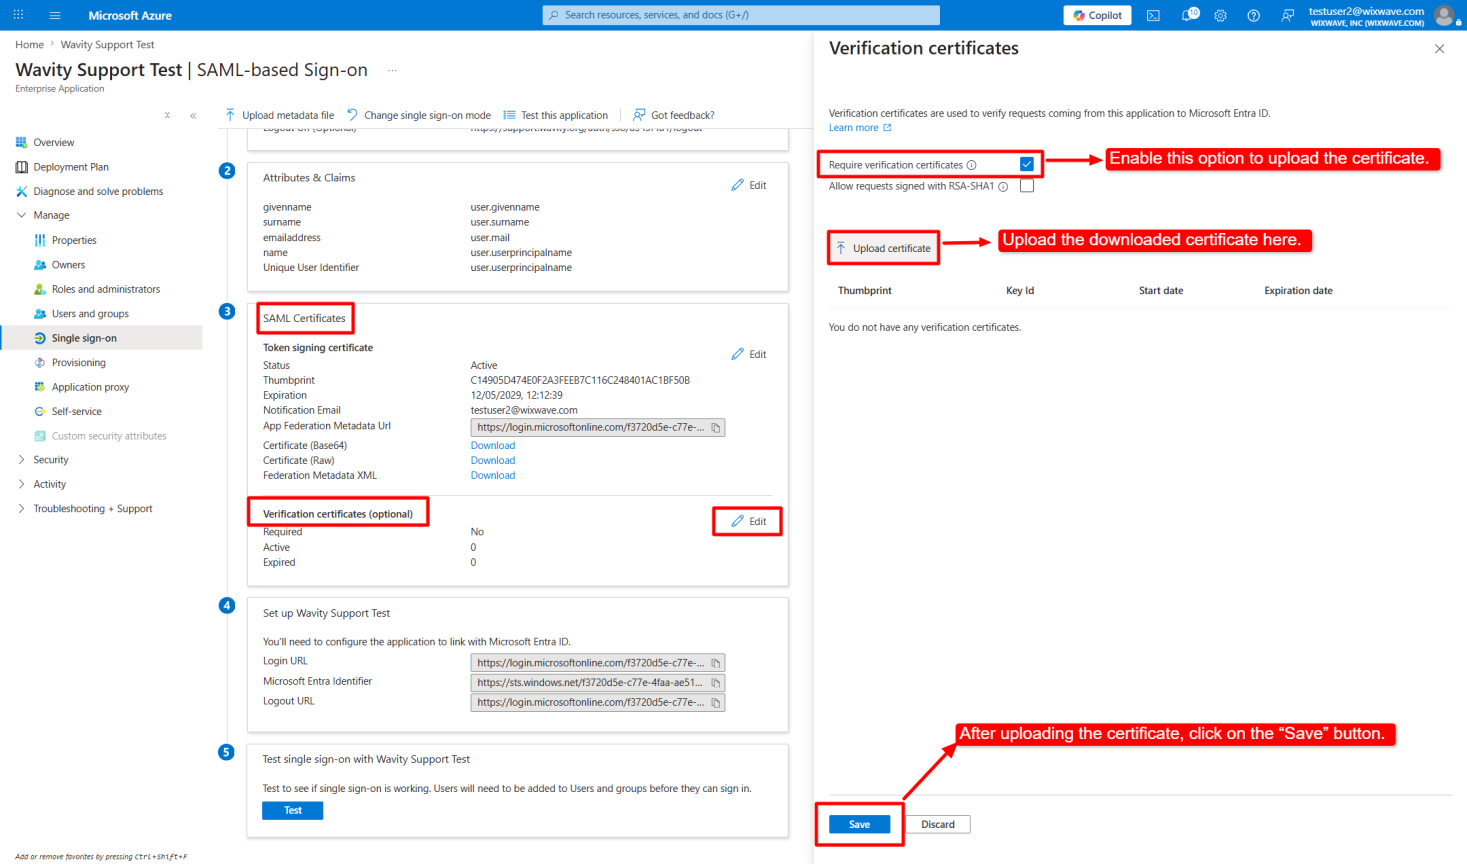
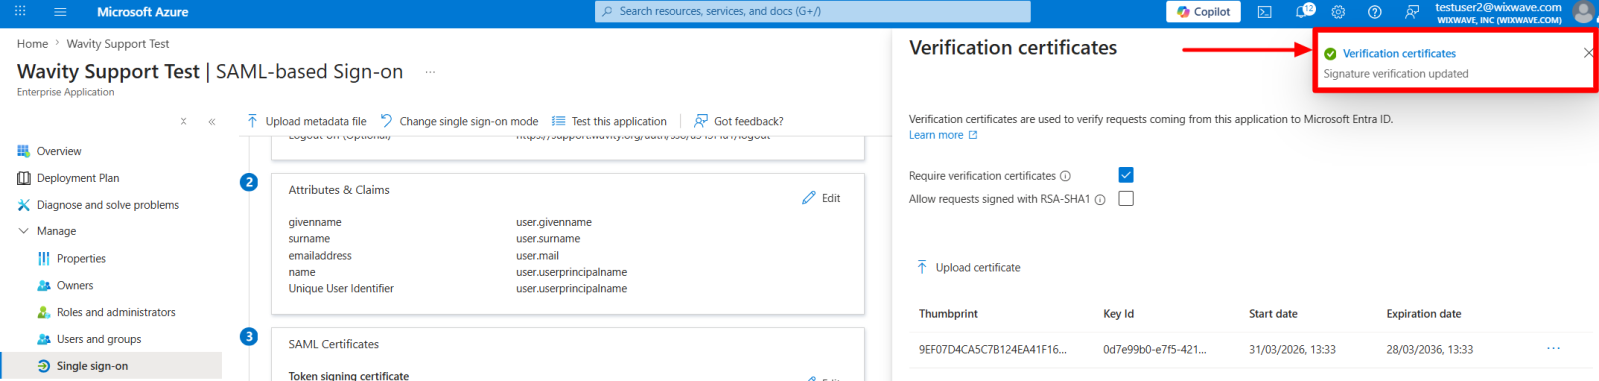
- After saving, signature verification will be updated.
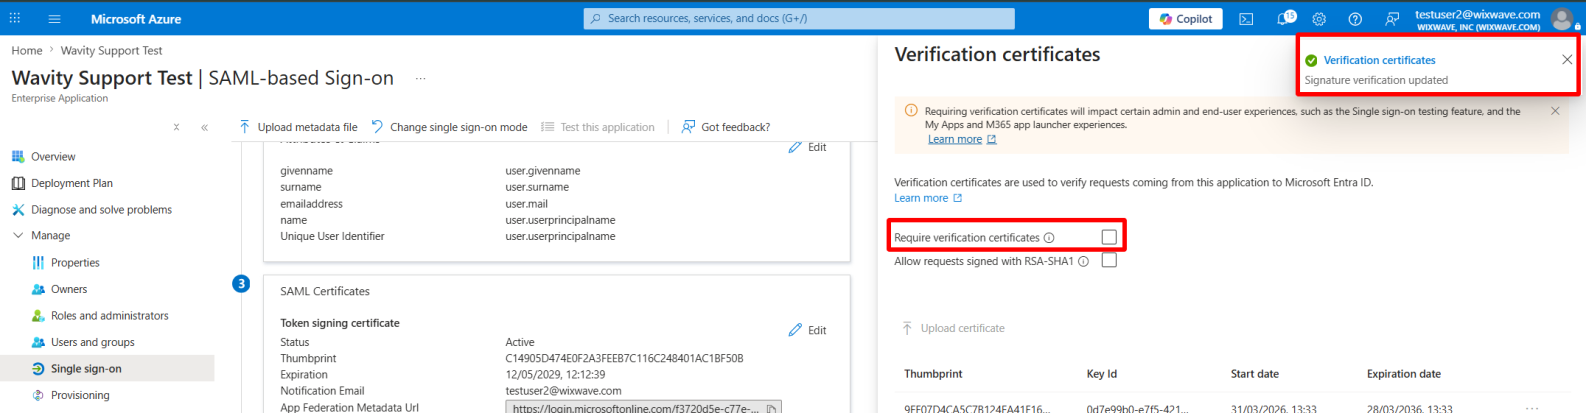
- Disable the “Require Verification Certificate” option. Disabling this functionality will skip this part of the verification process, but it will not affect any configured token signing certificate settings.
- After disable this option and save the changes.
- The admin can now log in to the tenant or click on the “Test” option to navigate directly to the Wavity tenant.
- If the admin selects the RSA-SHA 1 signature method in Wavity platform, ensure the same option is selected in Azure under Verification Certificates. Upload the certificate, then disable the “Require Verification Certificate” option and save the changes.
RSA-SHA 512
- It provides stronger security because SHA-512 creates a larger and more secure hash compared to older algorithms. It is mainly used in high-security authentication and certificate validation processes.
- Slightly heavier processing
RSA-SHA 1
- SHA-1 generates a 160-bit hash value, but it is considered outdated and less secure because vulnerabilities and collision attacks have been discovered over time.
- Older and weaker algorithm
- Mostly deprecated due to security risks
- Should only be used if legacy systems require it
Signed Response
- The “Signed Response” option enables the Identity Provider (IdP) to sign the complete SAML response for additional verification.
- The IdP signs the entire SAML response.
- Use this if your IdP signs the whole SAML response.
Signed Assertions
- The “Signed Assertions” option is used to sign SAML assertions to ensure the authenticity and integrity of user information.
- The IdP signs only the assertion section inside the SAML response.
- Verifies the user authentication data itself.
- Many IdPs sign assertions instead of full responses.
Encrypted Assertions
- The “Encrypted Assertions” option provides an additional layer of security by encrypting the assertion data.
- The assertion data is encrypted before being sent to Wavity.
- Protects sensitive user information such as:
- Username
- Roles
- Group mappings
- Used in organizations with stricter security or compliance requirements.

NameID Format
- The NameID Format defines the format in which user identity information will be shared between the Identity Provider and the Service Provider.
- Defines the format of the unique user identifier sent by the IdP.
Formats include:
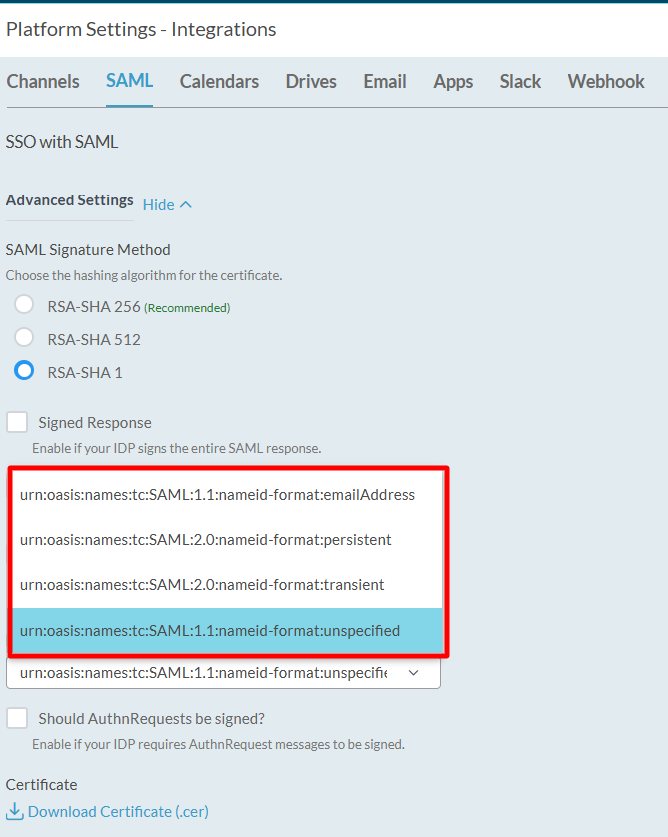
Should AuthnRequests be signed?
- The “Should AuthnRequests be signed?” option is used when the Identity Provider requires signed authentication request messages.
- Wavity digitally signs authentication requests sent to the IdP.
- Allows the IdP to verify that the login request genuinely came from Wavity.
- Prevents forged authentication requests.
Certificate
- The certificate download option allows users to download the certificate file for secure SAML configuration and verification.