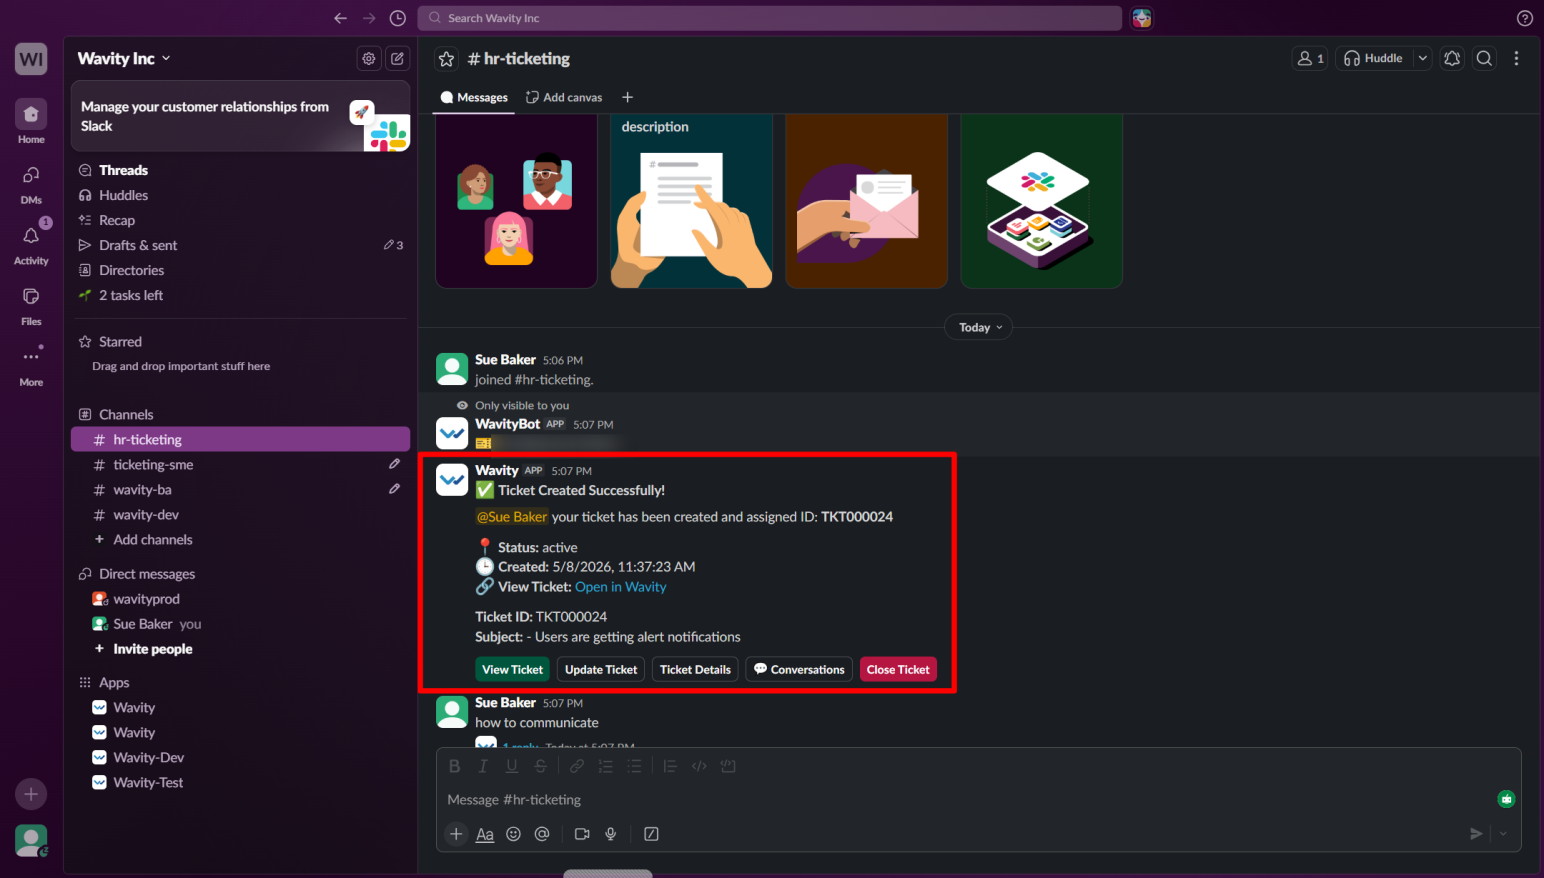
How to create a ticket from Slack
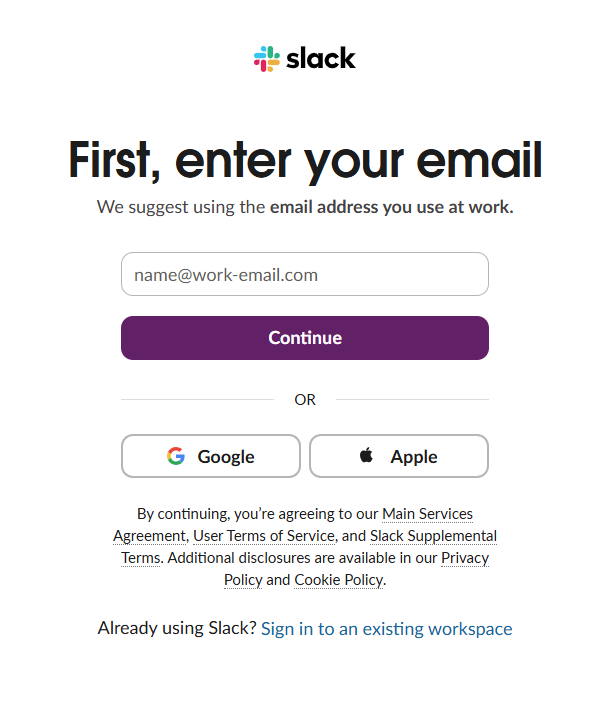
- To create a ticket from Slack, log in to your Slack account and enter your email address.
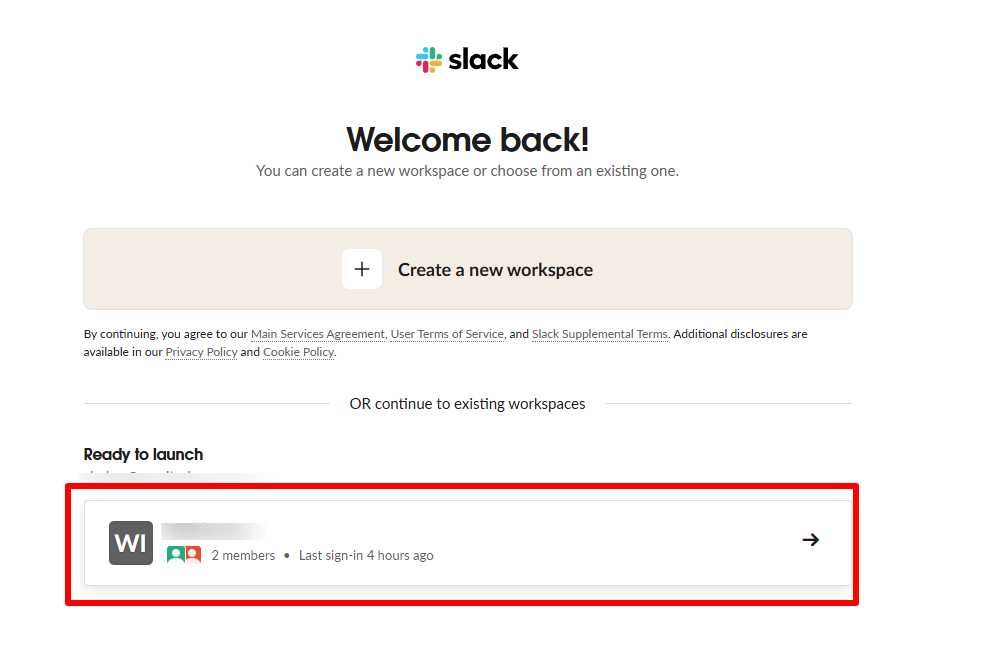
- Select the workspace that is integrated with the Wavity platform.
- User will be redirected to the Slack workspace.
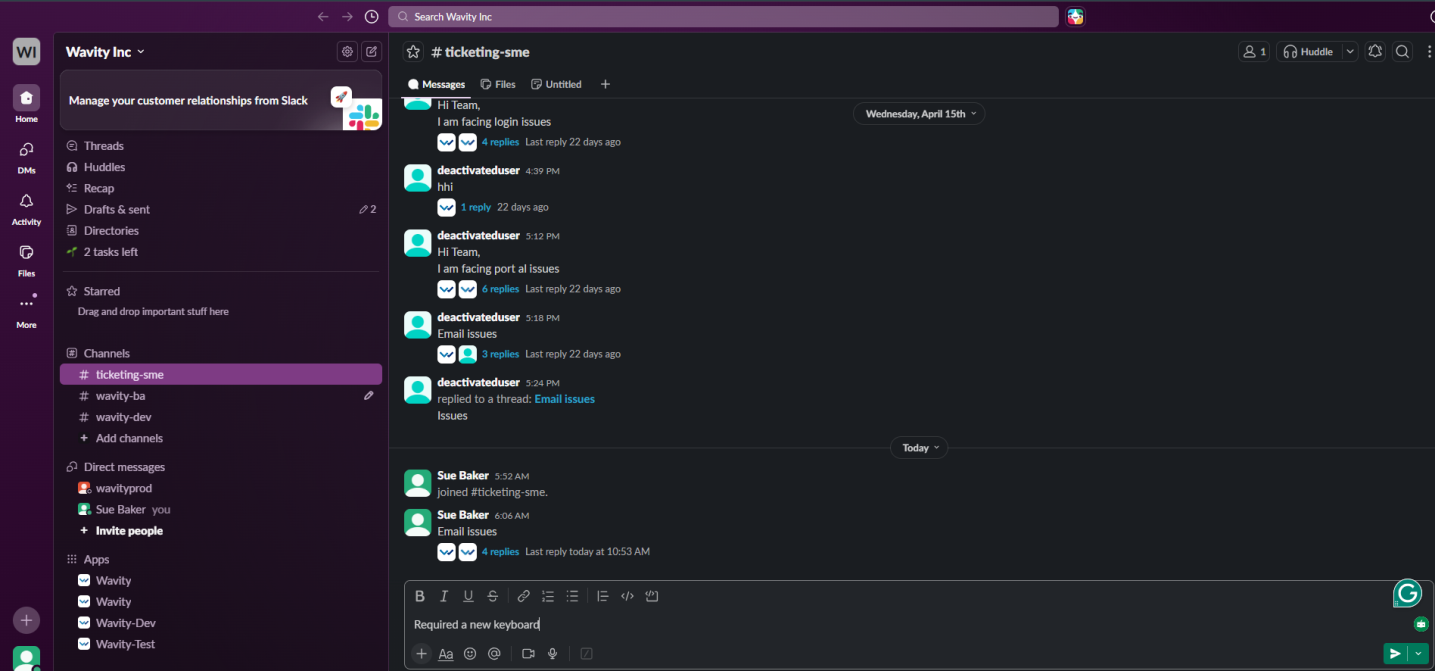
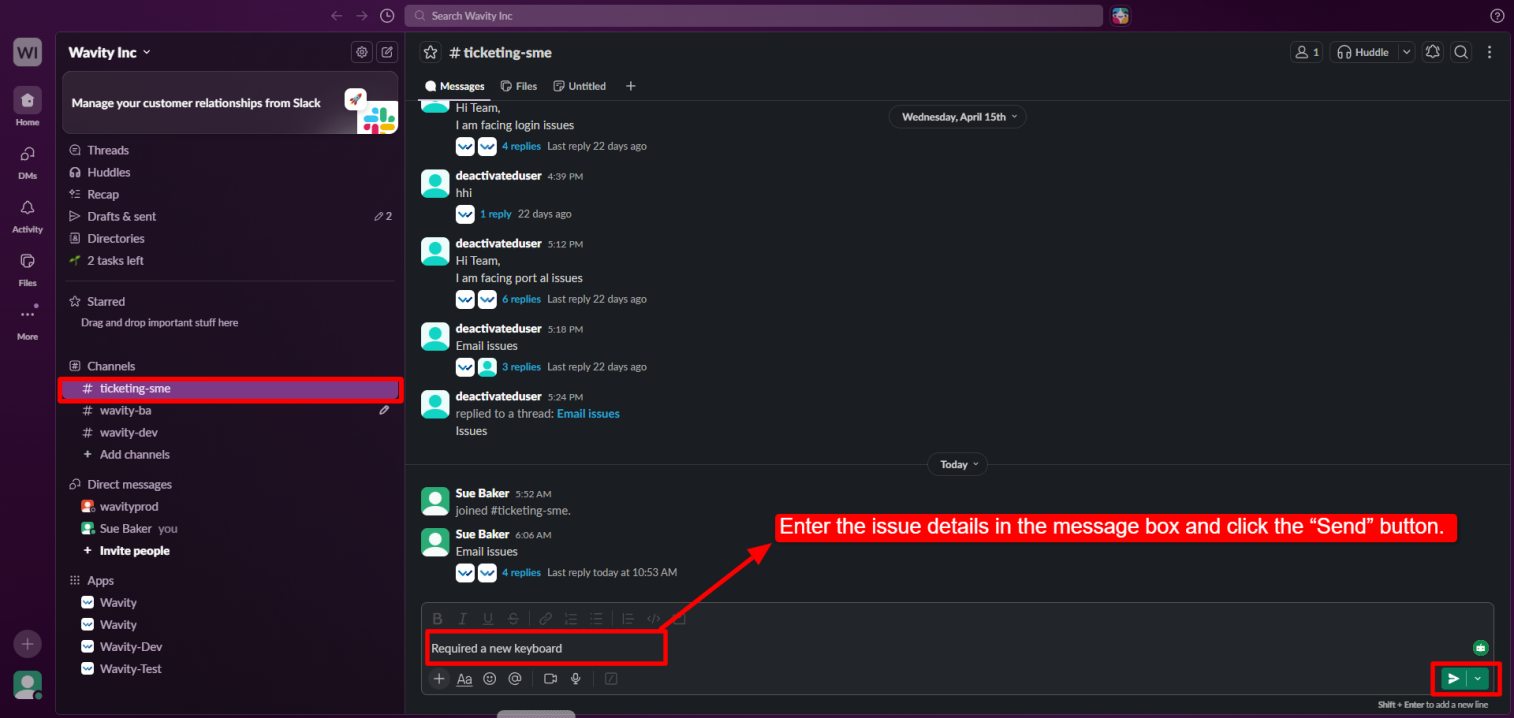
- Select the required channel to create a ticket.
- Enter your issue as a message and click the send button.
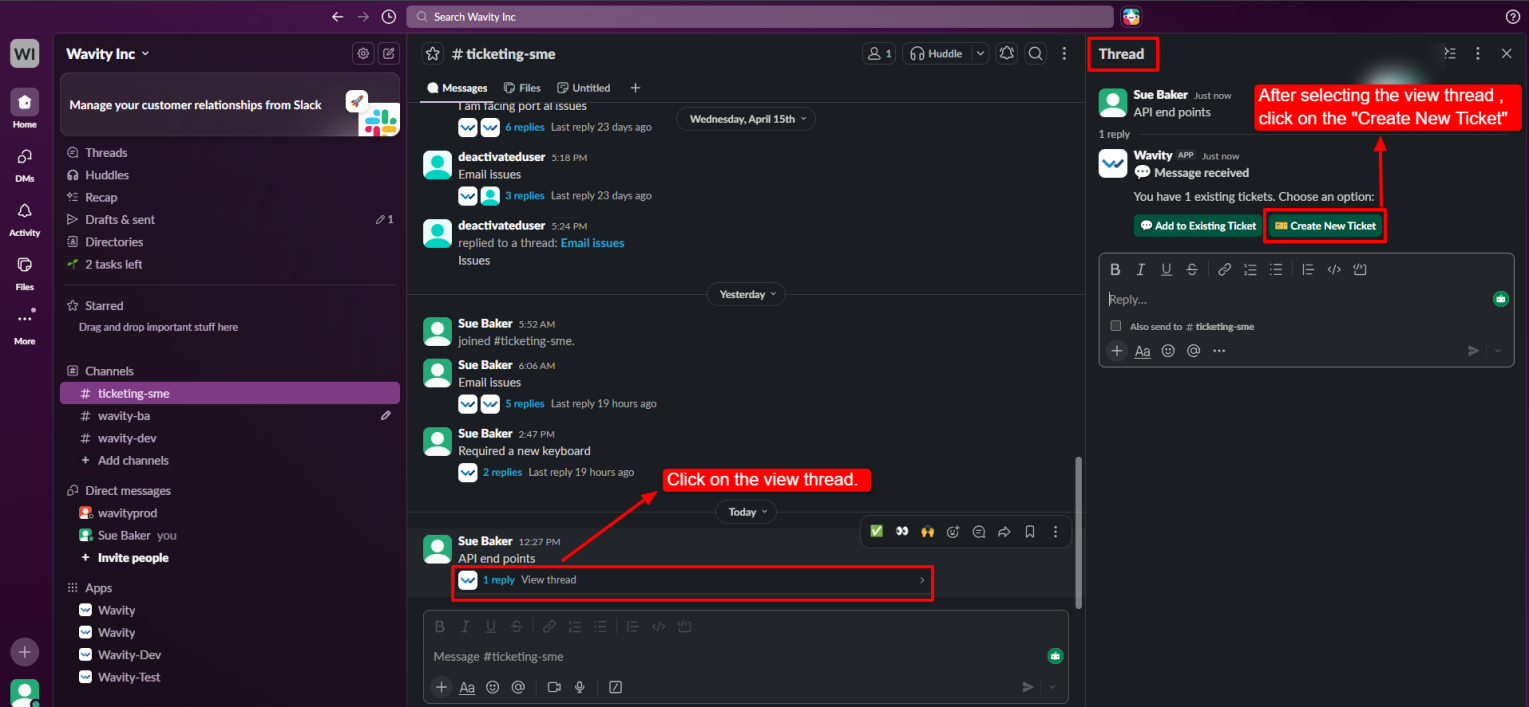
- Users can open the view thread of a conversation by clicking on the respective thread. Inside the thread view, select the “Create Ticket” option to raise a new ticket. Once selected, the ticket creation form will open, allowing users to enter the required details and submit the ticket.
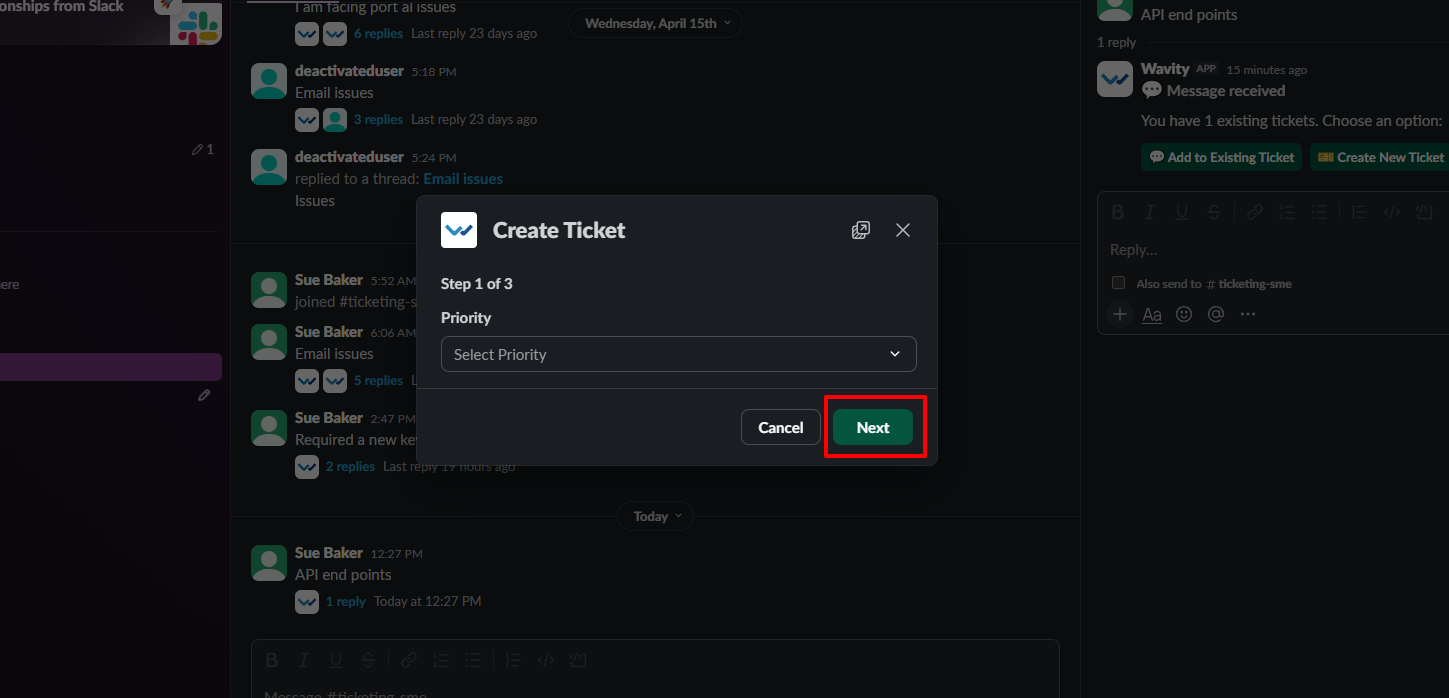
- Since it is a button-based form template, a popup window will appear where users need to complete the form step by step by clicking the “Next” button.
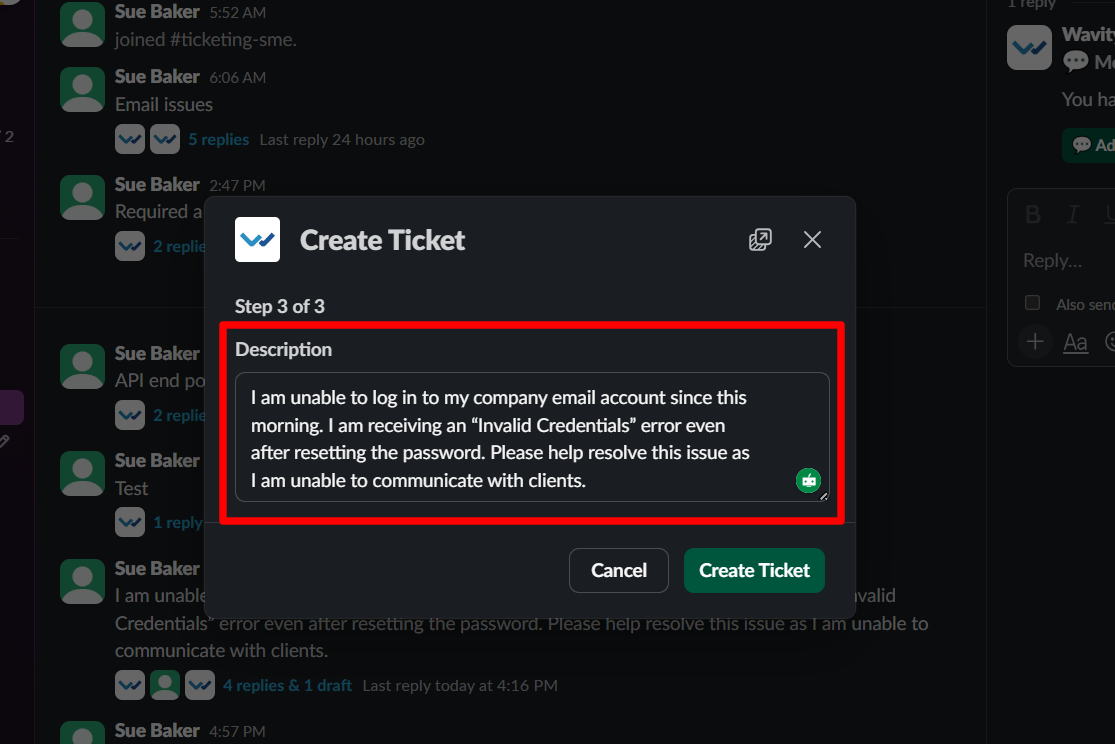
- After filling in the ticket details, click on the “Create Ticket” option.
- The ticket will be created, and users can view it in the thread view on the right side.
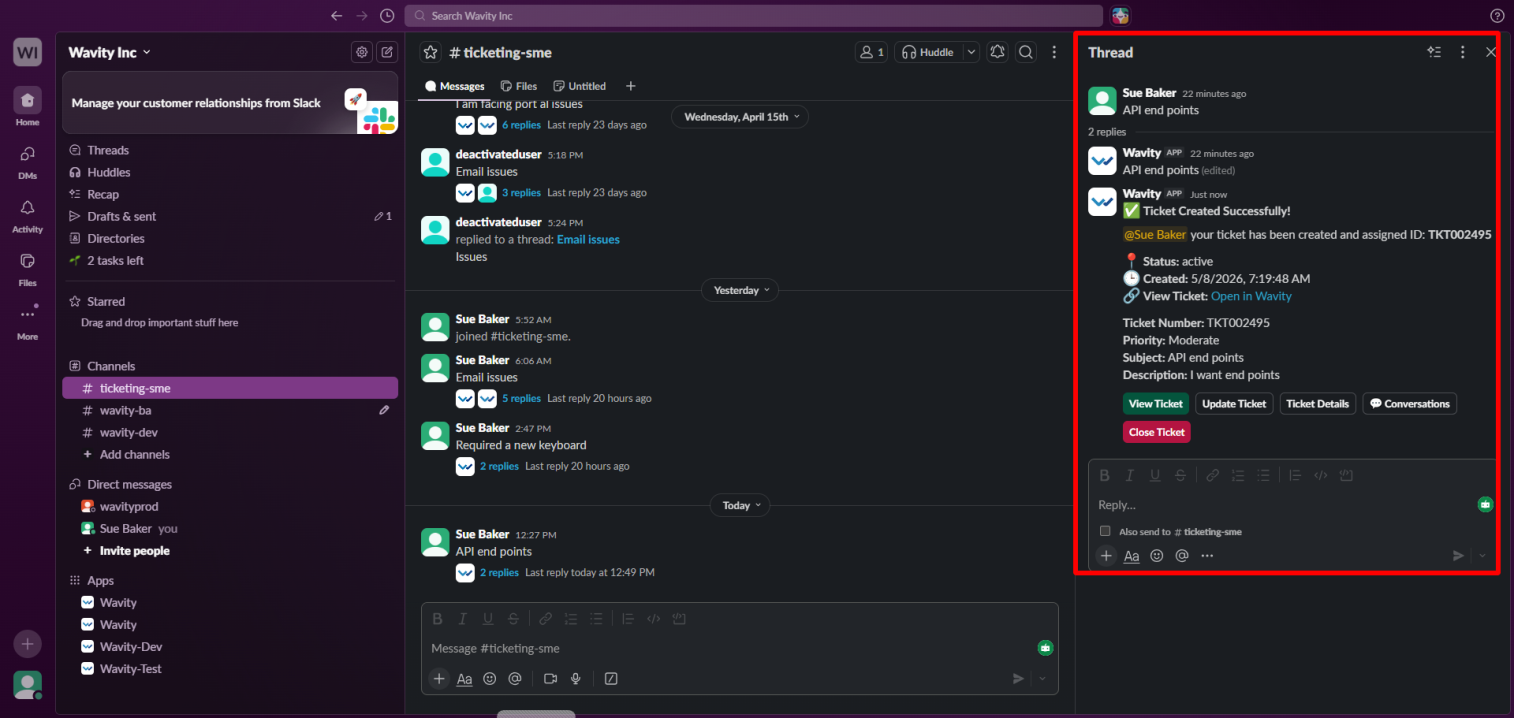
- The ticket will also be created in the Wavity platform, where agents can access and manage it.
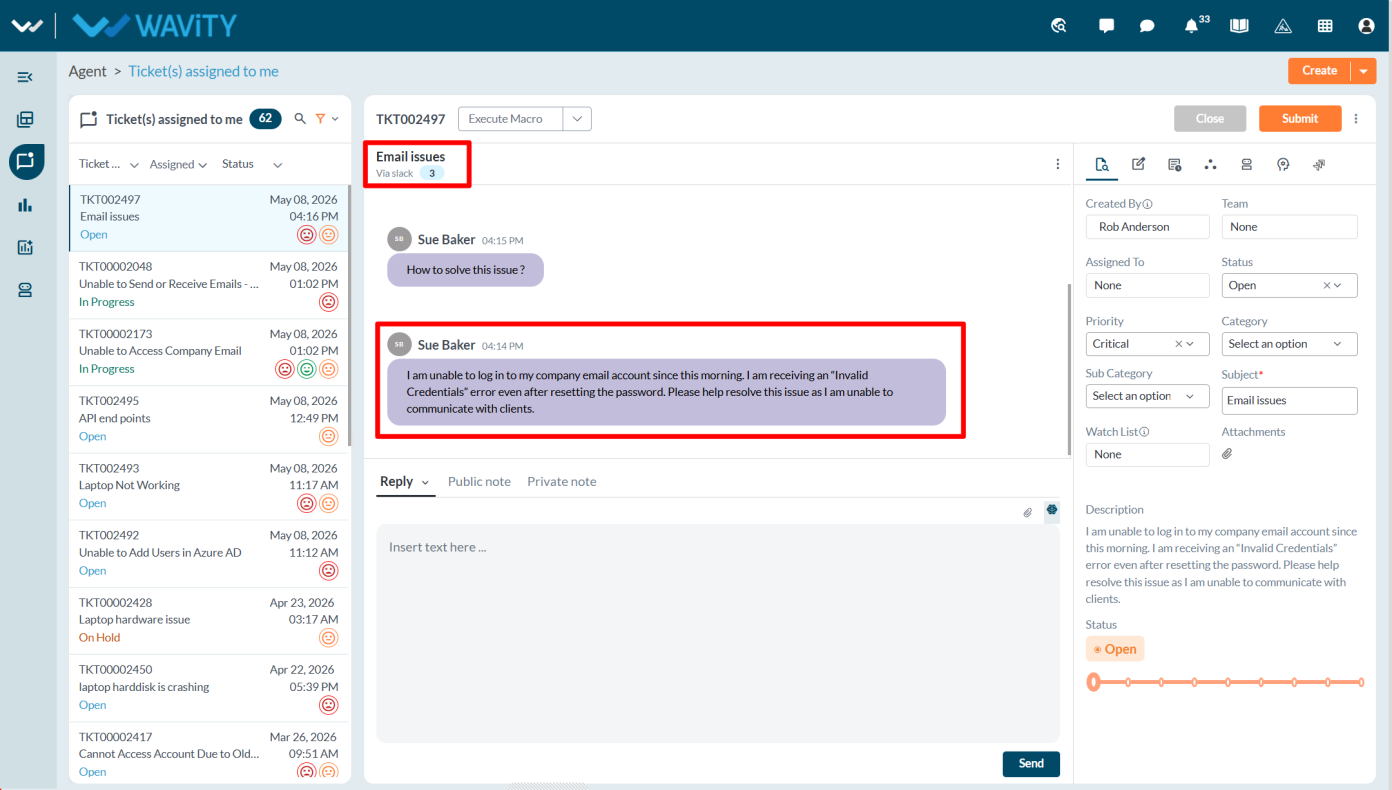
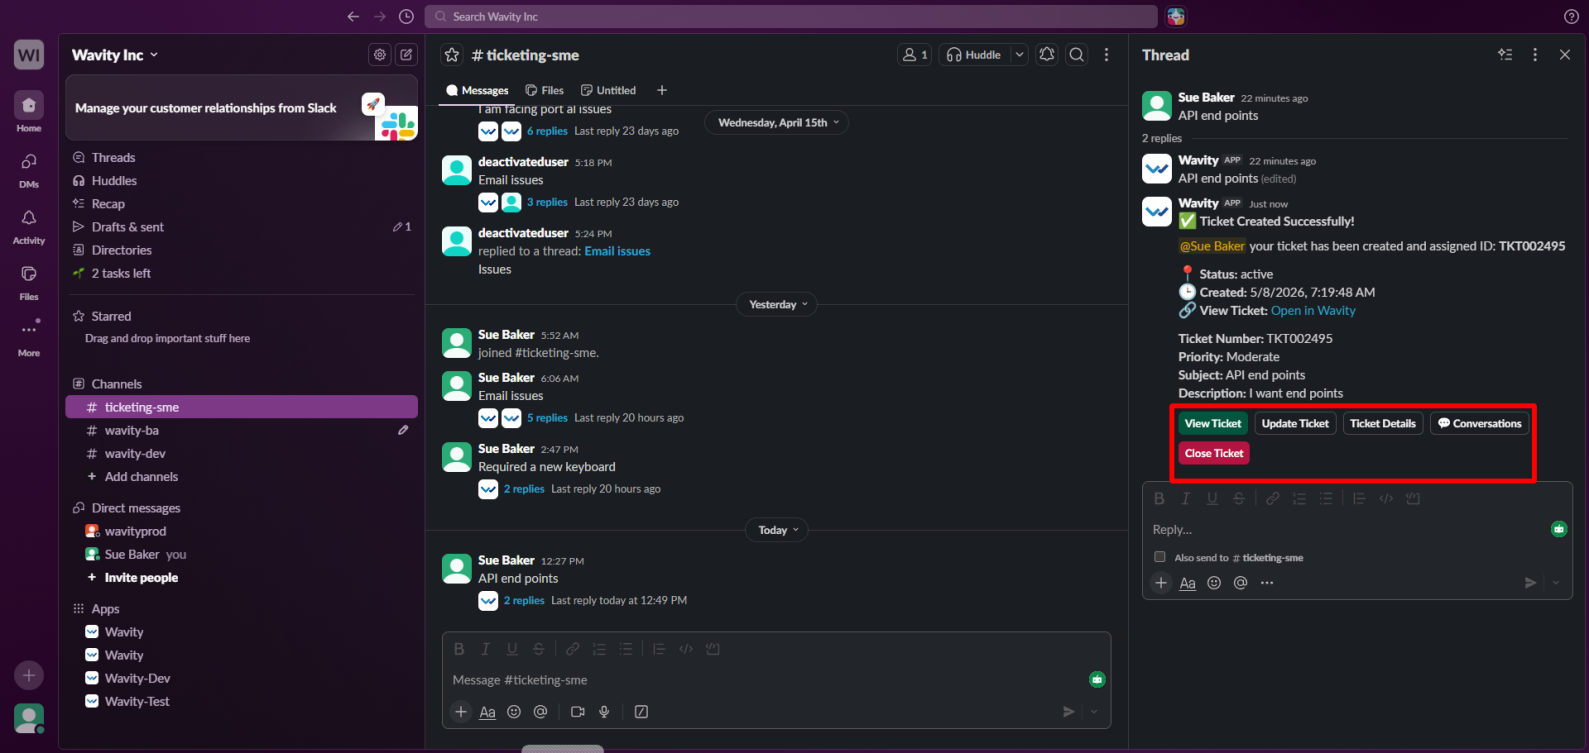
- “View Ticket” will navigate the user to the Wavity platform.
- “Update Ticket” allows users to modify the ticket even after creation.
- “Ticket Details” will display all ticket information in the thread view.
- Selecting a “conversations” will display details such as the subject, requester, and other conversation information in a popup.
- Users can close the ticket directly from Slack using the “Close Ticket” option, which will also close the ticket in the Wavity platform.
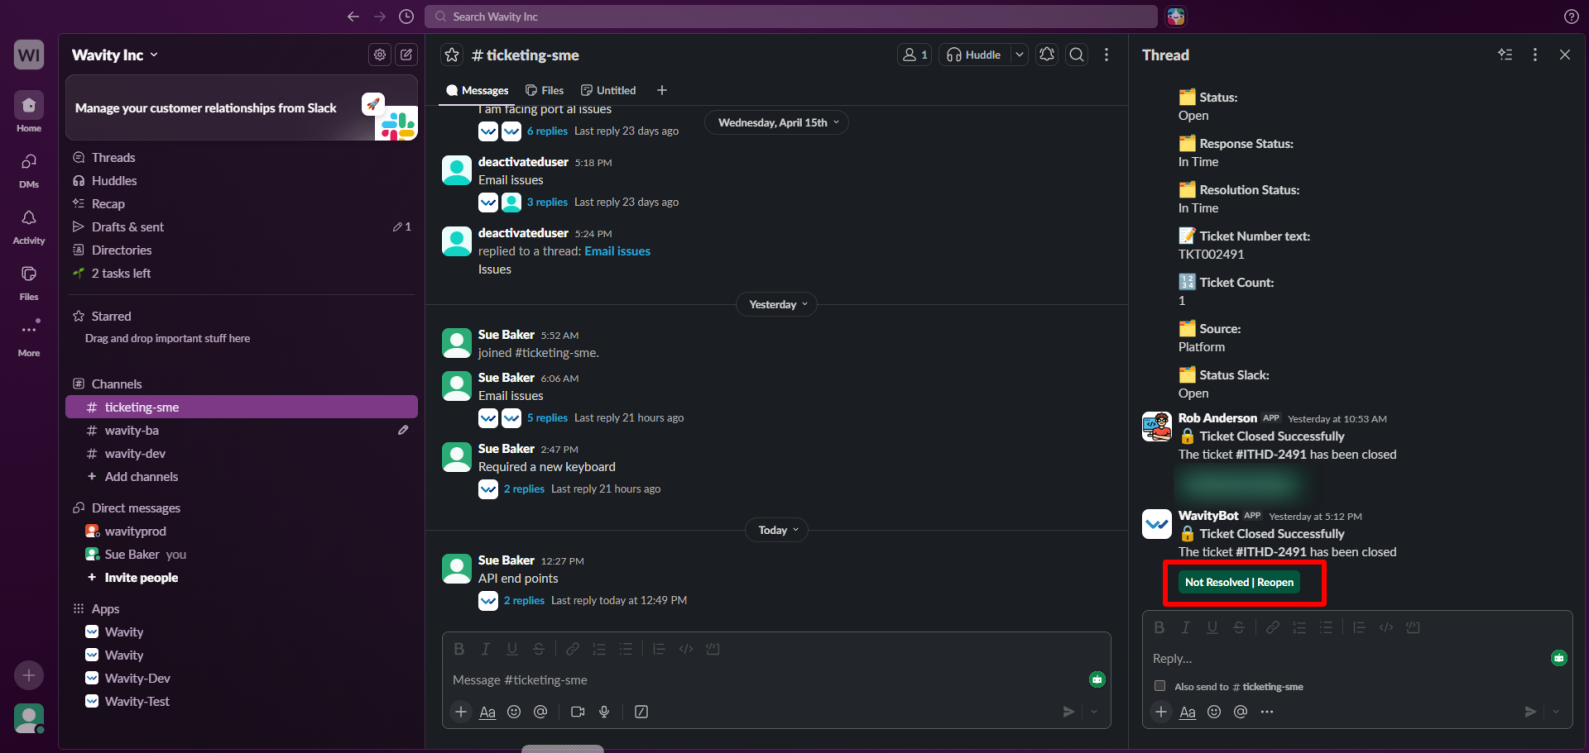
- Users can reopen the ticket by selecting the “Not Resolved |Reopen” option, which will also reopen the ticket in the Wavity platform.
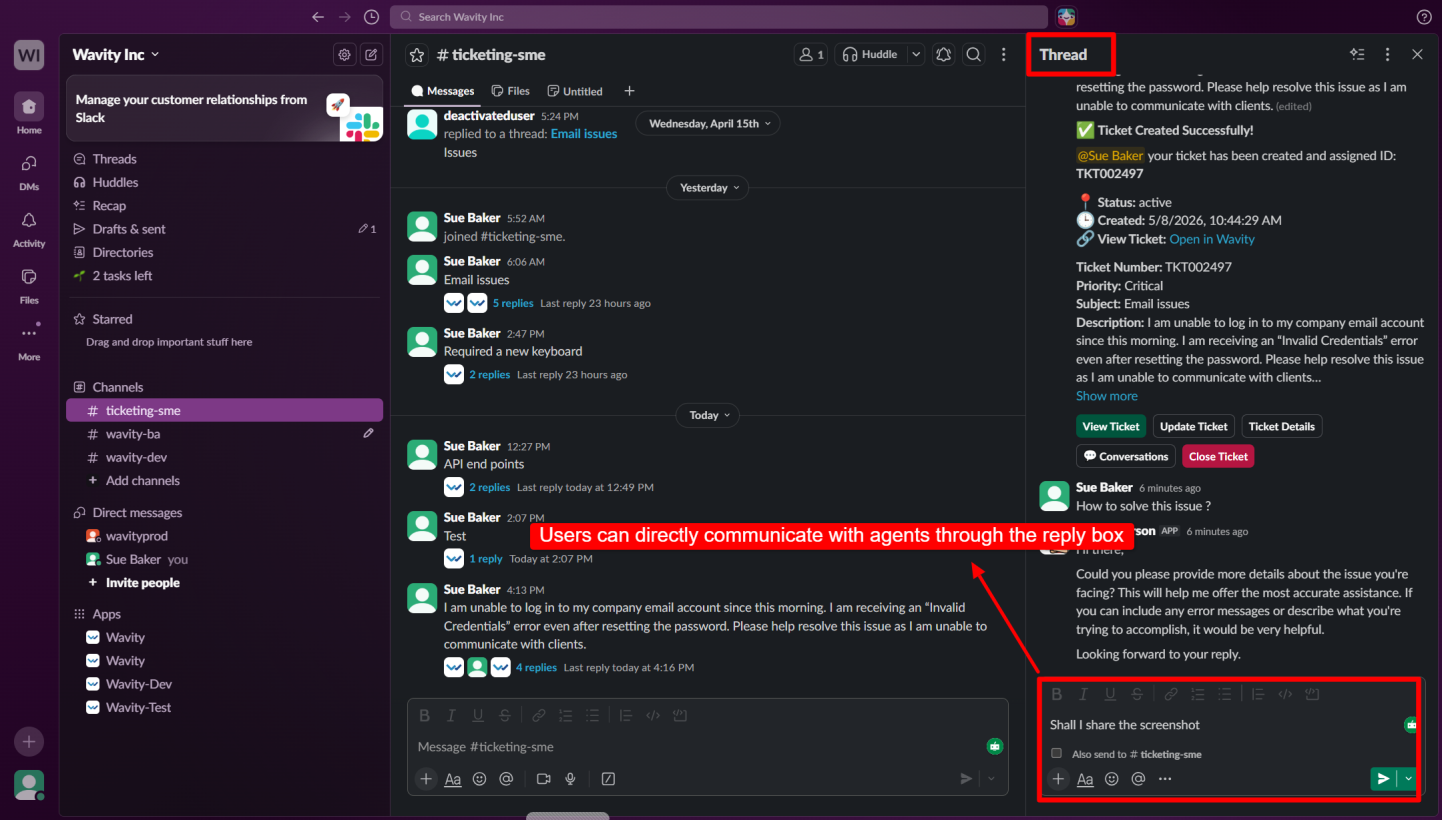
- Users can directly communicate with agents through the reply box available in the thread view while reporting their issues, and they can also upload attachments through the reply section.
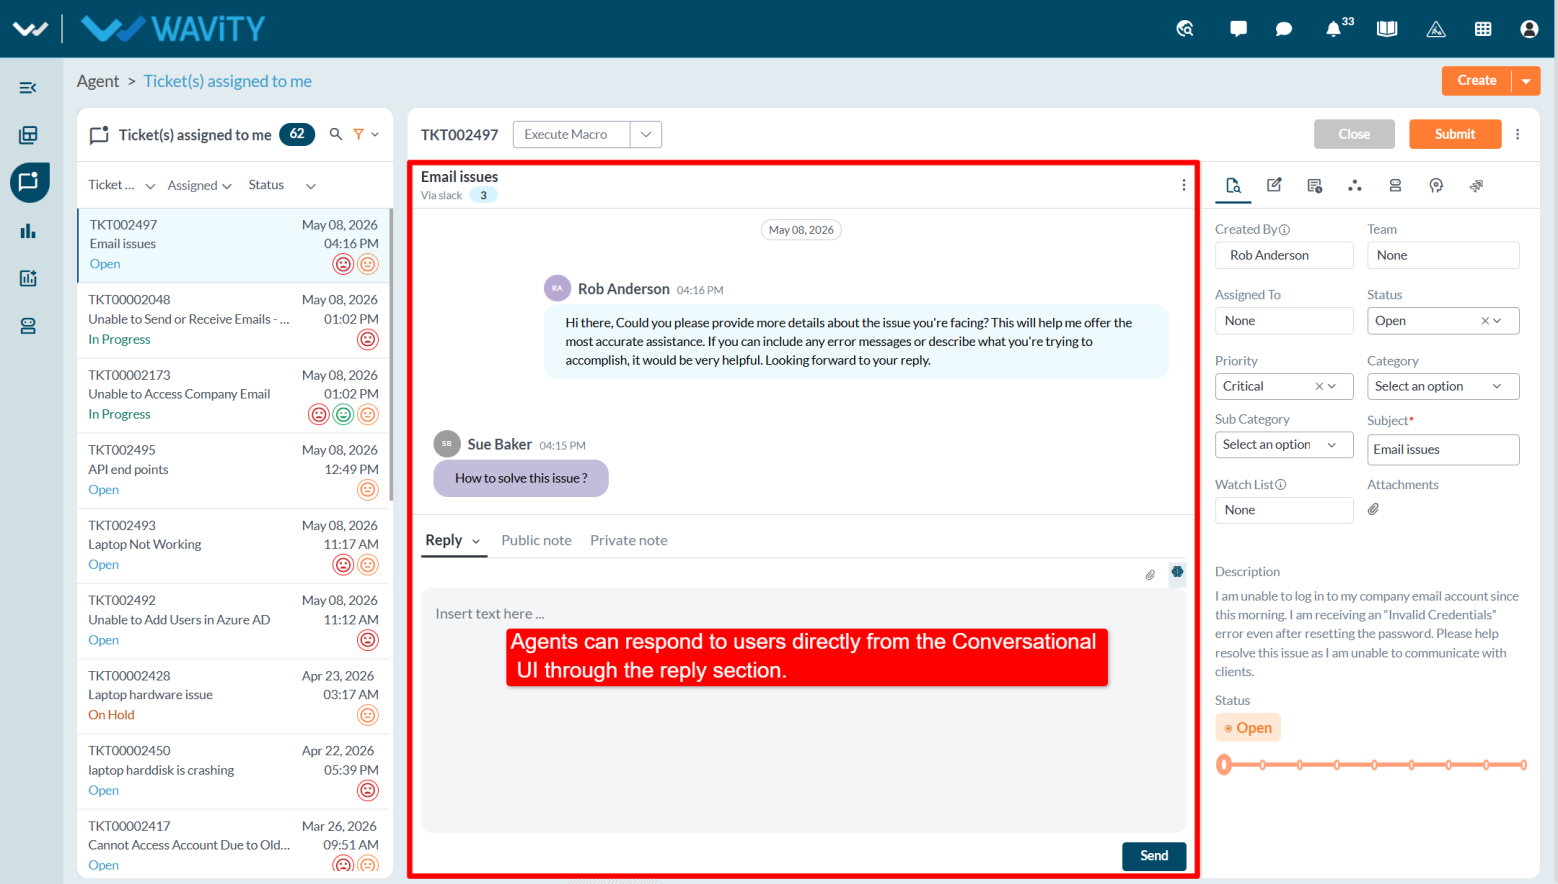
- Agents can respond to users directly from the Wavity platform through conversational UI.
- Agent responses from the Wavity platform will be displayed in the Slack thread view.

- Users can add messages to an existing ticket instead of creating a new ticket by selecting the “Add to Existing Ticket” option.
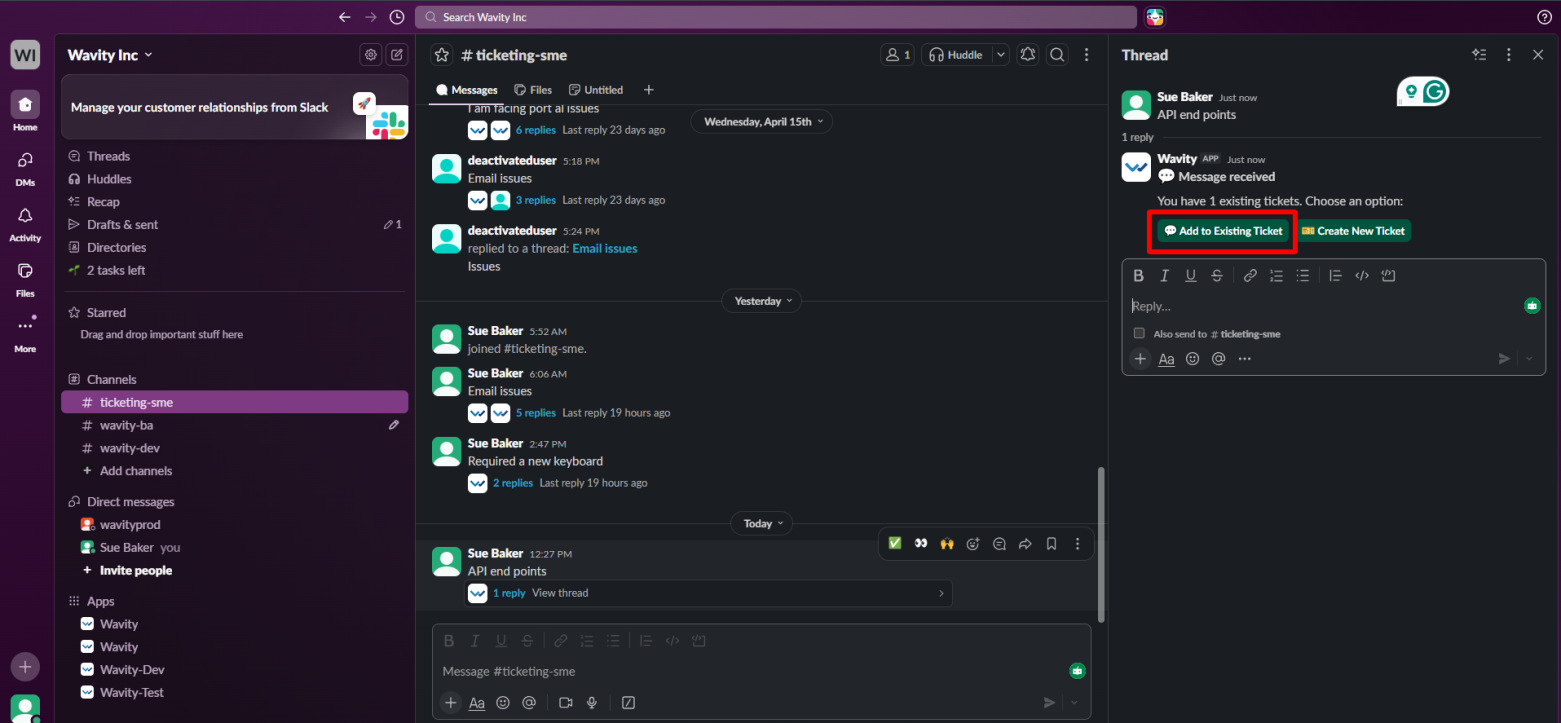
- Select an existing ticket ID from the dropdown options and click “Add Conversation.”

- The conversation will be added to the selected existing ticket. Users can also view the ticket conversation by selecting the “View Record Conversation” option, which will navigate them to the Wavity platform.

Form Based Template
- To create a ticket, describe your issue in the message box (e.g., laptop issue or software issue).
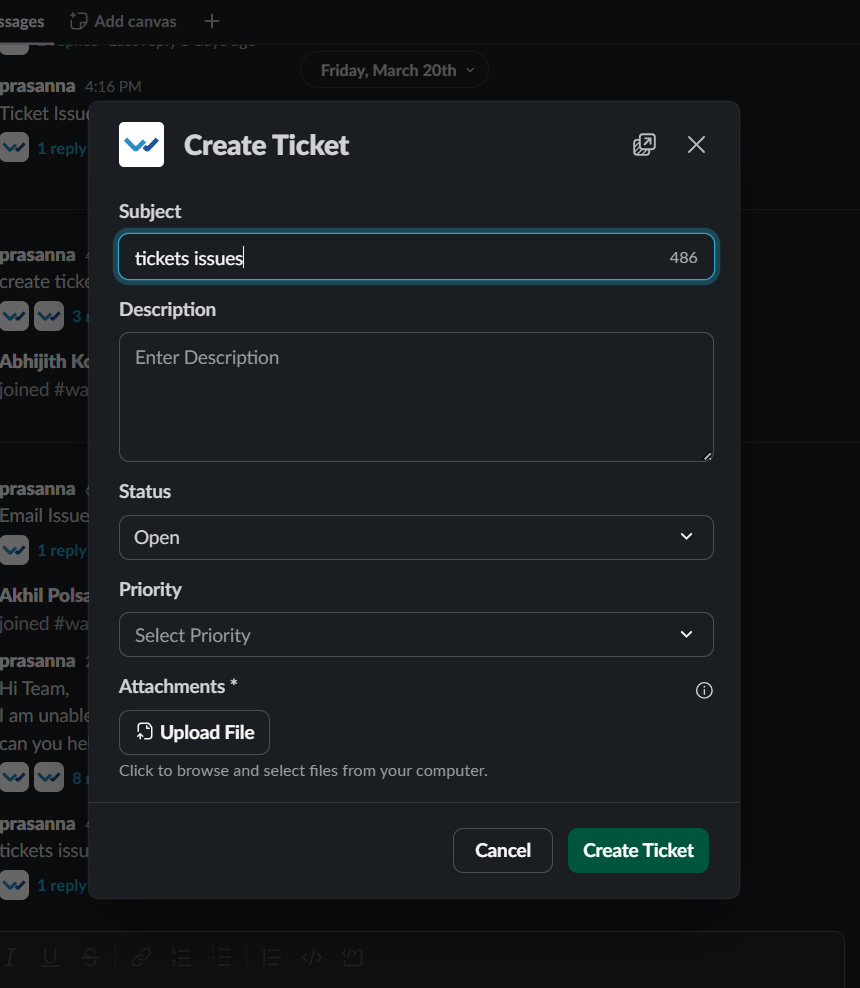
- User can view the thread click on it to open and select Create Ticket.
- All the details will be in the form view Initial message will view in the subject and enter the required details.
- The ticket will be created. You can view it on the Wavity platform by the selecting button “View Ticket”, update it, track the conversation, and close it.
- Whenever the agent updates the tickets in platform, user can view those details if they select on the Ticket details.
- If the ticket is added to existing ticket that ticket will be add in conversation.
- Users can also communicate directly with agents through Slack.
Command Based Template
- To create a ticket, the user needs to enter /create-ticket "ticket title" in the messages and press Enter. The ticket will be created automatically without appearing in threads; it will be displayed directly in the message.
- Using “/get-tickets” will display the tickets created by the user, where they can select from the available options.
- Using “/update-tickets” will update the existing tickets which user have created.