Admin Guide: Configuring Slack Channels and Forms
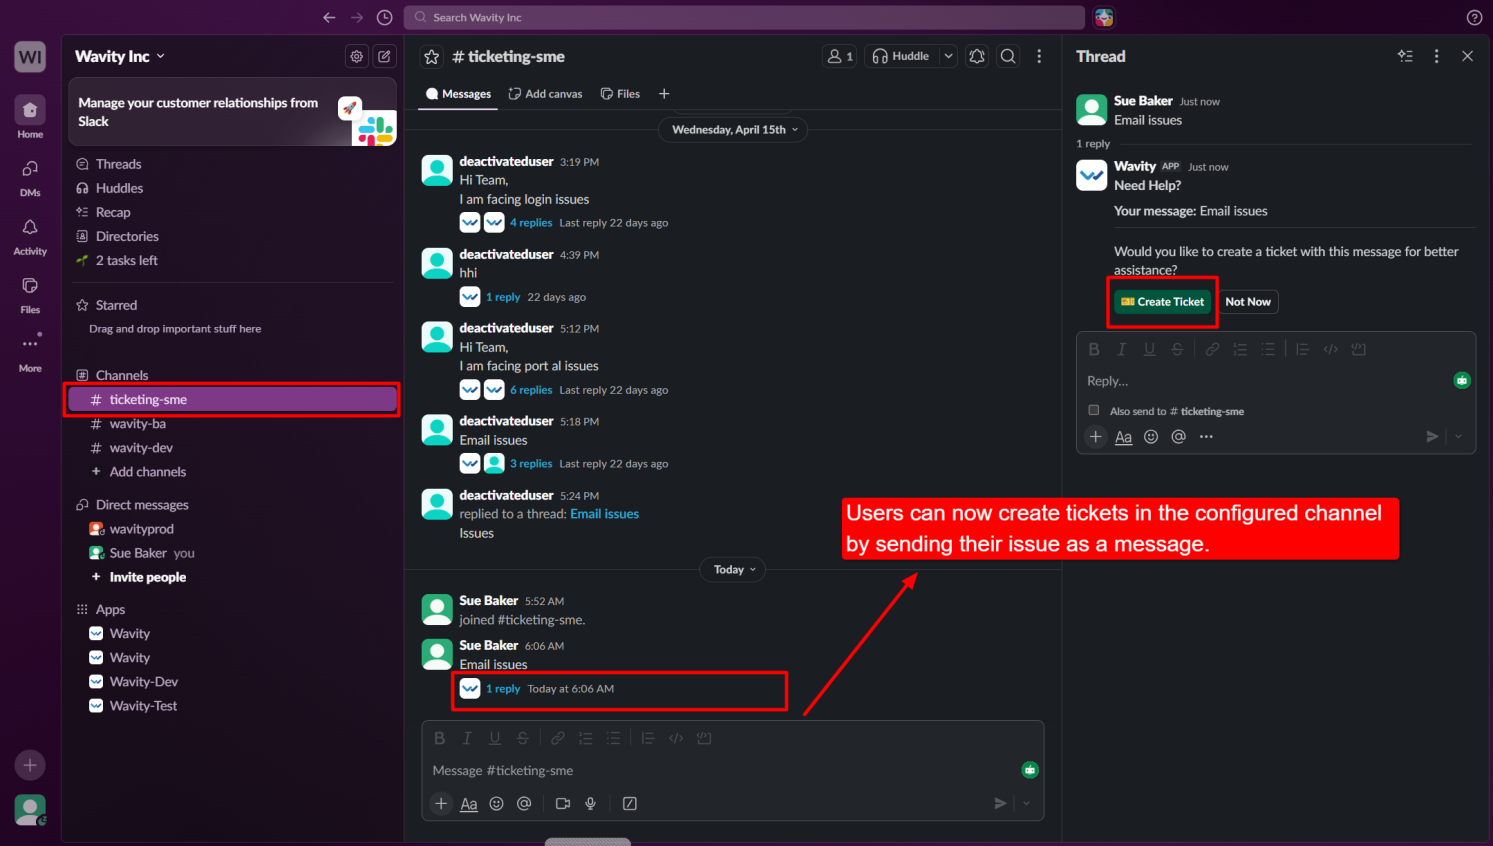
- Admin can create forms and configure Slack channels in the Wavity platform to allow users/requesters to create tickets directly from Slack without logging in to Wavity.
- Admin can define ticketing forms in three formats:
- Form-Based: Users create tickets by filling out a form.
- Button-Based: Users create tickets by selecting options step by step and clicking “Next” to provide additional details
- Command-Based: Users create tickets using commands such as “/create-ticket ticket title.”
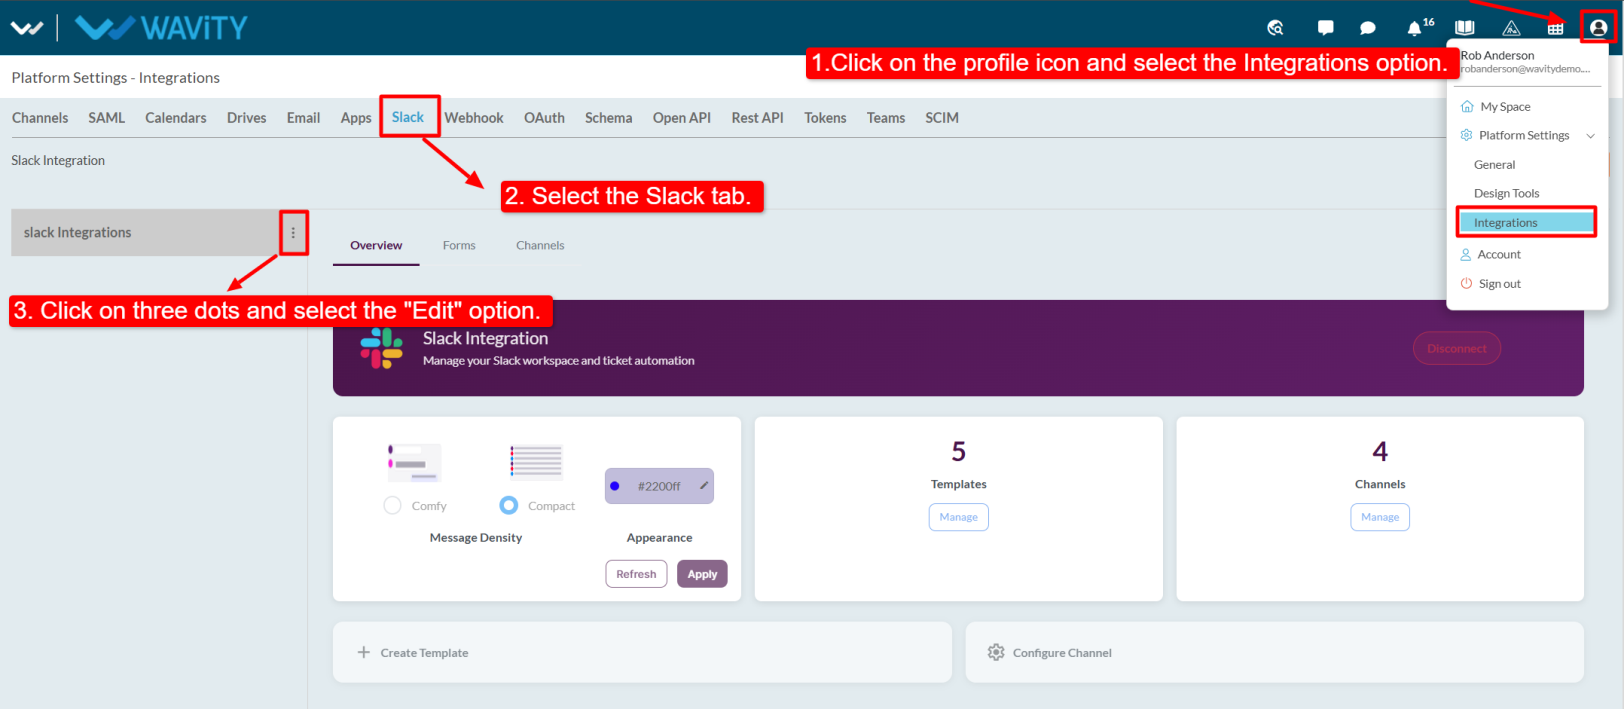
- To create a form, click on the profile icon, navigate to Integrations, and open the Slack tab. Click the three-dot menu and select Edit.
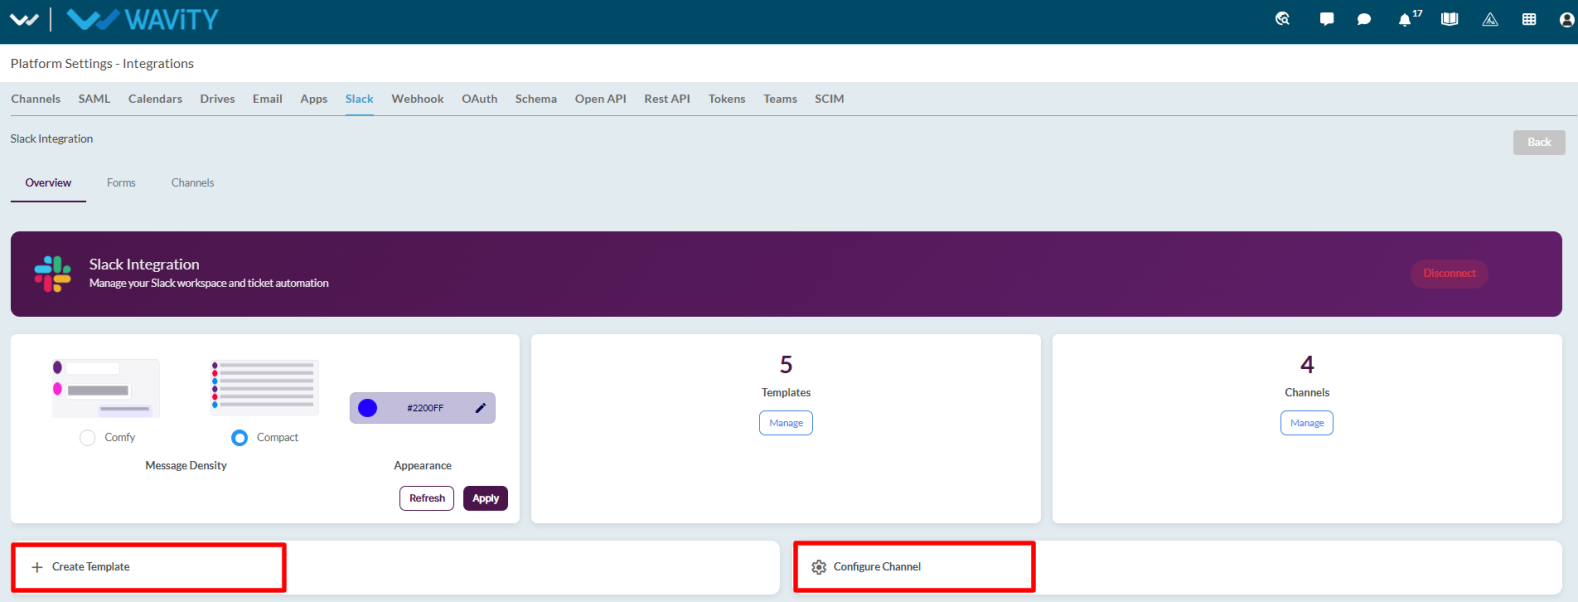
- In the Overview tab, admin can view Message Density, Appearance, Templates, and Channels.
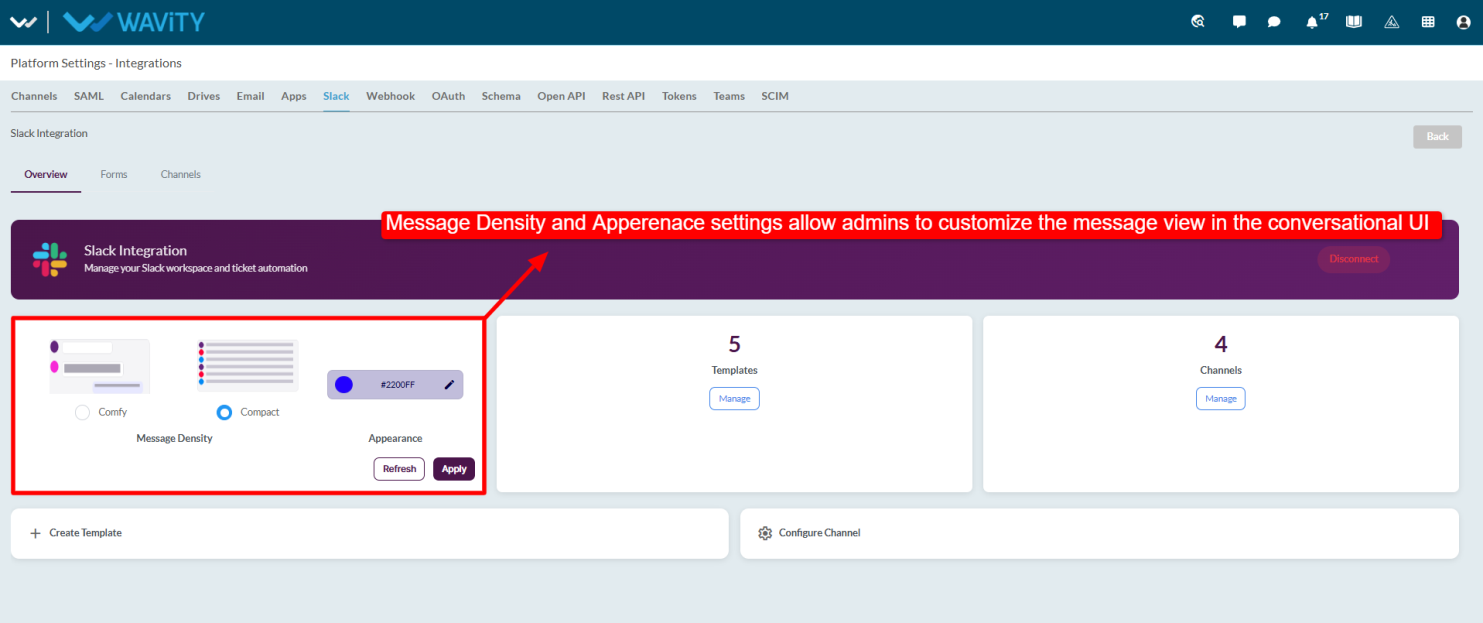
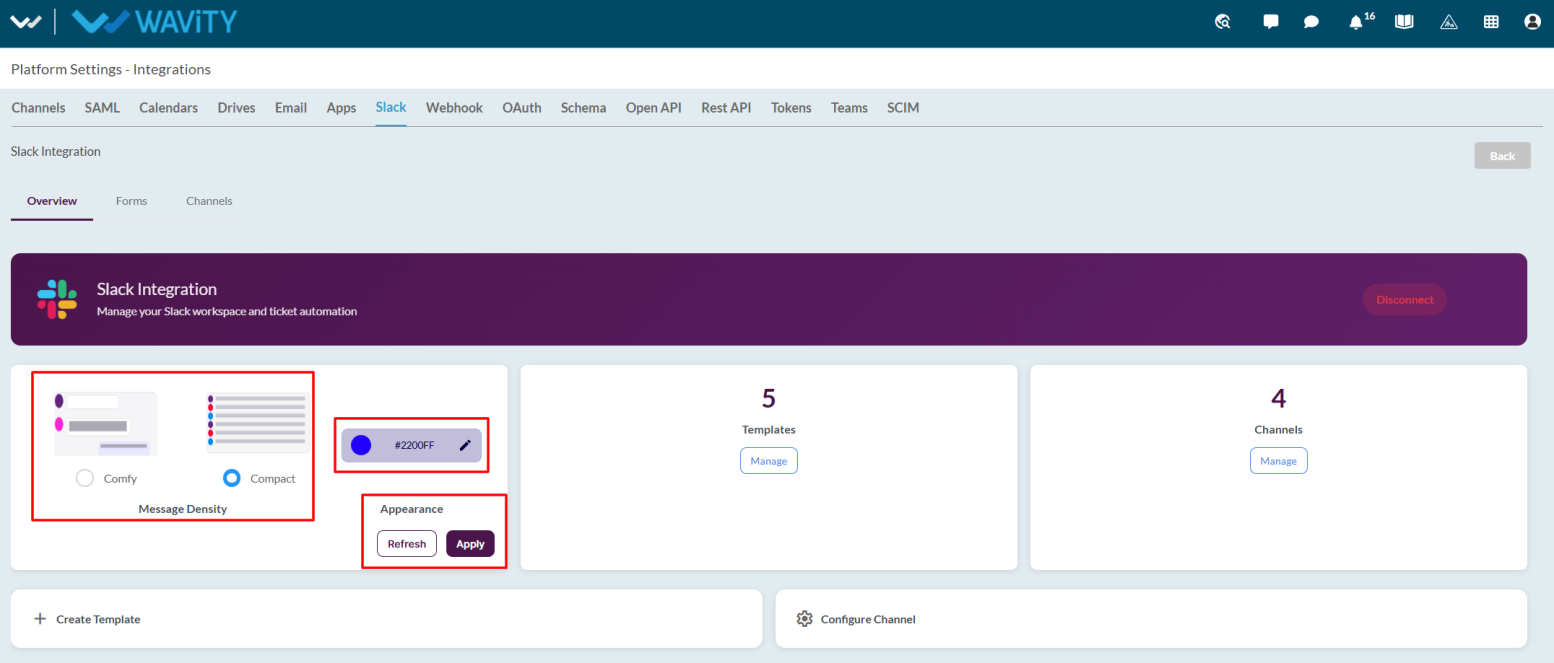
- Under Message Density, select either: Comfy: Highlights only the message OR Compact: Highlights the entire row.
- In Appearance, admin can change the message appearance color and click “Apply” to save changes.
- Use the “Refresh” button to reset Message Density and Appearance settings.
- Admin can edit and manage form templates and channels by clicking the “Manage” option in both the Templates and Channels sections.

- Admin can create a new form template by selecting the “Create Template” option and configure a Slack channel by selecting the “Configure Channel” option in Wavity.
Template Creation
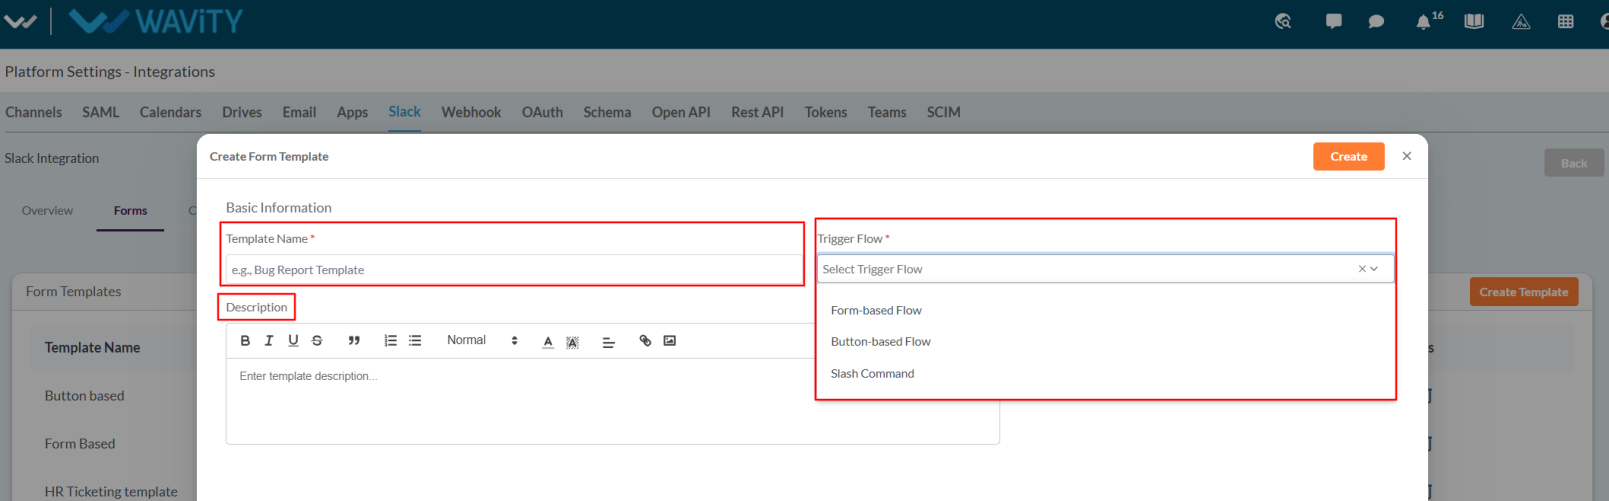
- Click on “Create Template” to create a form template.
- Enter the template name and select the “Trigger Flow” (Form-Based Flow, Button-Based Flow, or Slash Command). Add a description if needed.
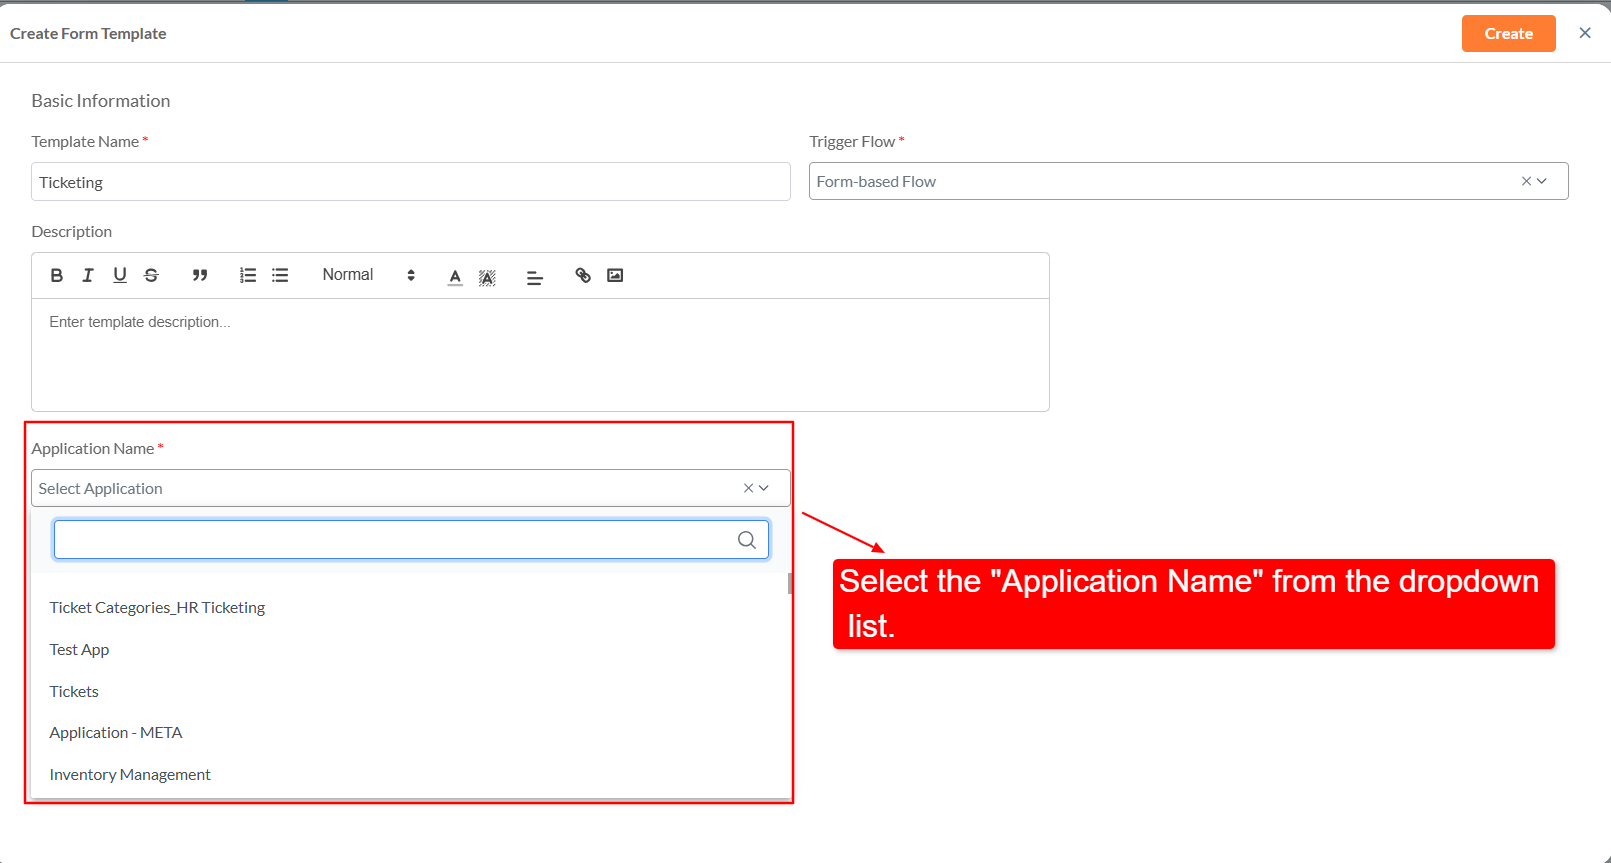
- Select the Application Name (this should be the main ticketing application).
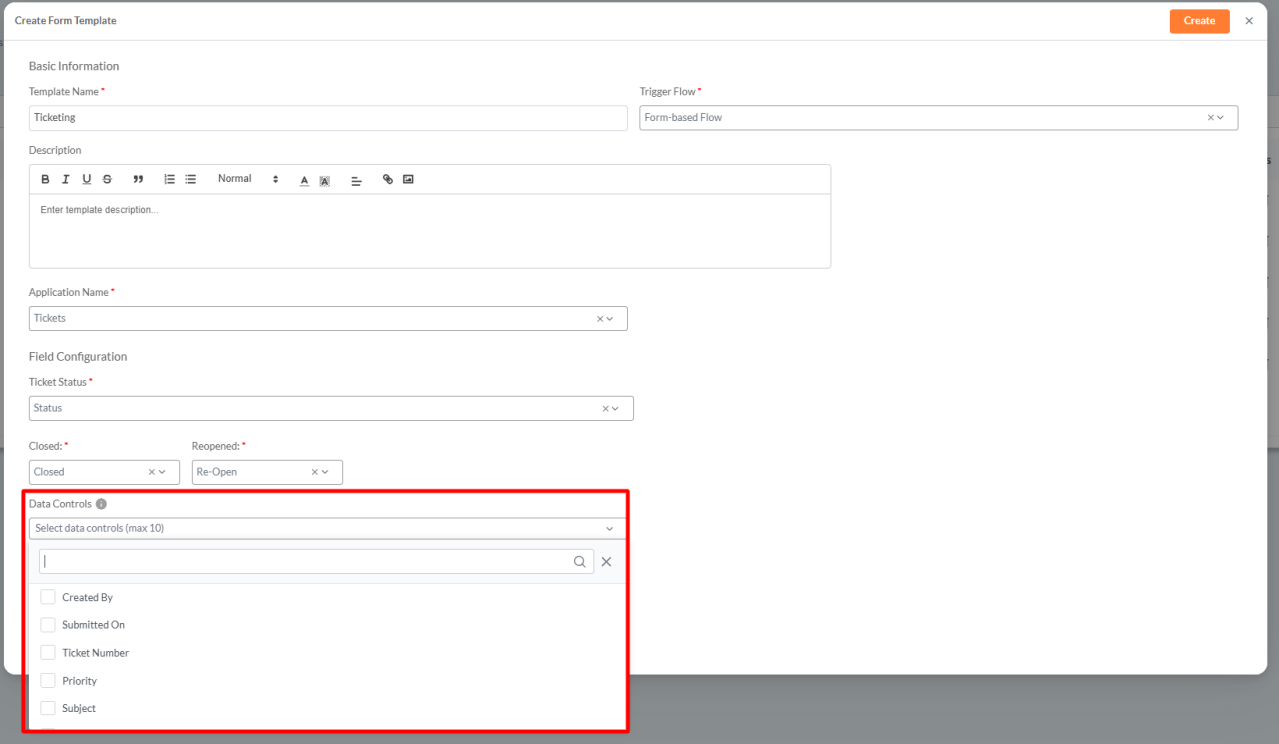
- Choose the Ticket Status field, along with Closed and Reopened options.

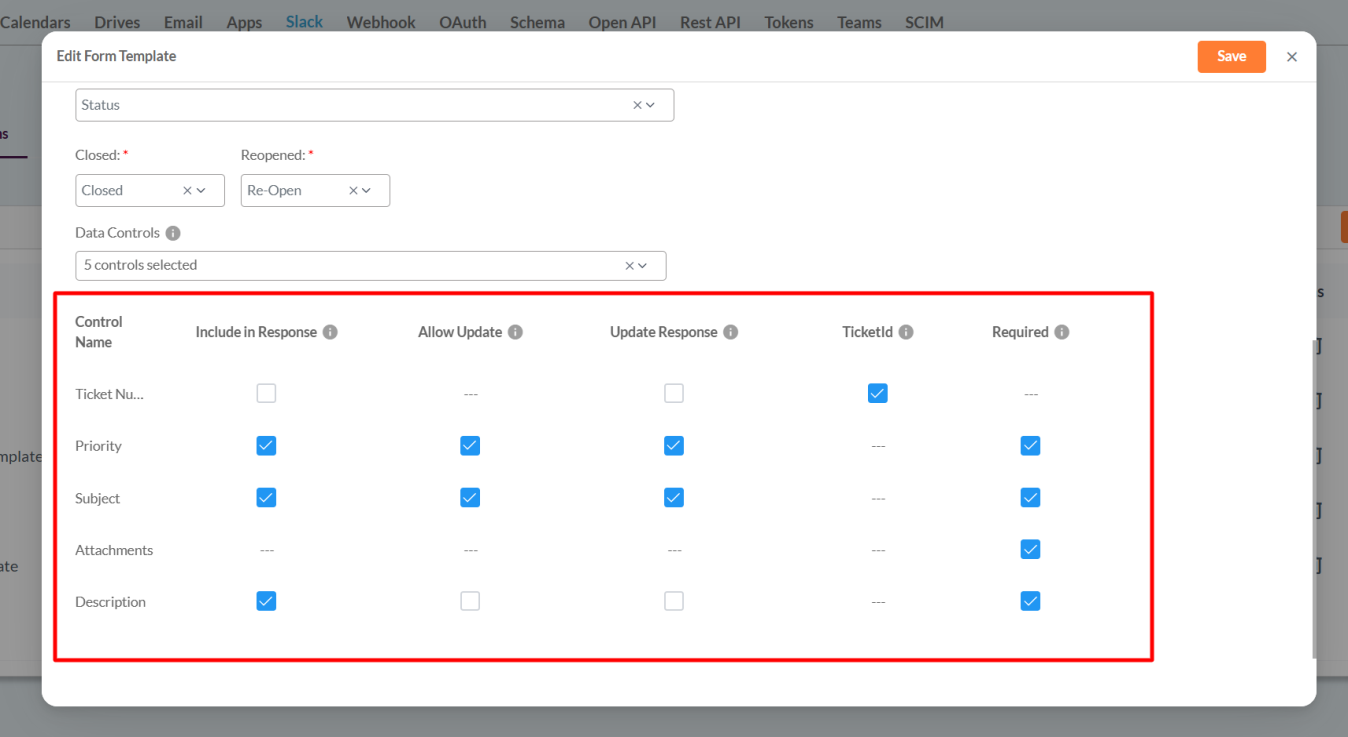
- Select up to 10 data controls that users must fill in while creating a ticket.
- Configure field-level options:
- Include in Response: After a ticket is created, only the selected fields are returned in the success response
- Allow Update: Only the specified fields are available for updating the ticket
- Update Response: After updating a ticket, only the selected fields are included in the response.
- Ticket ID: If Auto Ticket ID is enabled, the system automatically generates and returns the ticket ID.
- Required: Only the selected fields are displayed in Slack during ticket creation.
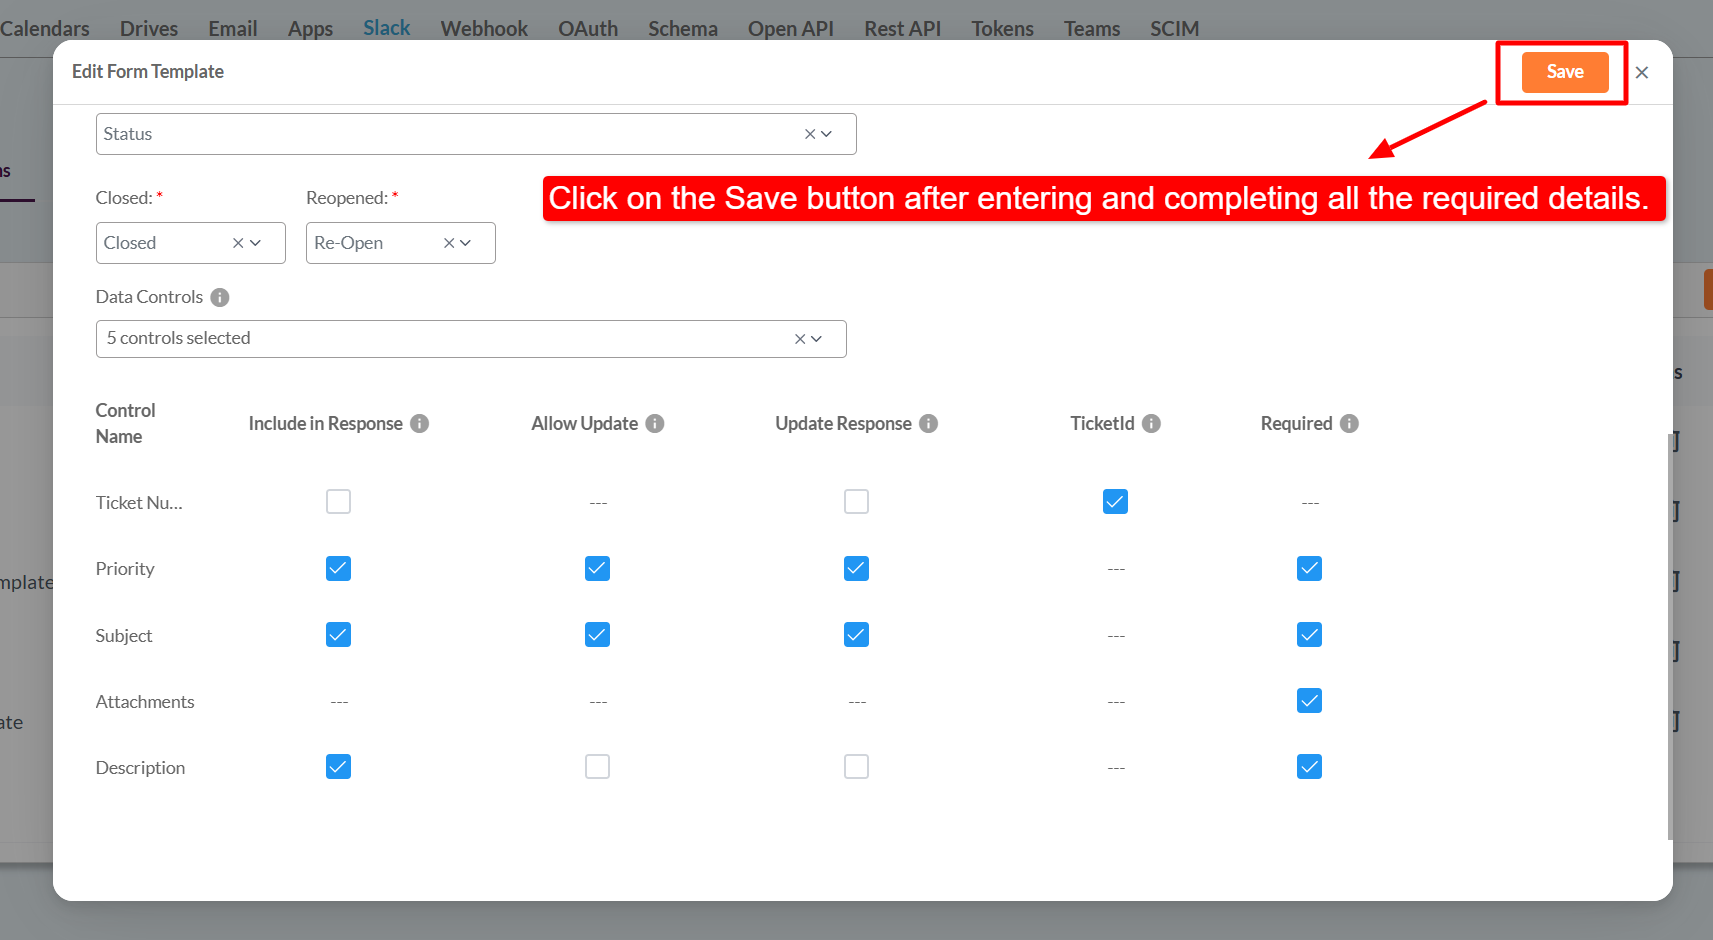
- Click “Save” to create the template.
Channel Configuration
- After creating the template, configure the Slack channel to enable ticket creation.
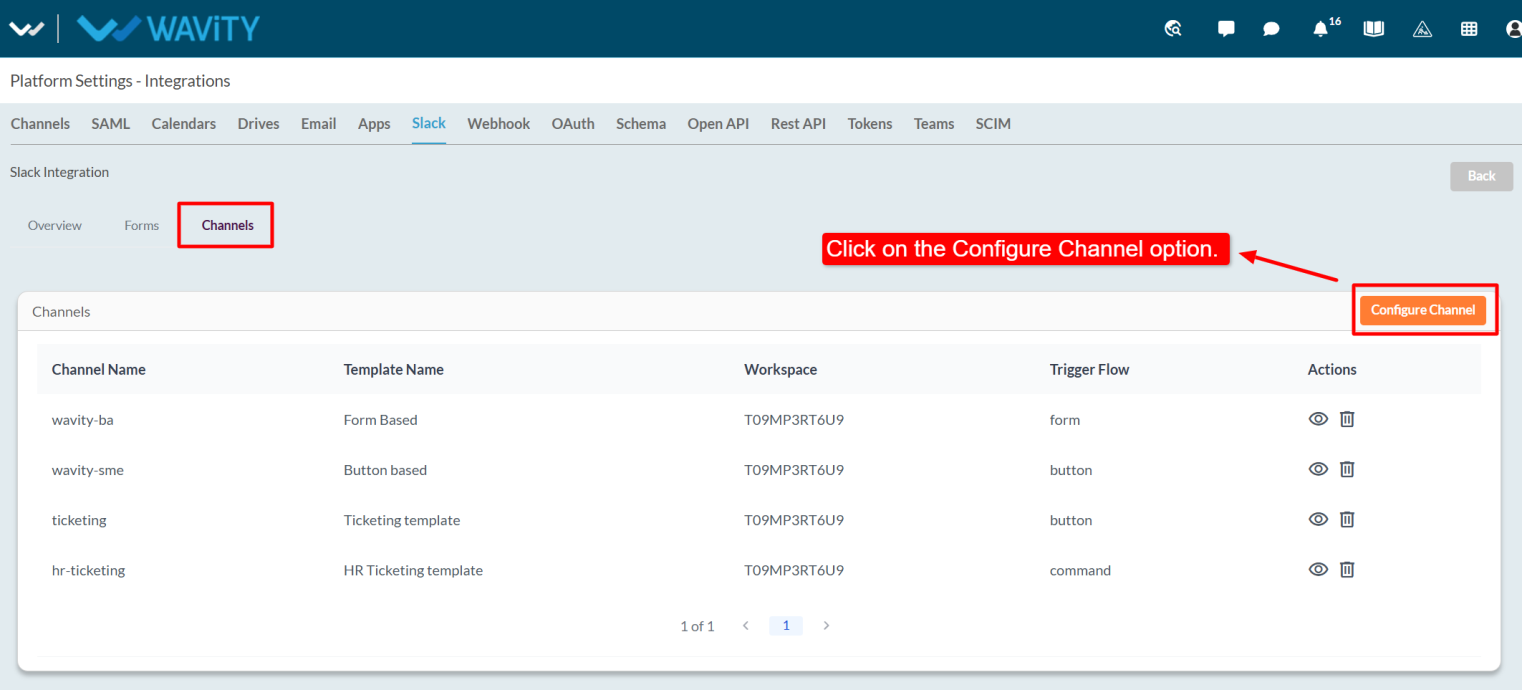
- Go to the “Channels” tab and click “Configure Channel.”
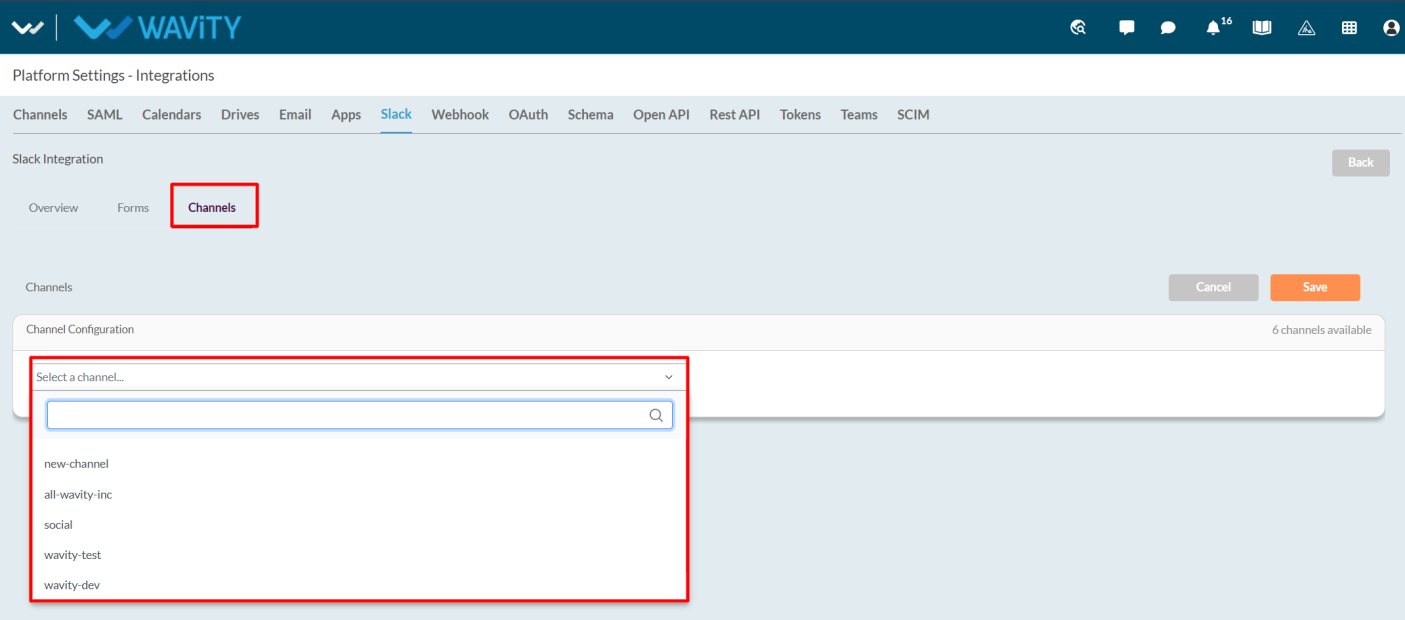
- Select a Slack channel from the dropdown list.
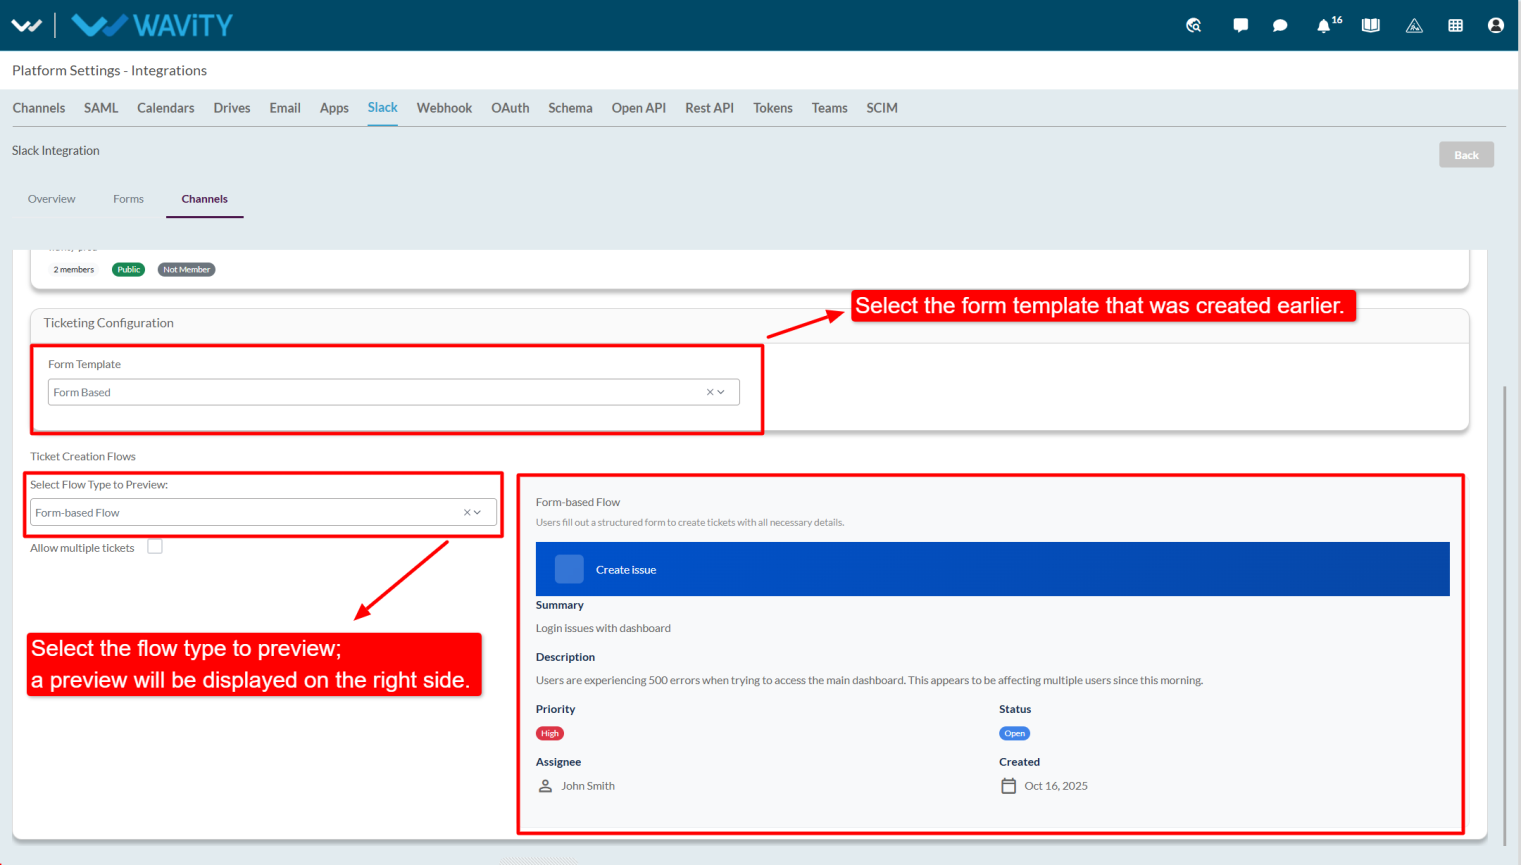
- Choose the form template created earlier.
- Select the flow type to preview; a preview will be displayed on the right side.
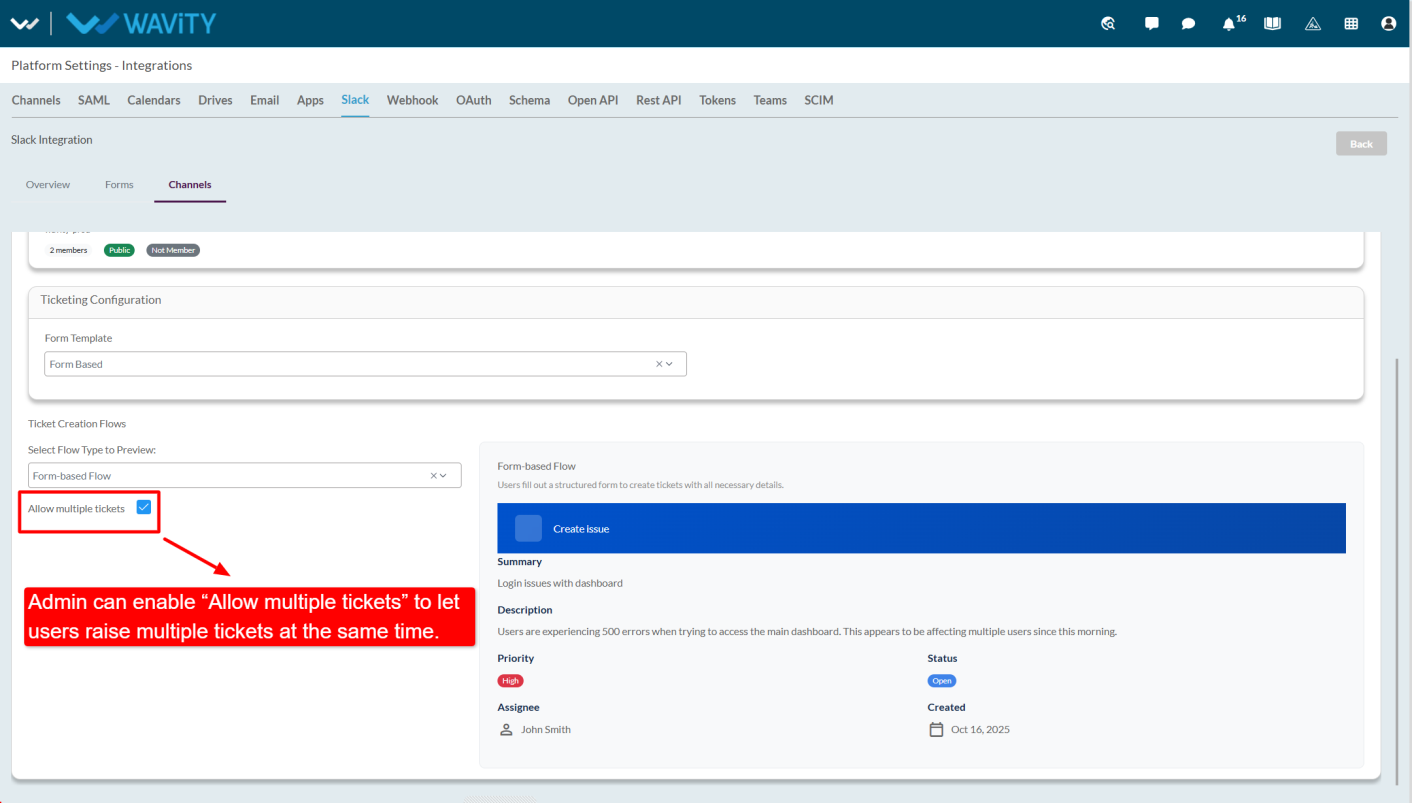
- Admin can enable “Allow multiple tickets” if users should be able to create multiple tickets simultaneously (even if previous tickets are not closed).
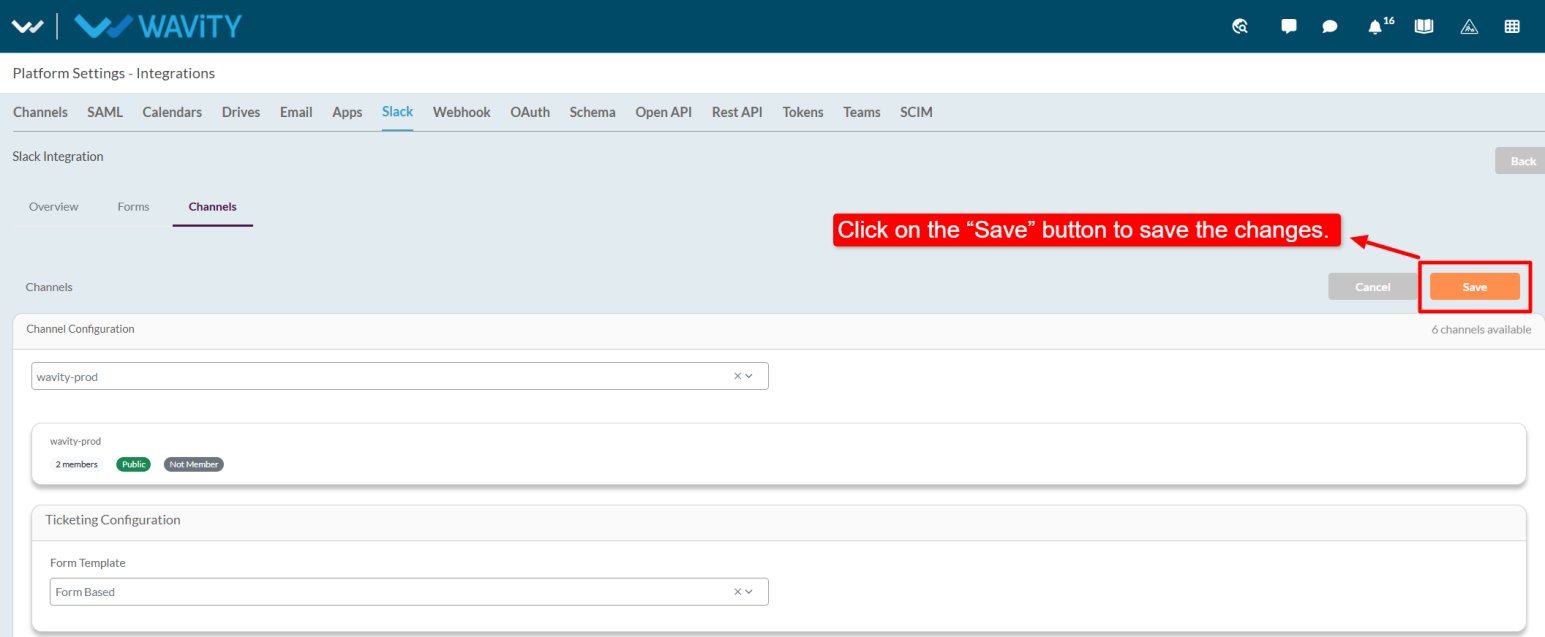
- Click “Save” to complete the configuration.
- Once configured, end users can create tickets directly from Slack using the selected channel.