Overview of the Wavity Helpdesk Platform
Overview of the Wavity Helpdesk Platform
- Wavity is a modern, cloud-based, AI-powered platform designed to simplify and streamline business processes through a zero-code approach. It offers robust capabilities Ticketing, Asset management, workflow automation, and collaborative communication, all in one unified interface.
- With built-in AI support, Wavity enhances user and agent experiences by enabling smart ticket classification, automated responses through macros, and intelligent suggestions boosting productivity while reducing manual effort.
- Wavity platform provides the Role-Based Personas which is customized views and access based on user roles such as Admin, Agent, or End User. Each role sees only the information and tools relevant to their responsibilities, ensuring a clean, focused interface and enhanced productivity.
- Note: The steps provided serve as sample instructions and can be customized based on specific requirements; however, the core workflow shall remain the same.
End User Workflow Overview
- End users have the ability to create tickets, monitor the status of their submitted requests, and communicate with agents to address their concerns.
- The end user will log in using their credentials and will be directed to the End User Interface. From the interface, they can create new tickets and track the status of existing ones.
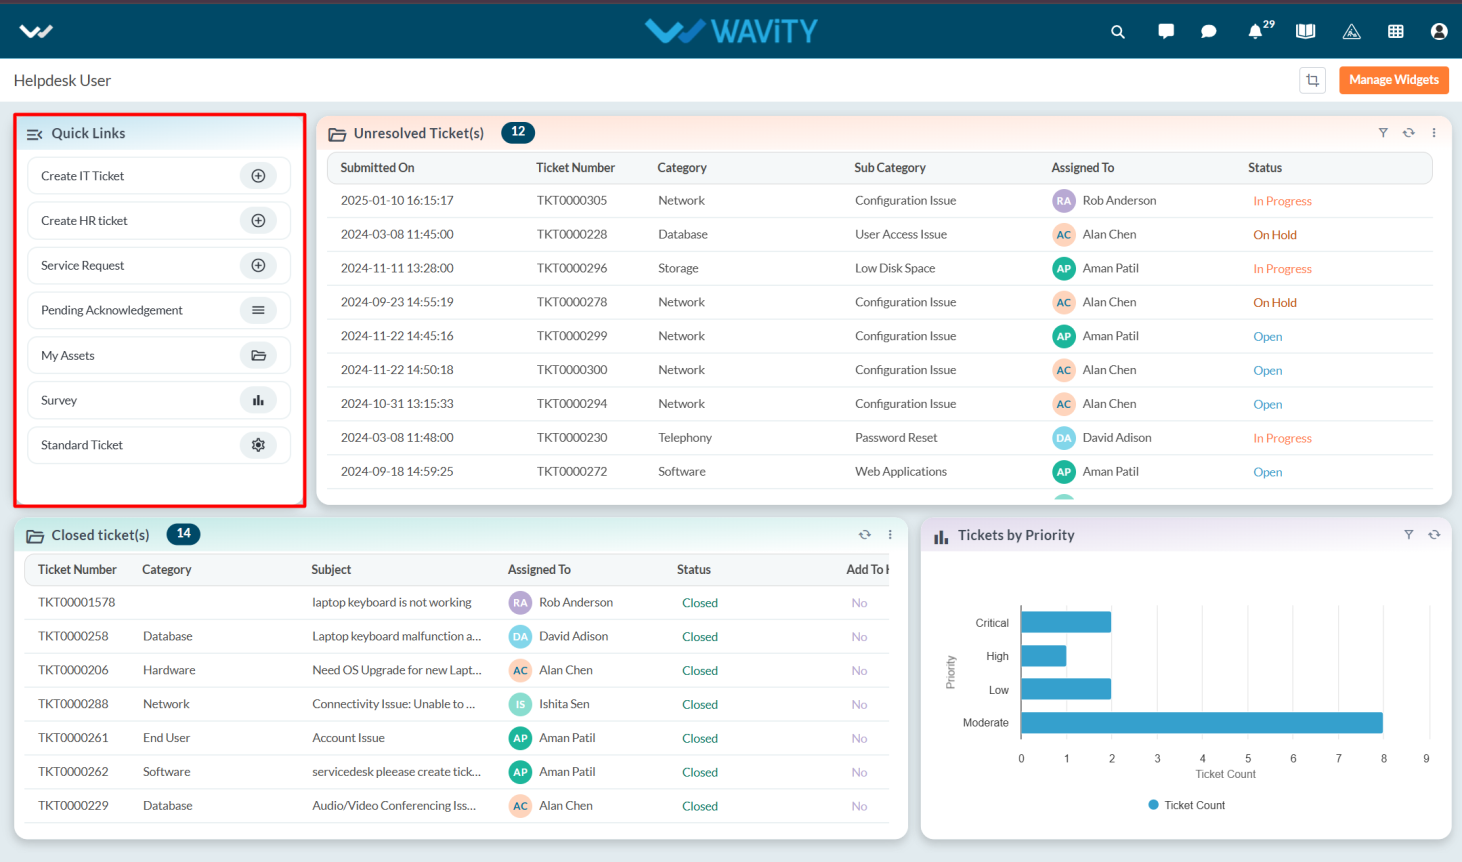
- From the Quick Links, User can create the Ticket, Acknowledge request, create requests and track their assets.
- On creating a ticket, User can select a category such as Software, Storage, Server, Printing, Security, etc. The Sub-Category options will be dynamically populated based on the selected Category. Additionally, the user can specify the Impact and Urgency levels of the issue.

- User can mention the issue of the ticket in the subject and attach any screenshots or any images related to the issues. They can add any agents to the watch List.
- User can describe their issues in detail in description box after entering the details click on the save button.

- User can see customer portal by selecting the Help portal from the Interface.
- In the Customer Portal, users can create a ticket by selecting the Create a Ticket option and view helpful articles to resolve their queries.

- Users can create a ticket through the chatbot by selecting Chat Icon from customer portal, chat with an agent to ask questions by selecting Talk to an agent, and view updates on their submitted tickets by selecting Get My Ticket(s).

Agent Workflow Overview
- Agents have access to tickets, communication tools, and workflow actions to efficiently resolve issues.
- When an agent logs in with their credentials, they can view the agent Interface as shown in the image.
- Agents can create, track, or add categories using the Quick Links.
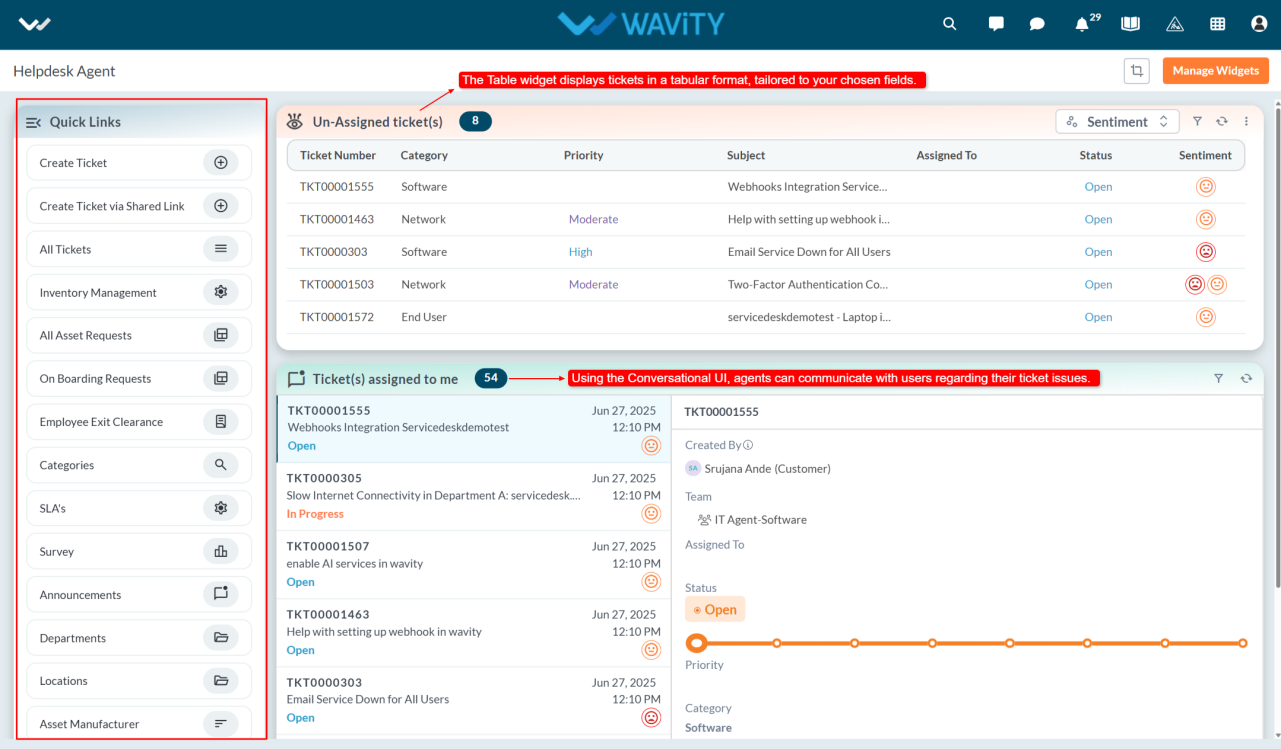
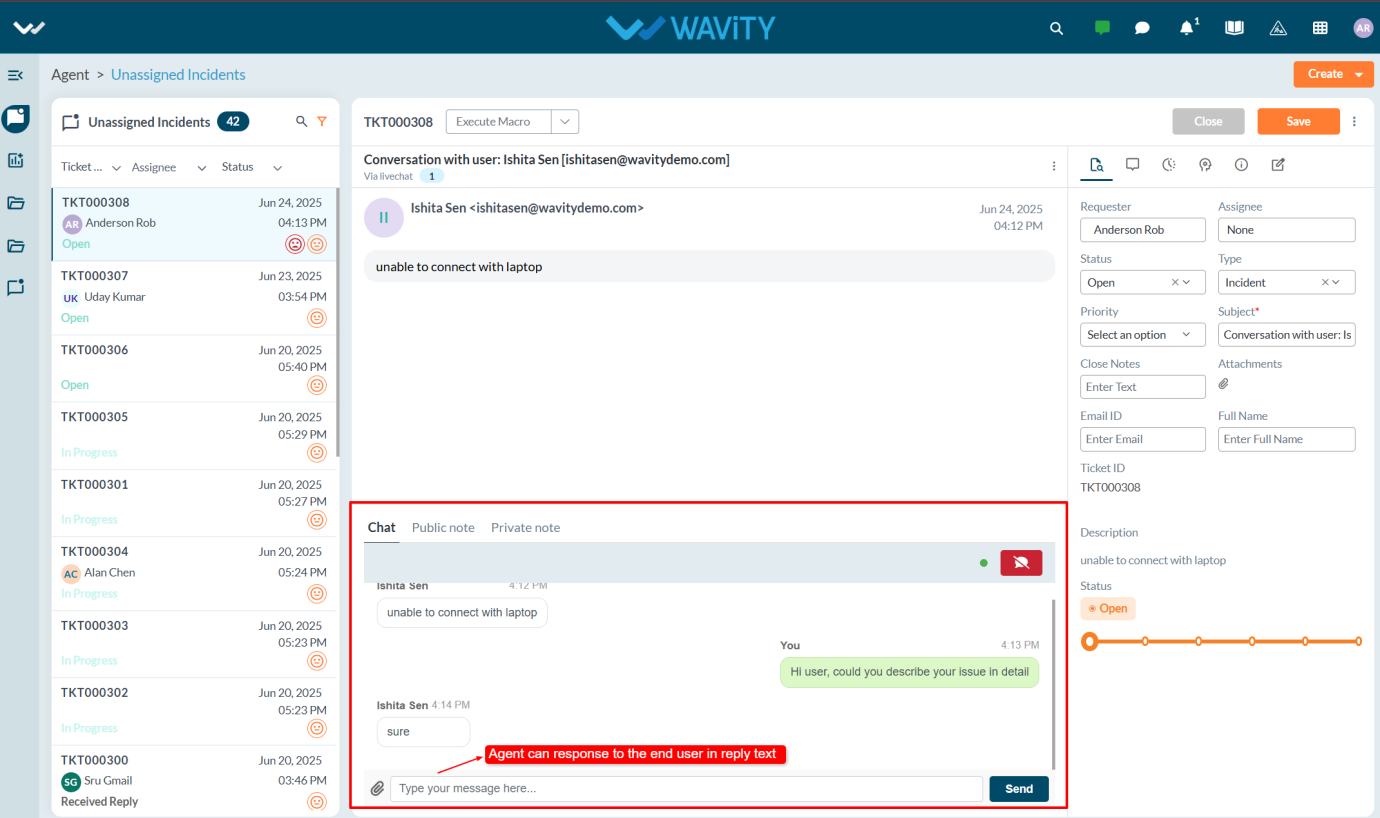
- Agents can access tickets assigned to them and communicate directly with end users using the Conversational UI. To view detailed information about a ticket, select the Record Details popup.

- Agent can add Public, Private Notes to the ticket and execute the Macro to the tickets.
- Public Notes: Everyone in the conversation can see these notes.
- Private Notes: Only selected people can see these notes.

- When the agent responds to and resolves the ticket, the Time Capture section automatically calculates the response and resolution time.

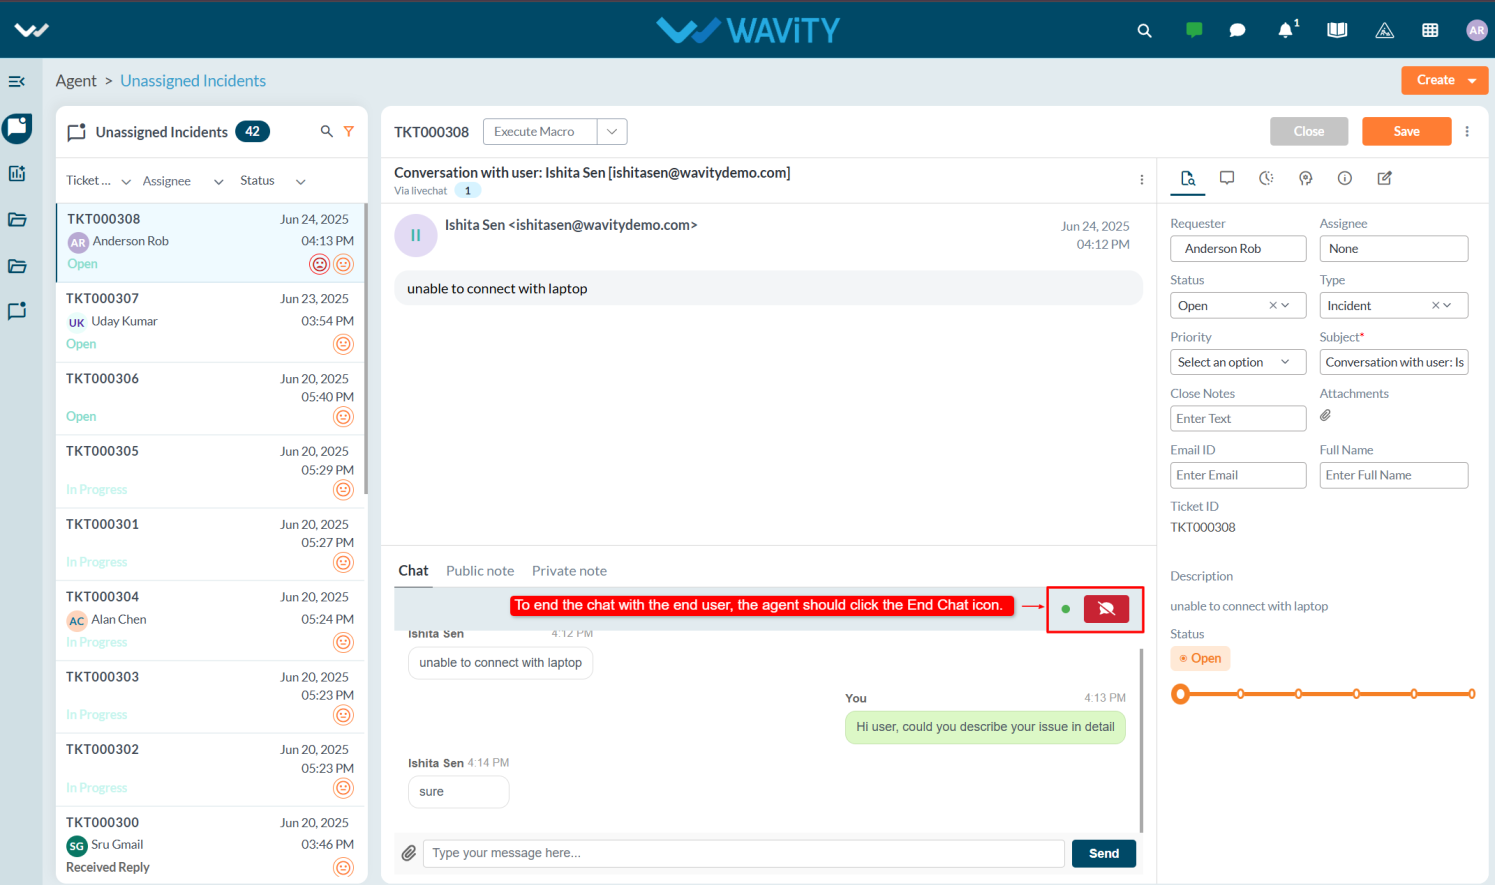
- To connect via Live Chat, the agent must be online when the end user selects Talk to an Agent from the chatbot.

- The agent can respond to the end user through the Conversational UI after accepting the chat.
- After communicating with the end user, the agent can end the chat by clicking on the close icon.