Resource Manager Guide: Assigning for a Project
Resource Manager Guide: Assigning for a Project
- In the Wavity Project Portfolio Management Solution, Assigning a resource person to a project is a simple and streamlined process.
- Users with Resource Manager access can assign resource persons to specific projects.
- Upon logging in with their credentials, users are directed to the Resource Manager Persona.
- Note: The steps provided serve as sample instructions and can be customized based on specific requirements; however, the core workflow will remain the same.
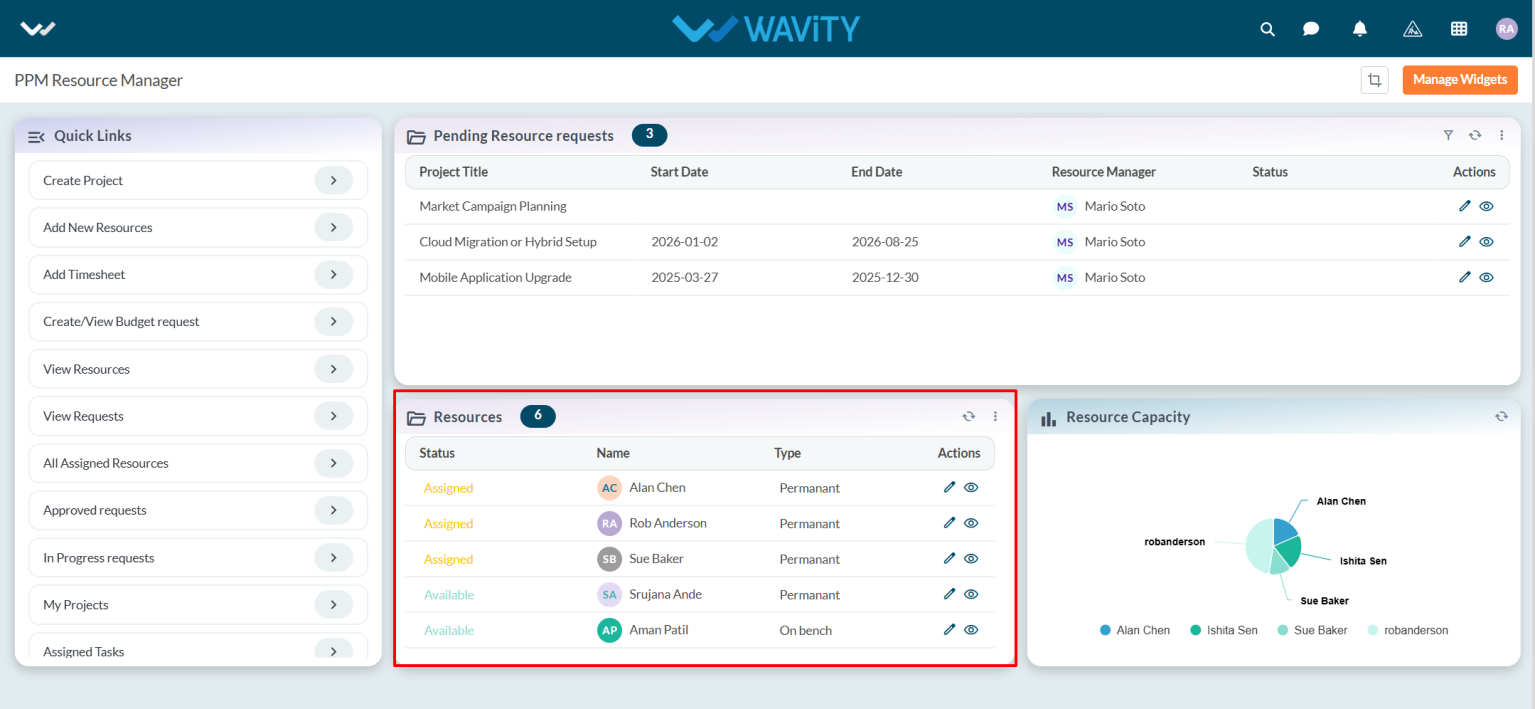
- From the Quick Links, the Resource Manager can create a project, add a new resource, add a timesheet, and view or track project status.

- In the Resource table widget, users can view the complete list of available resources.
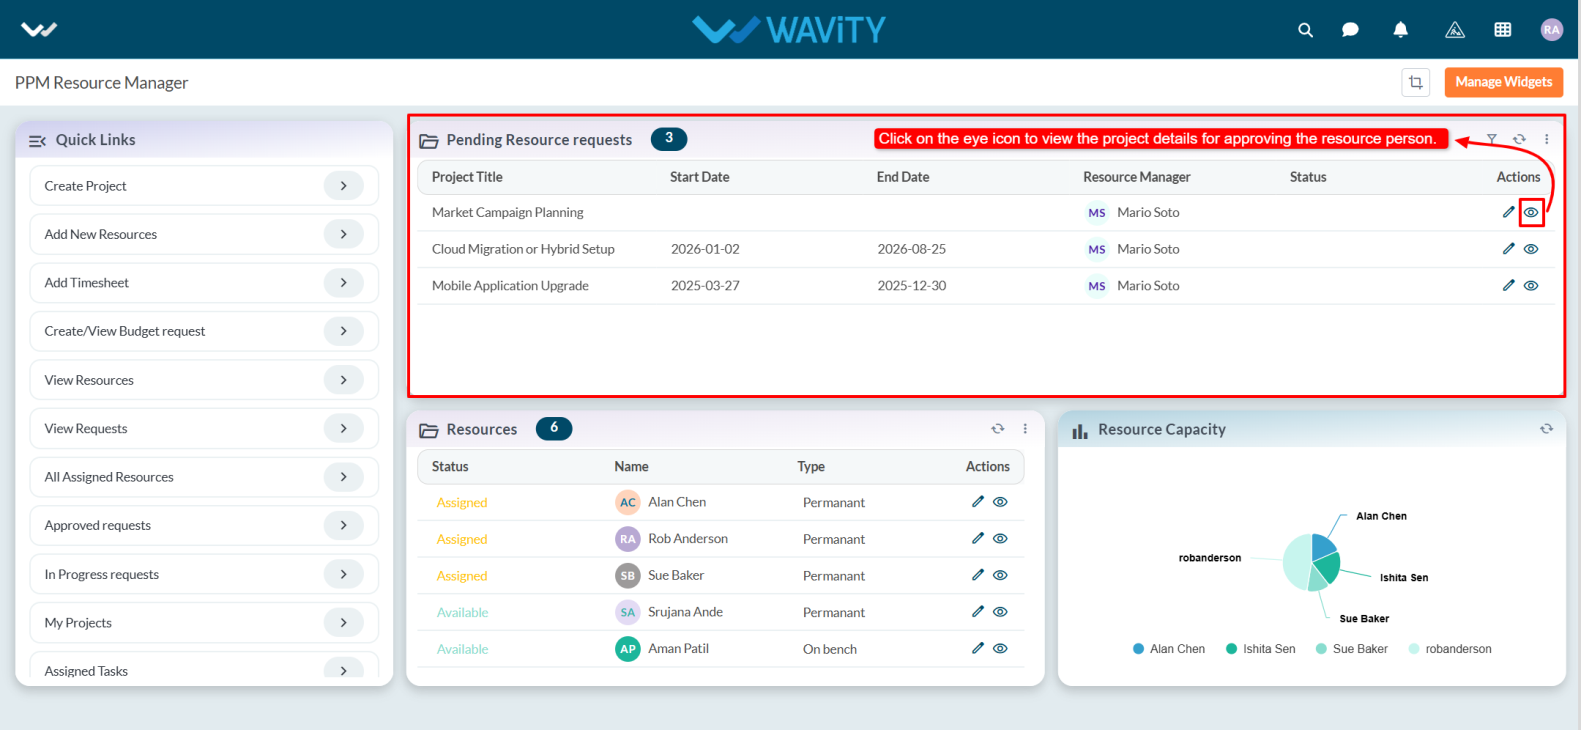
- In the Pending Resource Requests table widget, users can approve resource requests. Select any pending request from the list.
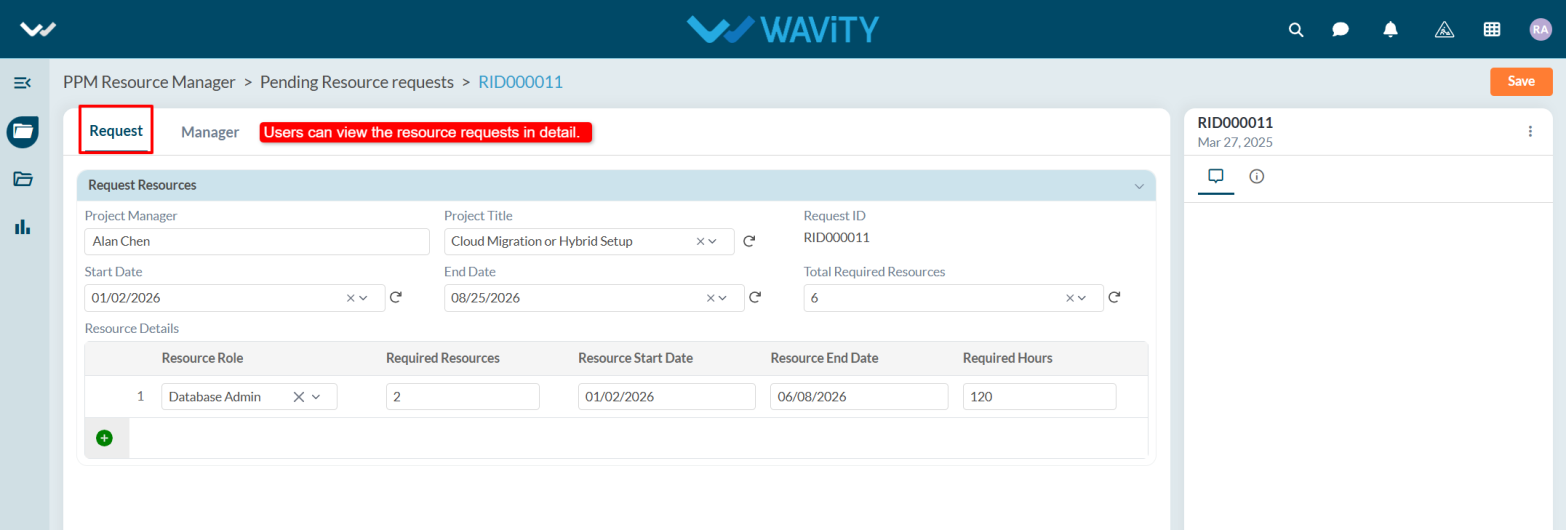
- In the Request tab, users can view detailed information about the resource request.
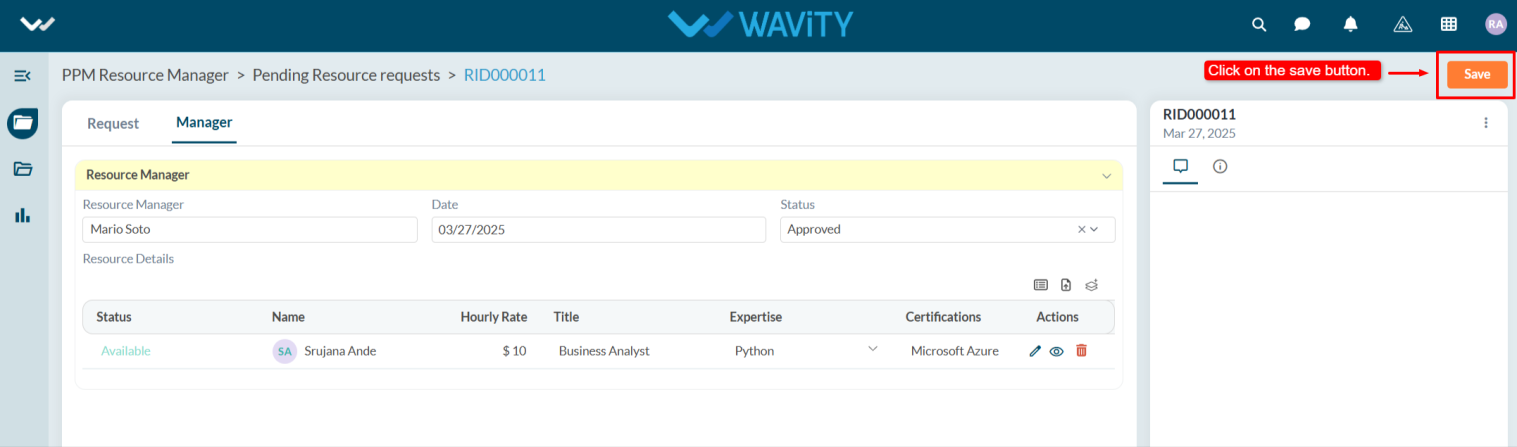
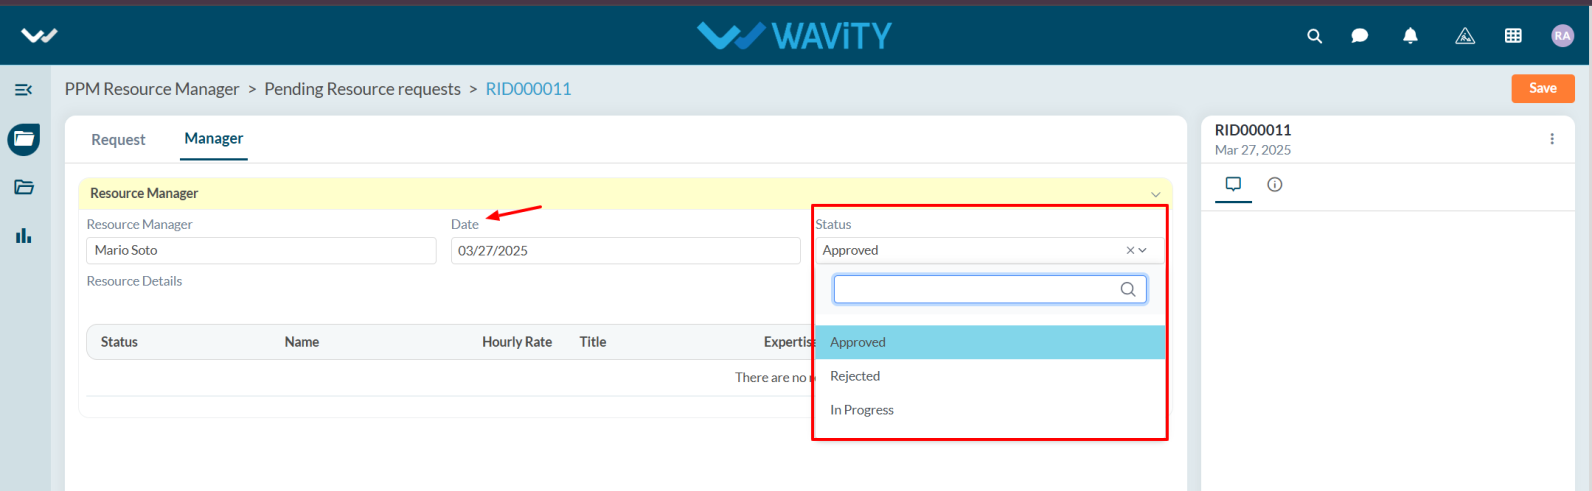
- In the Manager tab, under the Resource Manager section, the system will automatically populate the Resource Manager’s name.

- Select the Approval Date and update the Status to Approved.
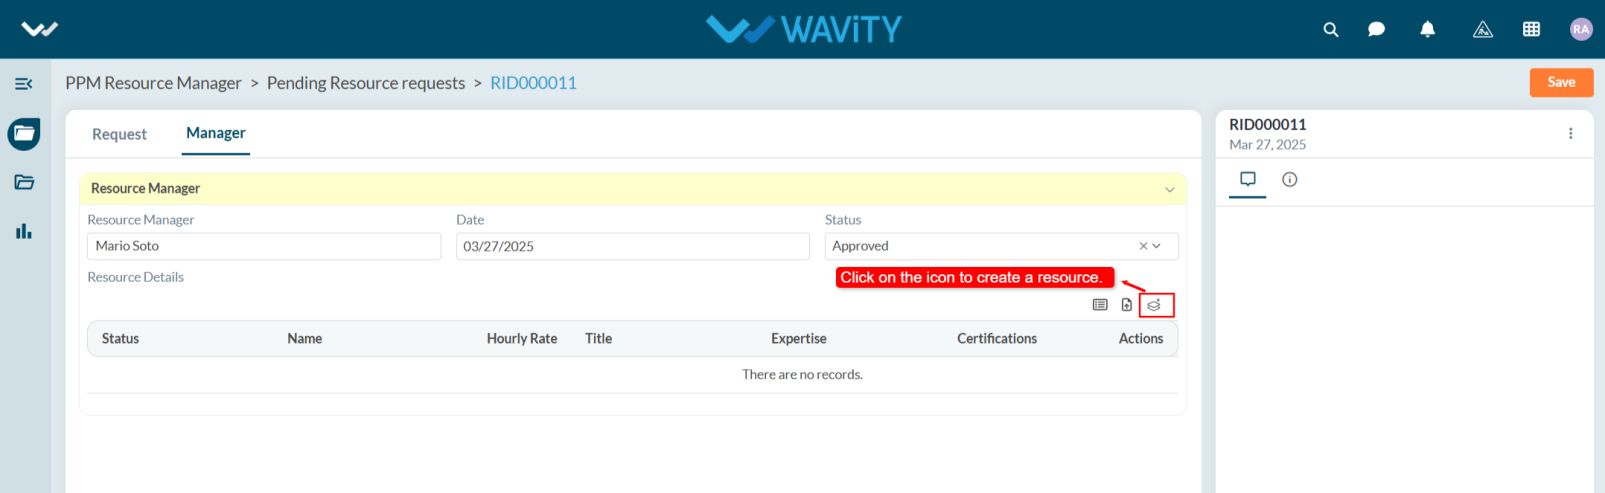
- Under Resource Details, create the resource by clicking the Create New Records icon.
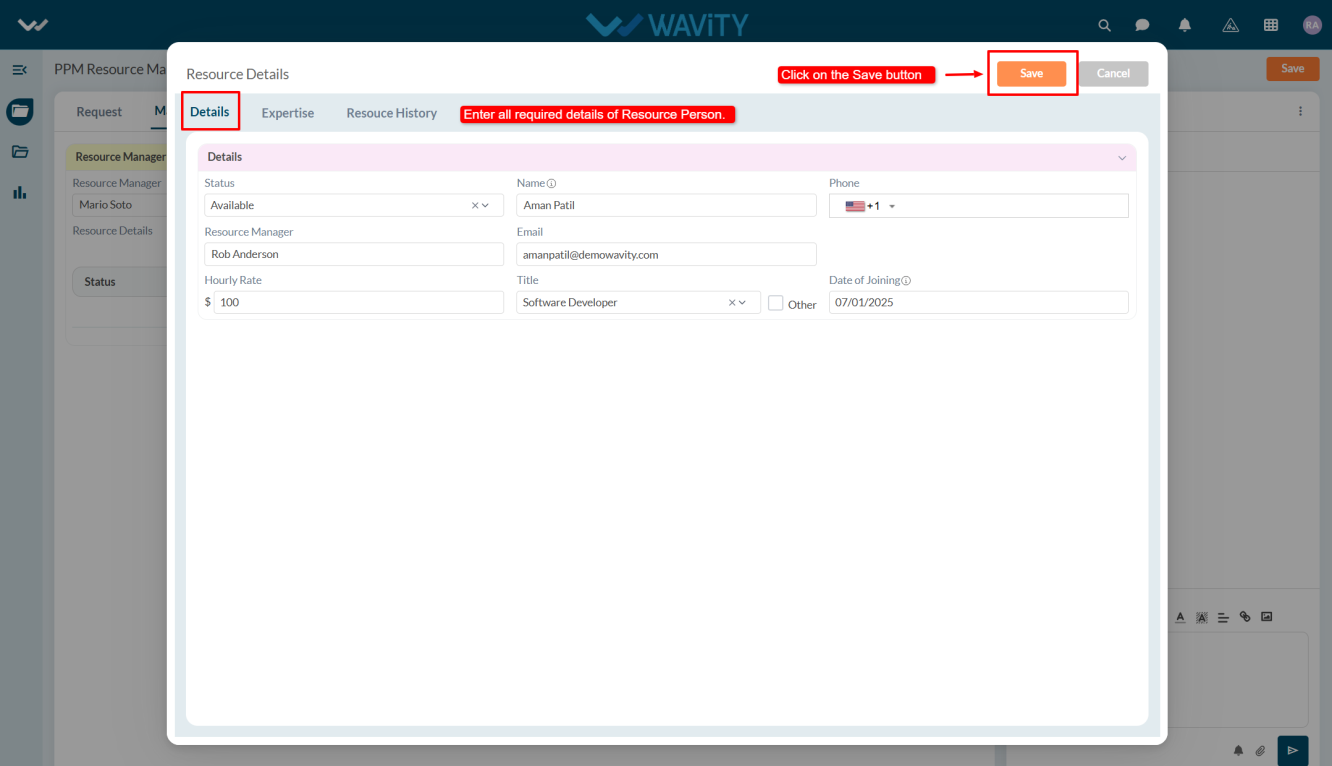
- In Details tab, enter all required details related to the resource person and click on the Save button.
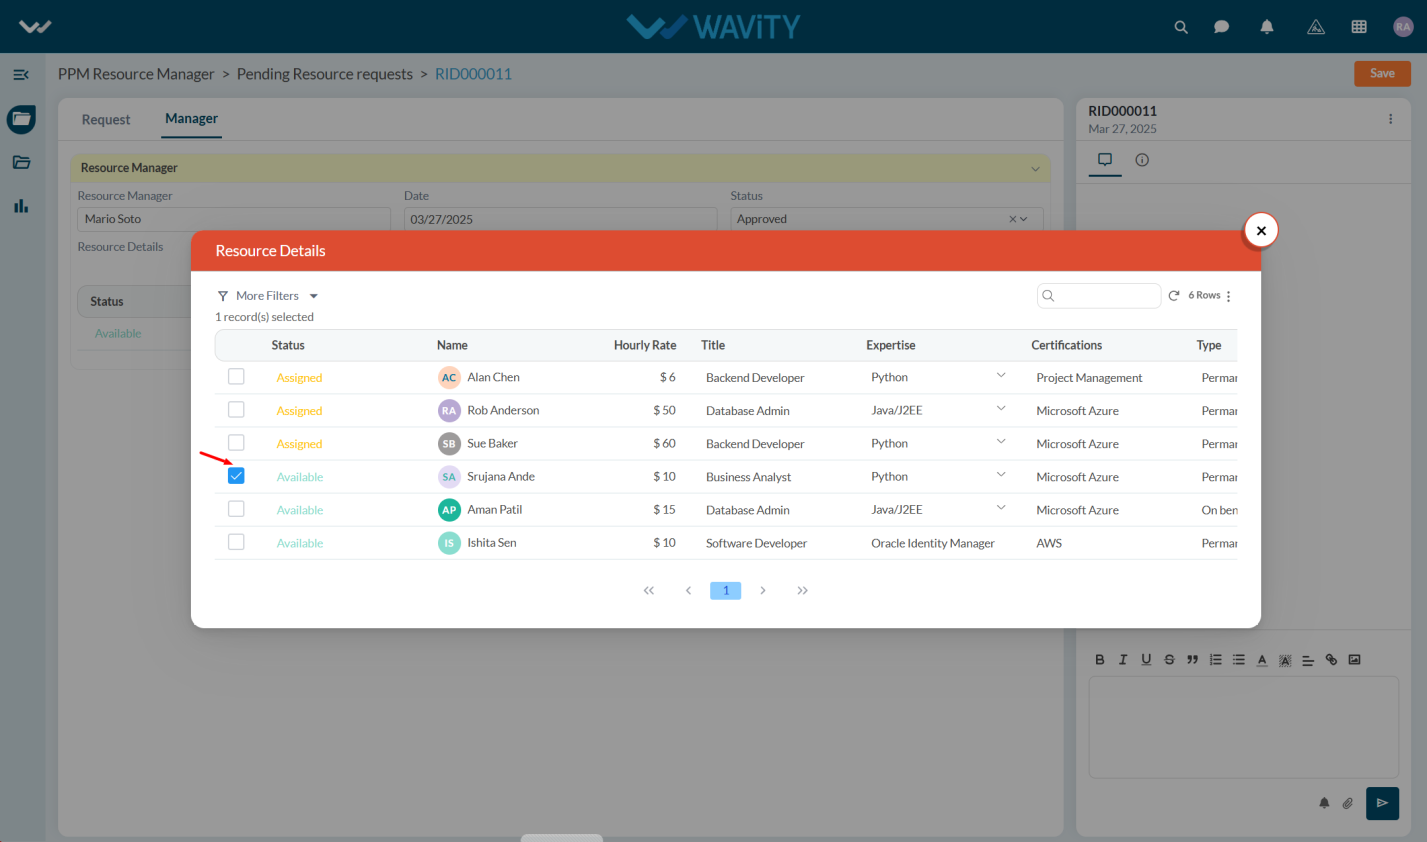
- To assign a resource, click the Select More Records icon.
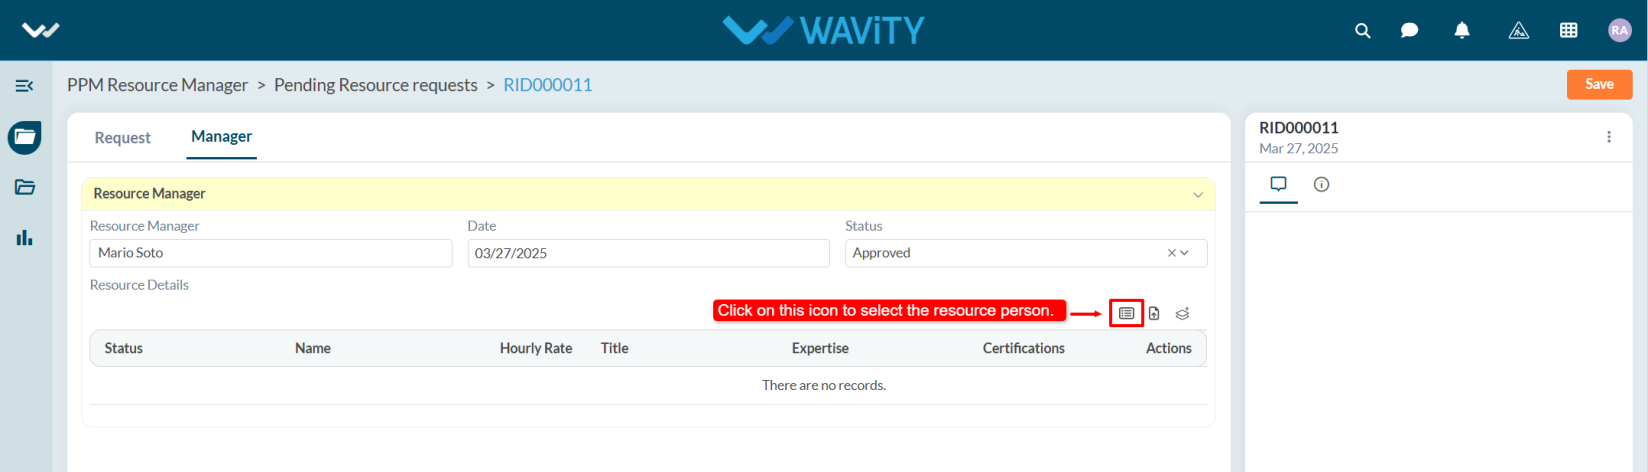
- Select the Resource Person from the list.
- After entering the details click on the Save details.