Resource Manager Guide: Adding New Resources
Resource Manager Guide: Adding New Resources
- In the Wavity PPM module, Resource Managers can easily add new resources.
- Only users with Resource Manager access can add resources.
- Note: The steps outlined below serve as sample instructions and can be customized to meet specific organizational needs; however, the core workflow remains unchanged.
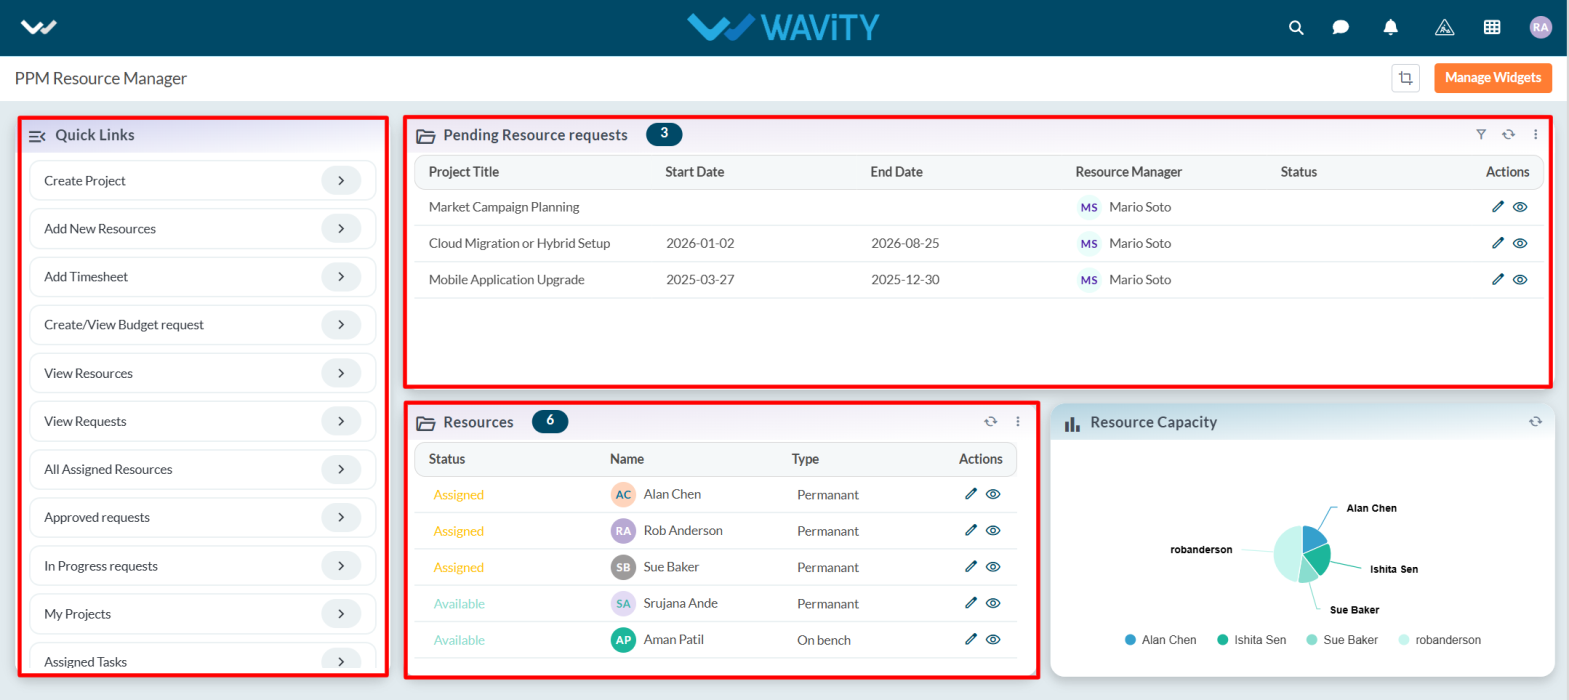
- Upon logging in with their credentials, users with Resource Manager access will land on the Resource Manager interface.
- They can track the status of requested resources via Quick Links, view pending requests under "Pending Resource Requests," and access all existing resources in the “Resource” table widget.
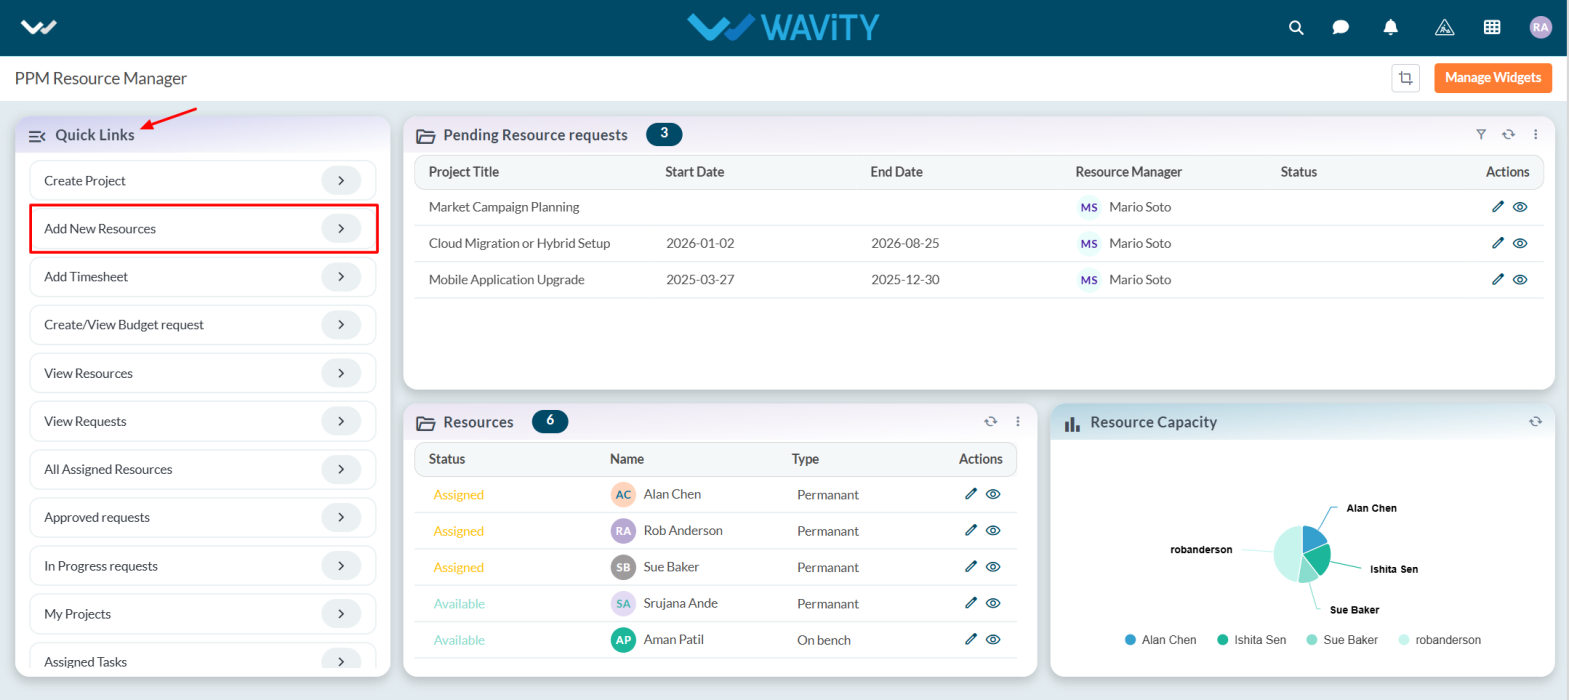
- To add a new resource, click on "Add New Resource" under Quick Links.
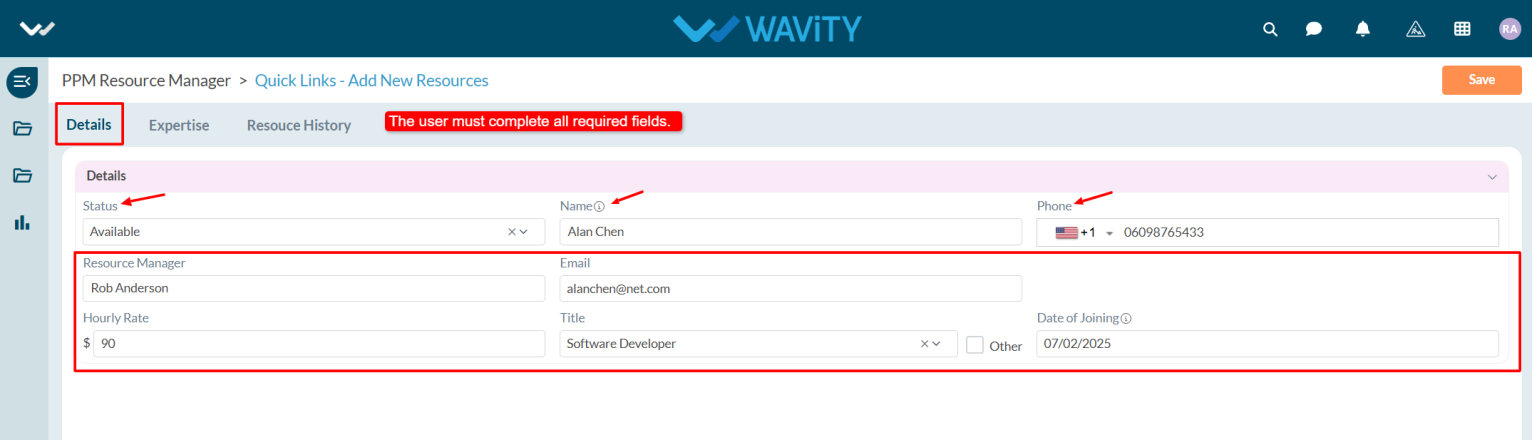
- The user will be navigated to the Details section, where they must fill in all required information.
- From the dropdown, select the status, enter the resource name in the Name field, specify the Resource Manager, provide the resource’s email address, set the hourly rate, choose the job title, and enter the Date of Joining.
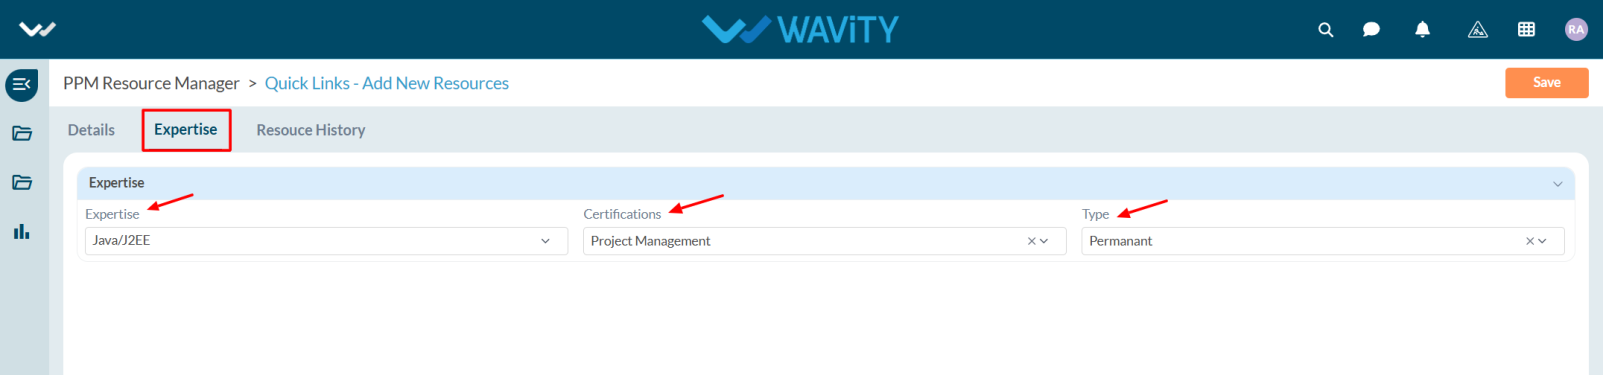
- In the Expertise tab, select the resource's area of expertise and certifications from the dropdown menu, and choose the Type (Bench or Permanent).
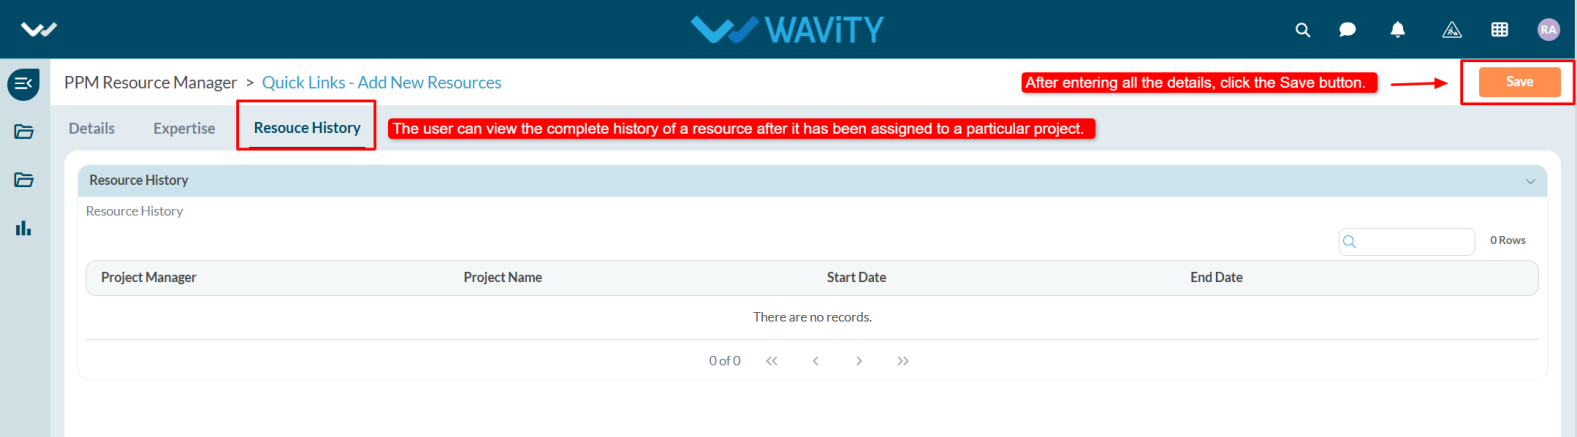
- After completing all required fields, click Save to add the new resource.
- Once the resource is assigned to a project, the complete assignment history will be captured and viewable in the Resource History section.