Project Creation in PPM: Overview
Project Creation in PPM: Overview
- Wavity enables manager’s to create and manage a comprehensive Project Portfolio Management (PPM) system, allowing organizations to oversee multiple projects, prioritize initiatives, allocate resources effectively, and ensure alignment with strategic objectives.
- Through Wavity intuitive interface, managers can track project performance, monitor progress, and make informed decisions across the entire project portfolio.
- In Wavity Project Portfolio Management module, each key role including the PMO (Project Management Office), Portfolio Manager, Project Manager, Resource Manager, and Team Member is associated with its own dedicated persona, allowing for tailored access, workflows, and responsibilities specific to their function within the project lifecycle.
- Note: The steps provided serve as sample instructions and can be customized based on specific requirements; however, the core workflow will remain the same.
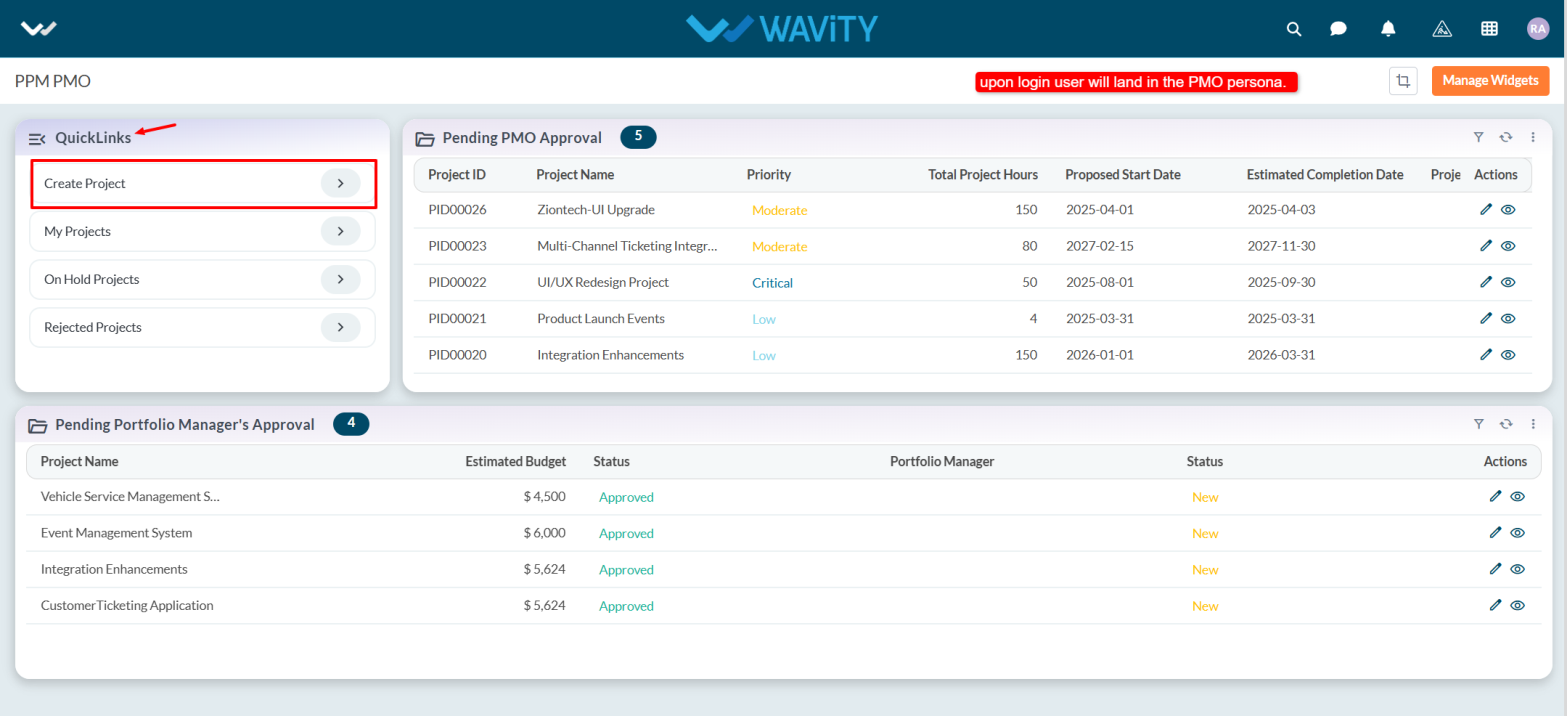
PMO (Project Management Office)
- Users with PMO access can log in using their credentials and will be directed to the PMO persona.
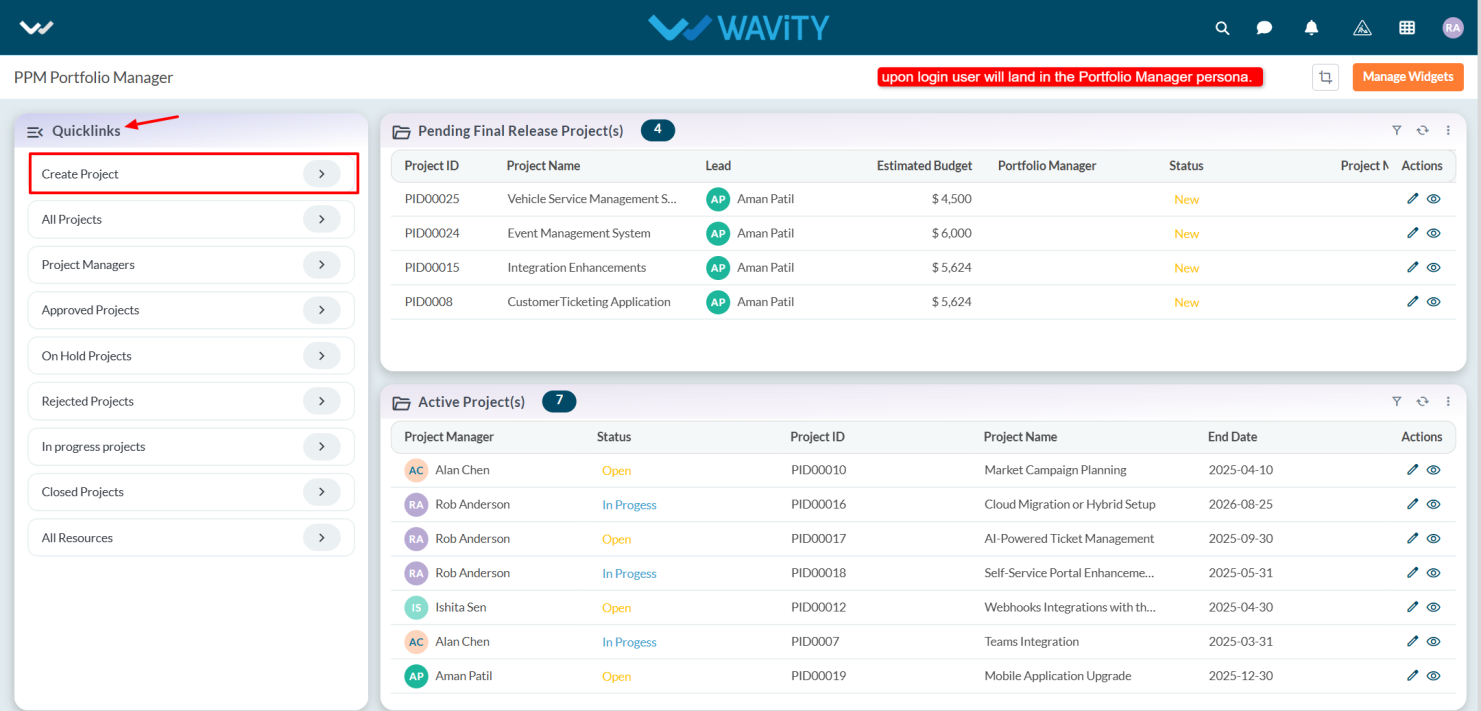
- The PMO can create a new project via the Quick Links.
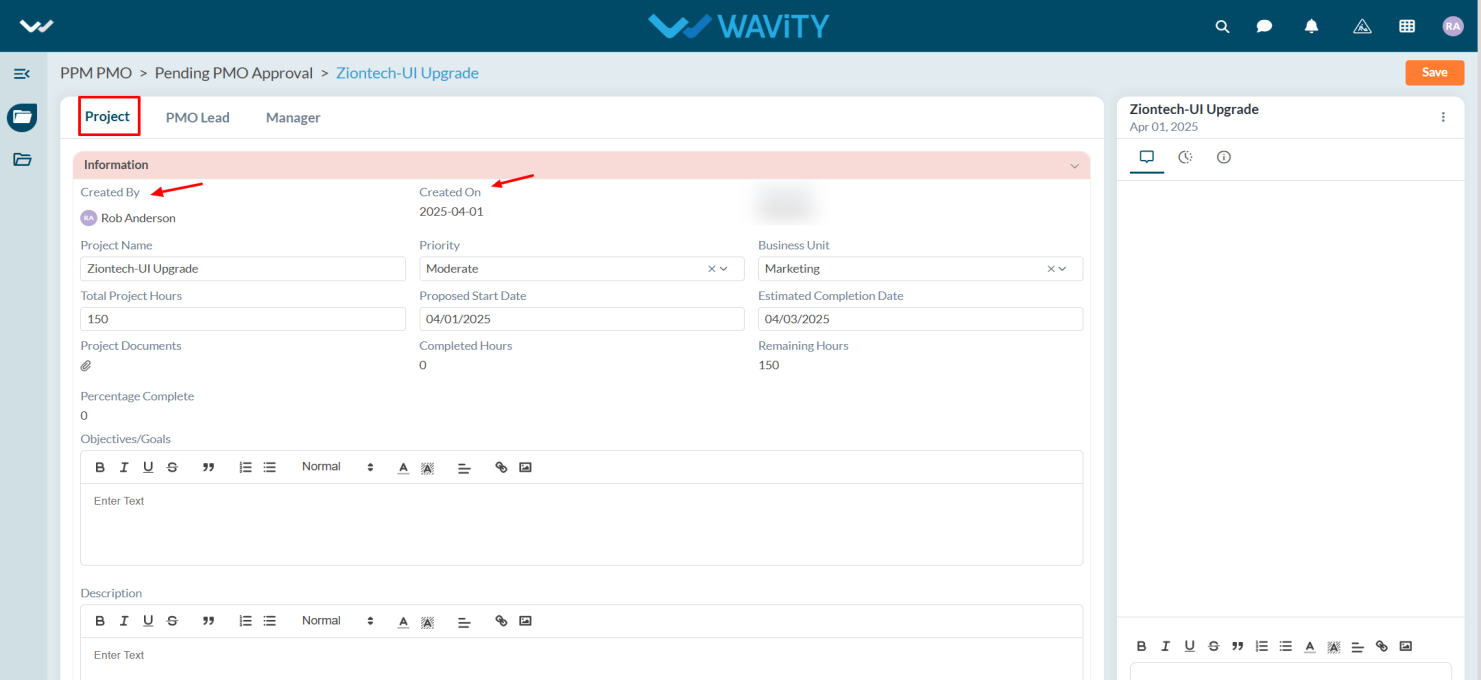
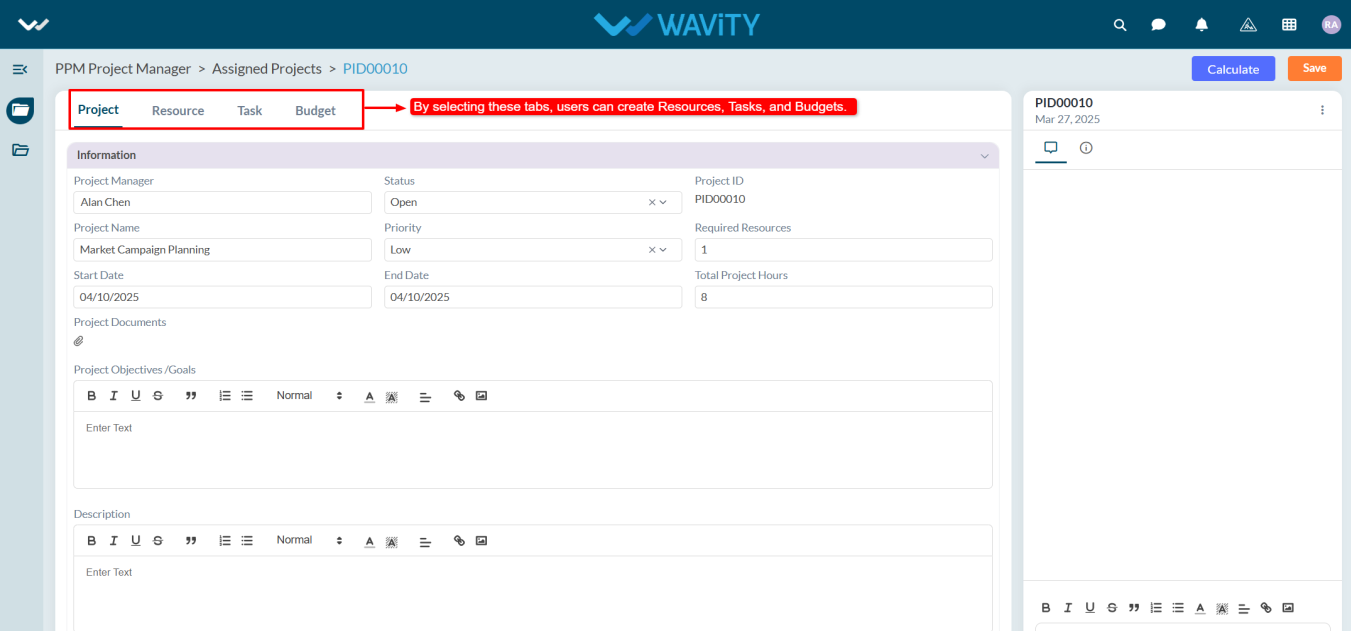
- Under the Project tab, navigate to the Information section, fill in all required details.
- The system will automatically capture the requester's name and the submission date.
- Select the appropriate Business Unit from the dropdown menu.
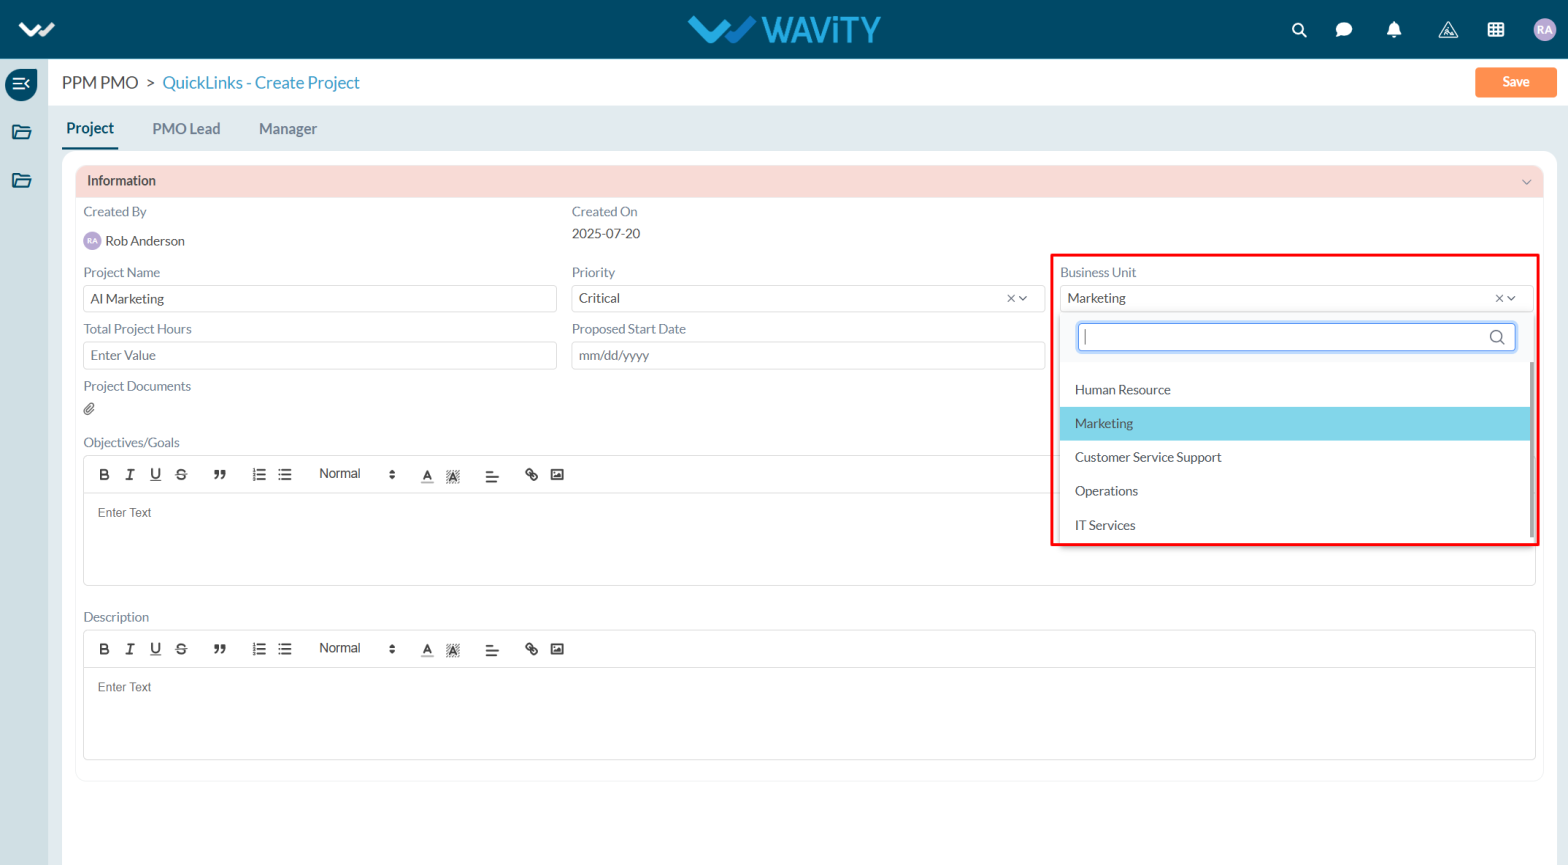
- While creating a project in Wavity, users must provide key timeline details, including the total estimated project hours, the proposed start date, and the estimated completion date.
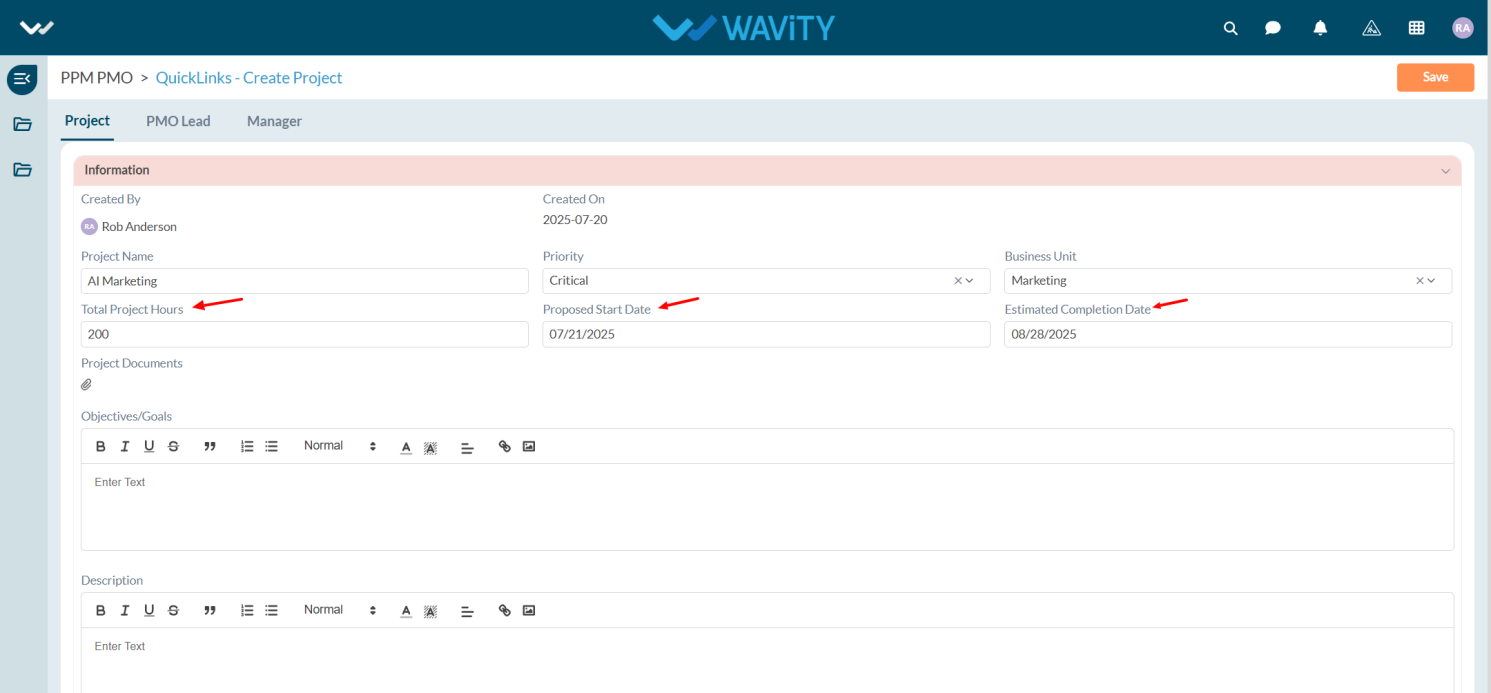
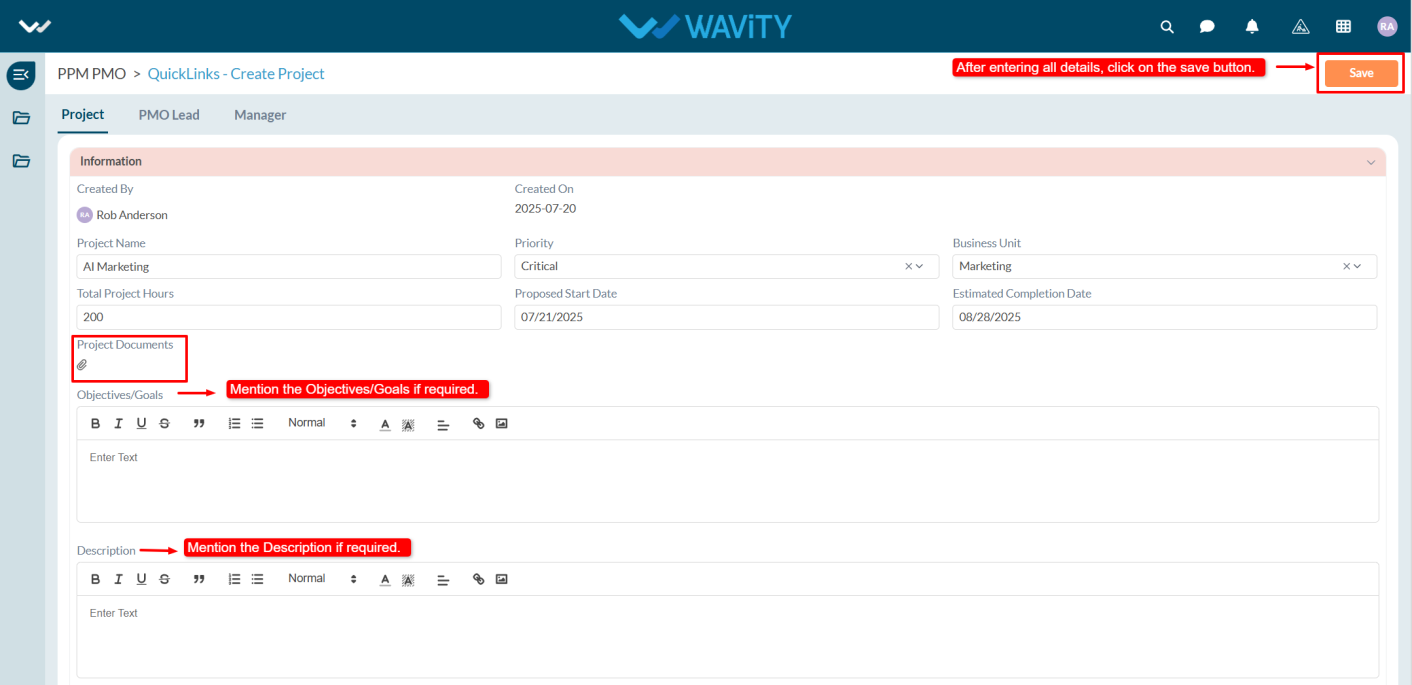
- If you have any supporting documents, you can attach them under Project Documents. Optionally, you may also include the project’s Objectives/Goals and Description.
- Once all details are entered, click the Save button to apply the changes.
Portfolio Manager
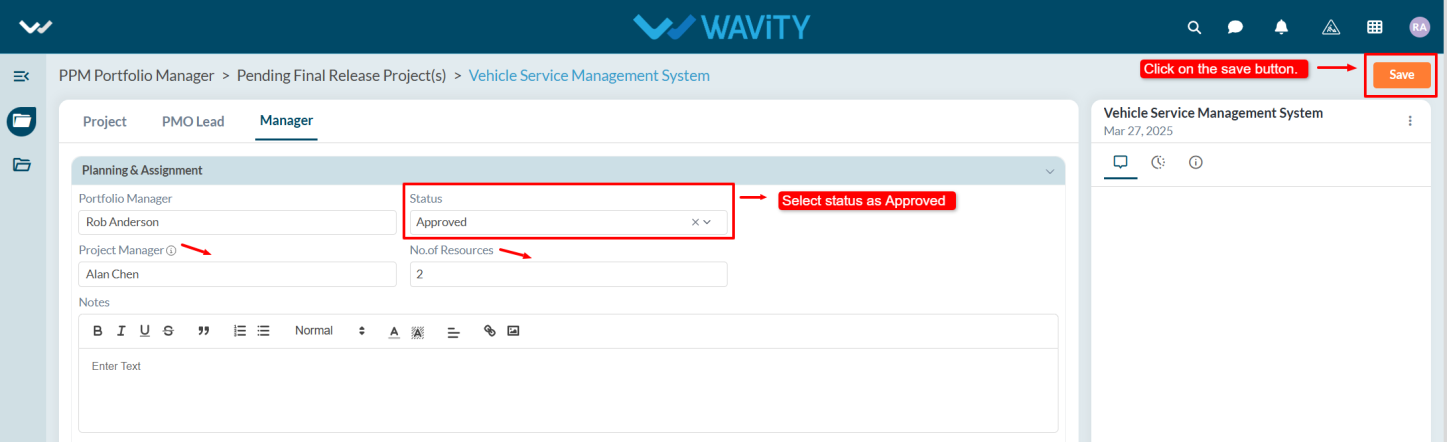
- The Portfolio Manager has the authority to create and approve projects, as well as assign a Project Manager.
- Users with Manager access can create projects.
- Managers can initiate project creation by selecting Create a Project from the Quick Links.
- Under the Project tab, the Manager enters the necessary details and clicks Save to record the project.
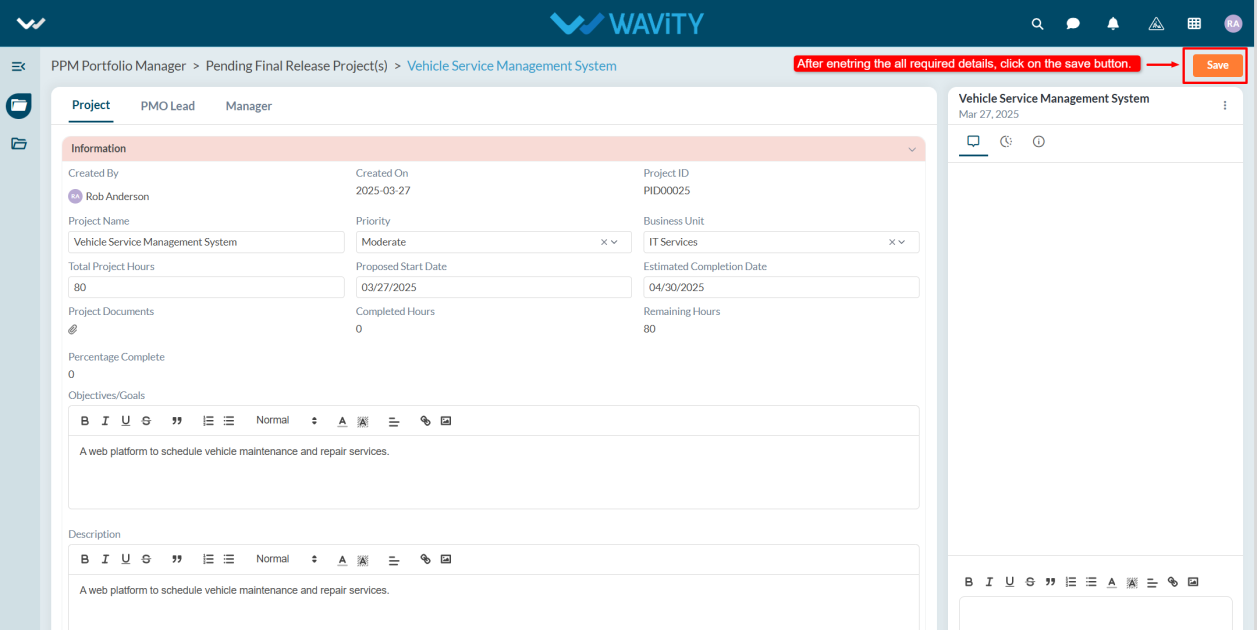
- In the Manager tab, the Portfolio Manager approves the project after it has been approved by the PMO Lead in the PMO Lead tab, assigns a Project Manager, specifies the required number of resources, and saves the record.
Project Manager
- The Project Manager has access to create projects, assign tasks, manage and view the budget, submit and approve timesheets, and request resources.
- From the Quick Links section, the Project Manager can create a project by selecting Create Project, similar to the Portfolio Manager and PMO.
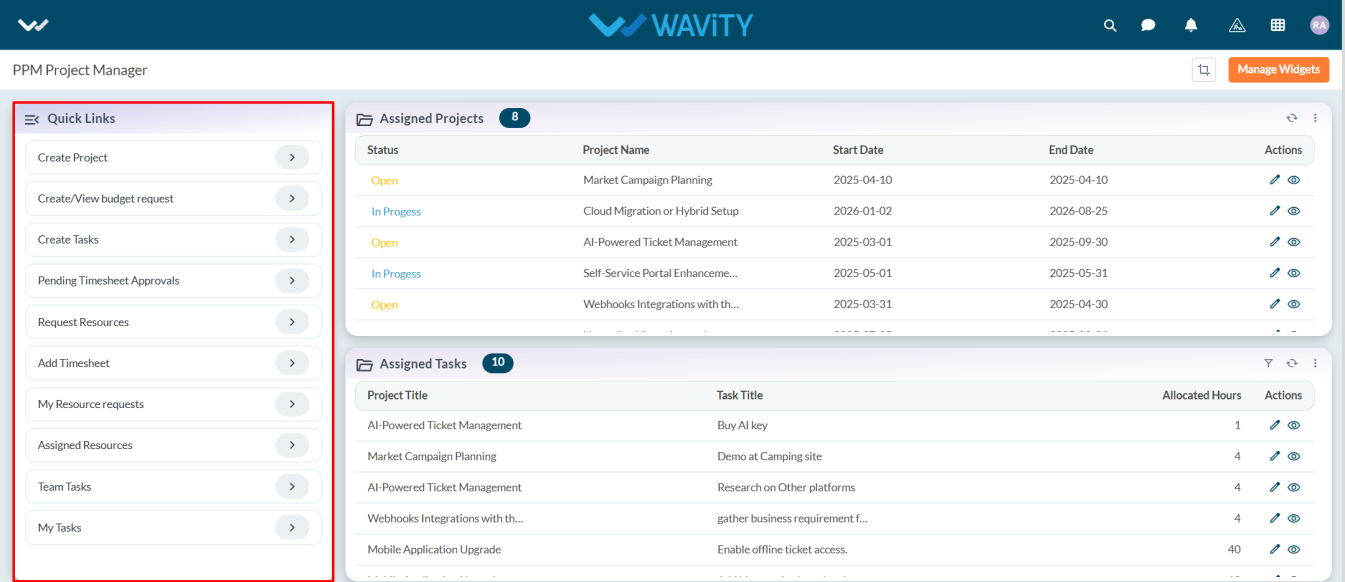
- The Project Manager works on assigned projects and can request resources, assign tasks, and submit budget requests for those projects.
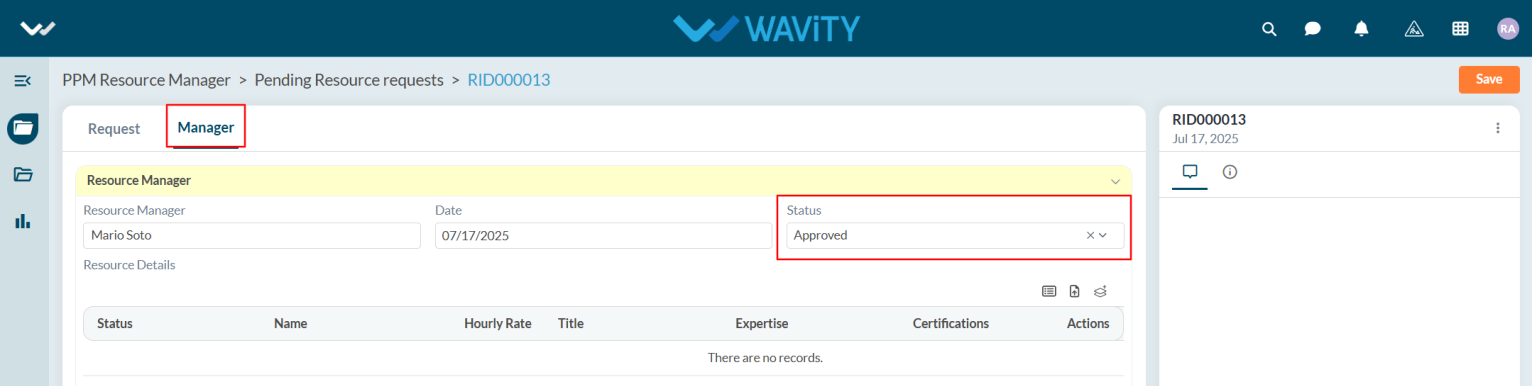
Resource Manager
- A user with Resource Manager access is responsible for approving resource allocations for specific projects. They can also add new resources, create projects, and creates timesheets.
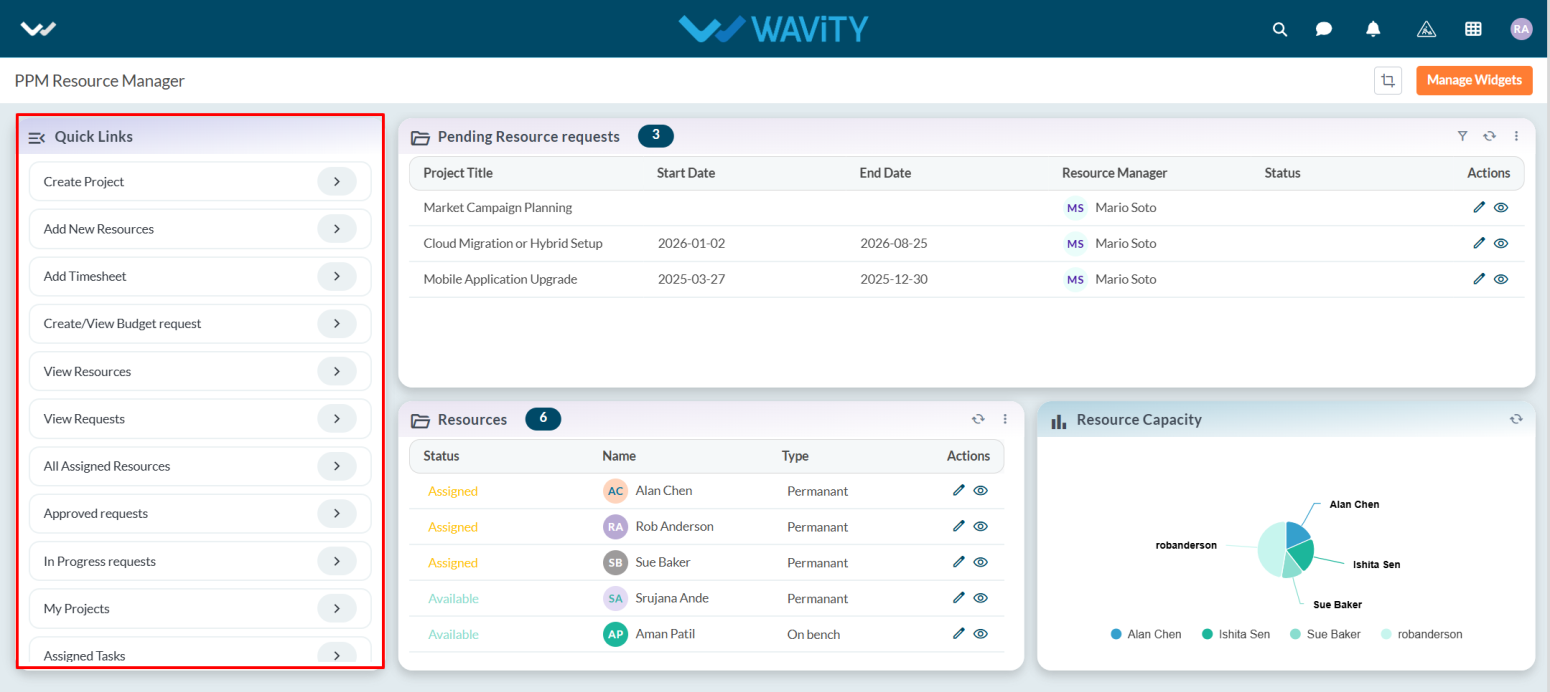
- In the Pending Resource Requests table under the Manager tab, the Resource Manager approves requests by changing the status to Approved.
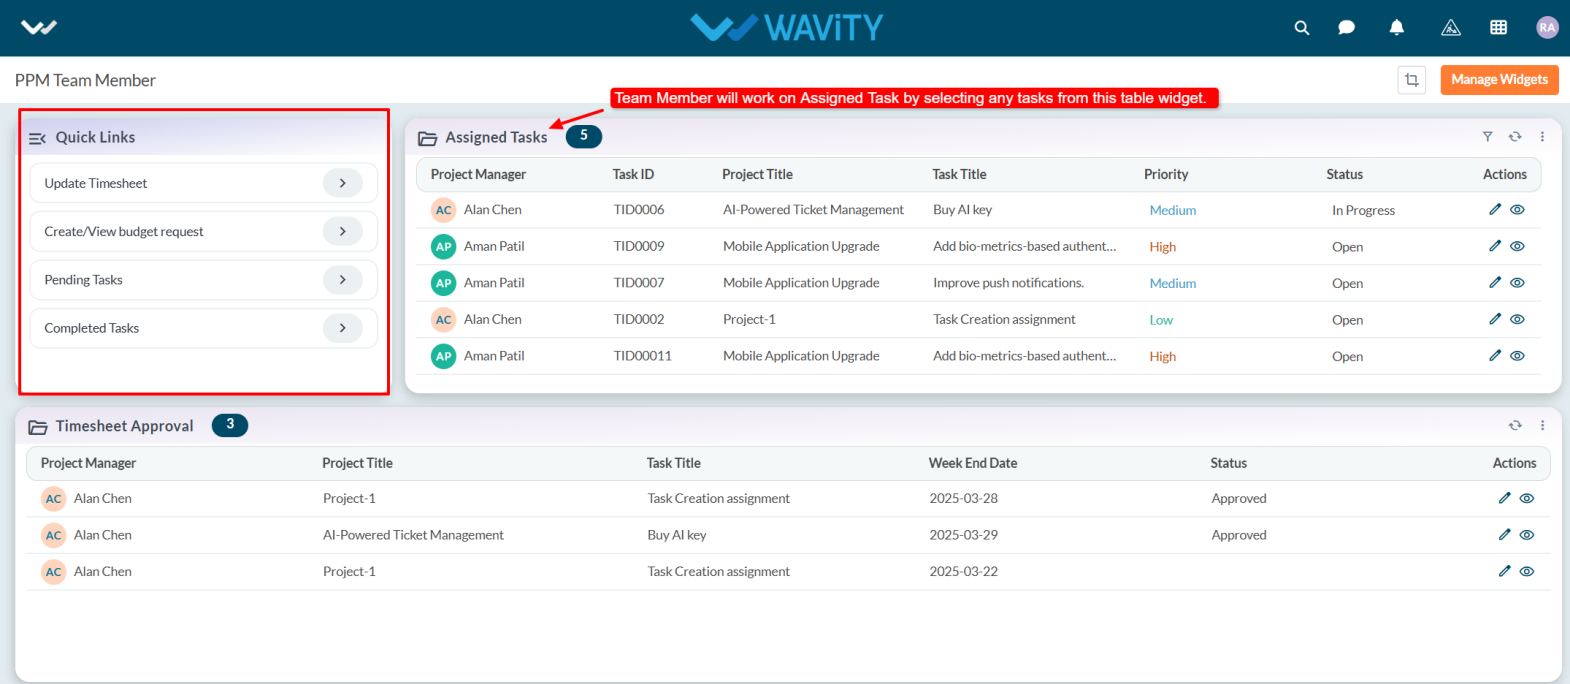
Team Member
- Team Members work on assigned tasks, update timesheets, and have access to create budgets.
- Team Members do not have access to create projects.