How to Use the Export Functionality in Wavity
How to Use the Export Functionality in Wavity?
- Wavity provides Export and Import functions within its platform
- The Export functionality allows you to export all fields from any application, including templates and data, into Excel sheets or PDF documents.
- Follow the steps below to perform Export functions in the Wavity platform.
- Log in to the Wavity platform. Based on your role, you will have access to your dashboard.
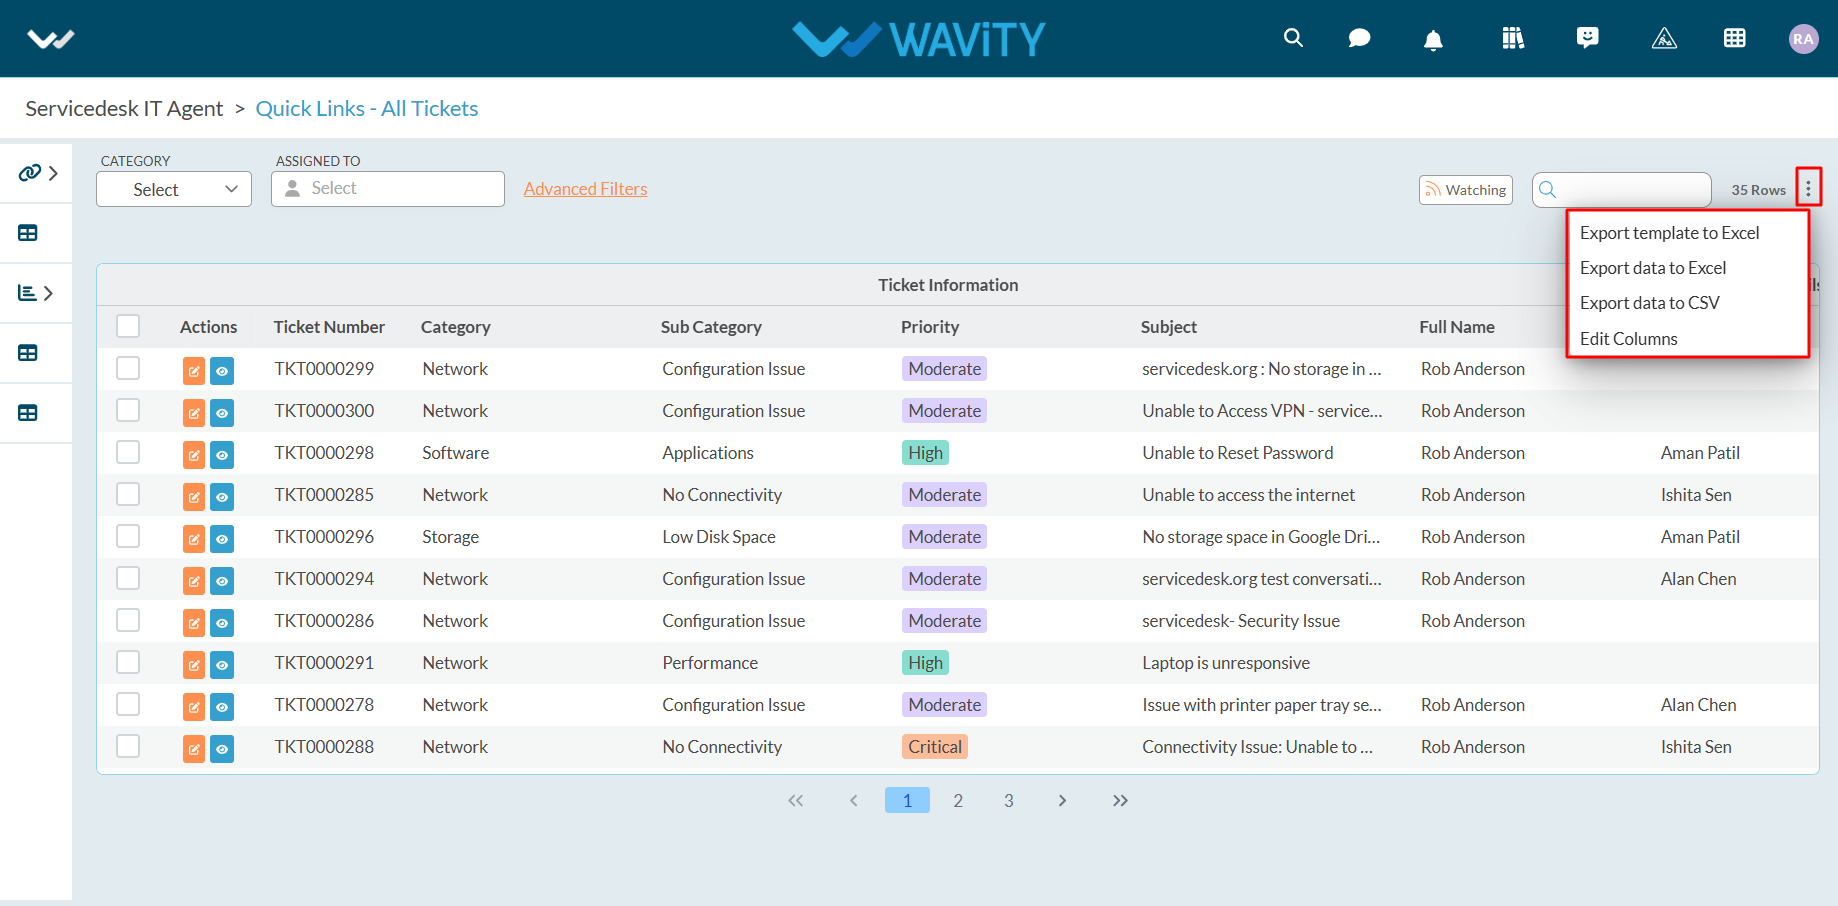
- From the quick Links, click on the application (e.g., "All Tickets") that contains the data you want to export. Refer to the image below for guidance.

- Export Template to Excel: Use this function to export the application's template in Excel format.
- Click on "Export Template to Excel".
- Select "Ignore Reference Applications" if needed and click "Export."
- Ignore Reference Applications: Check this box to exclude reference applications from the export. If unchecked, reference applications will be included in the exported template.

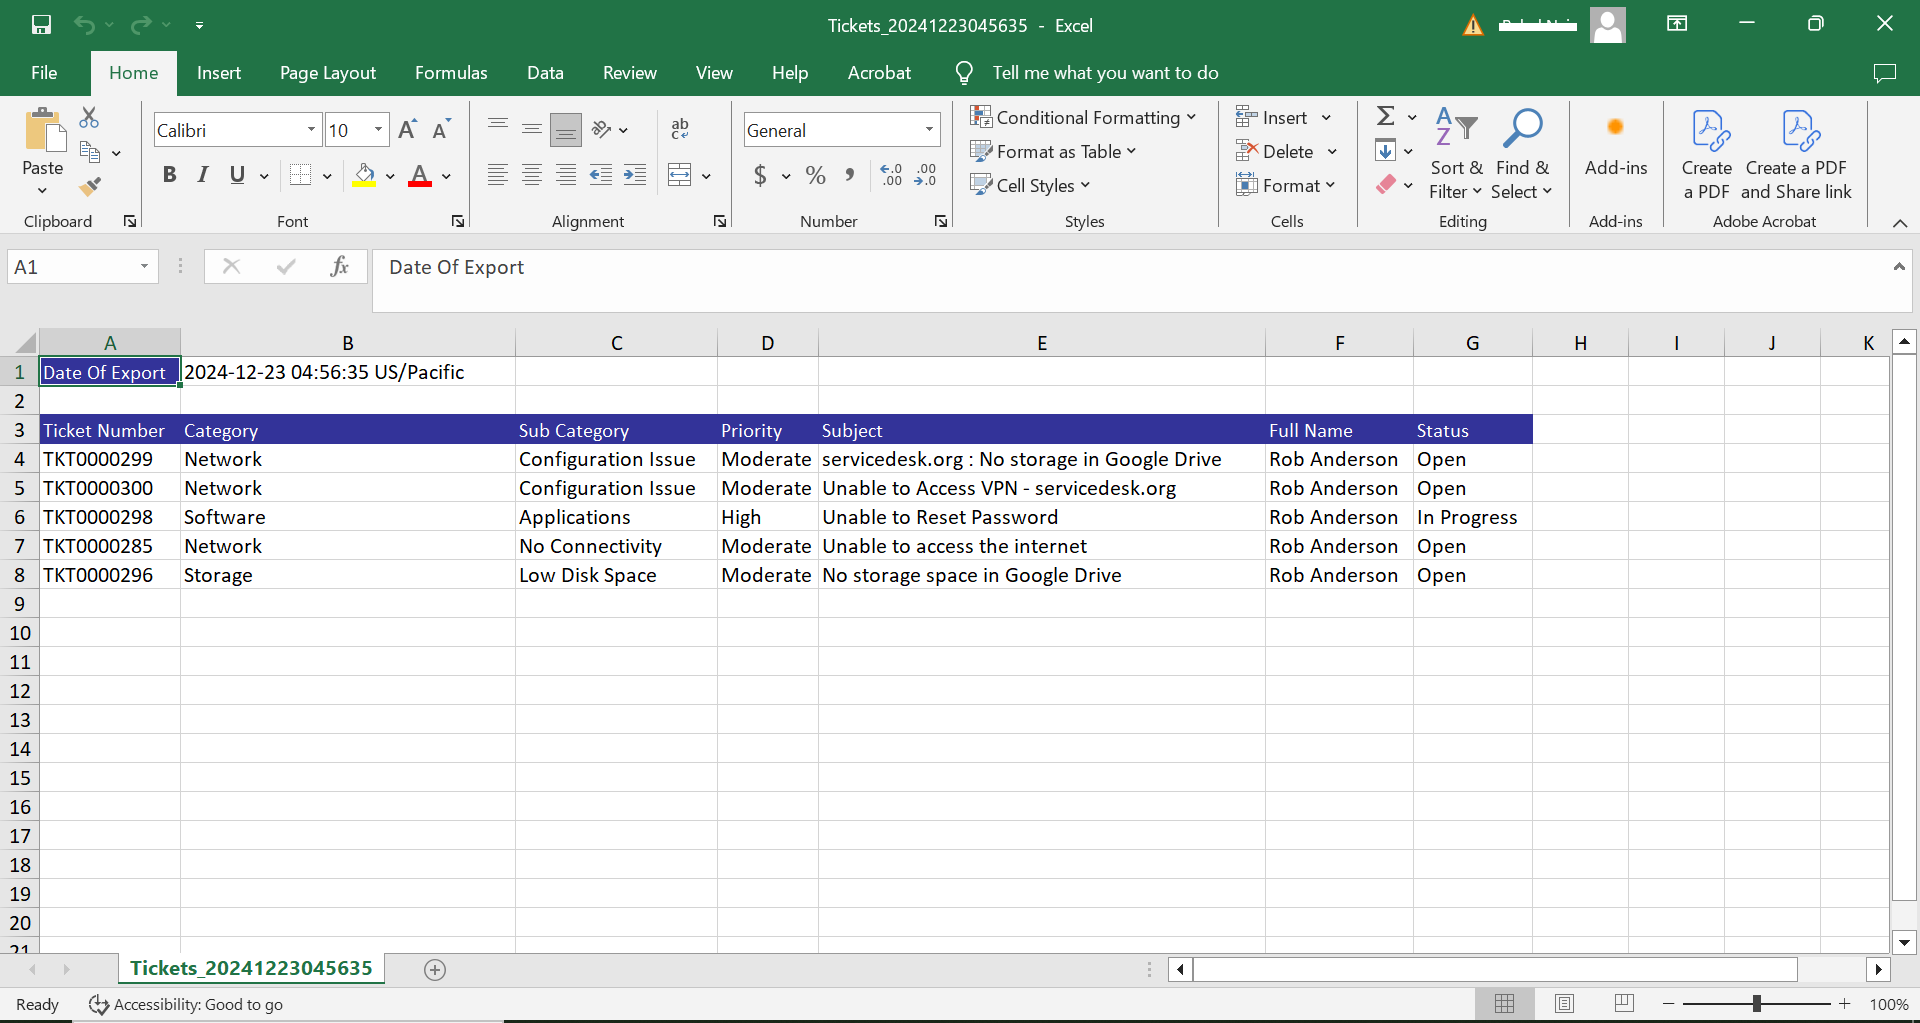
- Once you click on "Export," the Excel sheet containing the template will be downloaded to your system.
- Refer to the image below for an example of the downloaded Excel sheet.

- Export Data to Excel: Use this function to export all the data from the application in Excel format.
- Before exporting data to Excel, you can modify the columns or data fields you wish to include in the export.
- To do this, click on ‘Edit Columns’ and make the necessary adjustments to the data fields.

- All available data fields will be displayed in the dropdown.
- The currently selected data fields will have a tick mark indicating they are included in the export.
- Select the data fields you want to include in the export and deselect any fields that are not needed.

- Once you select the data fields, they will immediately appear in the list.
- Review the selected data fields to ensure the correct fields are included before exporting the data to Excel.

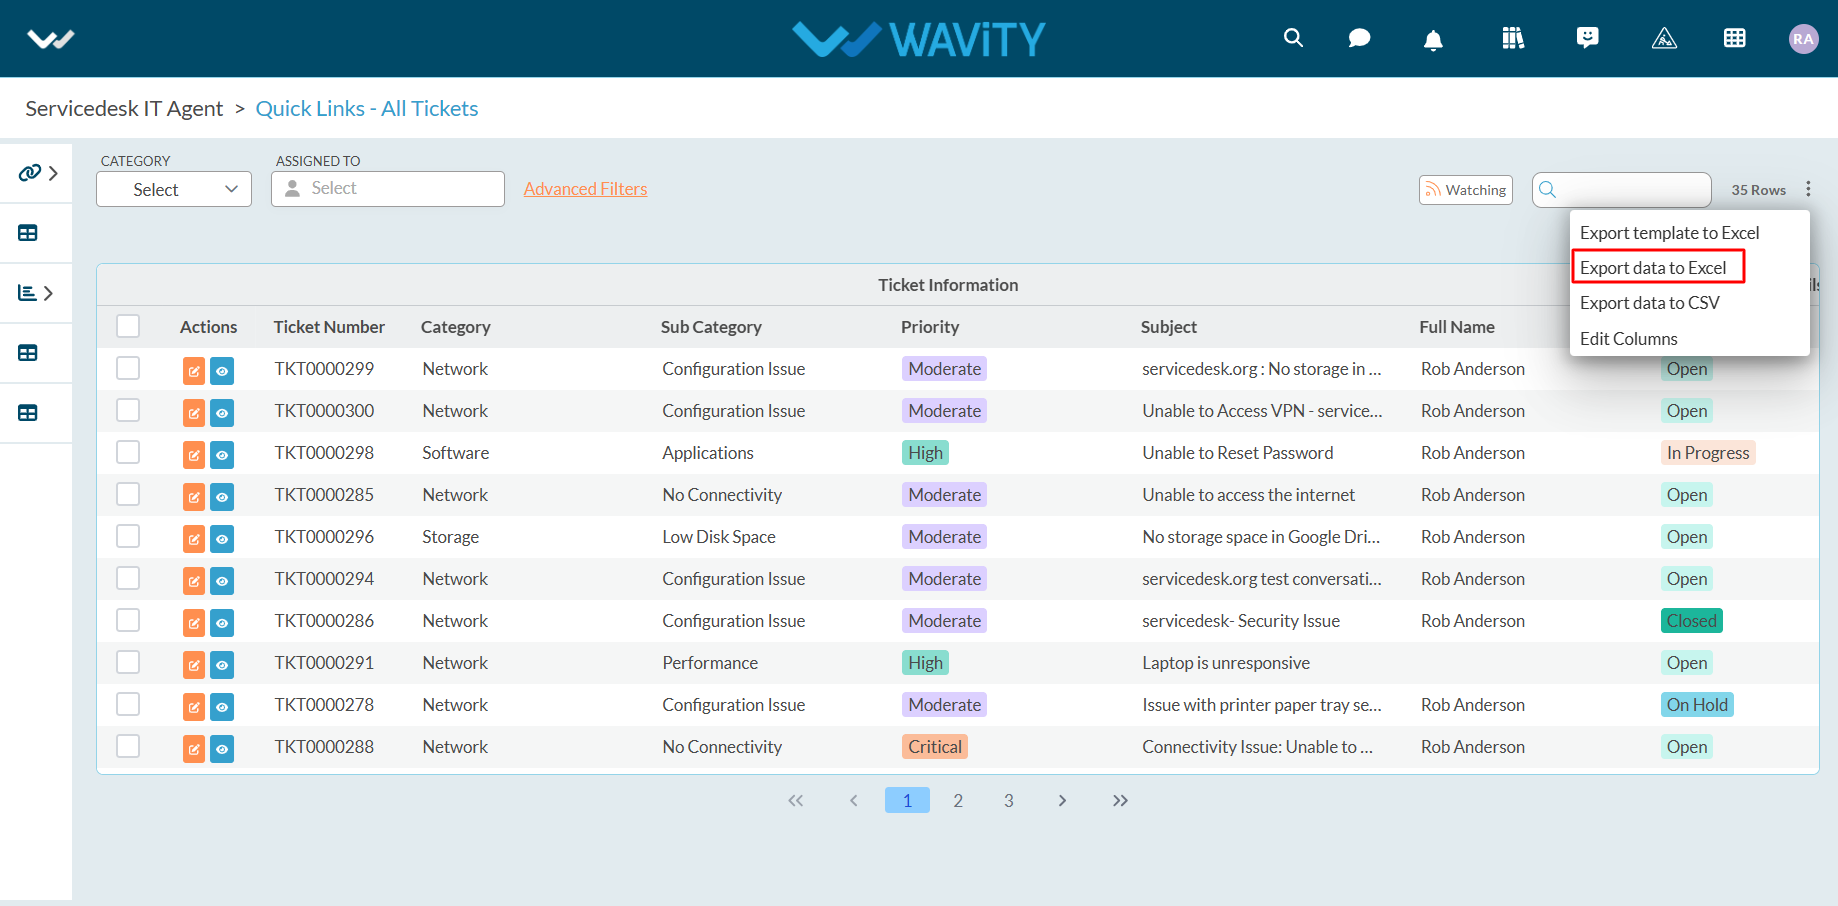
- Click on "Export Data to Excel" as shown below.
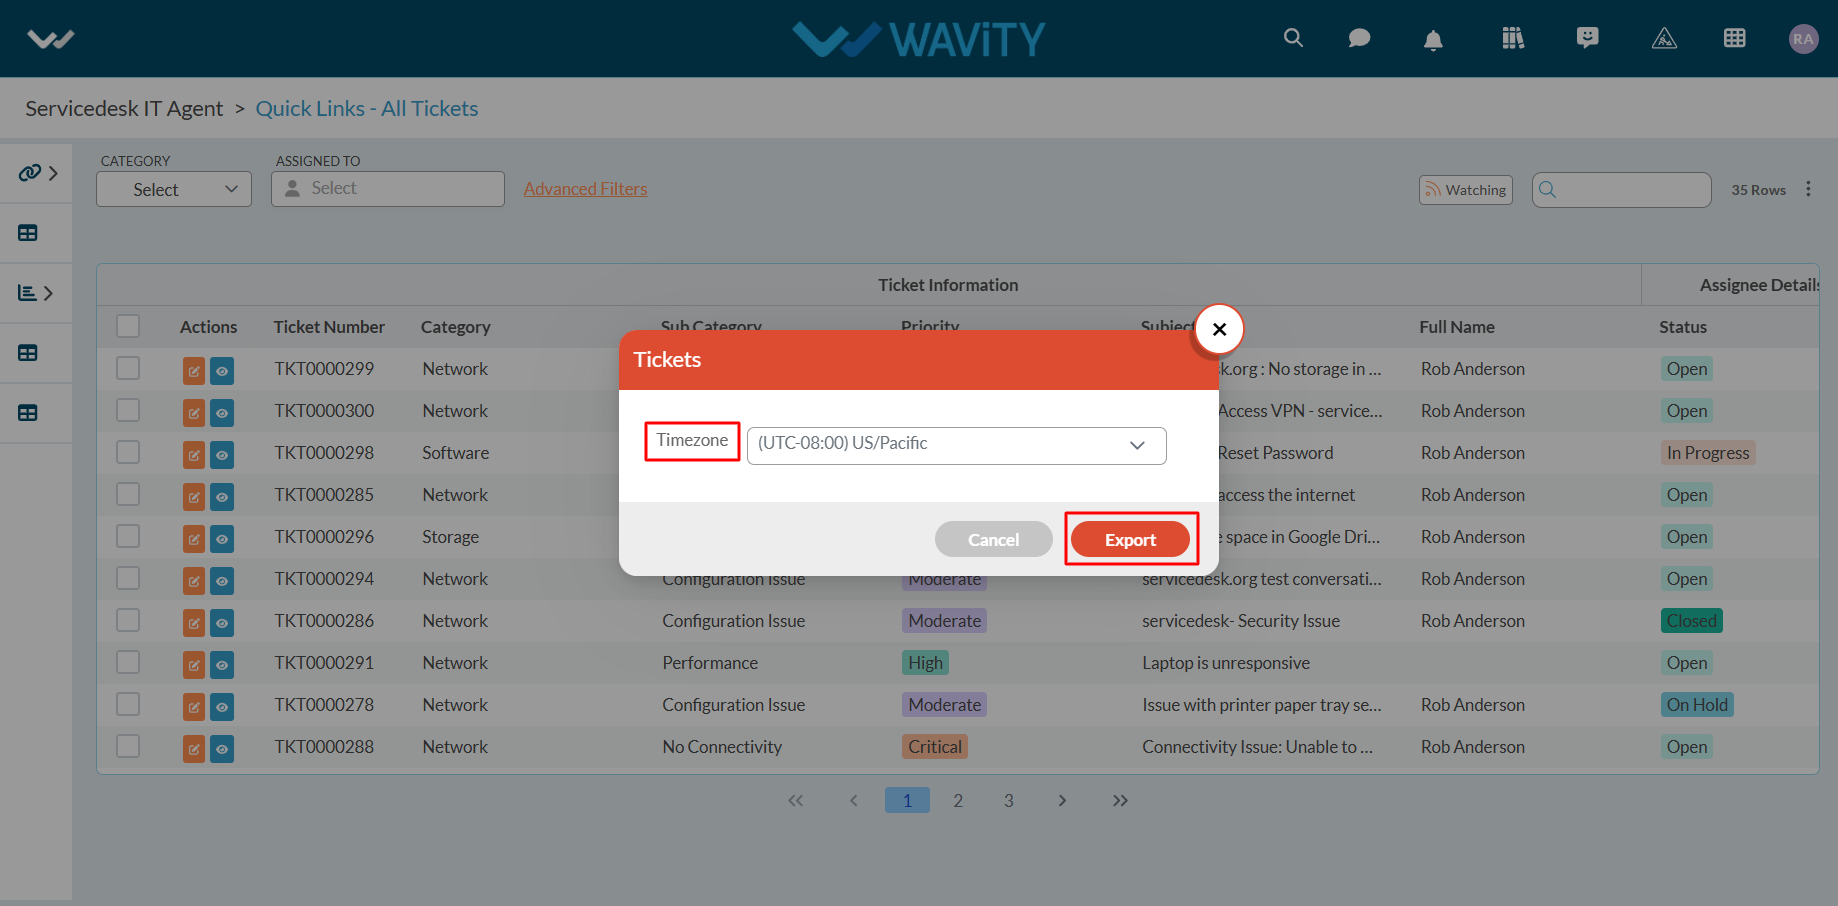
- Select your organization's time zone from the dropdown menu. For example, if your organization uses the PST time zone, select "US/Pacific" as shown below.
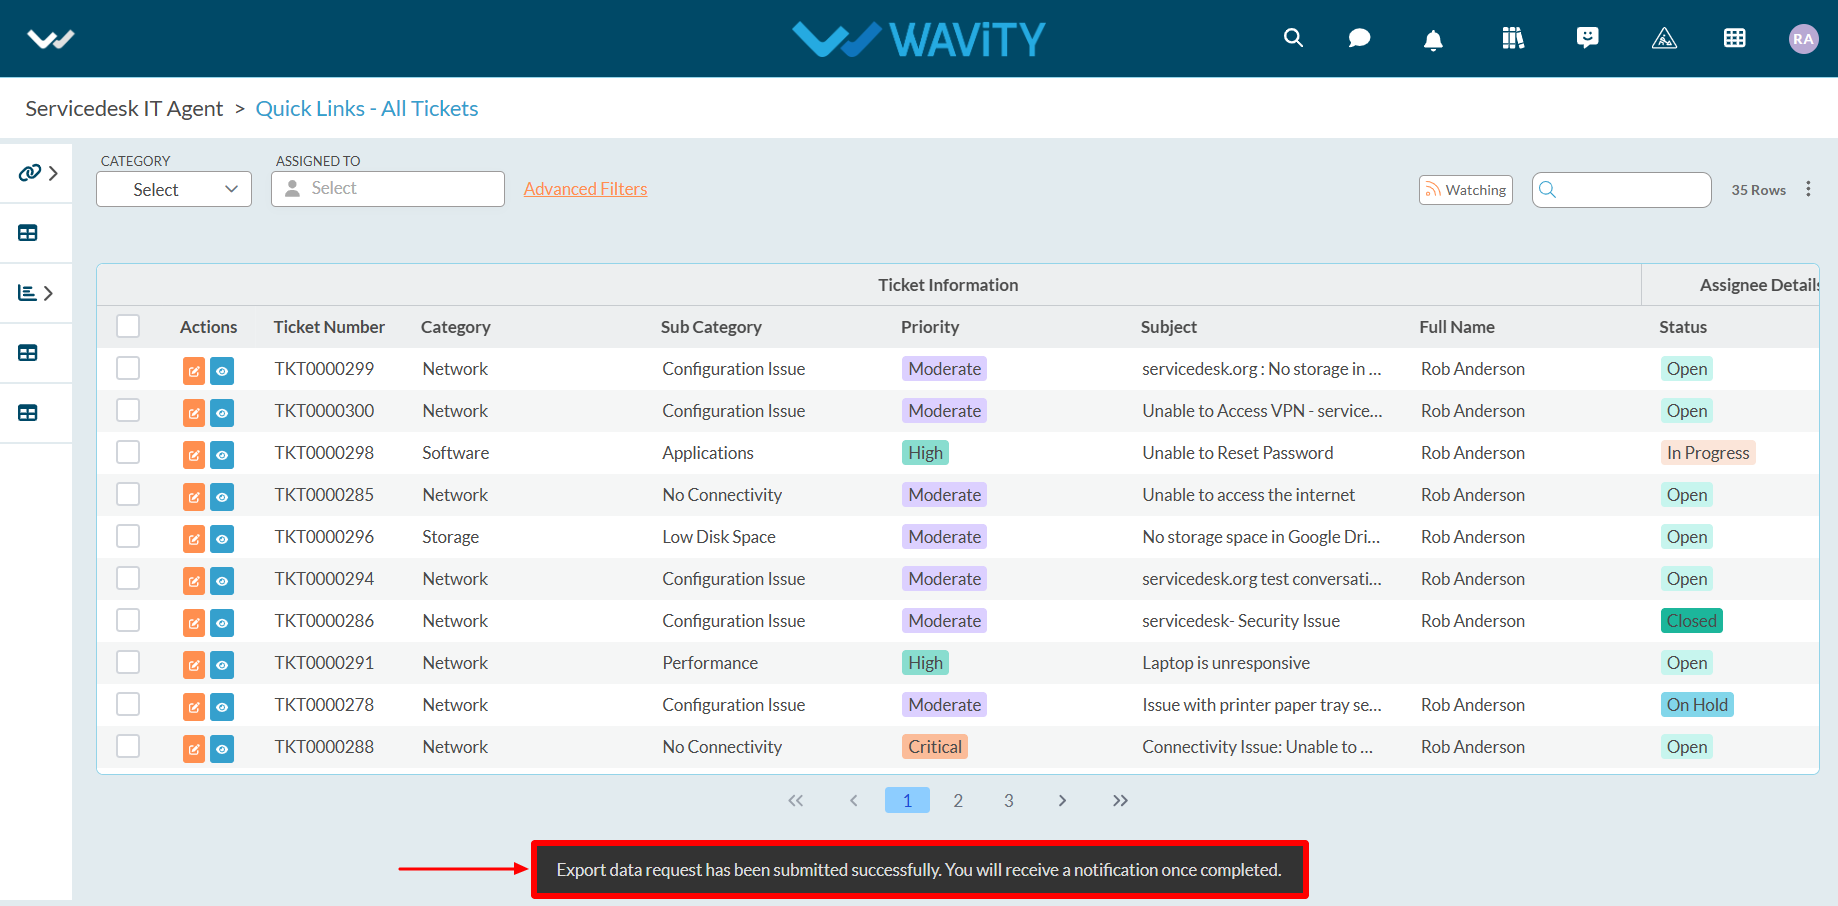
- Click "Export" after selecting the time zone.
- Upon successful completion of the export, a confirmation message will appear: "Export Data request has been submitted successfully."
- Click on the bell icon in the top-right corner to view all notifications.
- Locate the notification for the export request and click on the blue link to download the Excel sheet.

- After clicking the link, the Excel sheet containing the data and template will be downloaded to your system. Refer to the image below for reference.

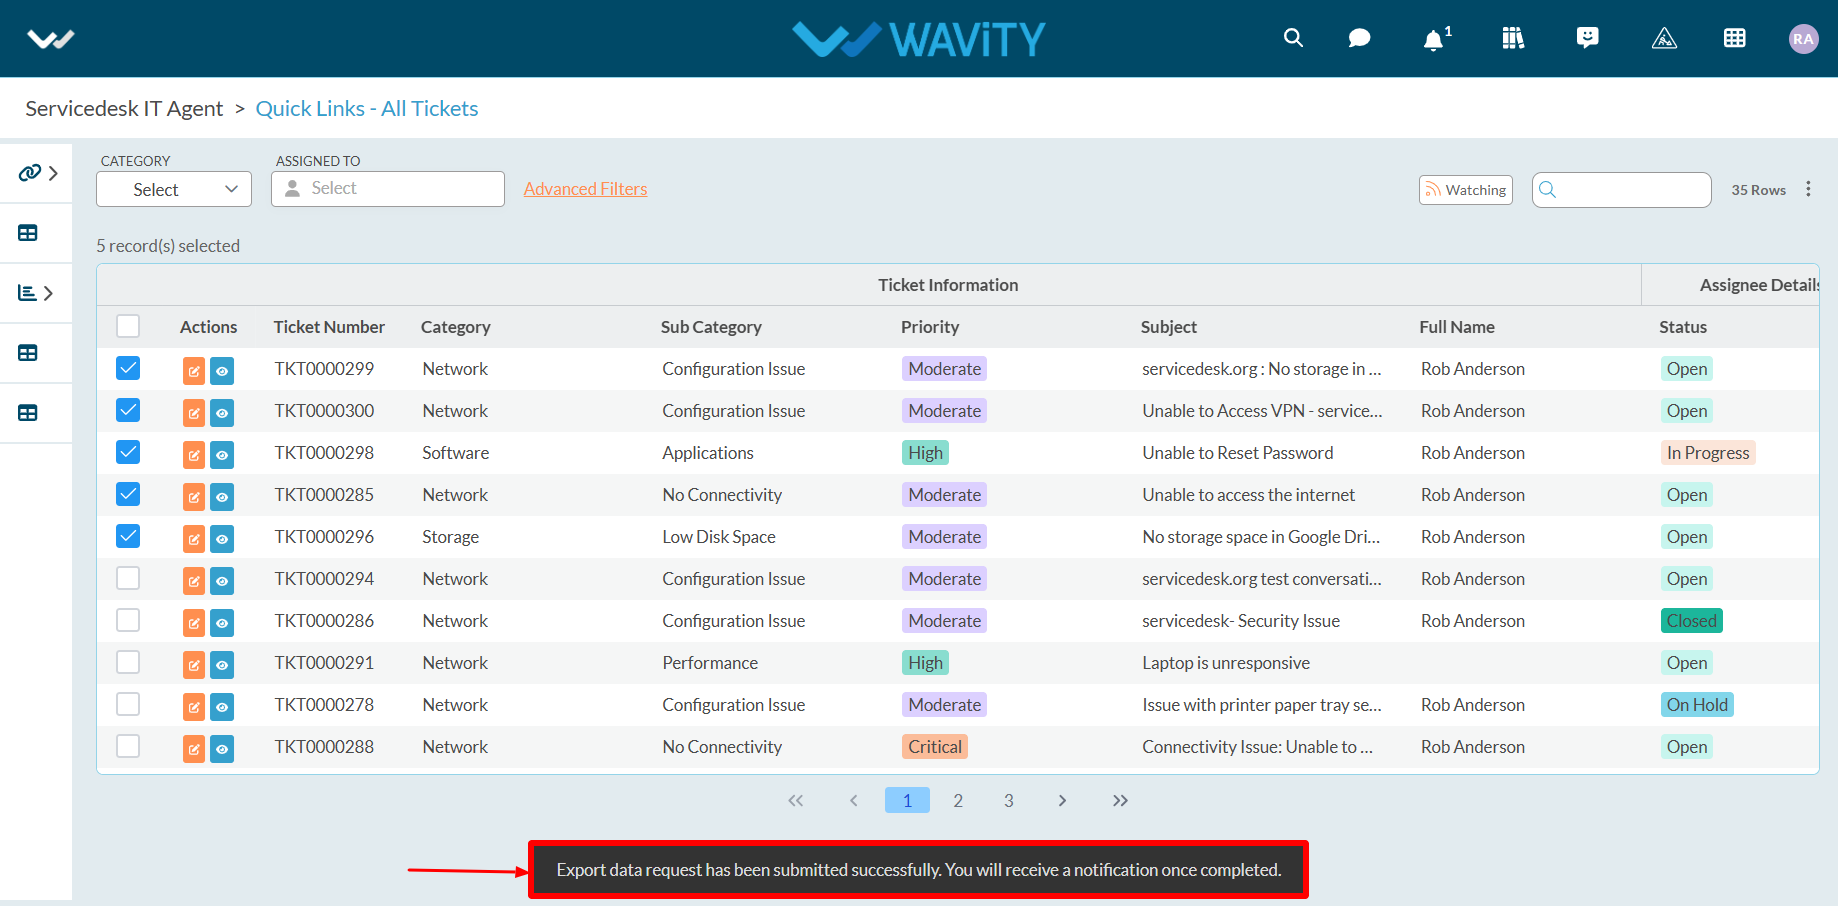
- Export of Selected data to Excel: This function allows you to export only the selected data from an application into a new Excel sheet.
- Check the required data (using the left corner selection boxes) and click "Export Data to Excel."

- Select your organization's time zone from the dropdown menu. For example, if your organization uses the PST time zone, select "US/Pacific" as shown below.
- Click "Export" after selecting the time zone.

- Once the export is successfully completed, you will see a confirmation message: "Export Data request has-been submitted successfully."
- Click on the bell icon in the top-right corner to access notifications. Locate the notification and click the blue link to download the Excel sheet with the selected data.

- After downloading, the Excel sheet containing the selected data will be available on your system. Refer to the image below for reference.
- Similar steps can be followed to export data to CSV, PDF, and other formats.