How To Reassign A Ticket?
How to Reassign a Ticket?
- In Wavity, reassigning a ticket is straightforward and user-friendly. With minimal steps, agents can transfer tickets to the appropriate team or other agents, ensuring efficient resolution and smooth workflow management.
- Note: The steps provided serve as sample instructions and can be customized based on specific requirements; however, the core workflow will remain the same.
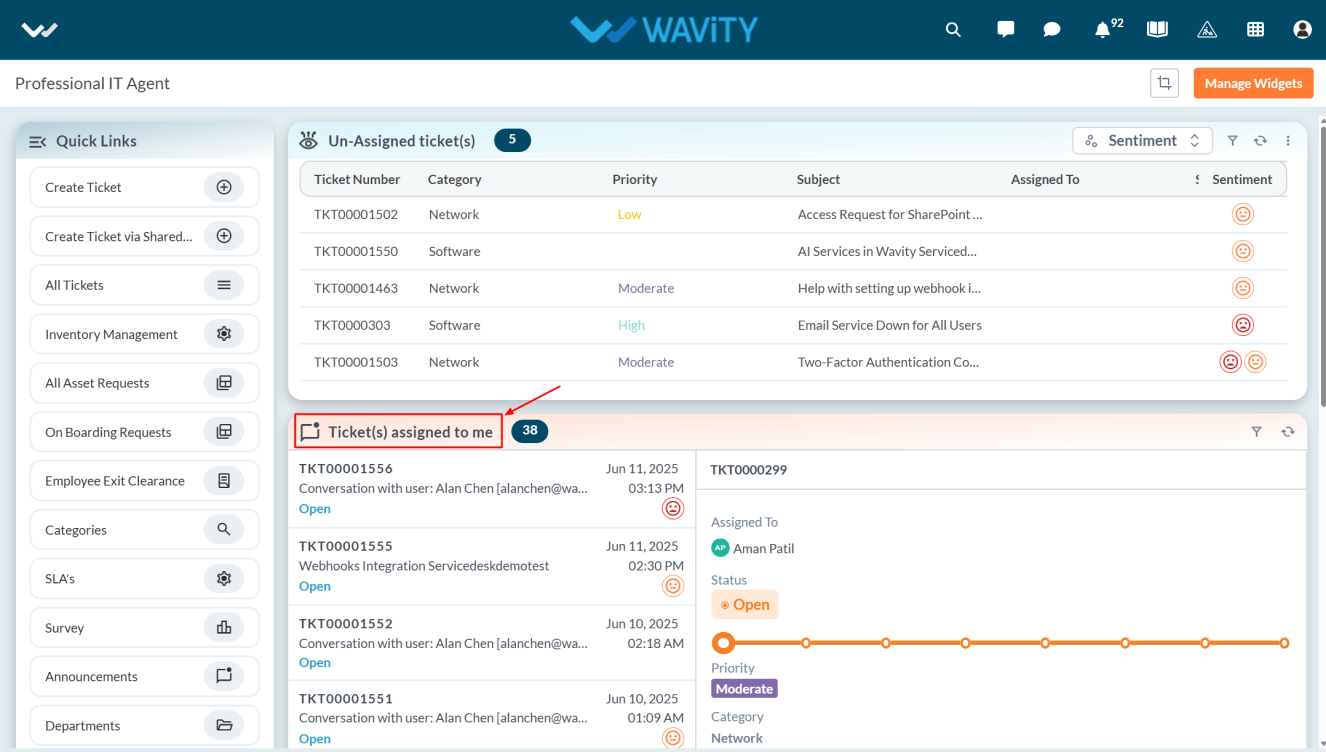
- In Agent dashboard, Click on the Ticket(s) assigned to me.
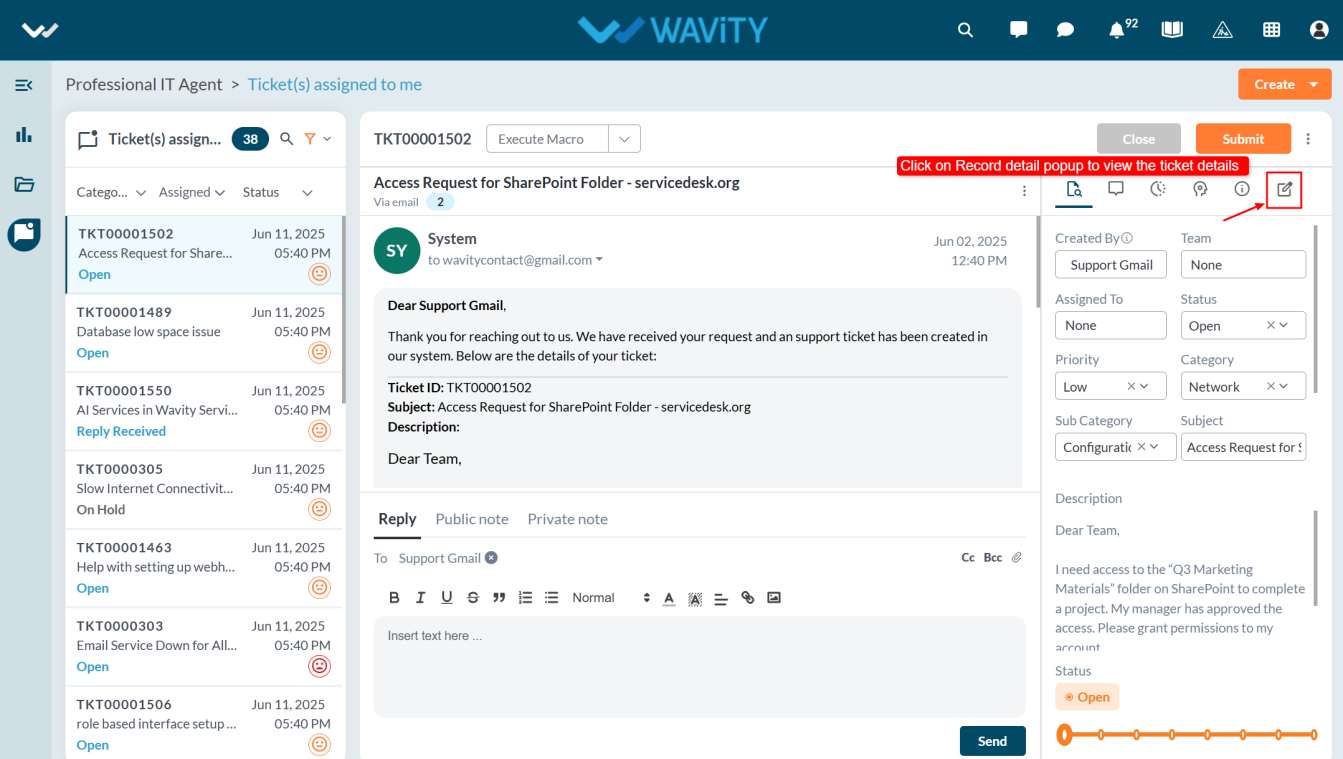
- After clicking on that, it will display the conversational UI at the right side click on the Record details popup.
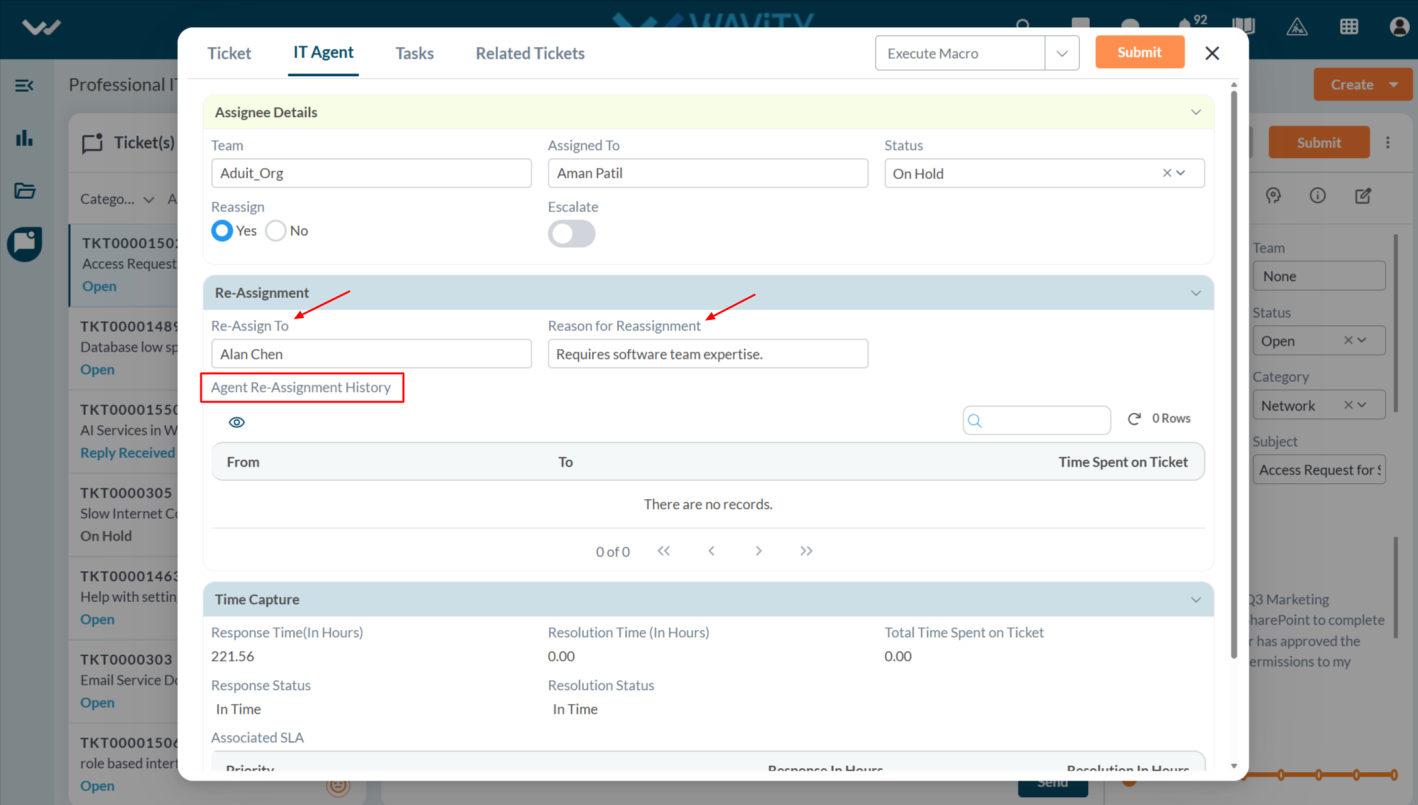
- Select the IT Agent tab, and then click Yes under the Reassign option. The Re-Assignment section will then appear, allowing you to update the Re-assignment details.
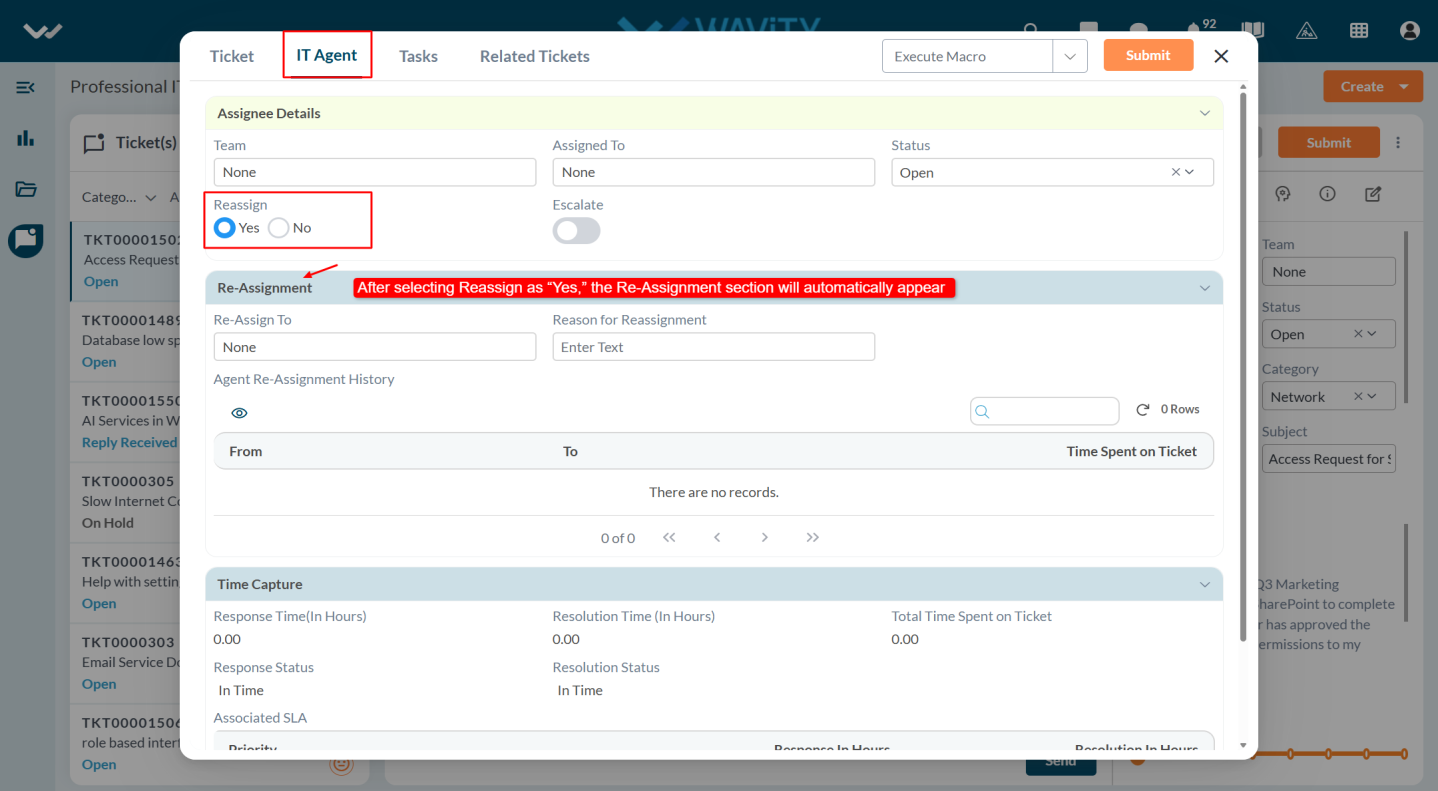
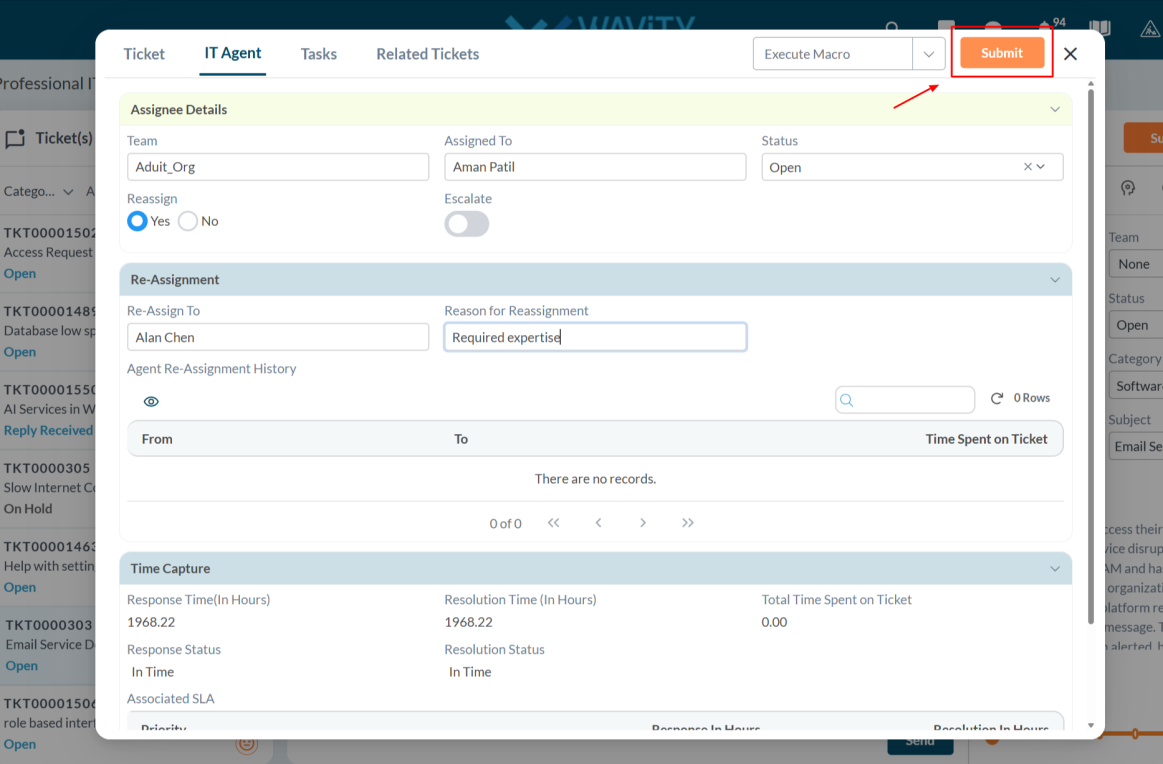
- Now, select the agent in the Reassign To field to reassign the ticket and provide a reason for the reassignment.
- In the Agent Re-Assignment History, you can view the list of agents who have previously worked on the ticket.
- After entering the details, click on the Submit button. The ticket will then be reassigned to the agent you selected.