How to Create and Save a New Filter
How to Create and Save a New Filter
- The Wavity Platform offers a My Filters feature, allowing users and groups to create custom filters based on specific conditions. These filters can be saved and reused with a single click, eliminating the need to reapply filters repeatedly. Use filters to quickly view specific sets of data such as tickets, tasks, or other module entries based on your defined criteria.
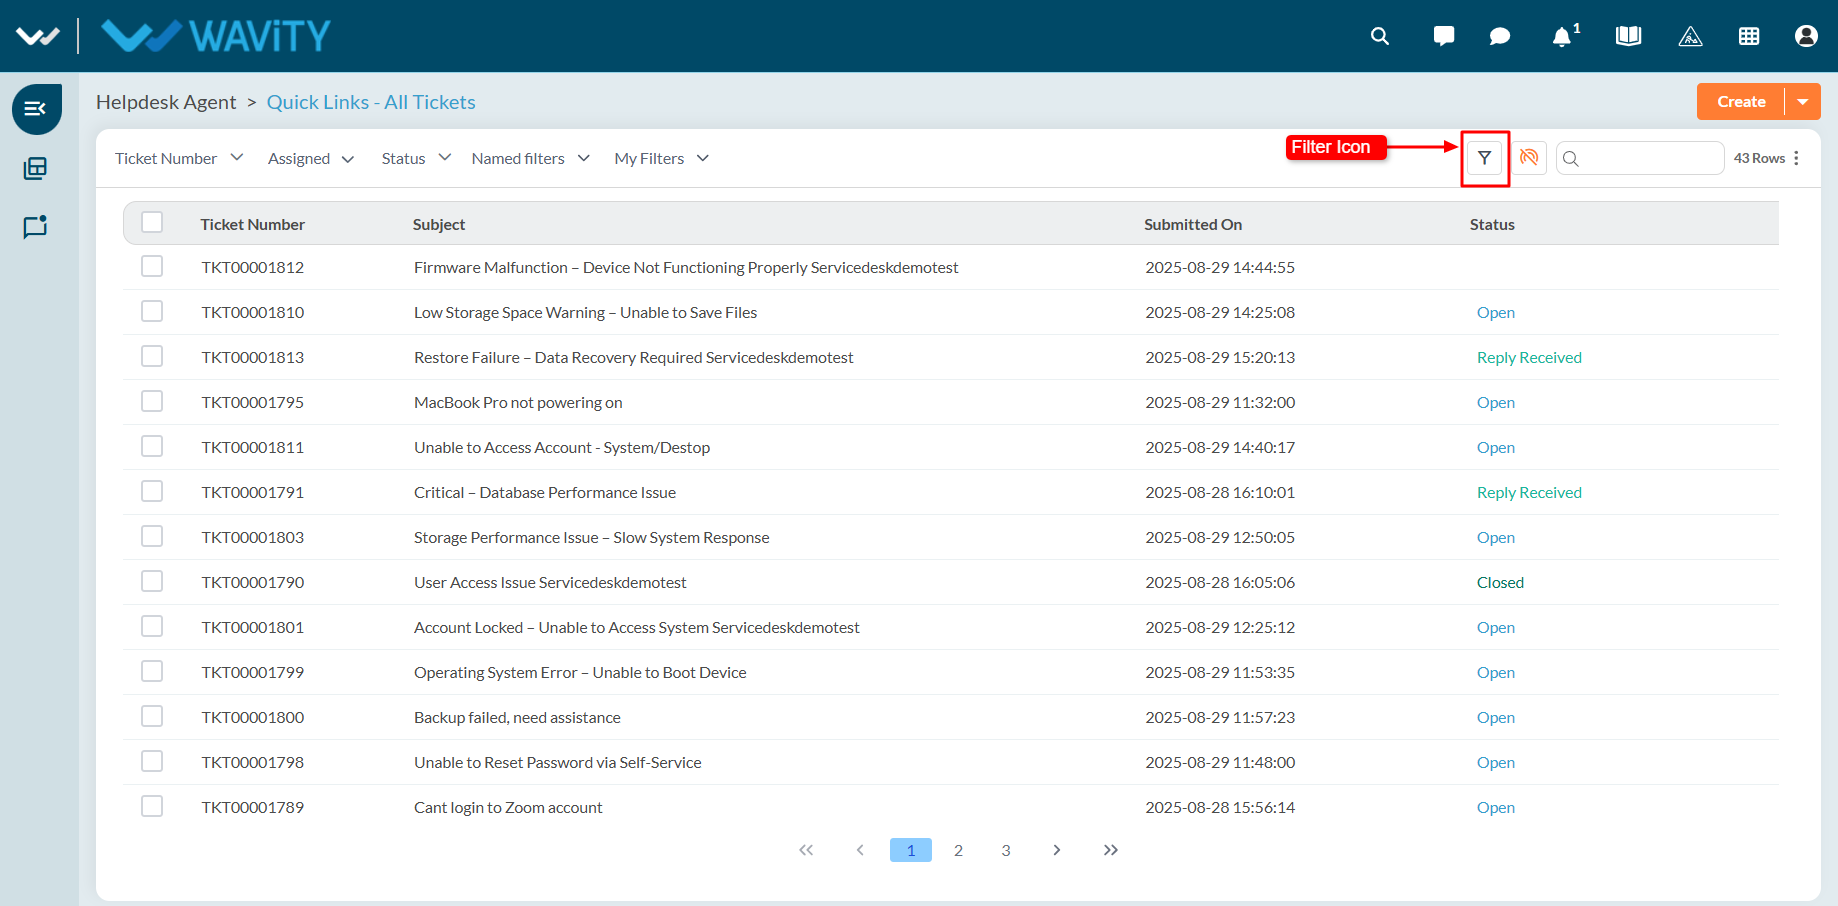
- You can apply filtering on listing pages such as All Tickets, Tasks, or other modules. Navigate to a listing page (e.g., click "All Tickets" from the Quick Links section).

- Open the Filter Panel: Click the Filter icon to open the filter configuration panel.
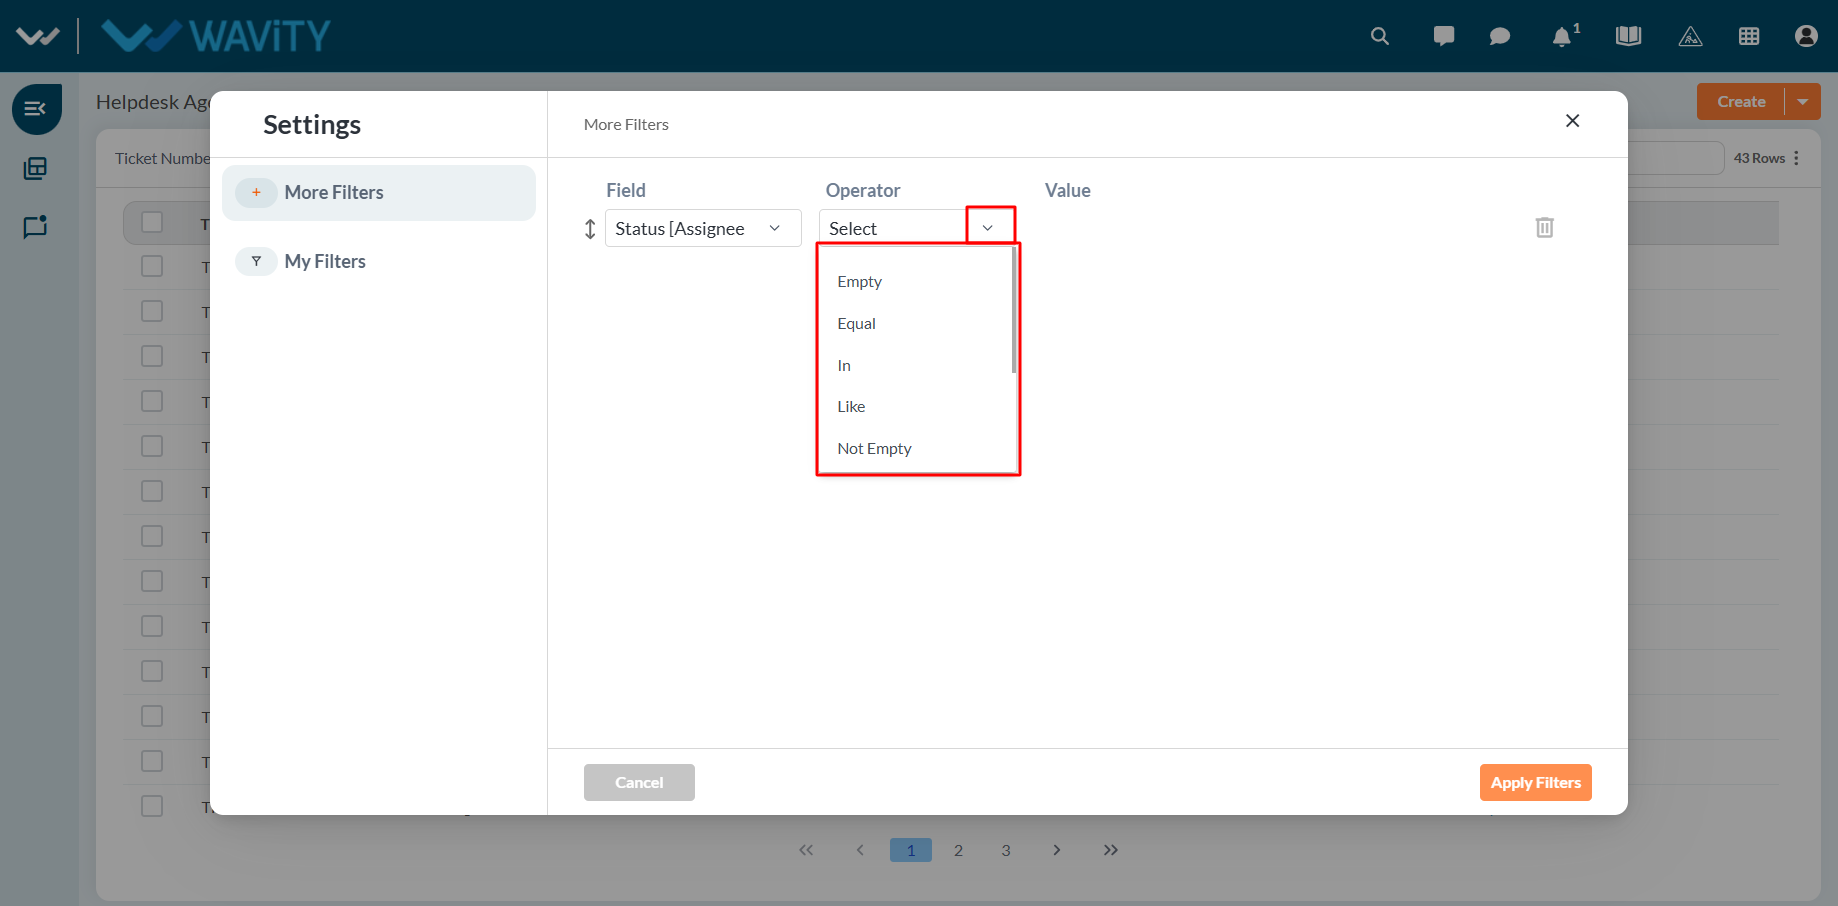
- Define Filter Criteria
- Select a Field: Choose the data field you want to filter by (e.g., Status, Priority).

- Choose an Operator: Select an operator (e.g., equals, contains, greater than).
- For more understanding on advanced filters, refer following link: How To Apply Advanced Filters? | Wavity
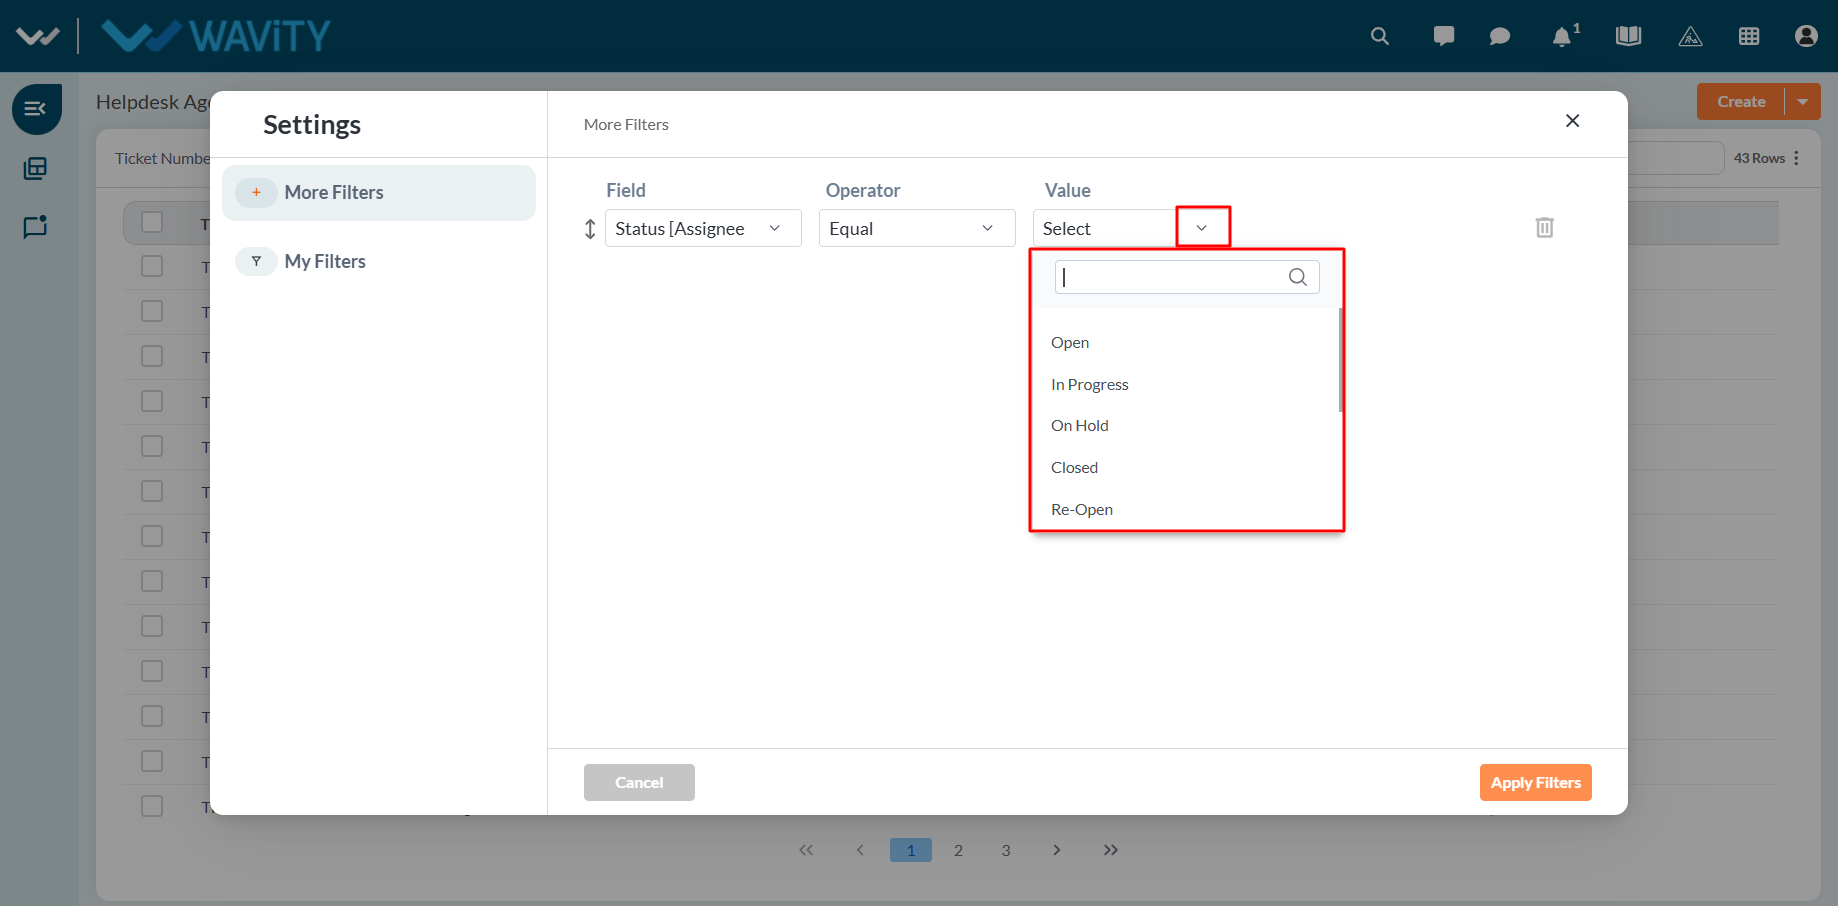
- Enter/Select a Value: Based on the field, select or enter the appropriate value.
- Add Conditions (Optional): Use AND / OR to combine multiple filter conditions.
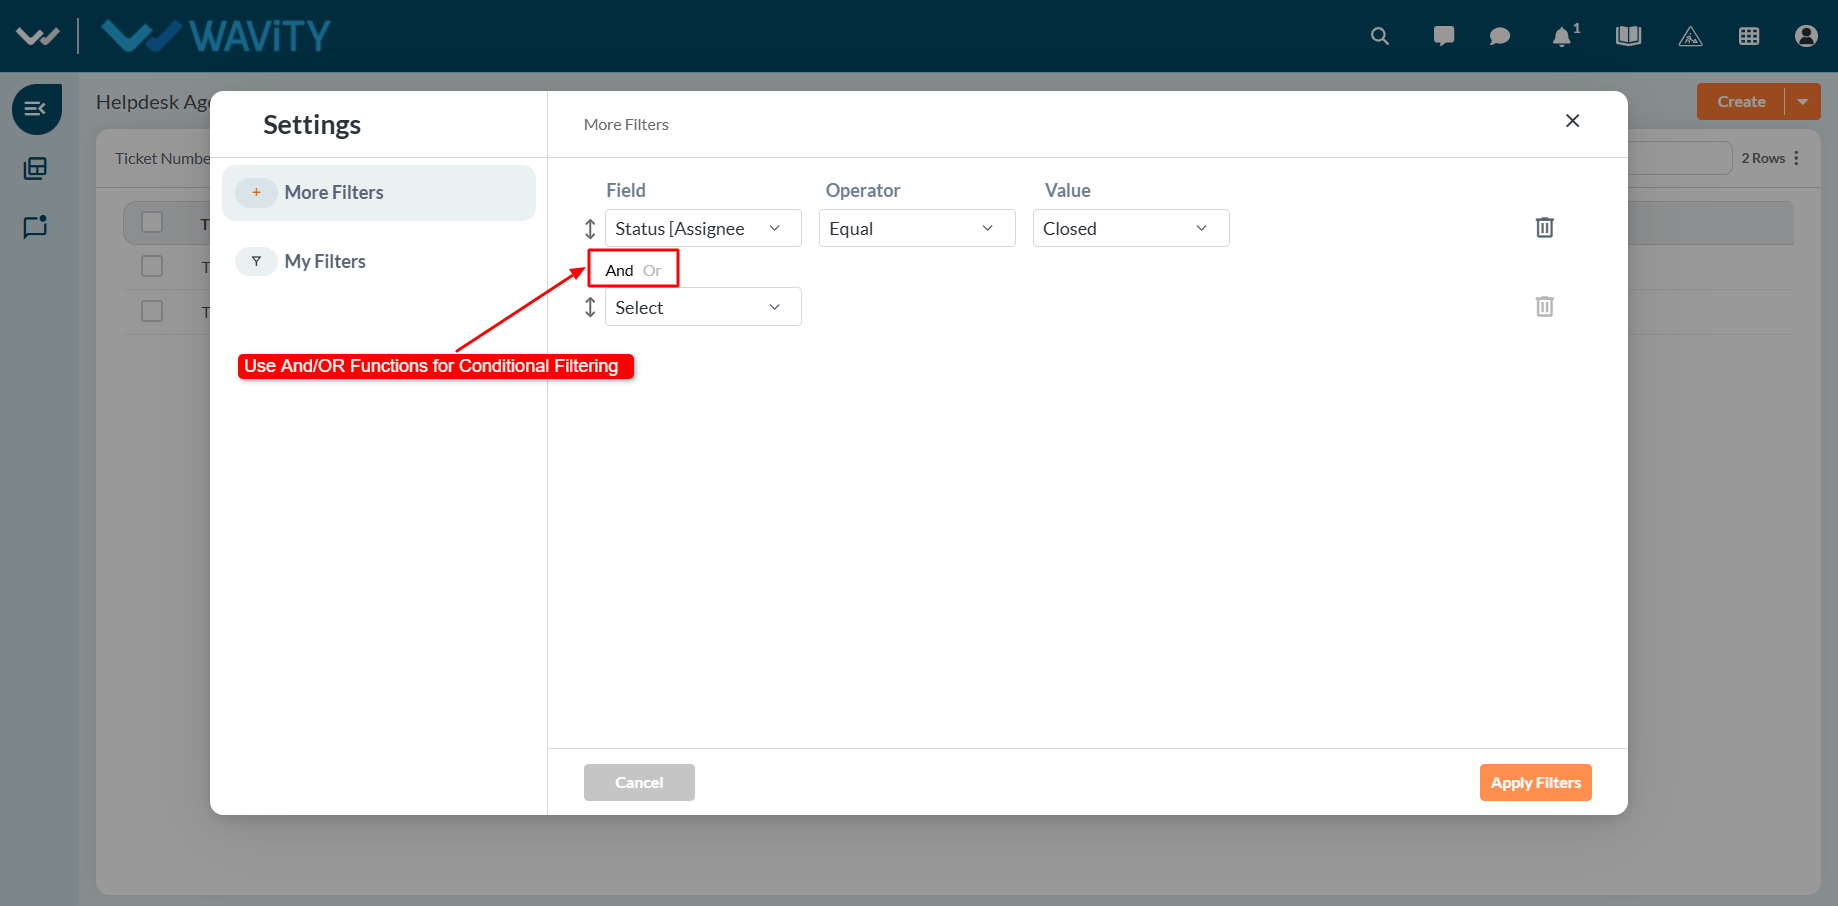
- Use the delete icon to remove any condition you no longer need.
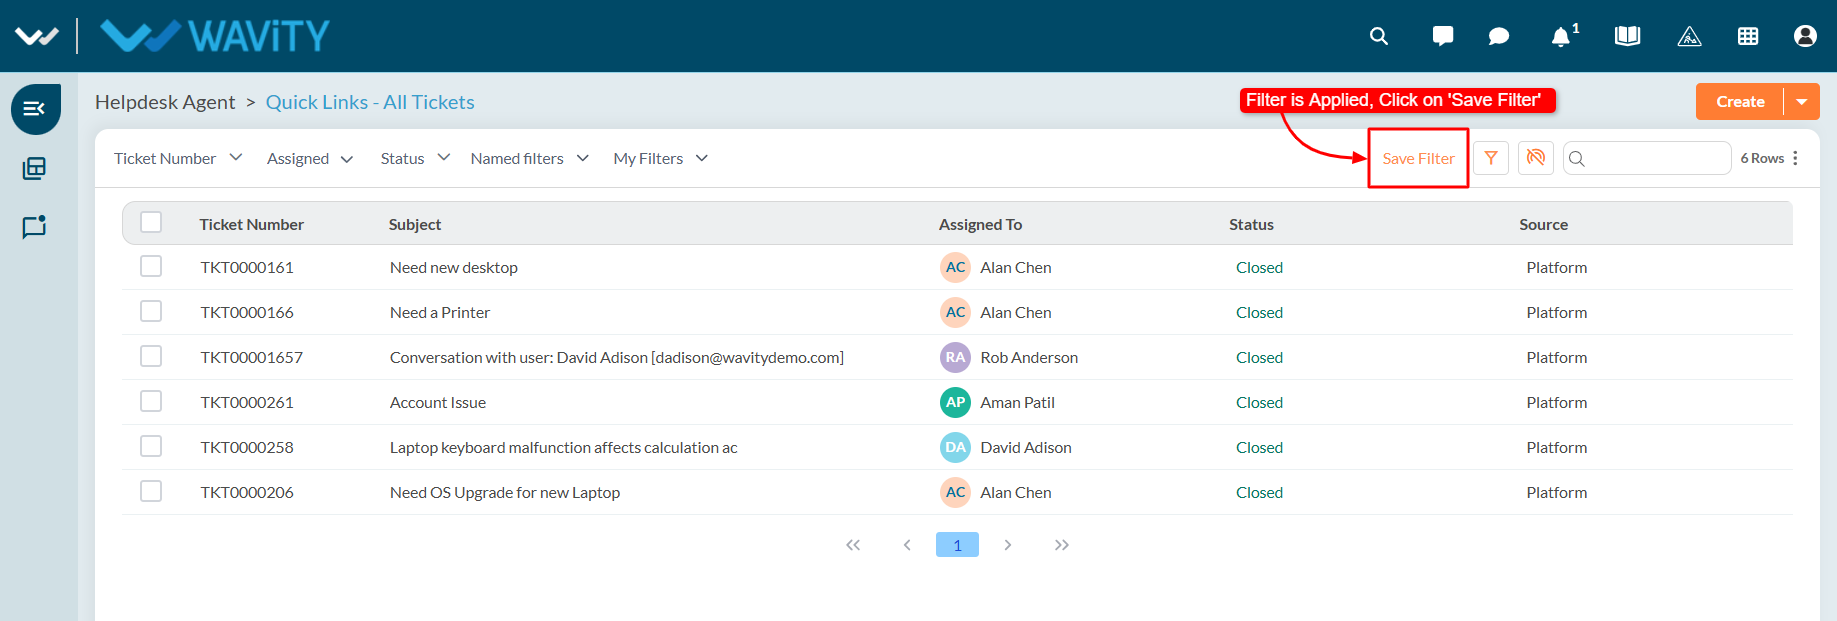
- Apply the Filter: Once your conditions are set, click Apply Filters to see the filtered results.

Save the Filter for Reuse
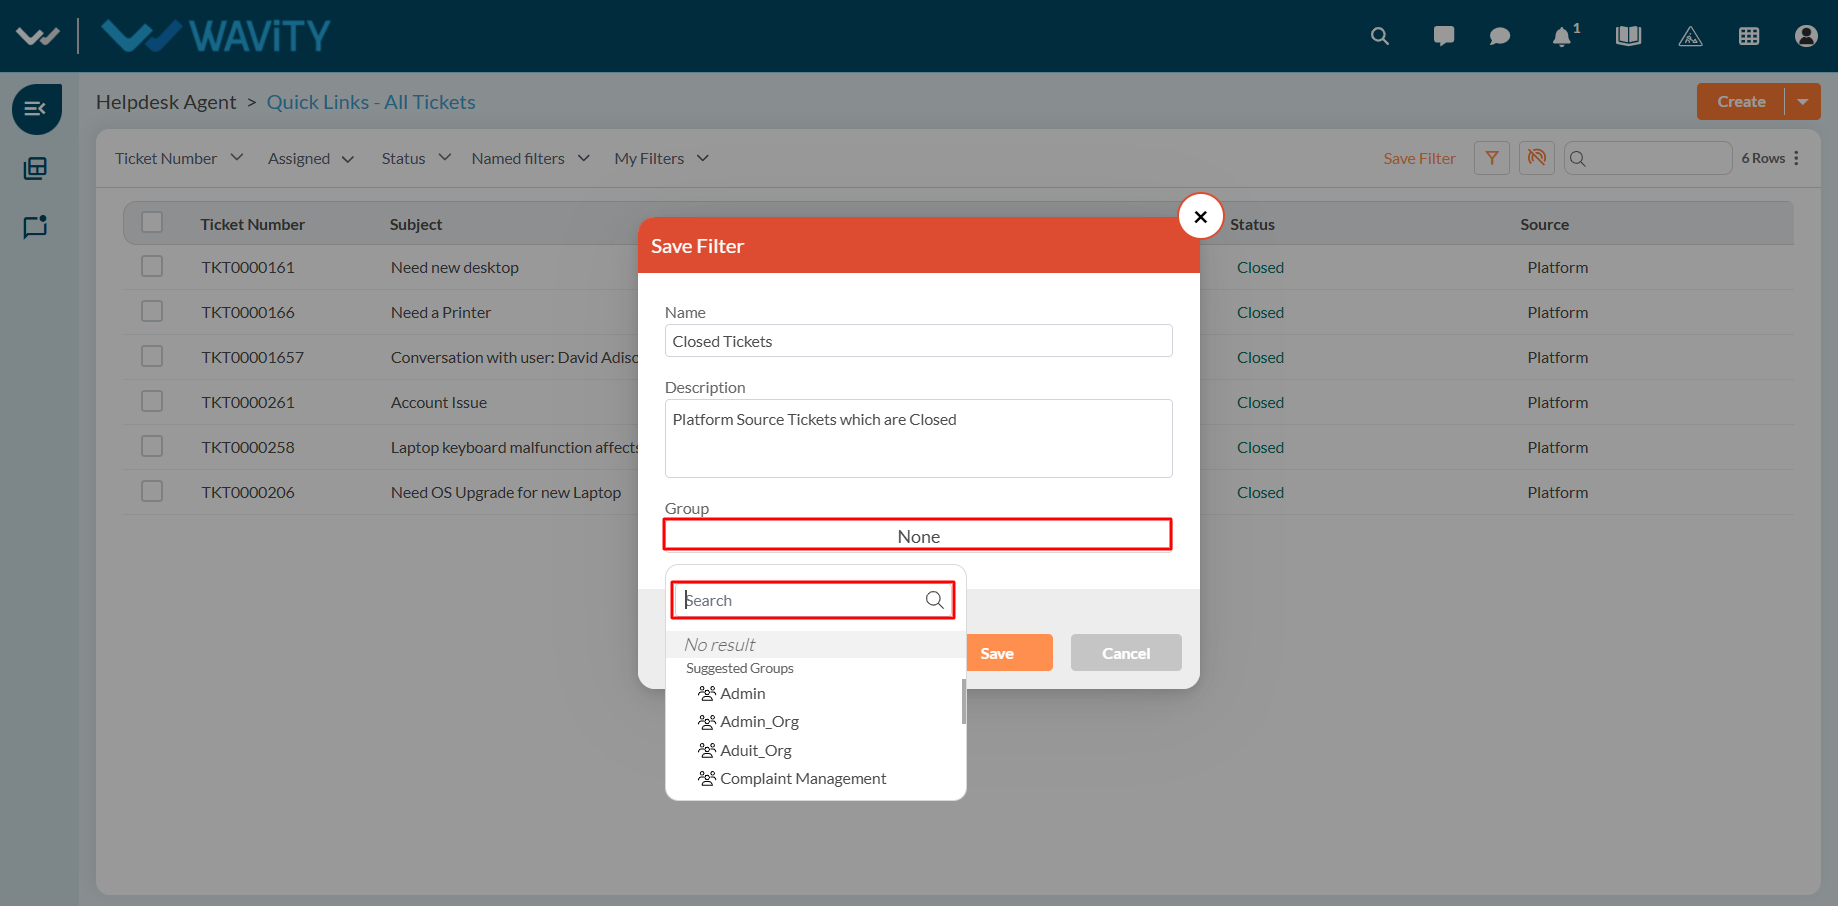
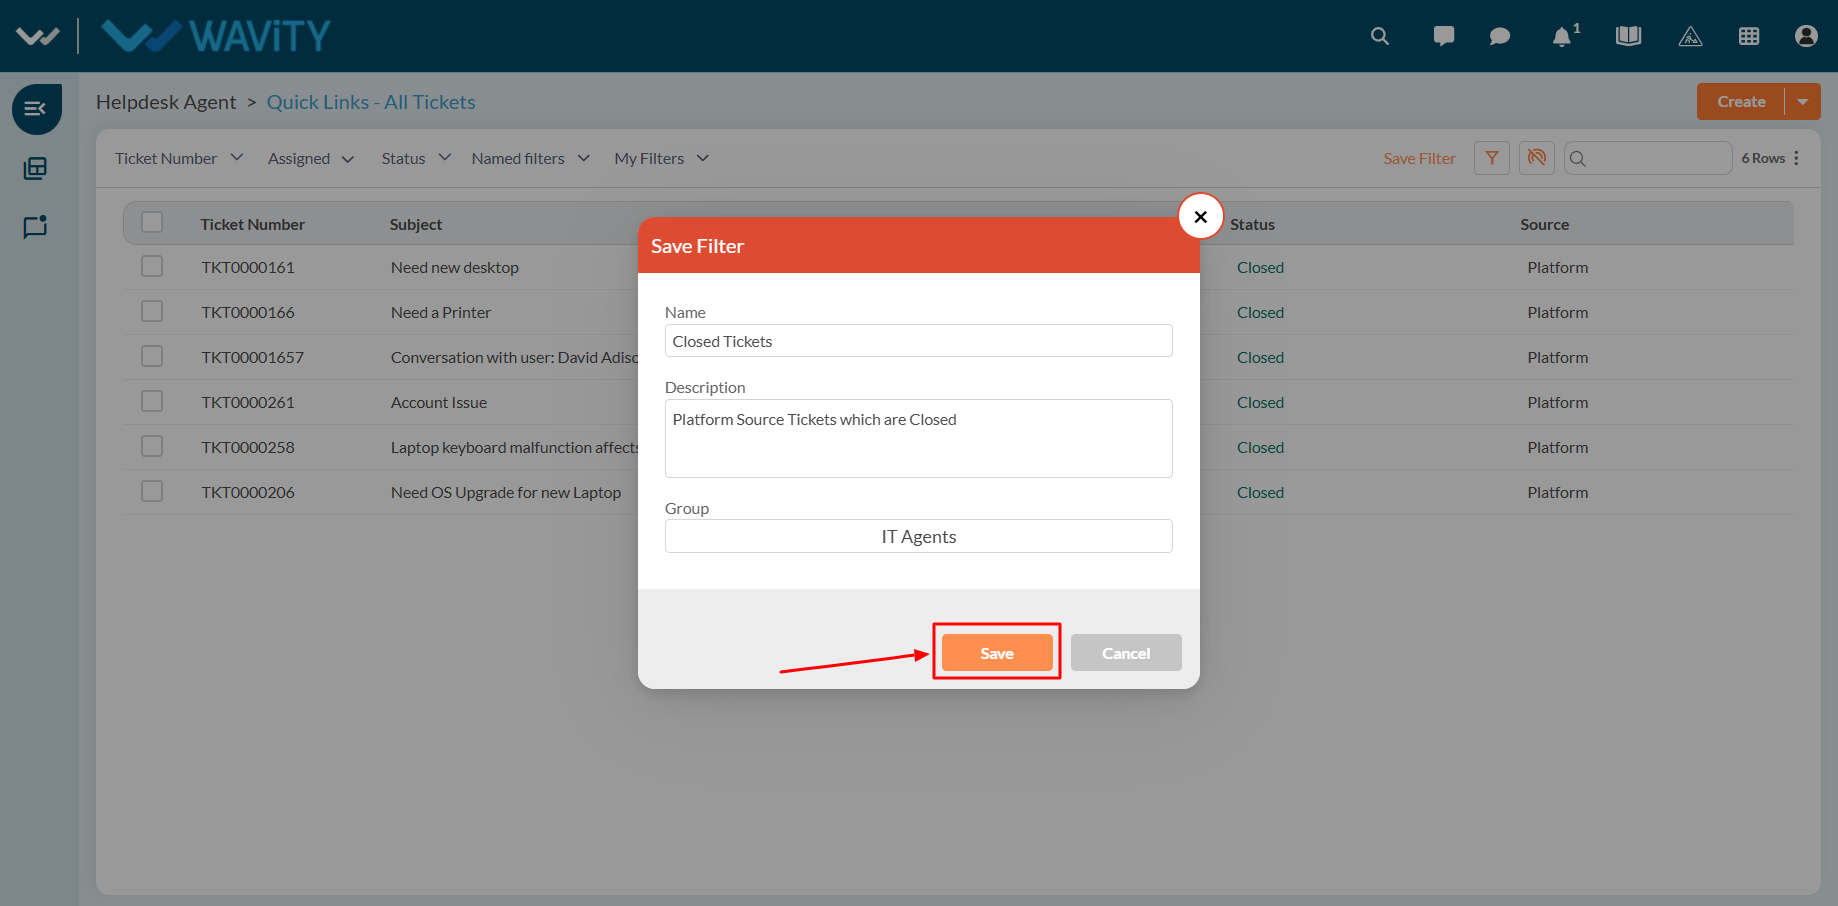
- Click on Save Filter after applying the desired filters.
- Enter a Filter Name and an optional Description.

- Select the Groups who should have access to this filter.
- Click Save to store the filter for future use.
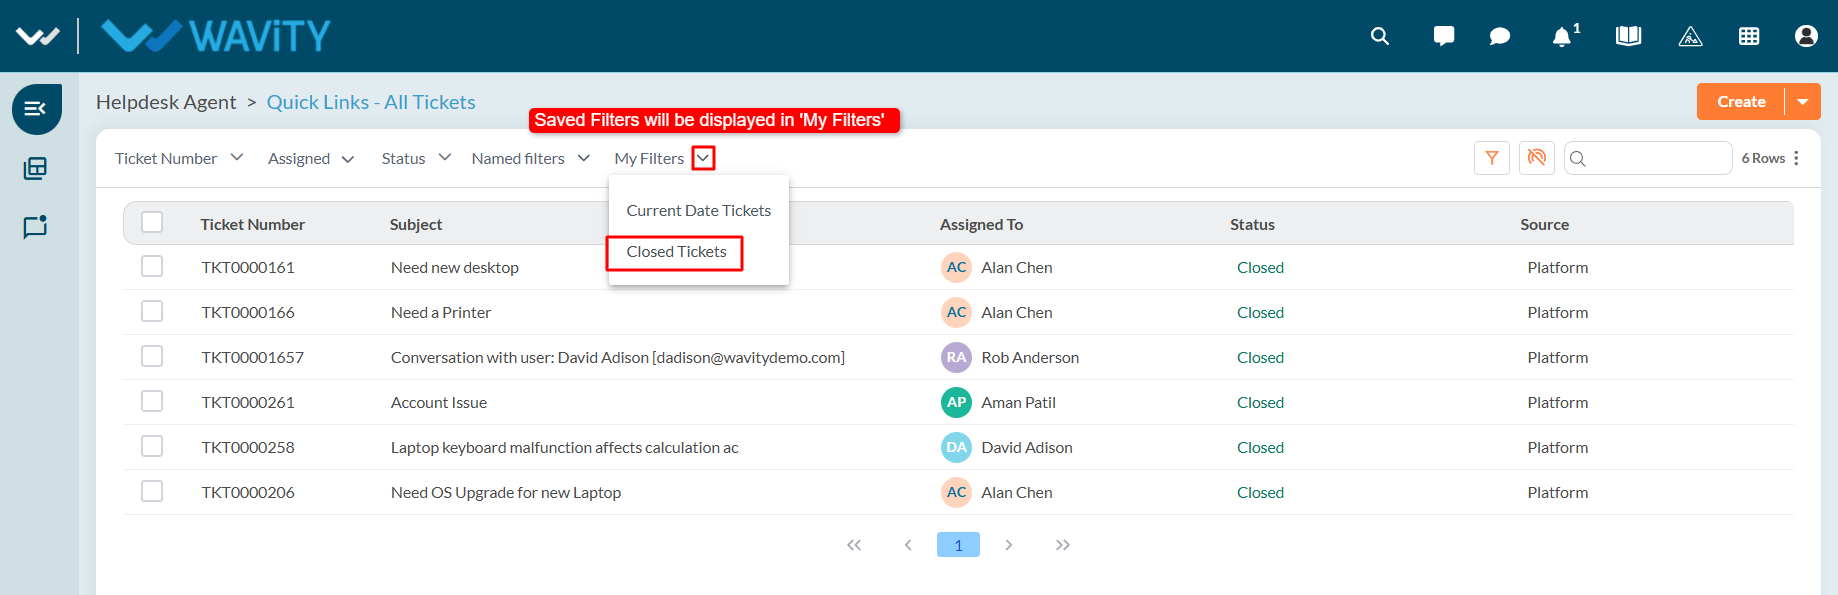
Accessing Saved Filters
- Your saved filters will appear in the My Filters dropdown list. Click on any saved filter to apply it instantly.
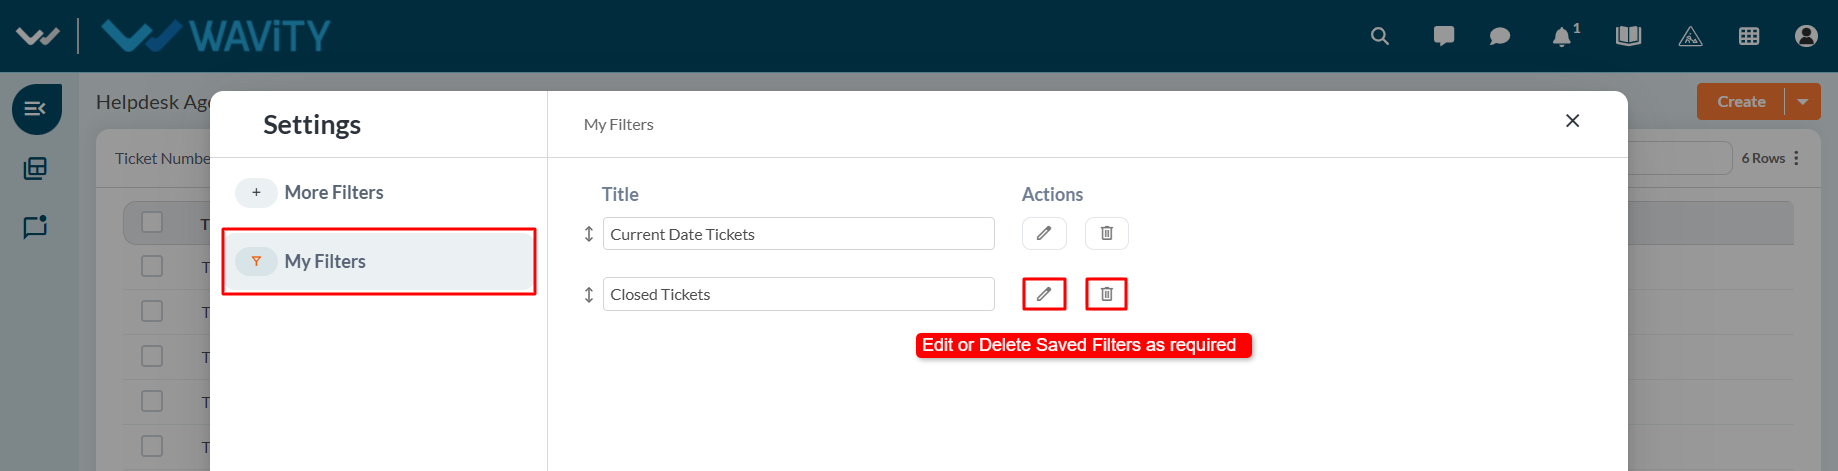
- Click the Filter icon again to open the filter panel. You can also choose to edit or delete saved filters as needed.
- This feature simplifies data management by letting you quickly switch between frequently used views. Perfect for teams who need to track and monitor specific data sets efficiently.