End User Guide: How to Create a Ticket through Platform?
- In Wavity, creating a ticket is a simple and user-friendly process. Users can generate tickets through various channels including the platform, Customer Portal, Chatbot, Email, Slack, Microsoft Teams, WhatsApp, Instagram, and Facebook.
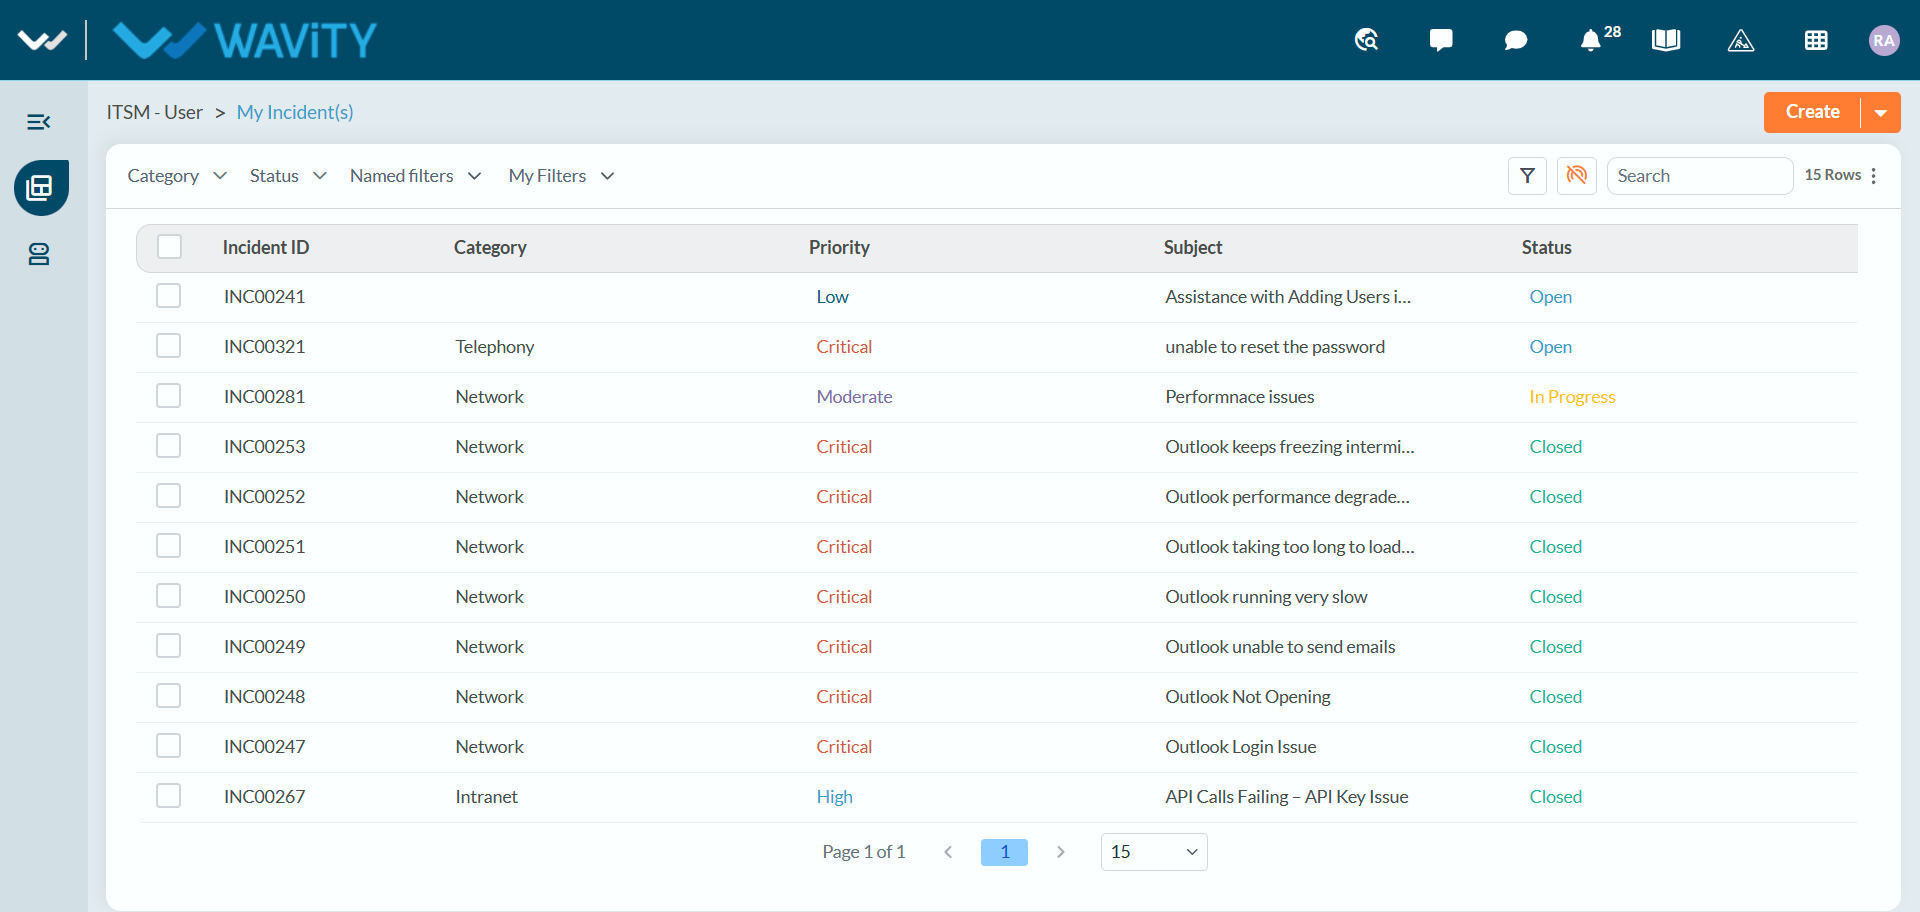
- Users can create a ticket through the Wavity platform by logging in with their credentials. Upon successful login, they will be directed to the User Landing Page.
- Note: The steps provided serve as sample instructions and can be customized based on specific requirements; however, the core workflow will remain the same.
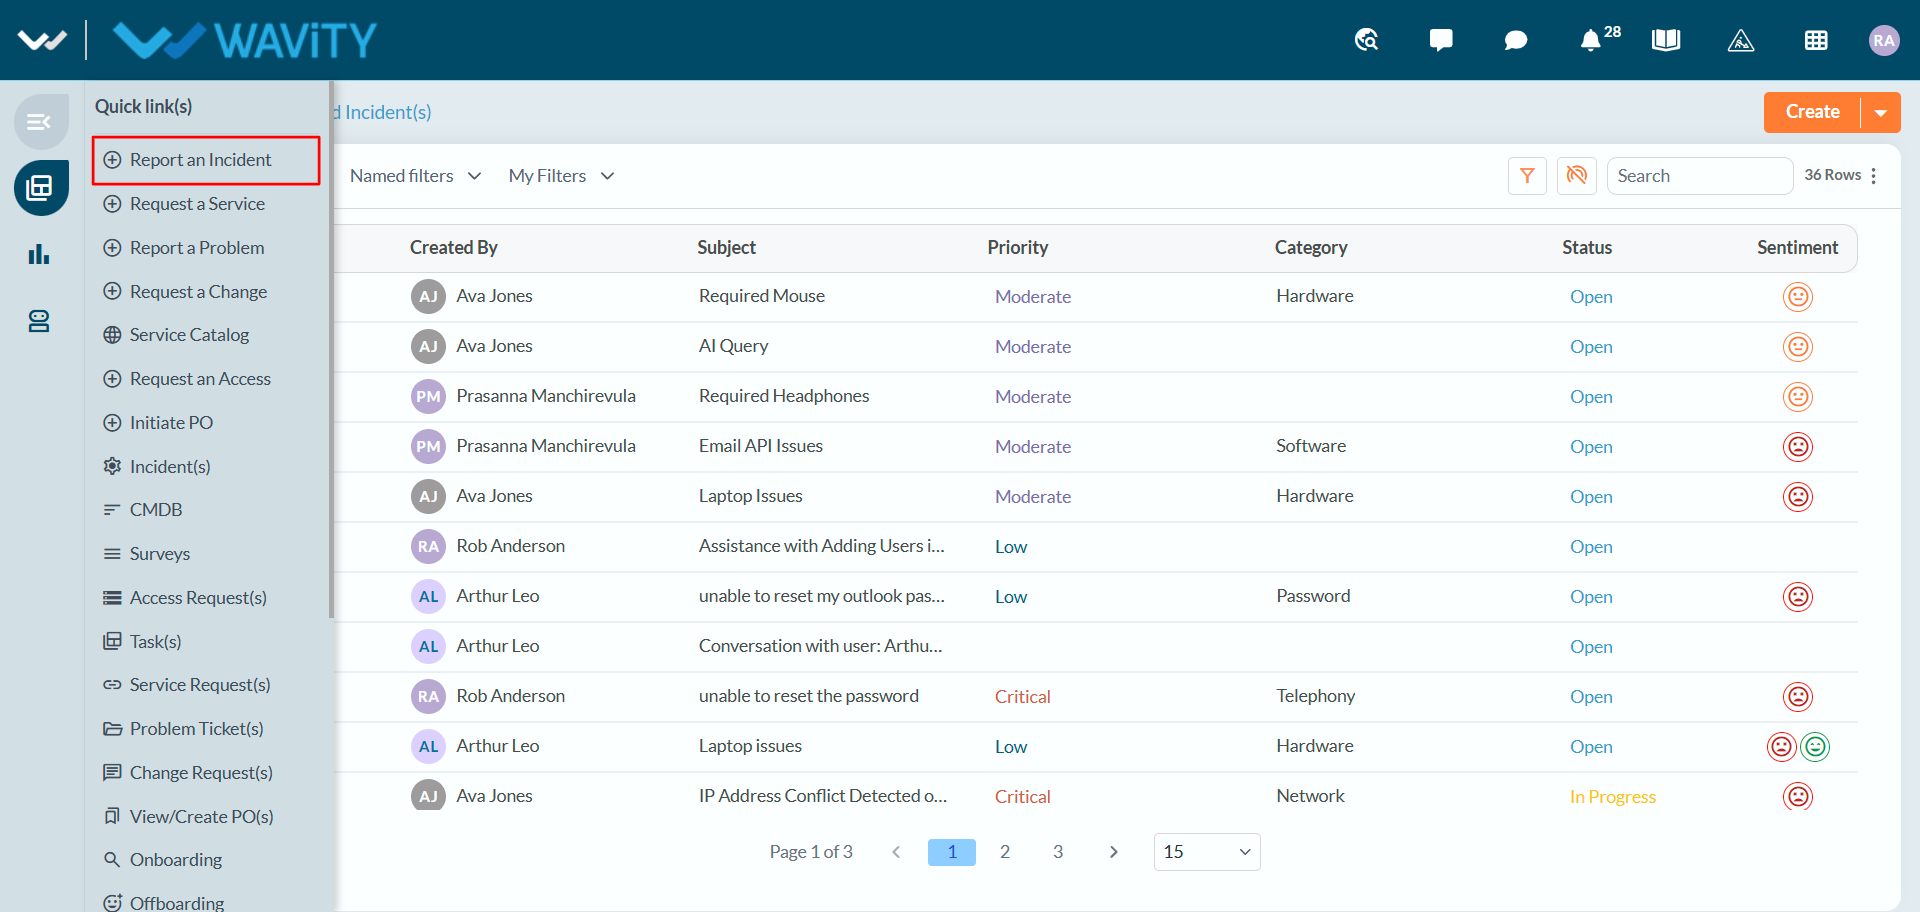
- Hover over the left navigation panel. Under Quick Links, click Report an Incident to create a new incident ticket.
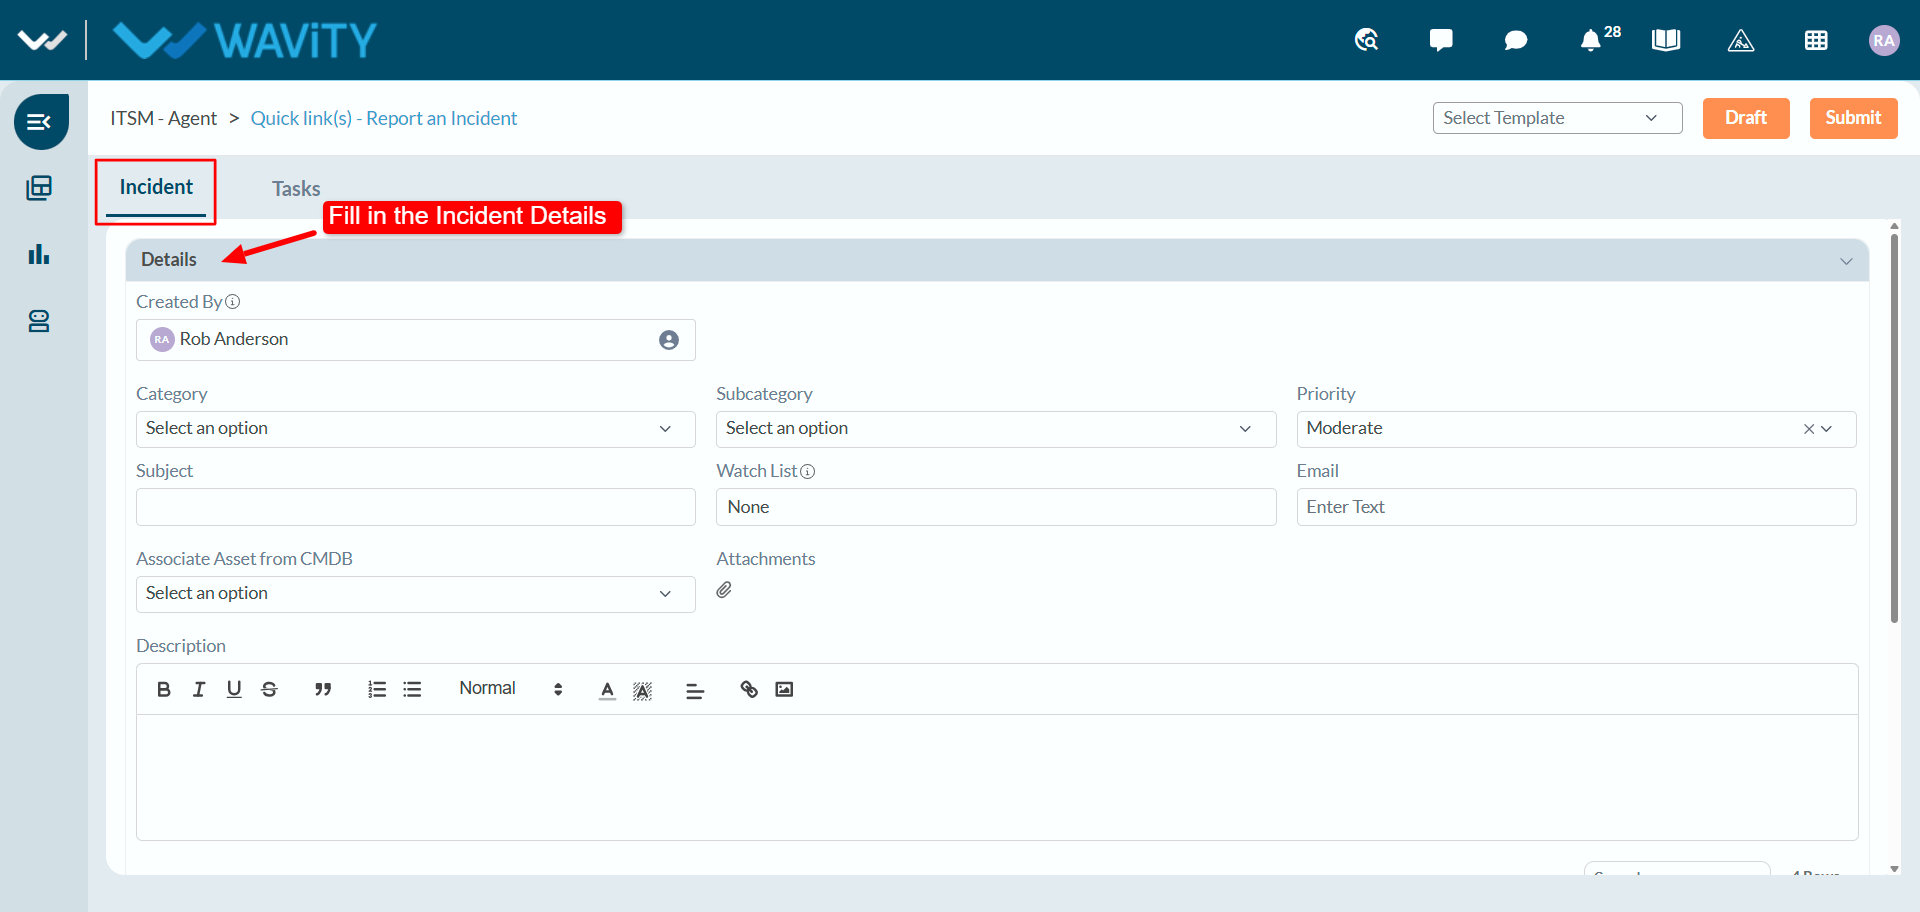
- In the Incident tab, enter all the required information in the Incident Details section.
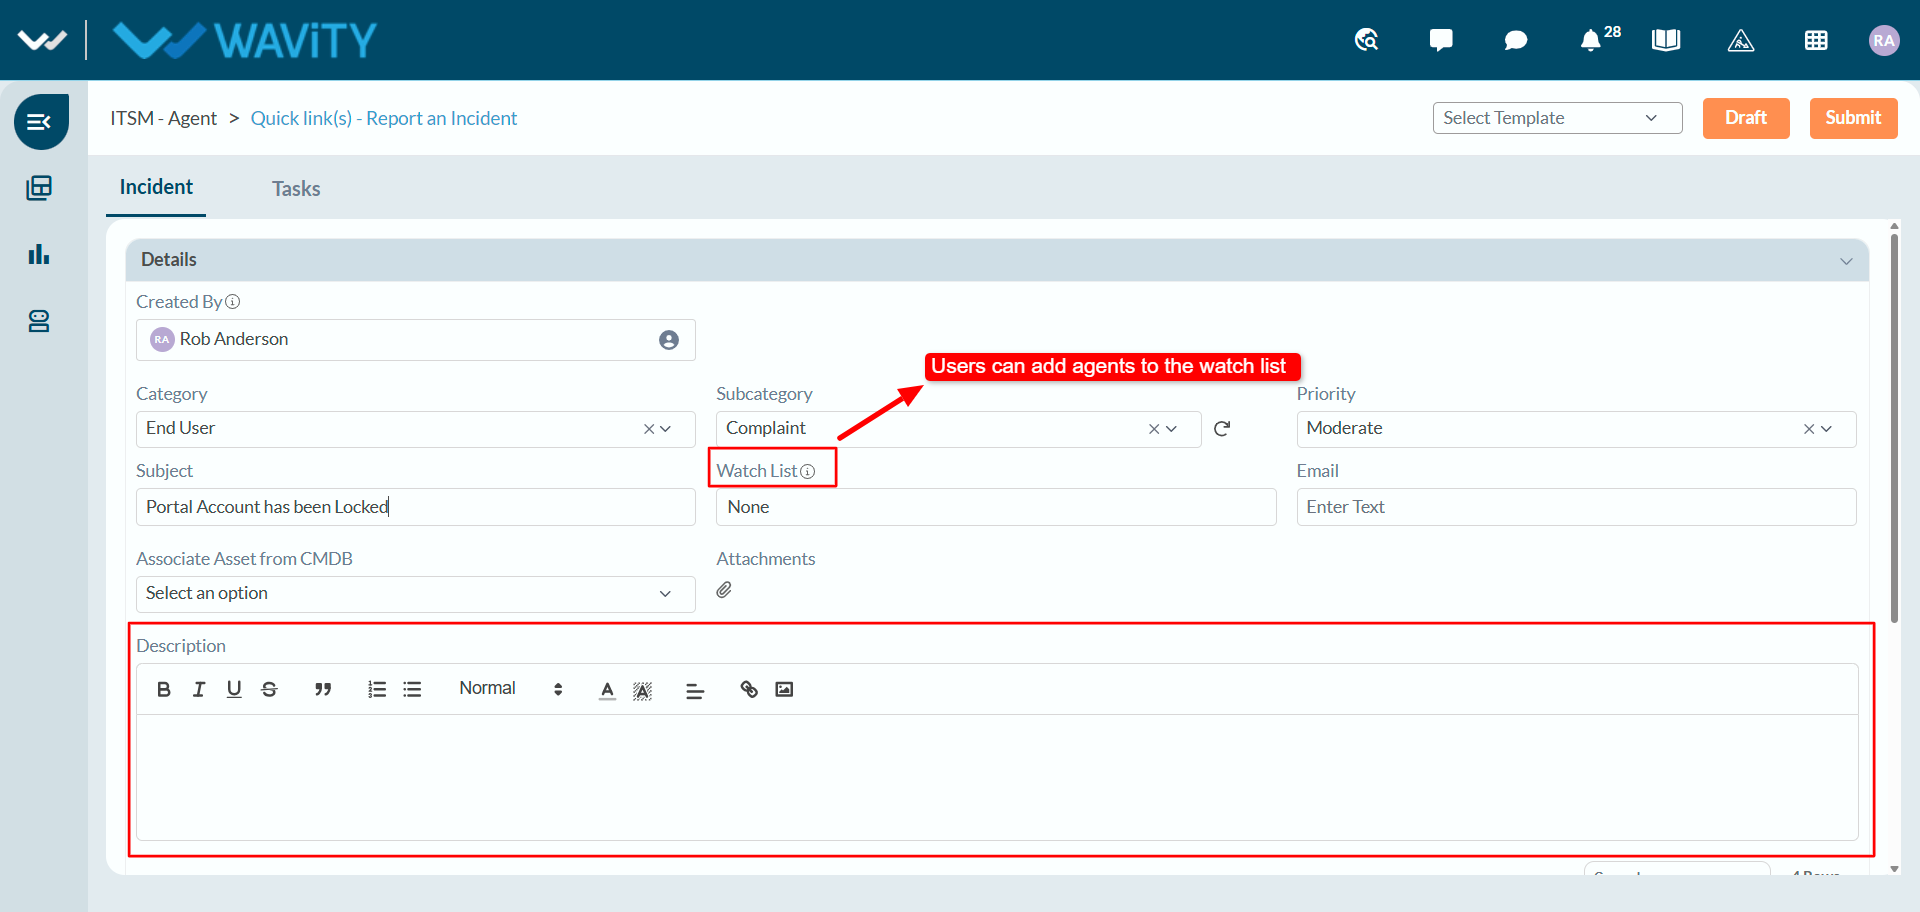
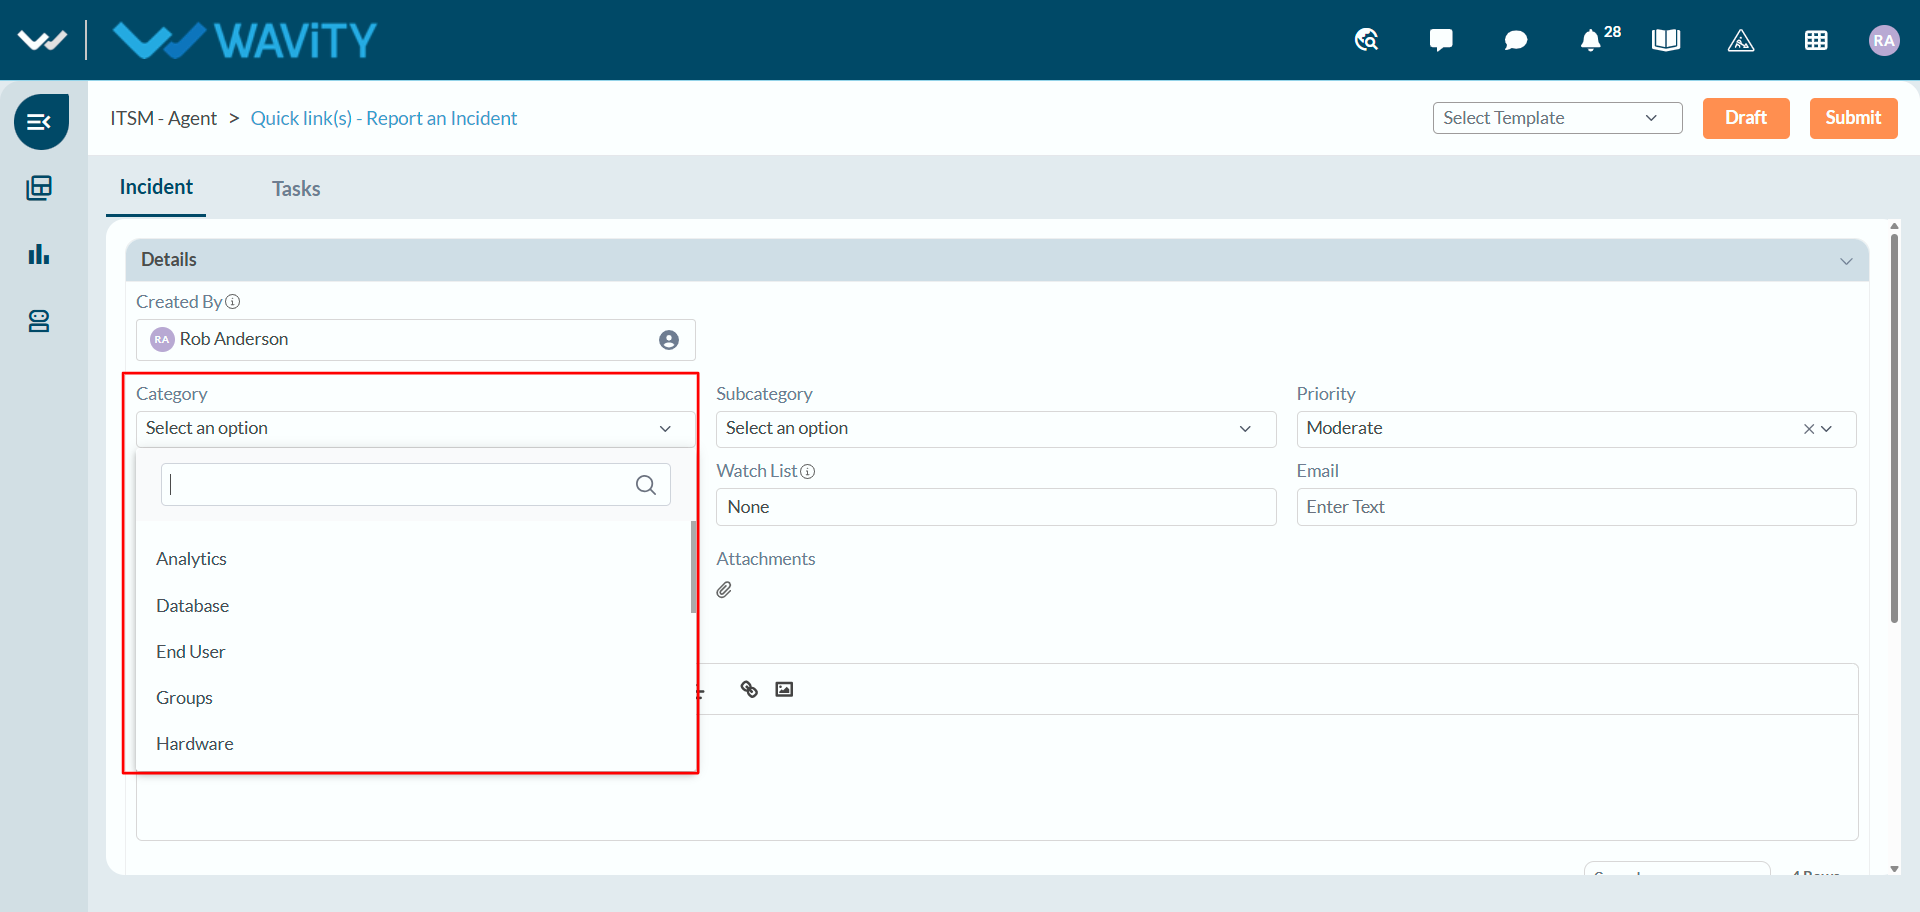
- By default, the requester will be considered a system user. Select the category from the dropdown below as shown in the image.
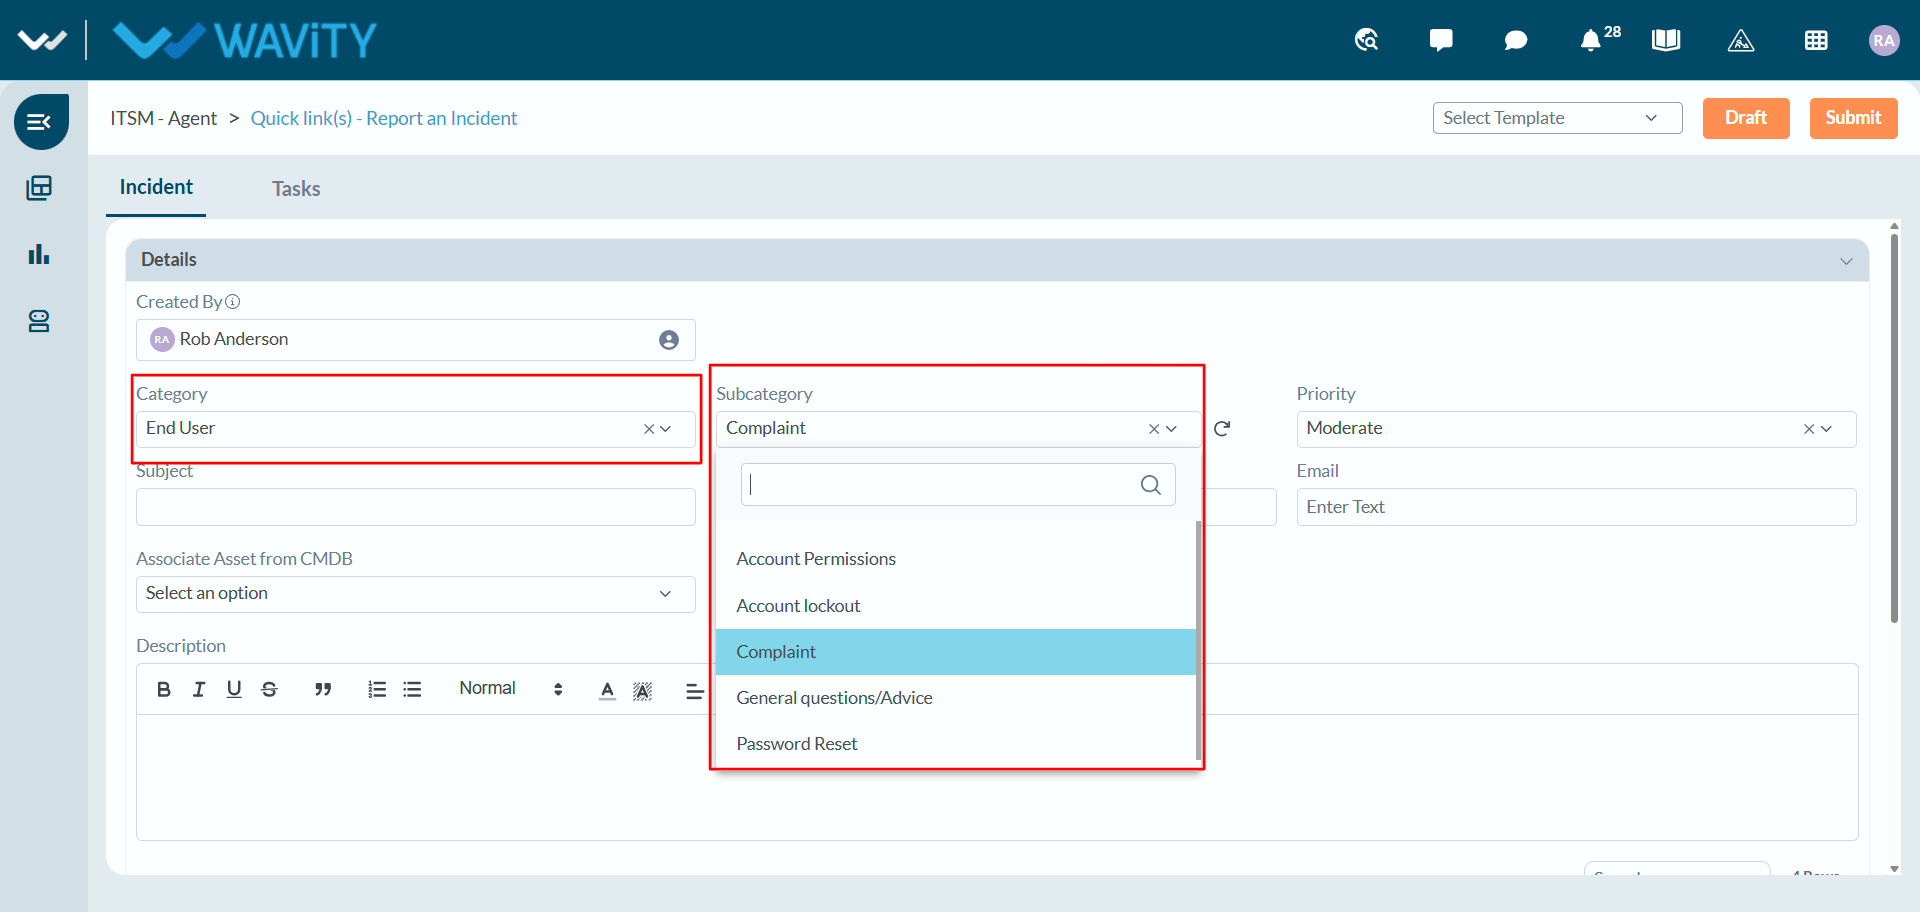
- Select the Appropriate Sub-Category from the dropdowns.
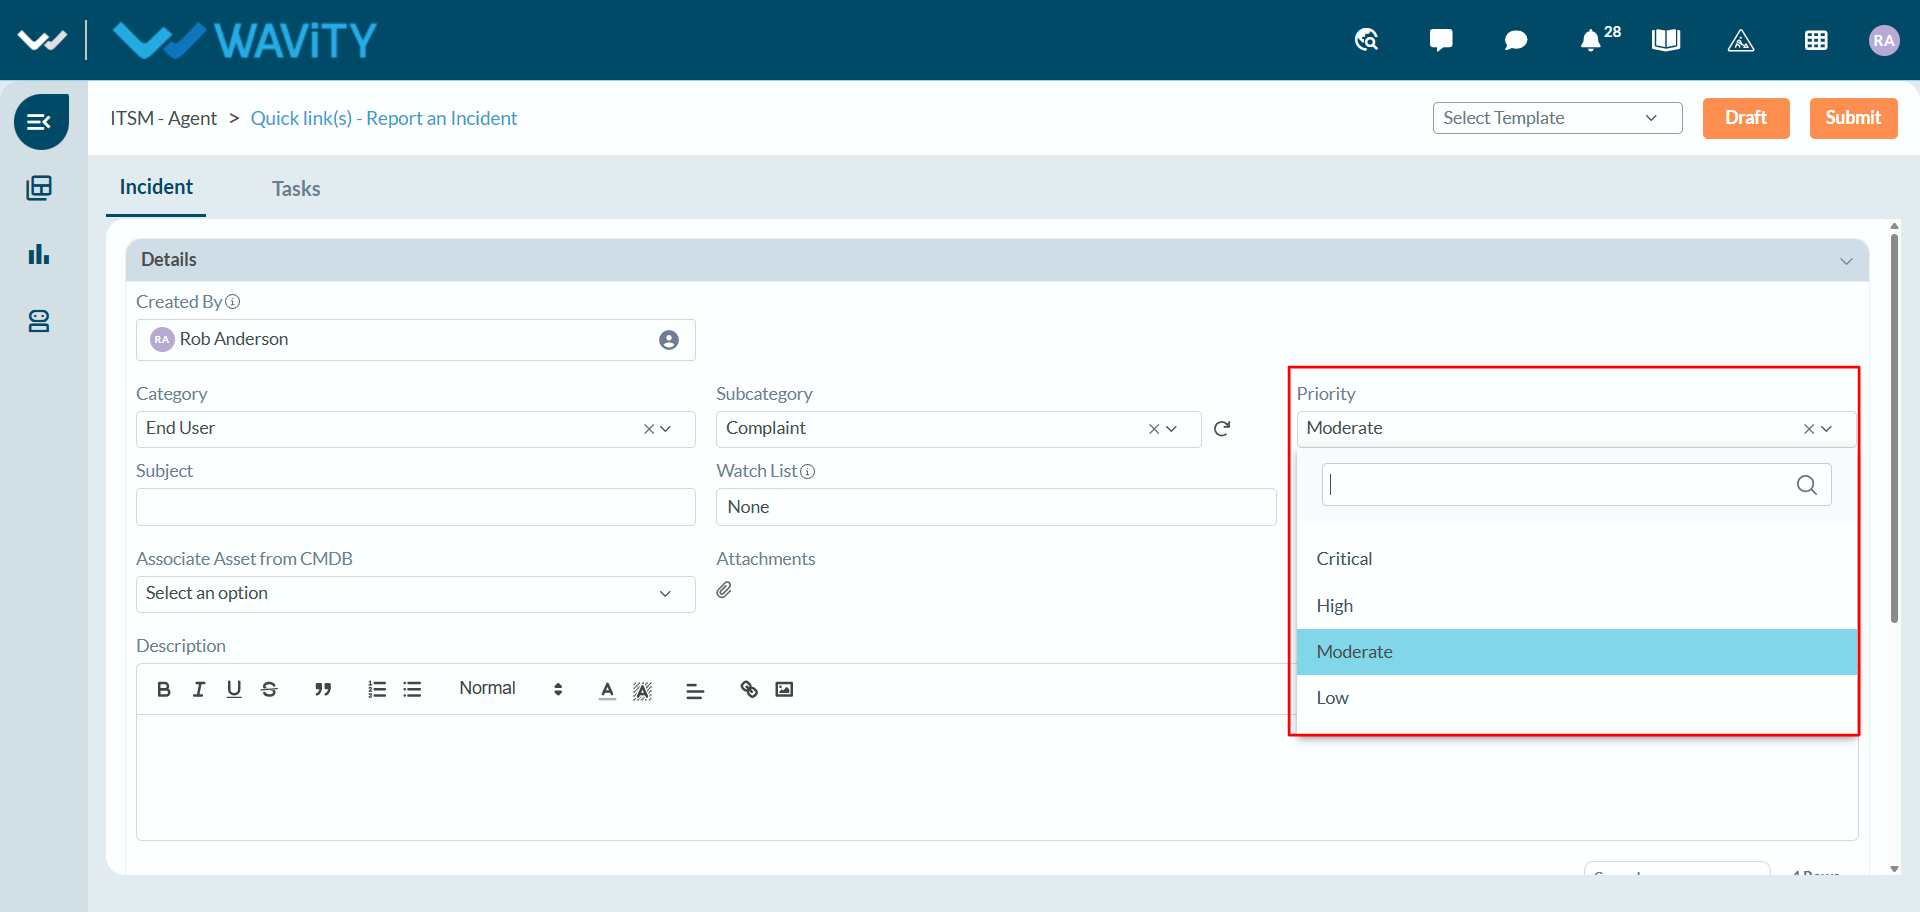
- Select the Priority of the ticket such as Critical, High, Moderate and Low.
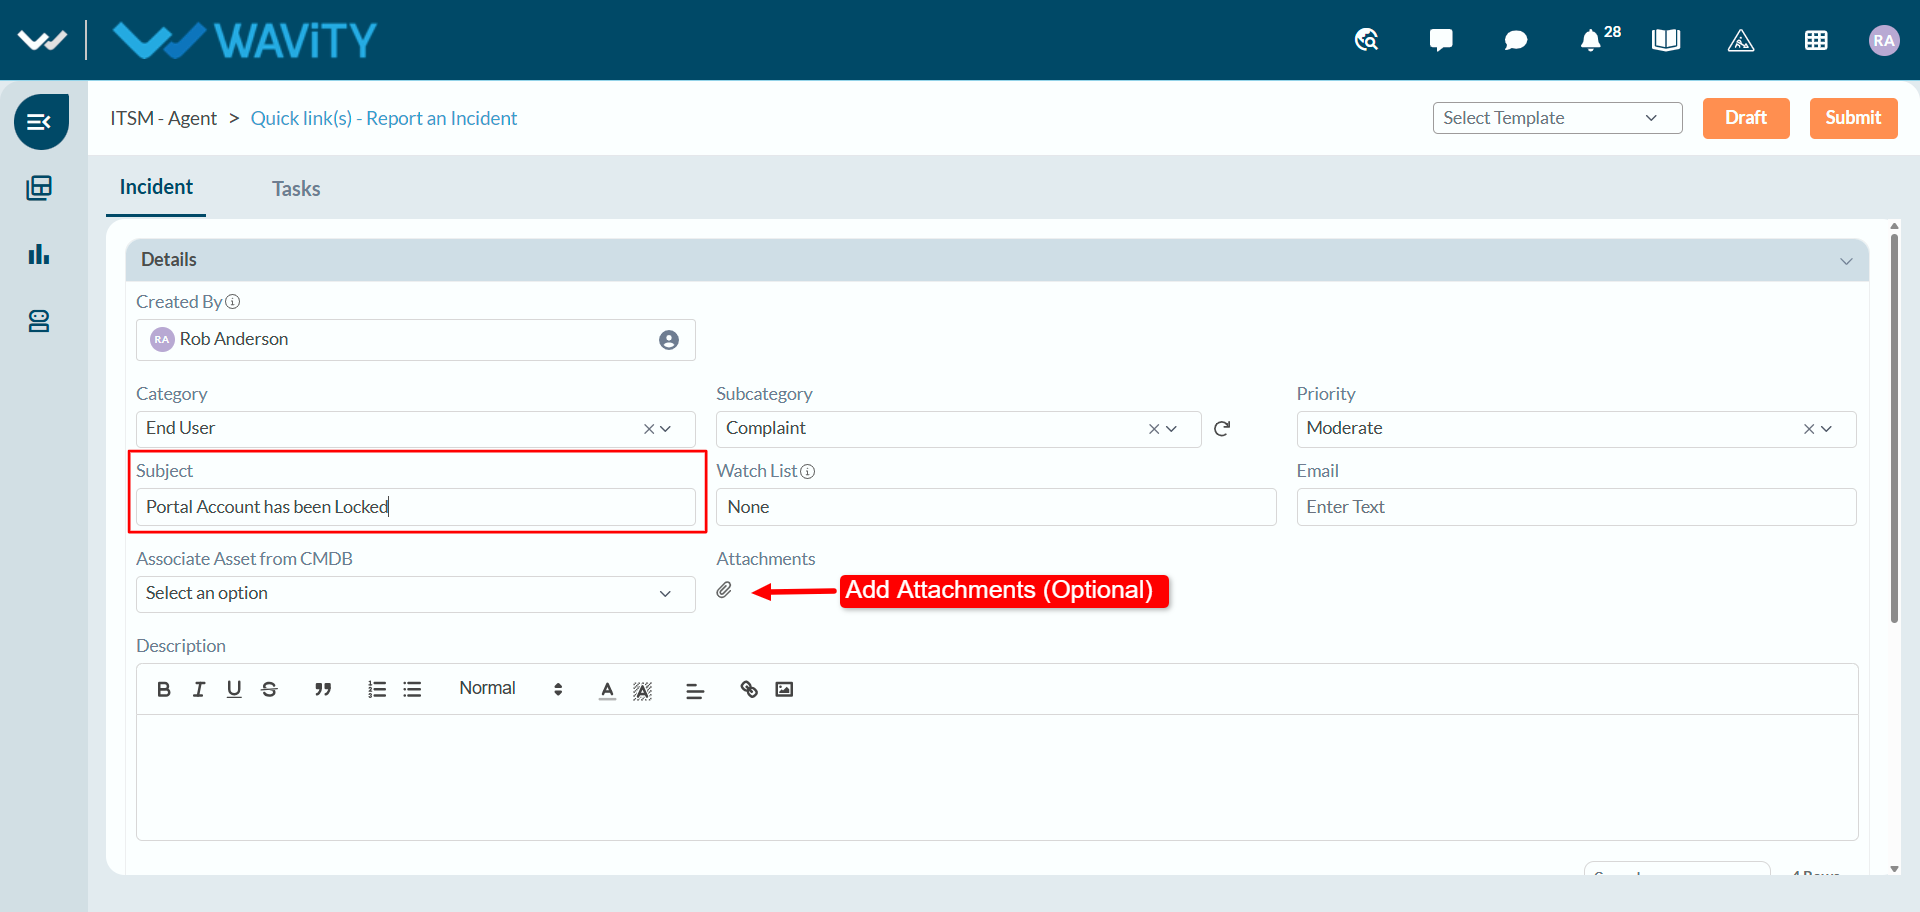
- Mentioning a clear subject while creating the ticket helps the agent quickly understand the nature of the problem and prioritize the issue effectively. Users can add attachments, such as images or screenshots that are relevant to the issue to help agents better understand and resolve the problem.
- Users can select agents from the Watch List and provide a detailed description of their issue in the Description box. After entering the details, click on the Submit.