How to Create a Change Request
How to Create a Change Request in Wavity ServiceDesk
- In the Wavity platform, creating a change request is a simple and intuitive process designed to support structured change management.
- Note: The steps below represent standard instructions and can be tailored to meet specific organizational requirements. The overall workflow remains consistent.
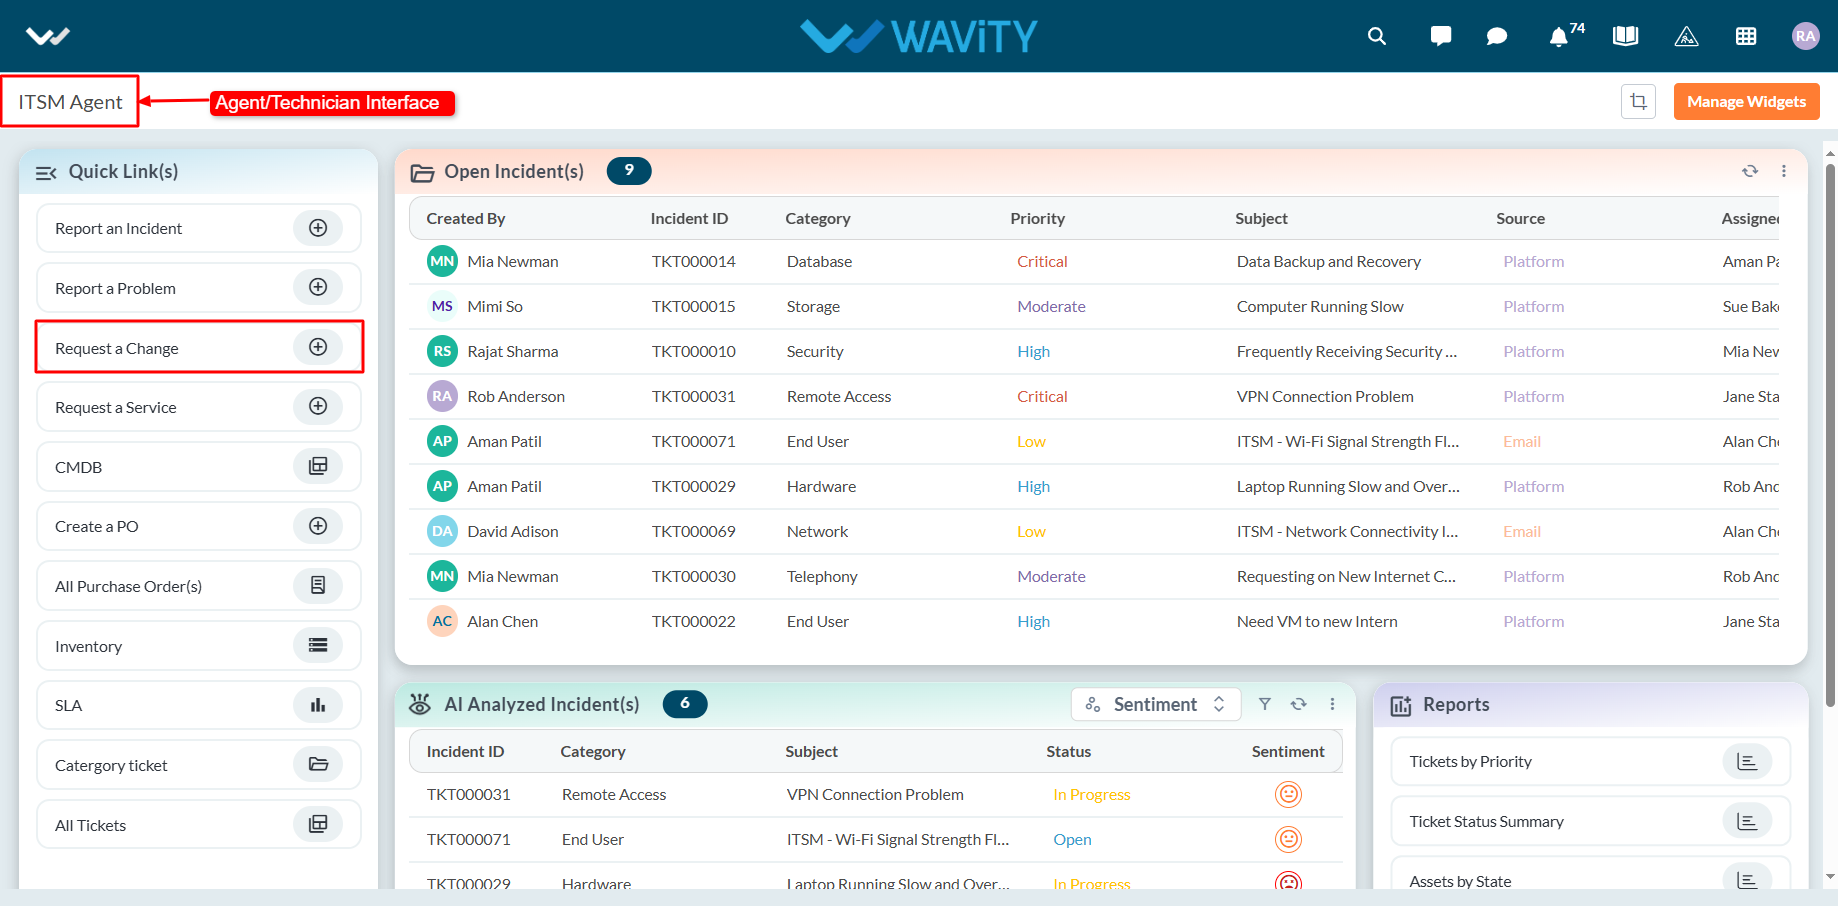
- Agents with appropriate permissions can log in using their credentials and will be directed to the Agent Interface.
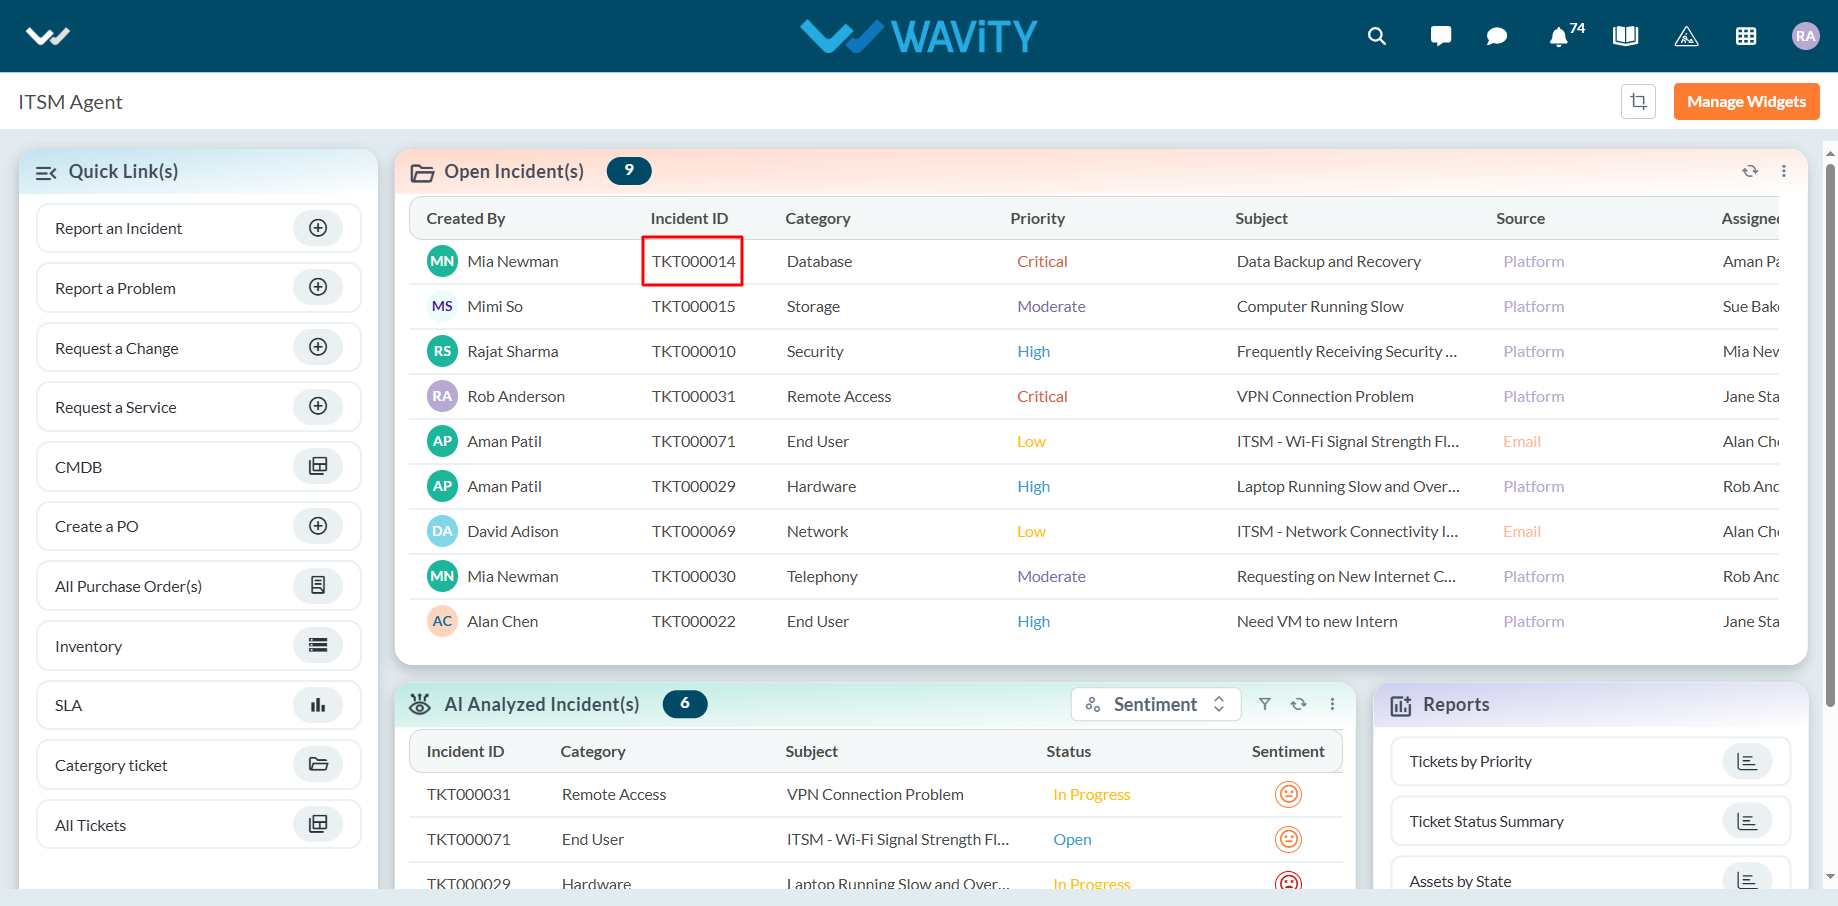
- From the Quick Links section, click on ‘Request a Change’ to initiate a new change request.
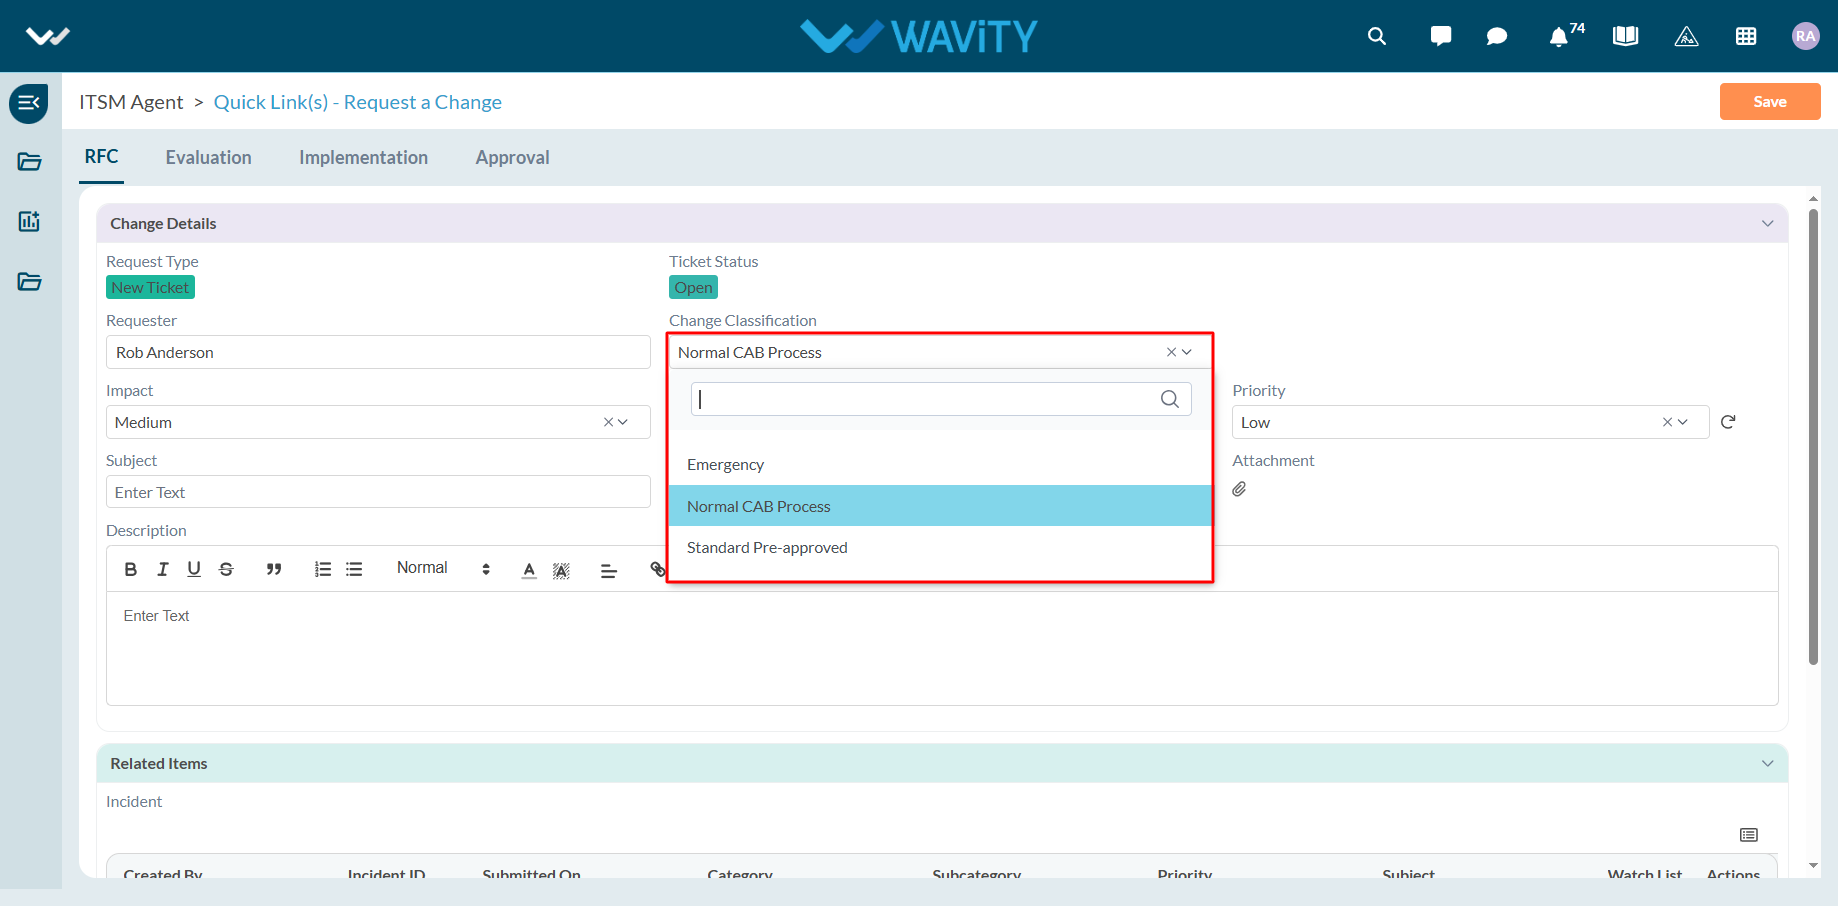
- Use the Change Classification dropdown to select the type of change: Emergency, Normal CAB Process, Standard Pre-Approved.
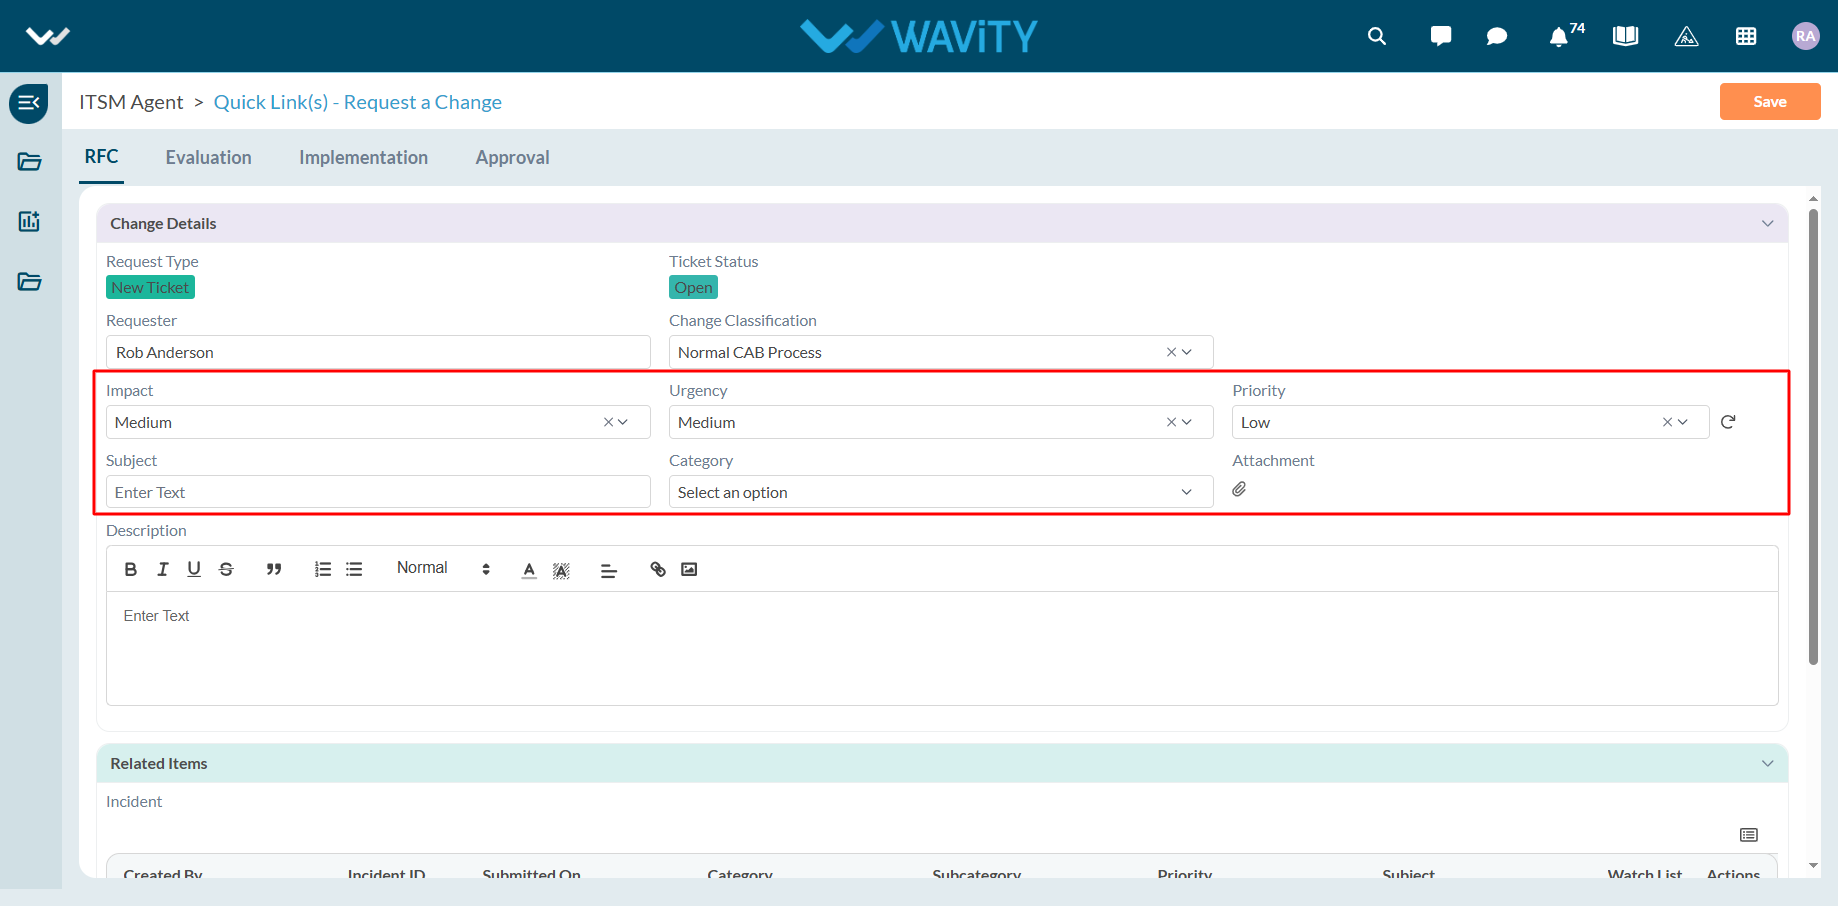
- Populate relevant fields using dropdown menus fields such as impact, urgency, priority, category. Attach any supporting files relevant to the change using the file upload option.
- Enter a Subject for the change request.
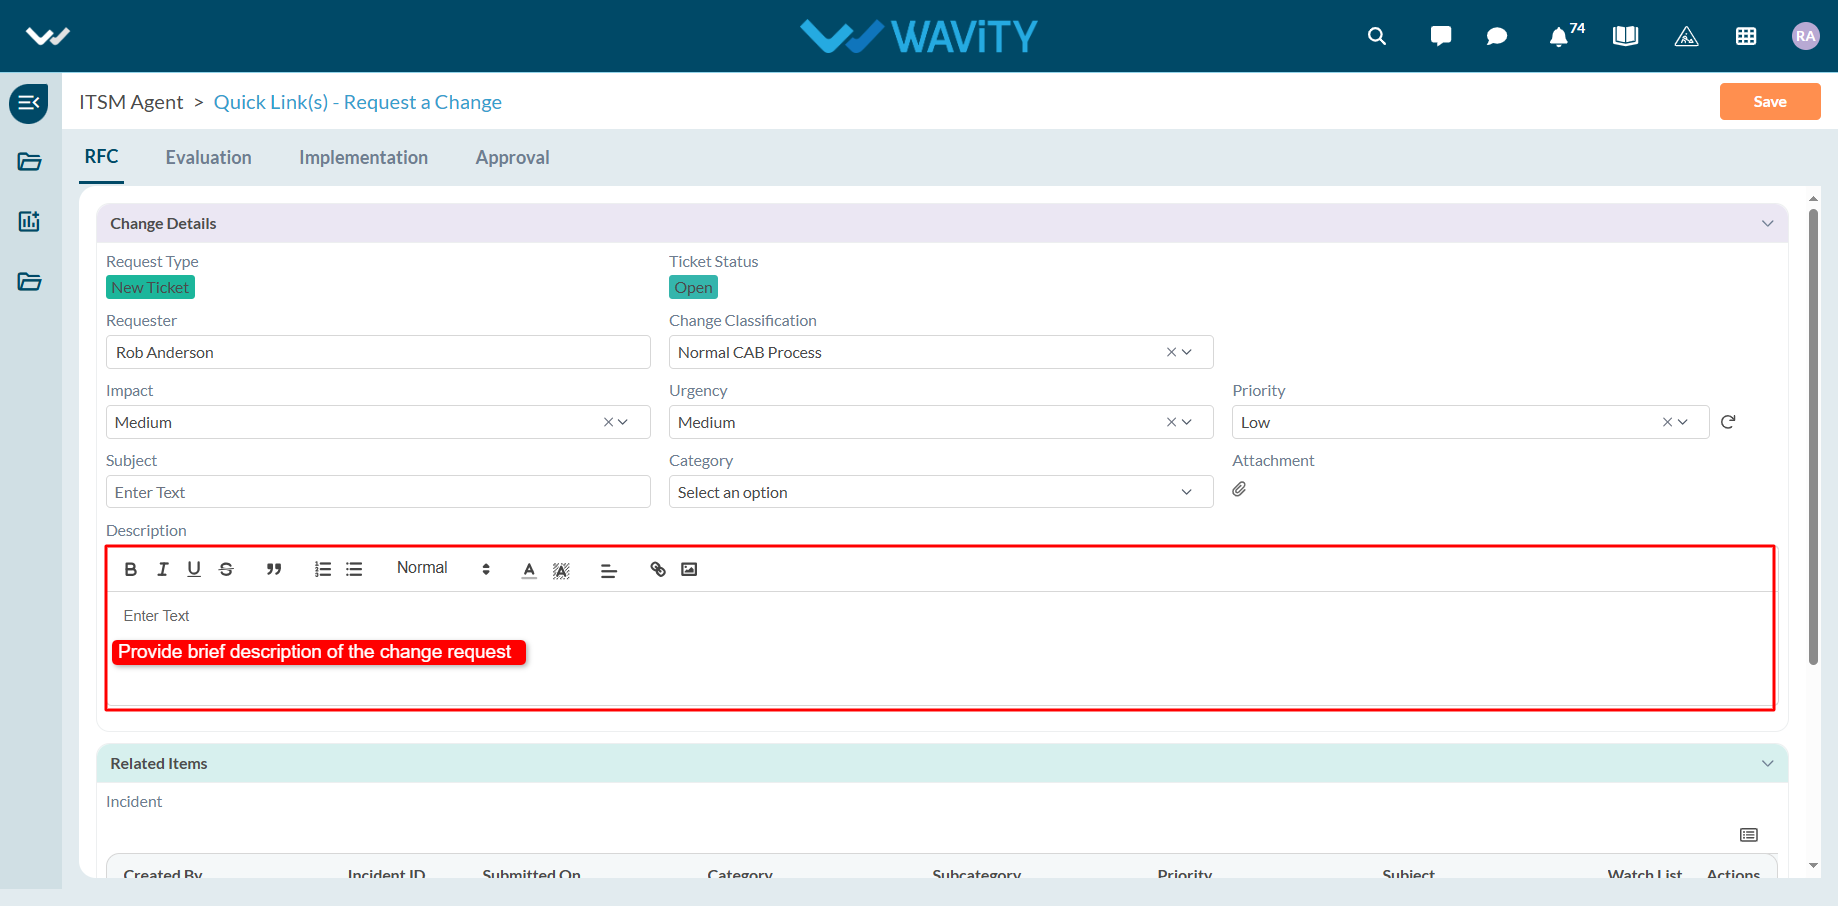
- Provide a brief and clear Description of the change in the designated field.
- Now, to link an incident to the change request, agent can click on the ‘Link’ icon as shown in below image.
- To link related incidents: Click on the ‘Link’ icon.

- Select the appropriate incidents from the list.
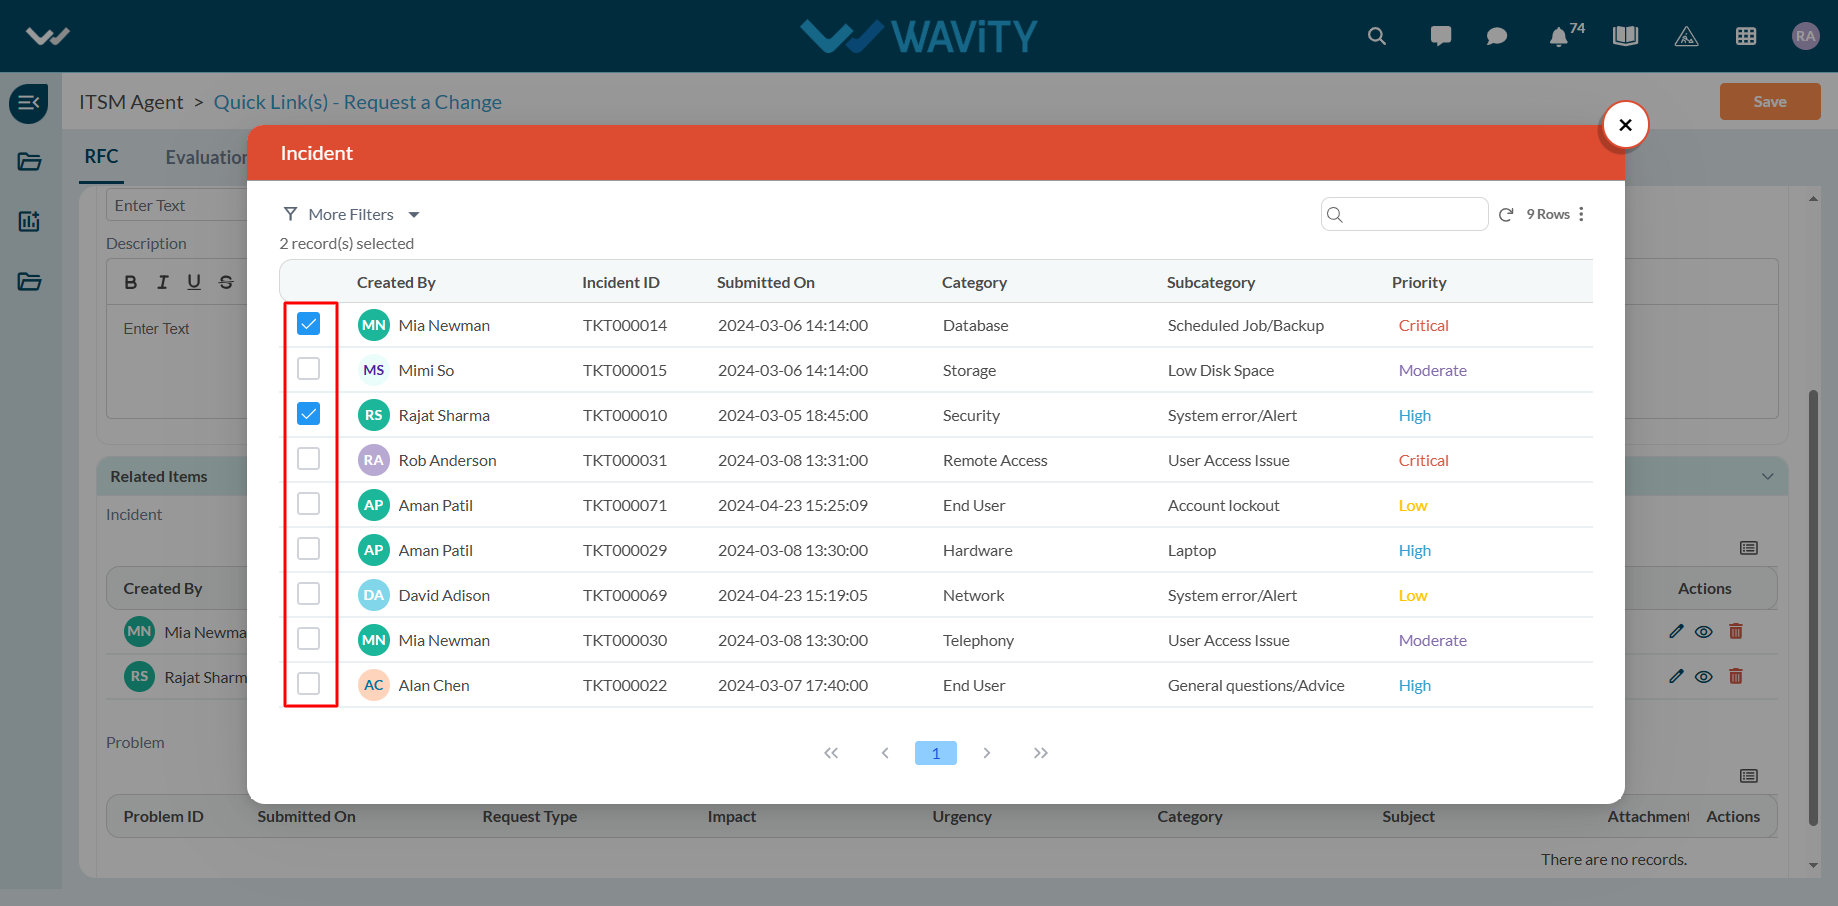
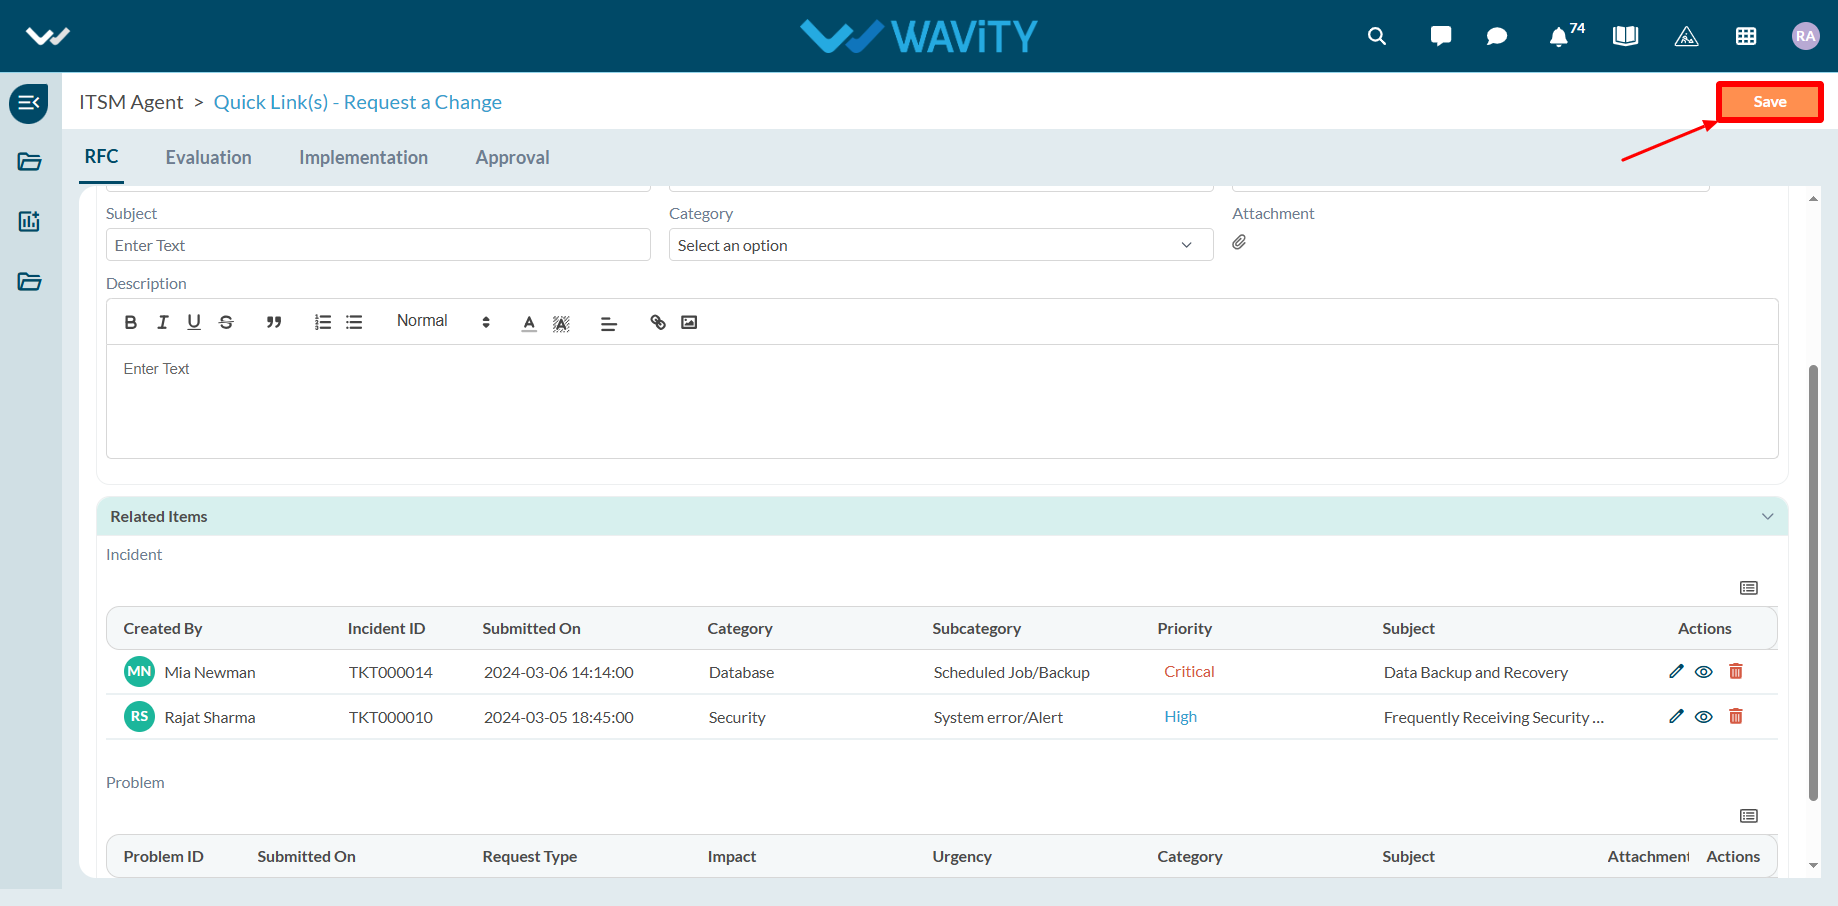
- Linked incidents will be displayed under the change request for reference. Once all details are completed, click ‘Save’ or ‘Submit’ to log the change request.
- Upon submission, the Change Manager will be automatically notified to review and take further action.
- Alternatively, agents can also convert an incident into a change request by following these steps:
- Open an incident assigned to the agent.
- Navigate to the Resolution section. Use the dropdown to select the option to Convert to Change Request.
