Creating Print Templates in App Designer
Creating Print Templates in App Designer
- In Wavity, users can print tickets by selecting specific form fields they want to include in the printout.
- Only users with Admin access can create a Print Template.
- Click on the Profile icon and select Design Tools.
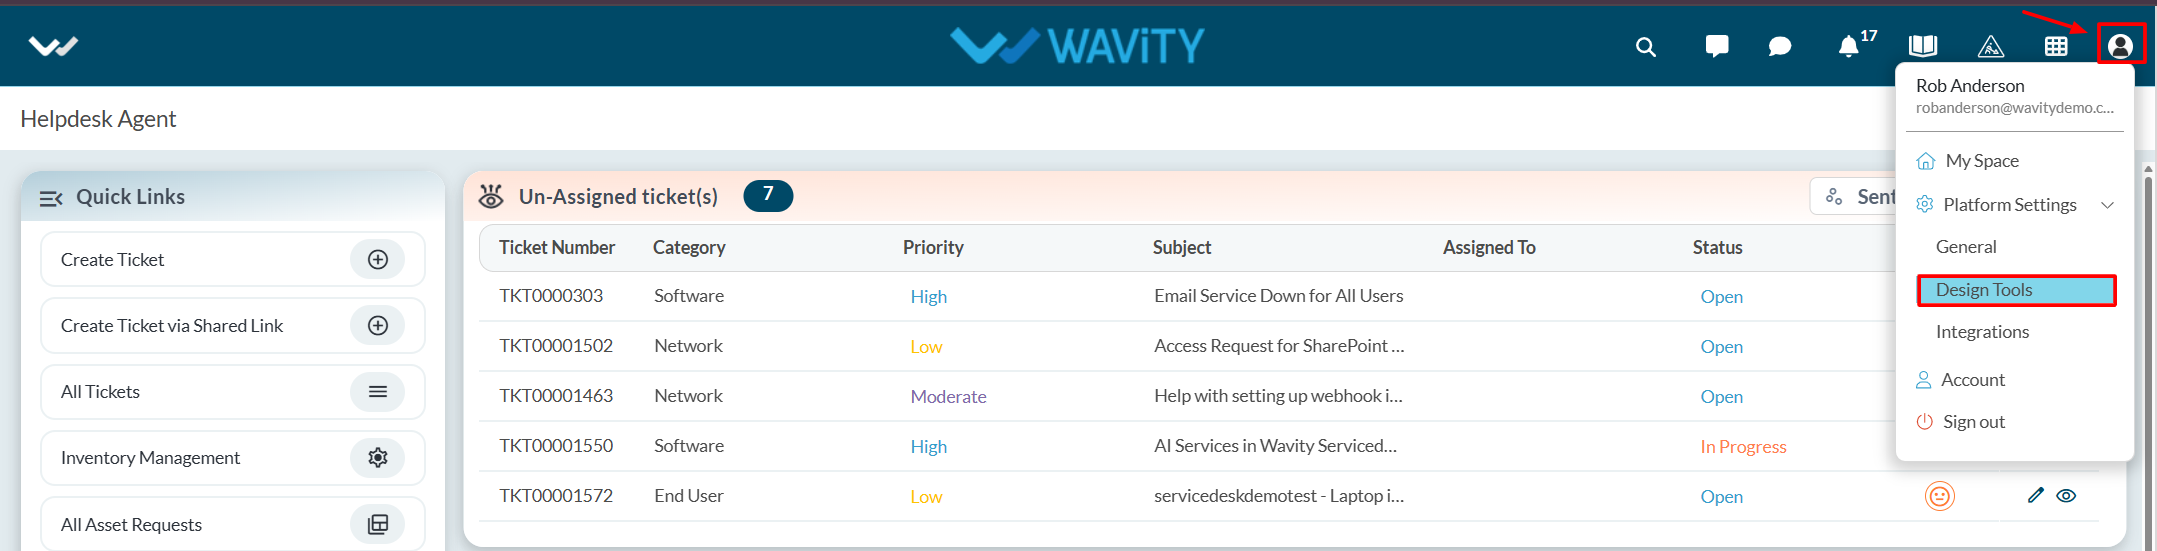
- You will be redirected to the Design Tools page, where under the App tab, you can select the desired application, click the three dots, and choose Print Template.

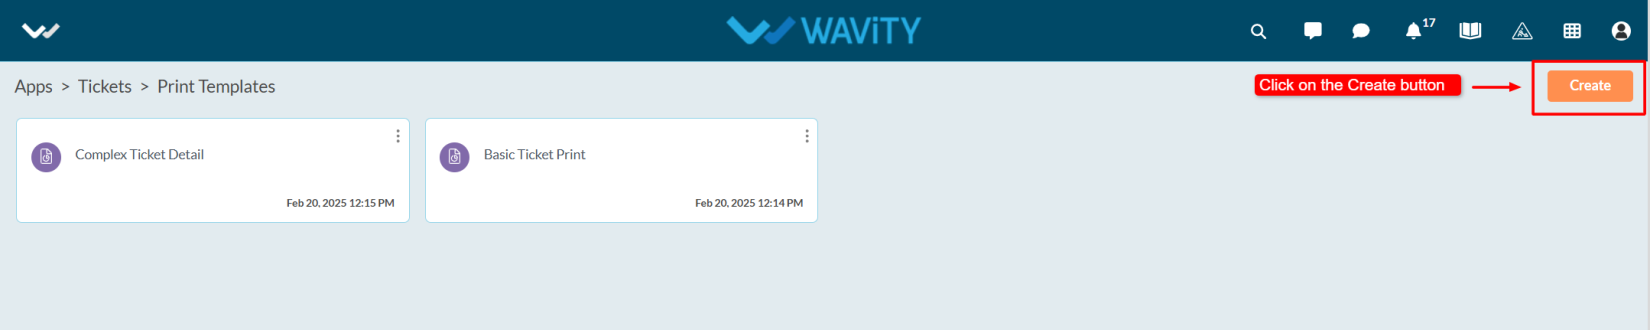
- Click on the Create button.
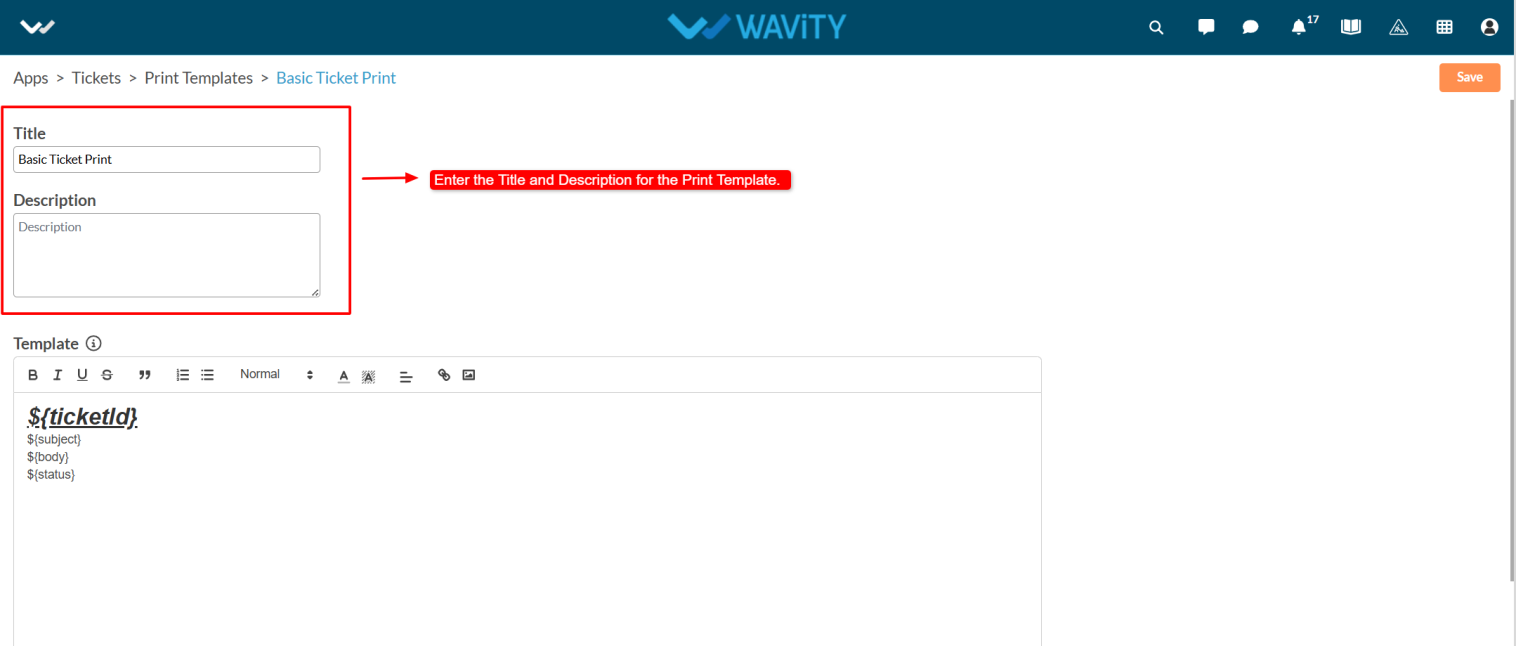
- Enter the Title and Description as per your requirements.
- Content can dynamically use data from application records.
- To identify which parts of the content should be replaced with application data, use a unique identifier.
- Wrap the identifier with ${} syntax. For example :${ name} – Here, the key name will be replaced with the corresponding value from the application record.
- Note: Keys must only contain alphabets and numbers. No spaces or special characters are allowed.
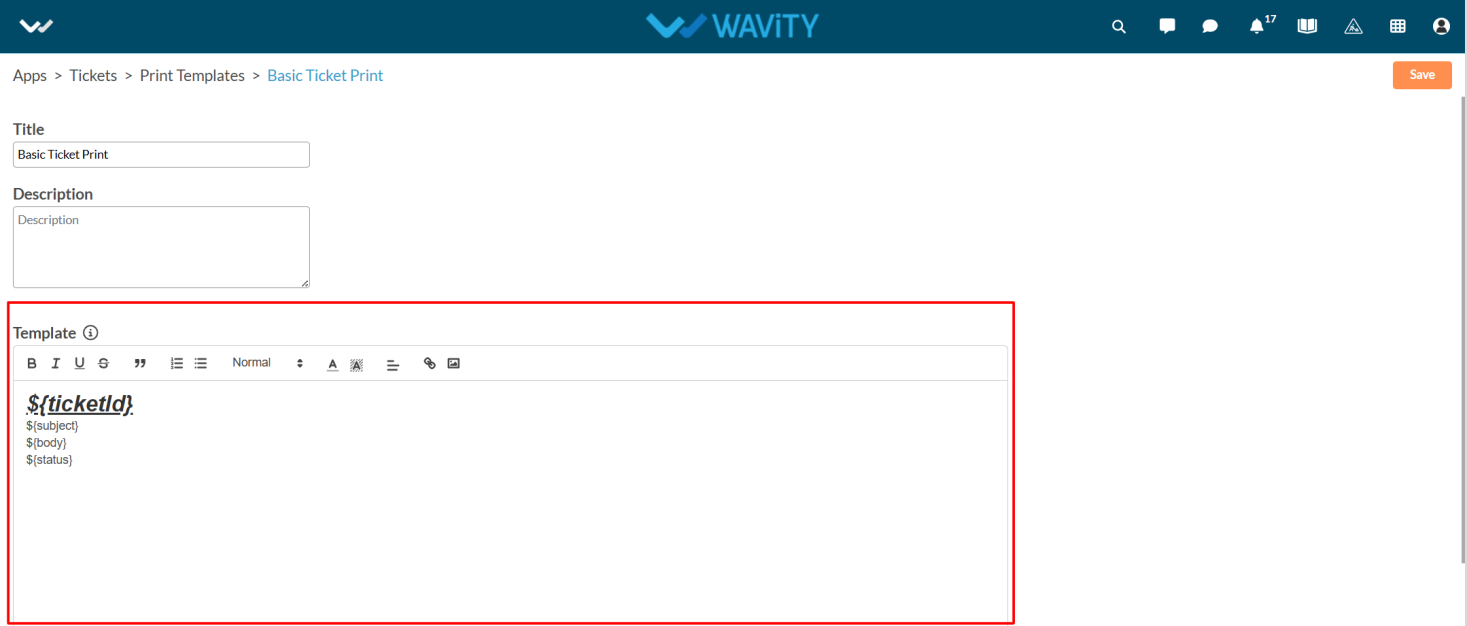
- Mention the form fields to be included in the printable version of the ticket in the Template box. After entering the details, click the Create button to save the template.

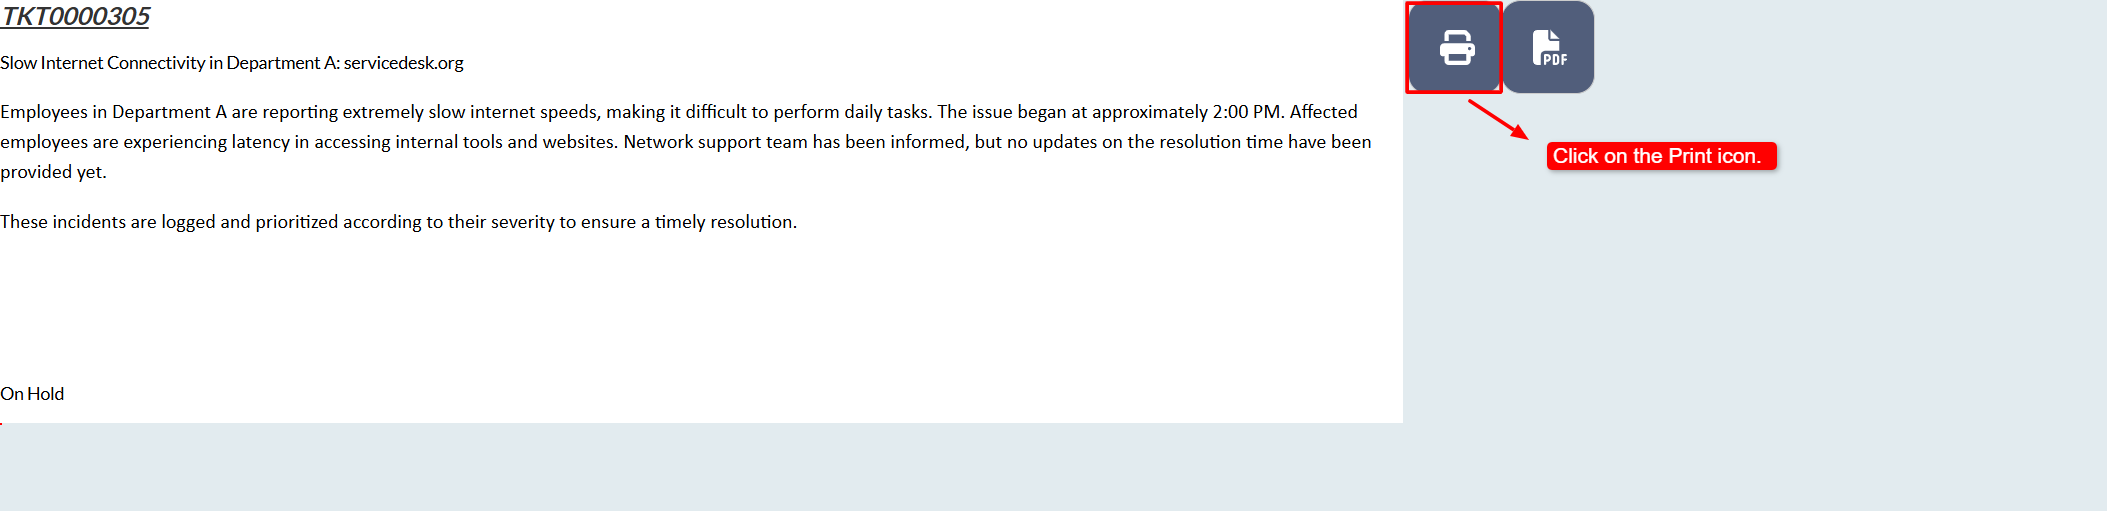
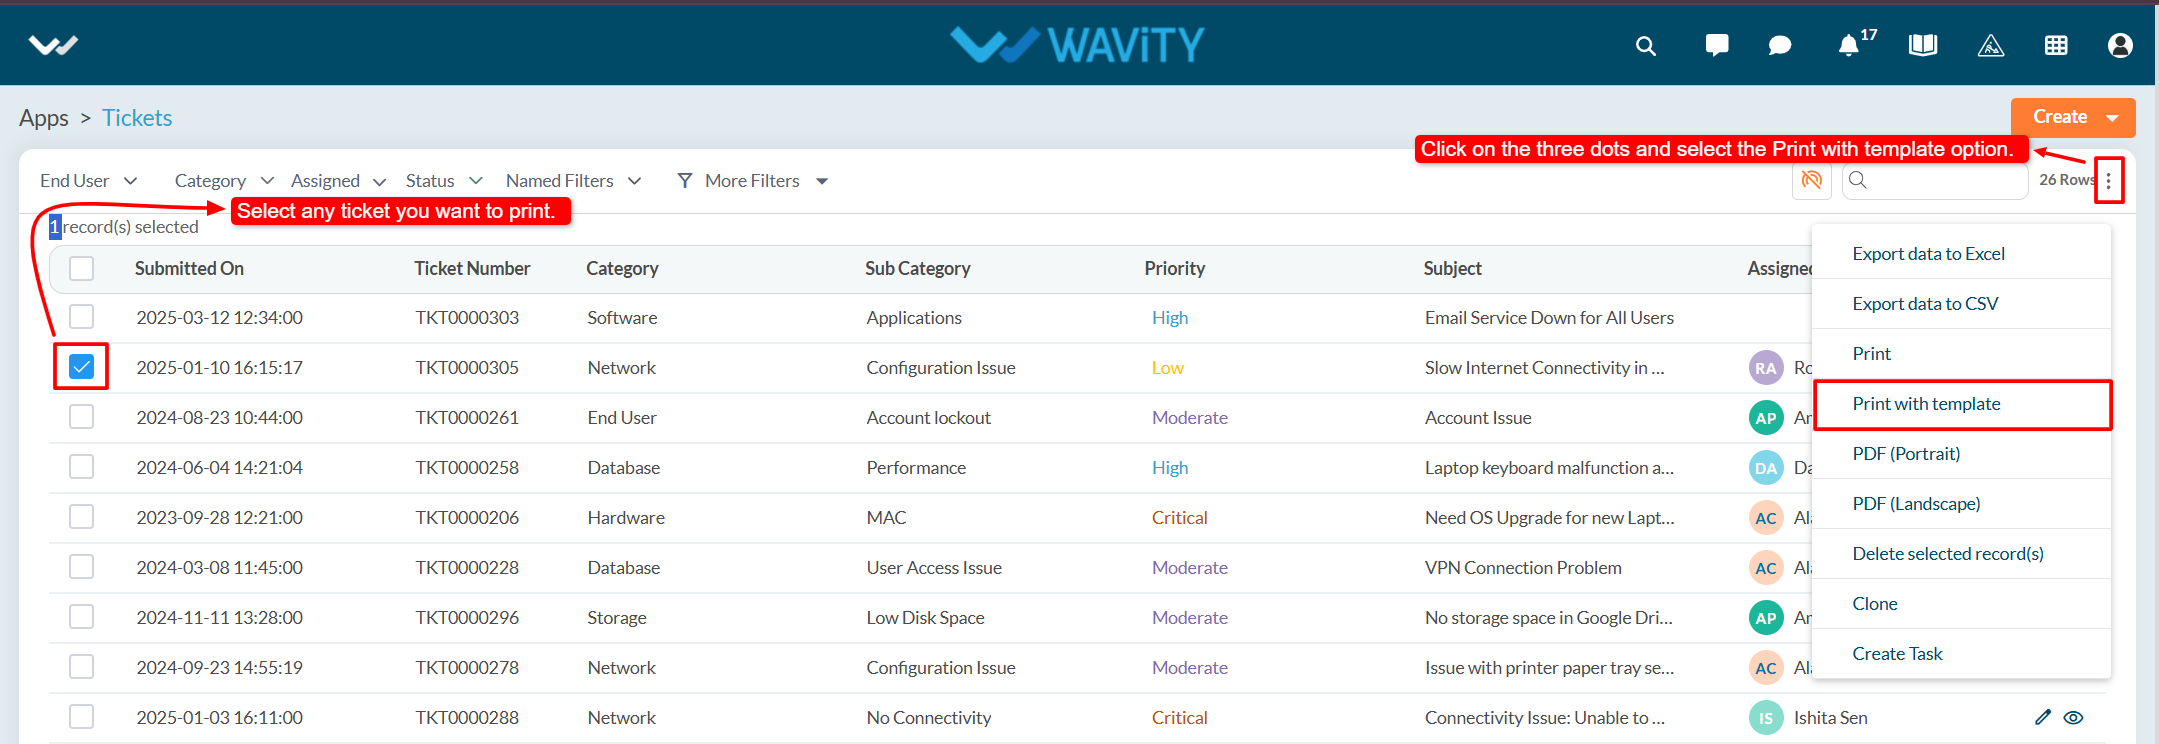
- Select any ticket from the application, then click on the three-dot menu and choose Print with Template.
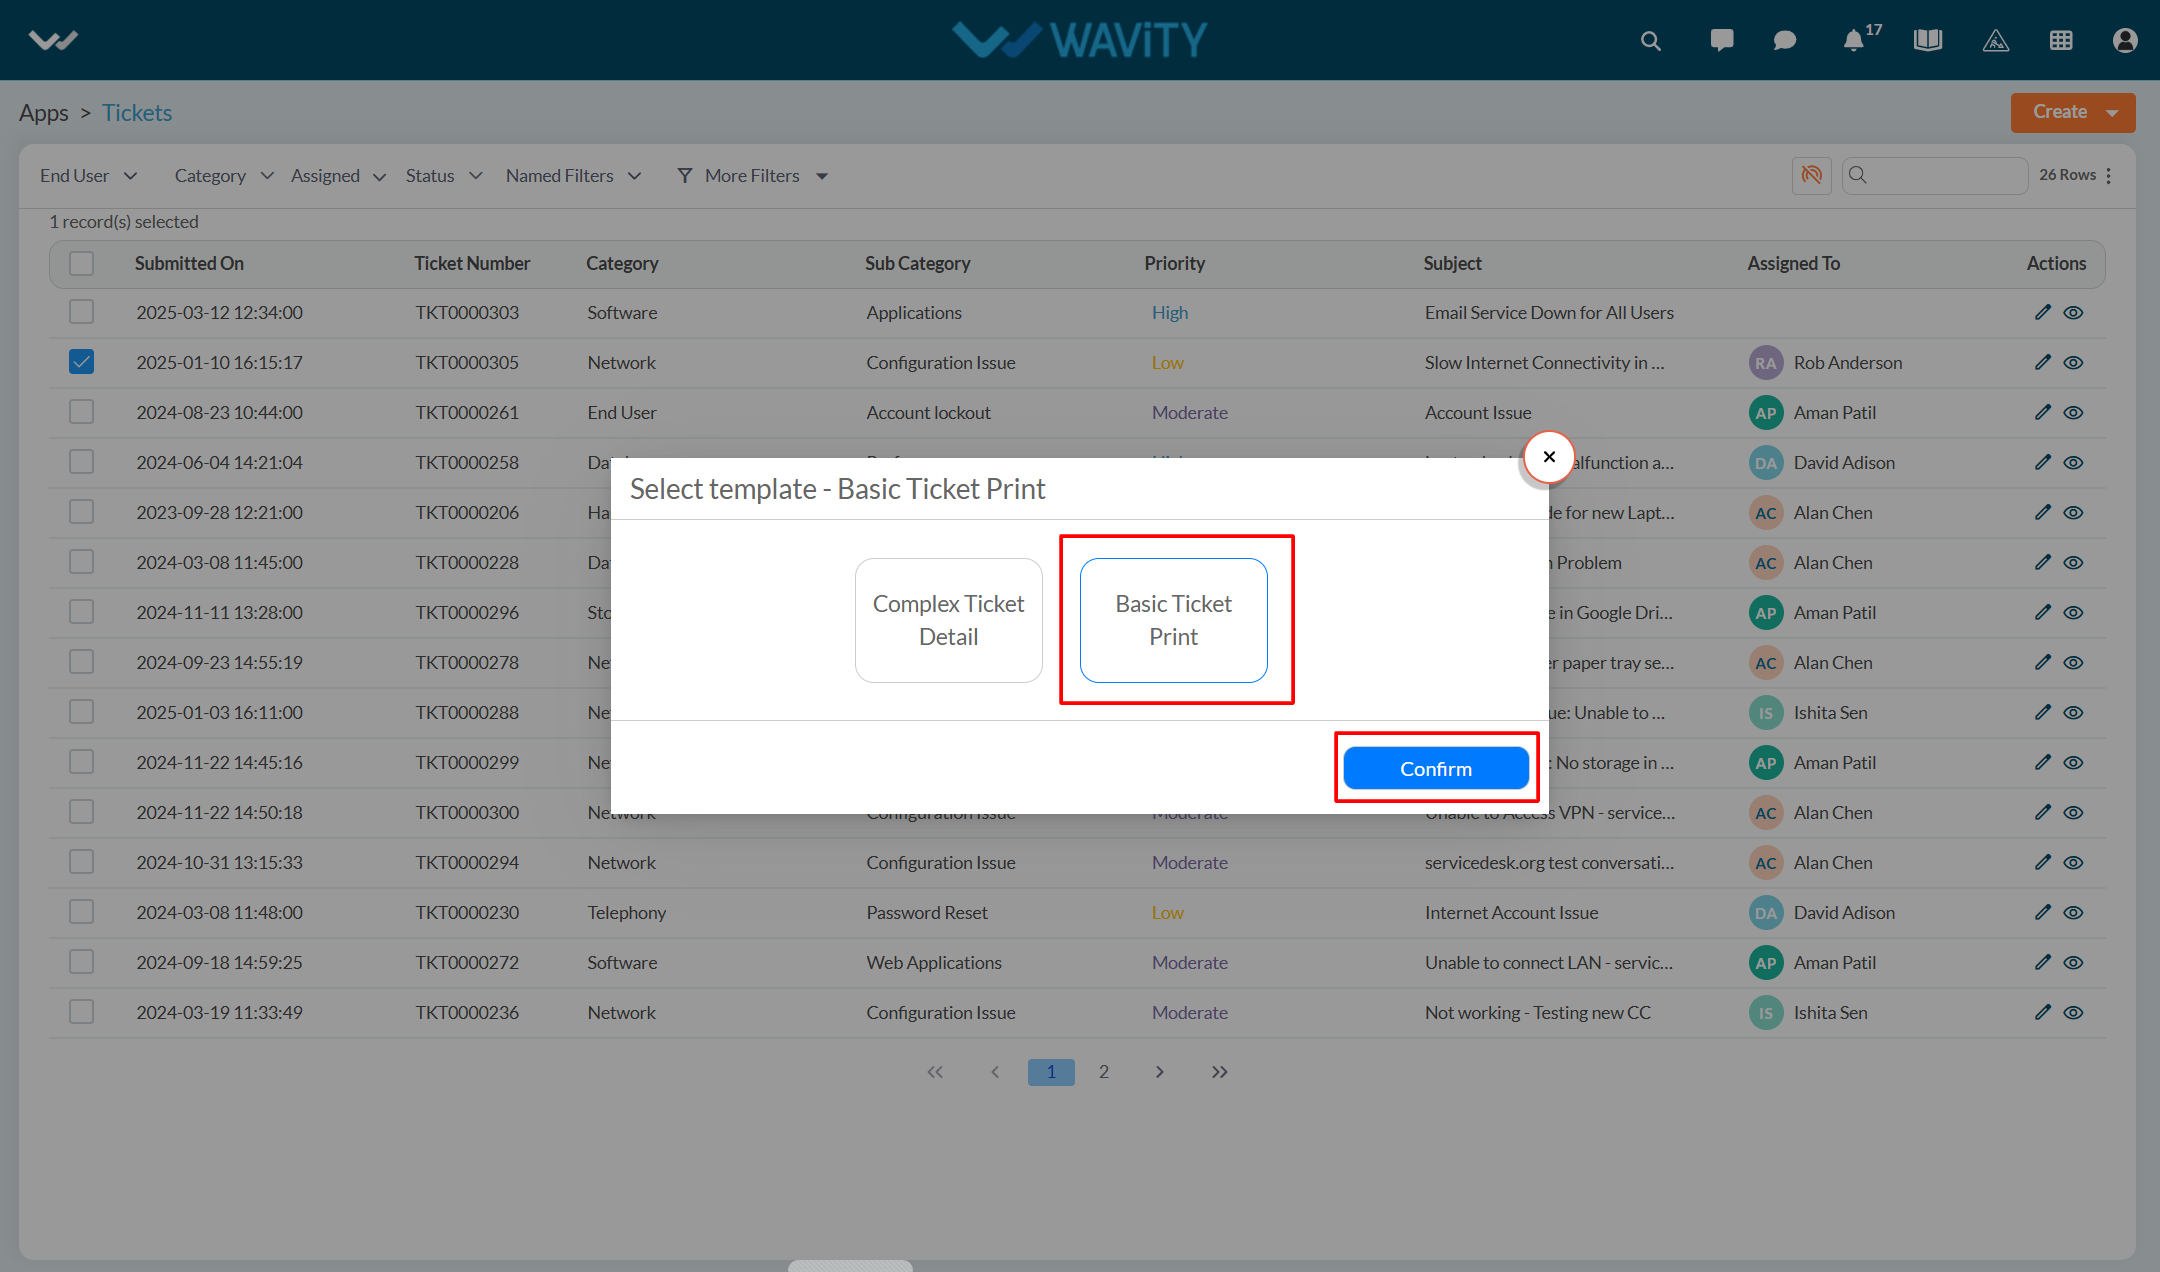
- From the options of available templates, select the desired one and click Confirm.
- You will see a Print Preview of the ticket.
- Click on the Print icon to print the ticket.