Creating Data Templates in App Designer
Creating Data Templates in App Designer
- In Wavity, Data Templates are pre-defined forms that allow end users to quickly fill out information with a single click, minimizing manual effort.
- Creating a Data Template is a simple and straightforward process; only admin will have access to create Data Templates.
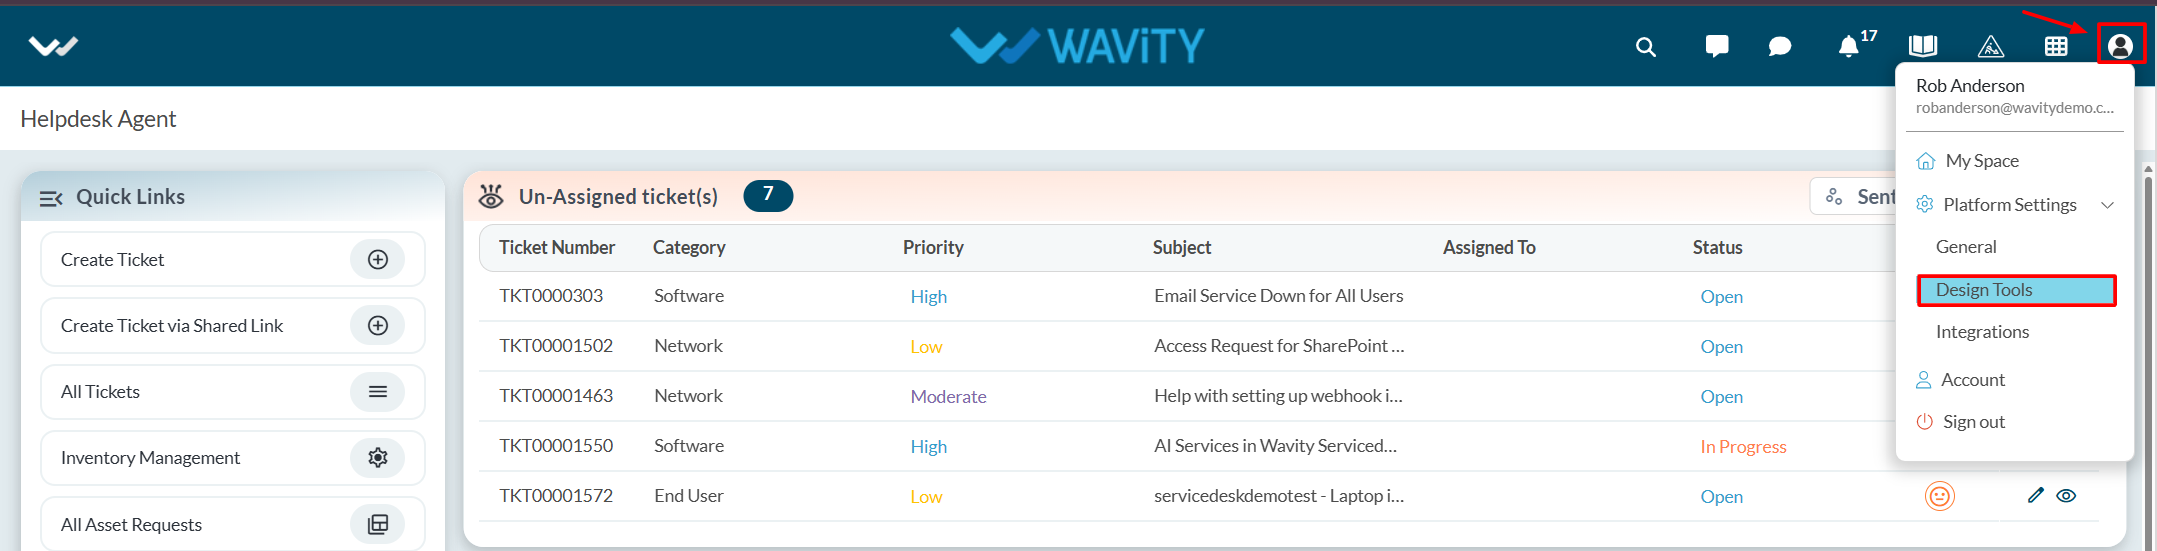
- Click on the Profile icon and select Design Tools.
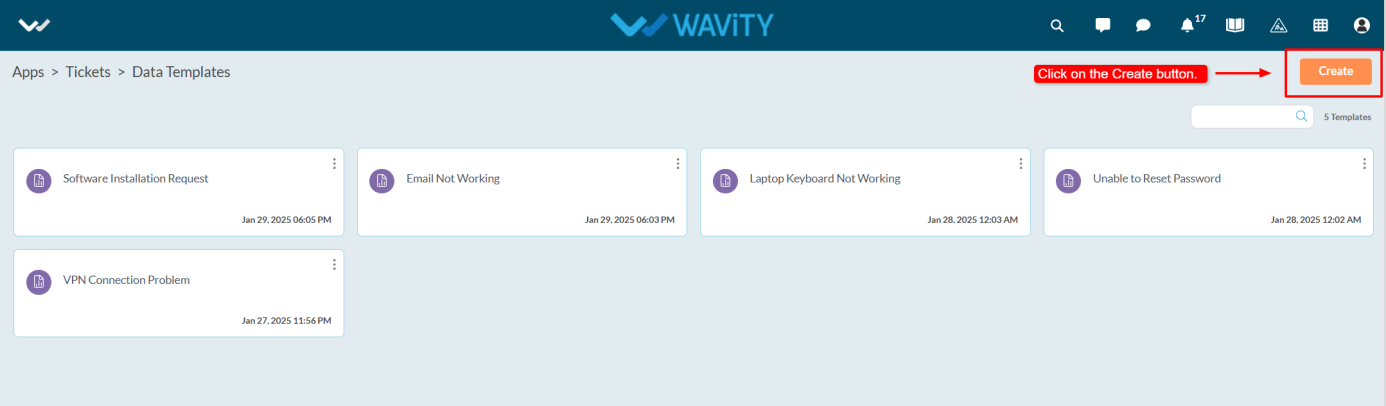
- You will be redirected to the Design Tools page. Under the App tab, choose the application where you want to create the Data Template. Click on the three dots and select Data Templates.

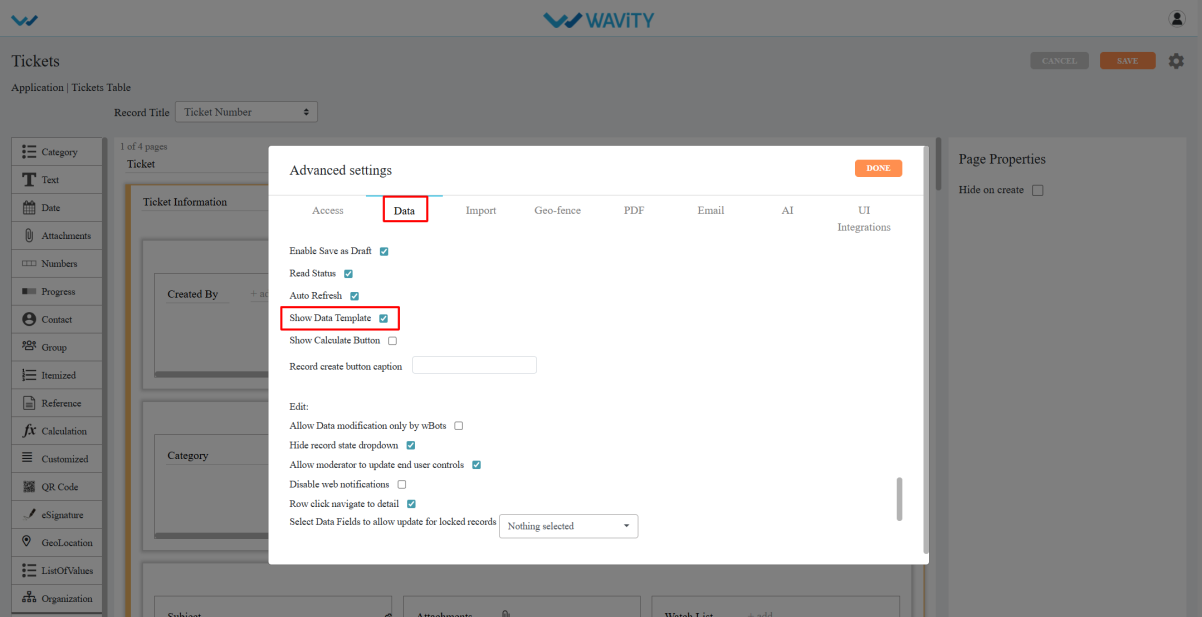
- Make sure that the "Show Data Template" option is enabled in the Advanced Settings.
- Click on the Create button.
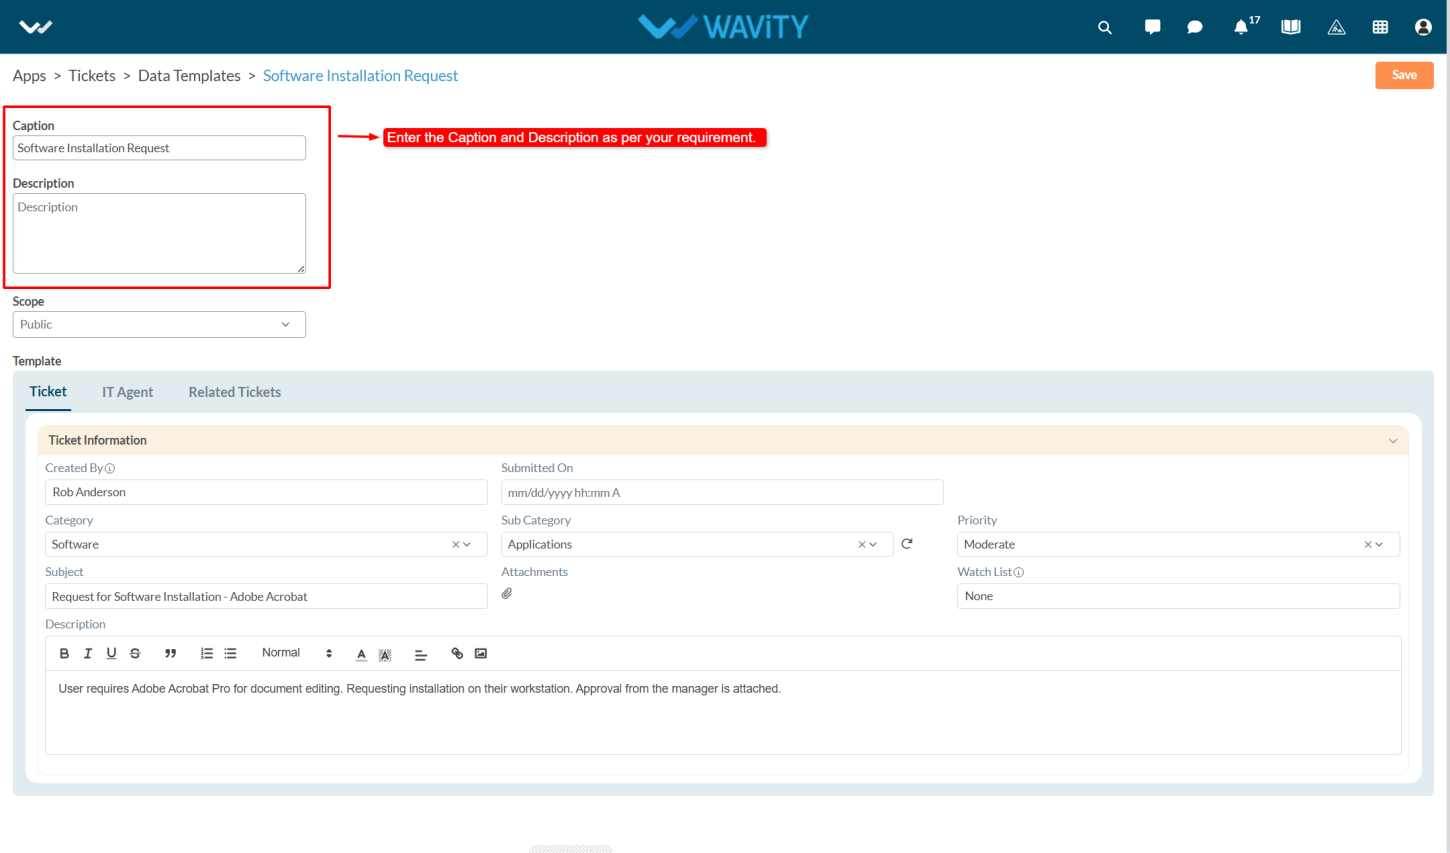
- Enter the Caption and Description as required.
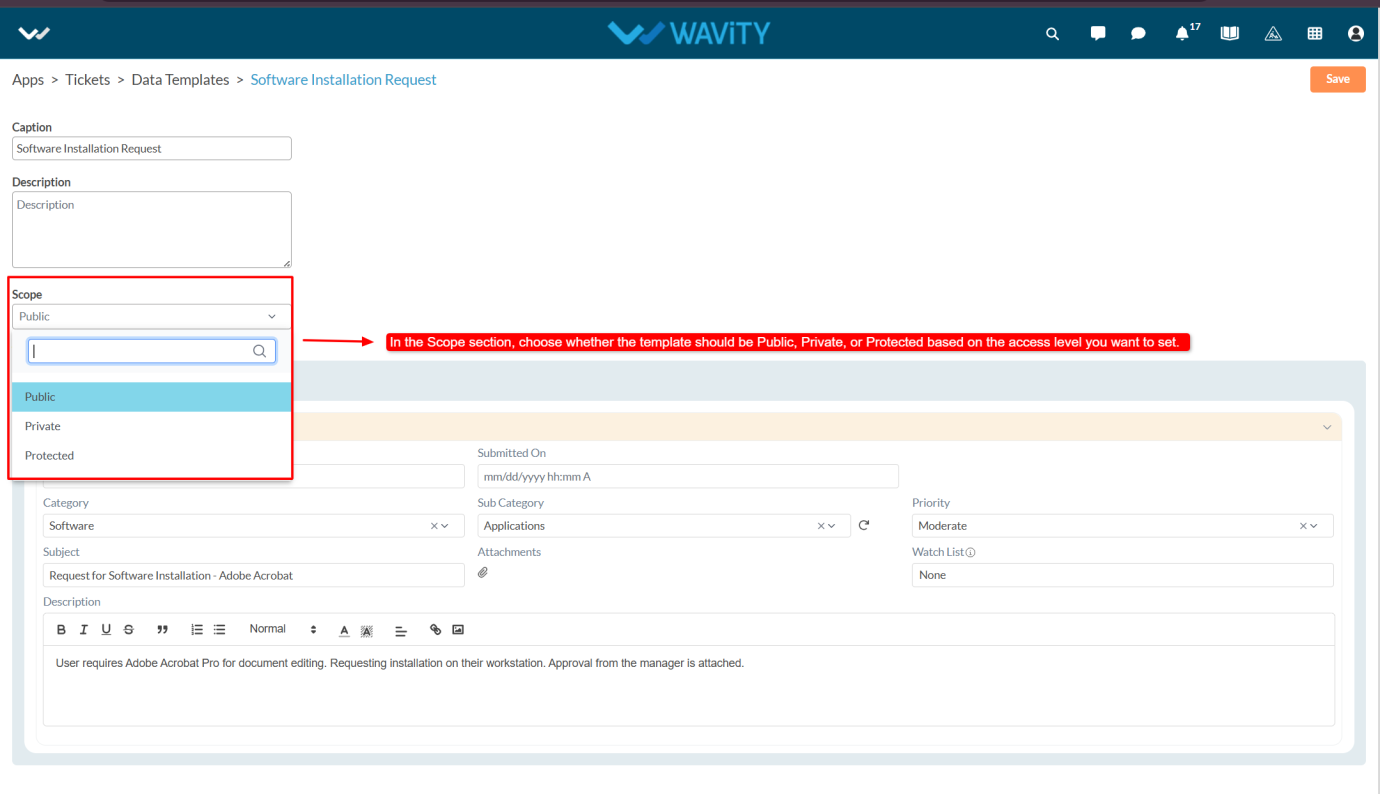
- In the Scope section, choose whether the template should be Public, Private, or protected based on the access level you want to set.
- Public: Accessible to all users.
- Private: Accessible only to the admin who created the template. If one admin creates a template, only they can view it—other admins will not have access to that template.
- Protected: Accessible only to selected users or groups.
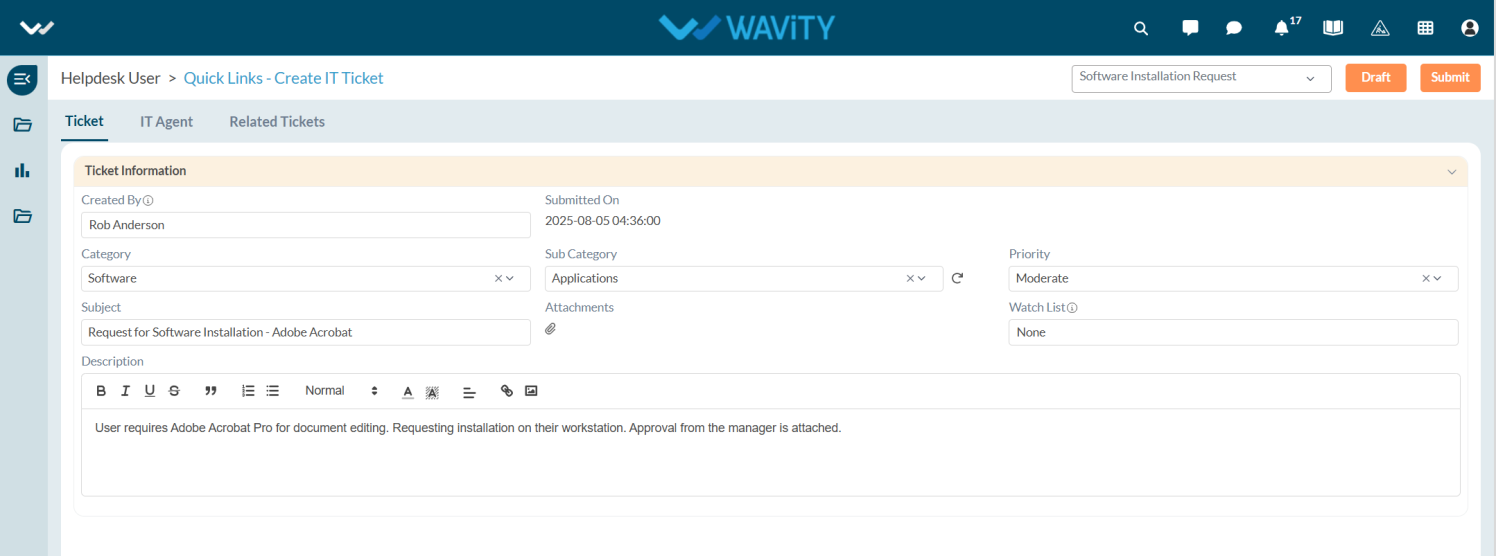
- Fill in the Template such as Category, Subcategory, Priority ,subject and description.
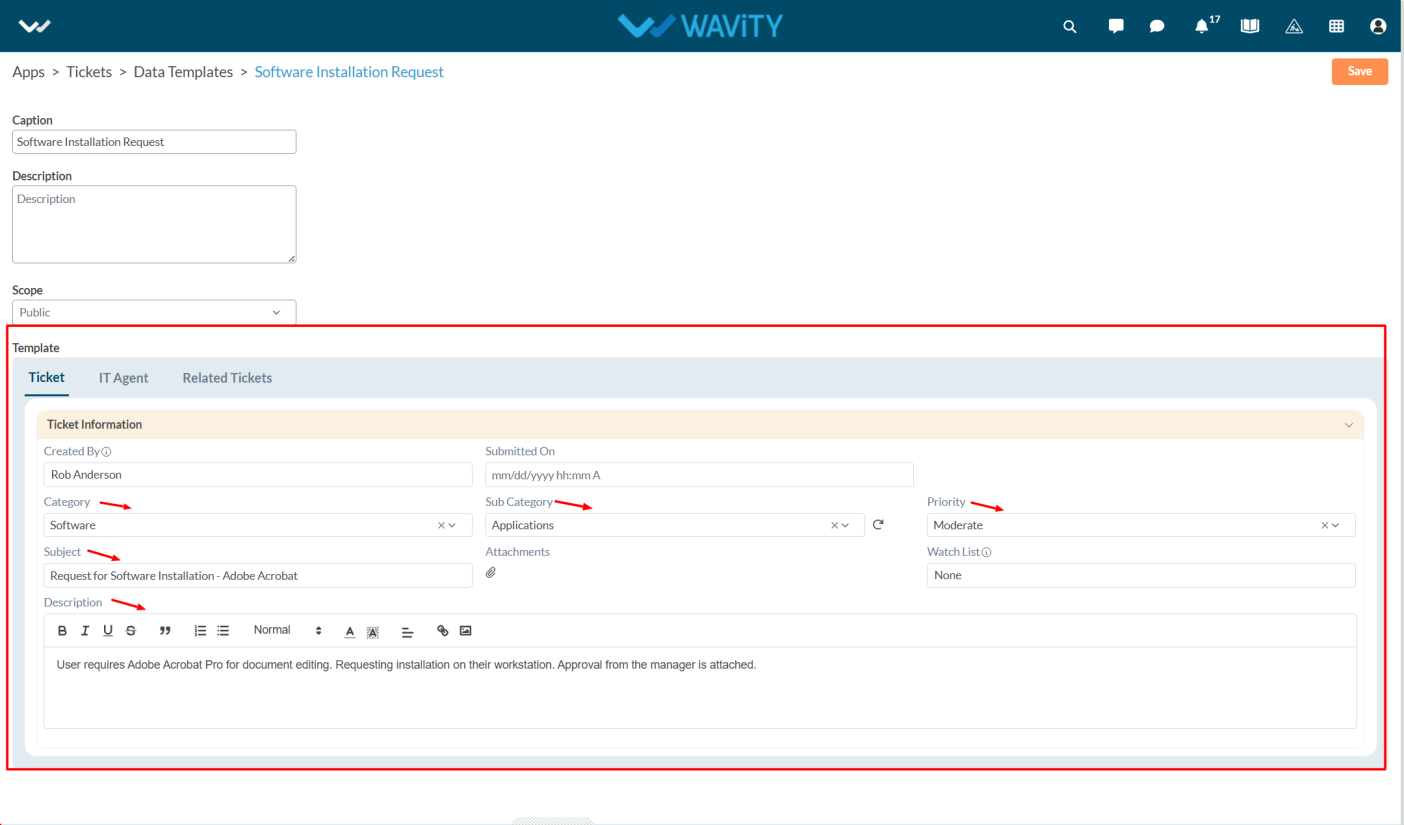
- After entering the required details and selecting the form, click on the Save button to create the Data Template.

- When navigating to the Ticket Creation page, users will see the available Data Templates at the top. Users can select a template.

- Click Yes to apply it.
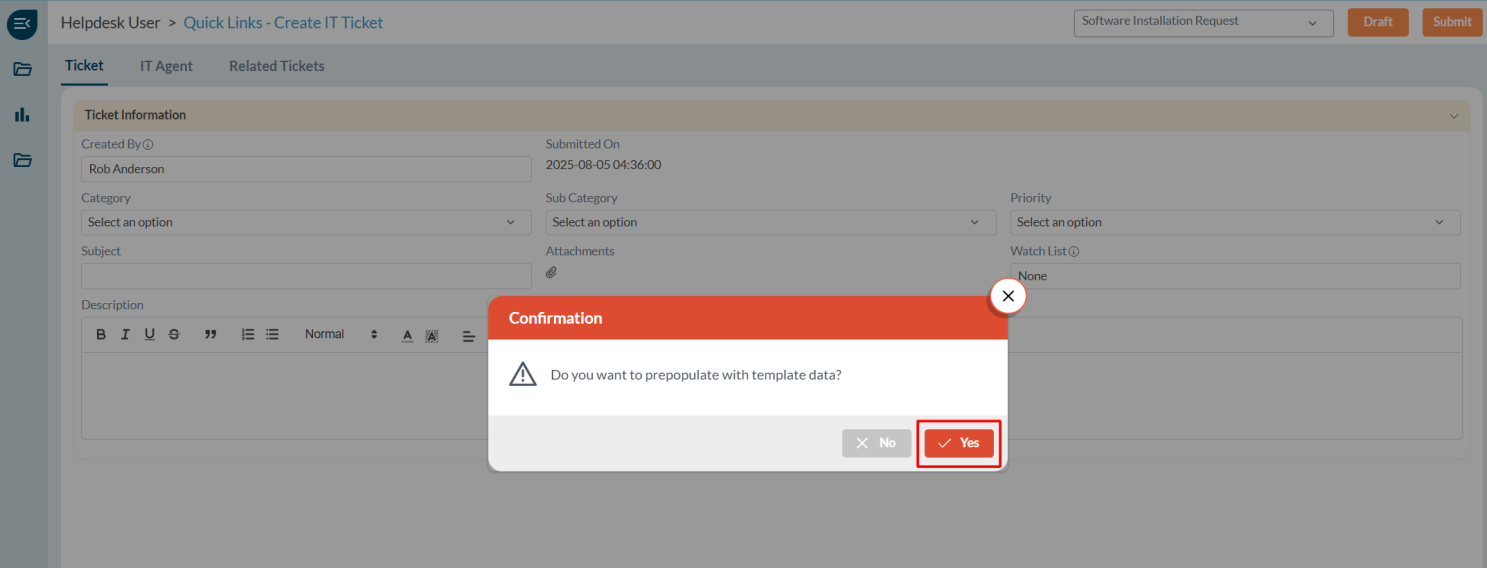
- The form fields will be automatically filled based on the selected template.