Agent Guide: Creating and Managing Onboarding Requests
Agent Guide: Creating and Managing Onboarding Requests
- The Wavity platform offers a simple and user-friendly process to On board a new user.
- An agent (with appropriate access) initiates the process by creating an Onboarding Request.
- Note: The following steps serve as a general guide and can be customized as needed. However, the core workflow remains consistent.
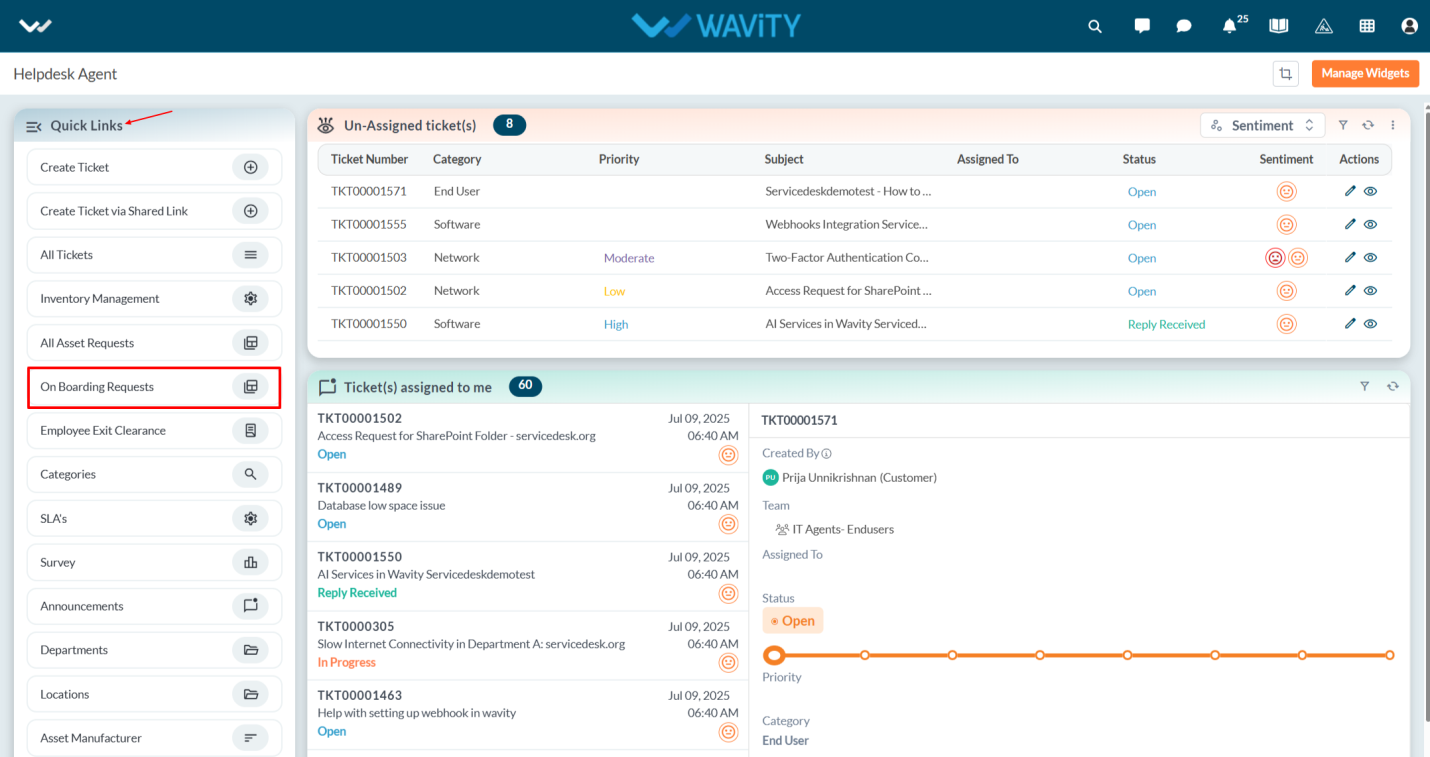
- In the Agent Persona, go to Quick Links and select On Boarding Requests.
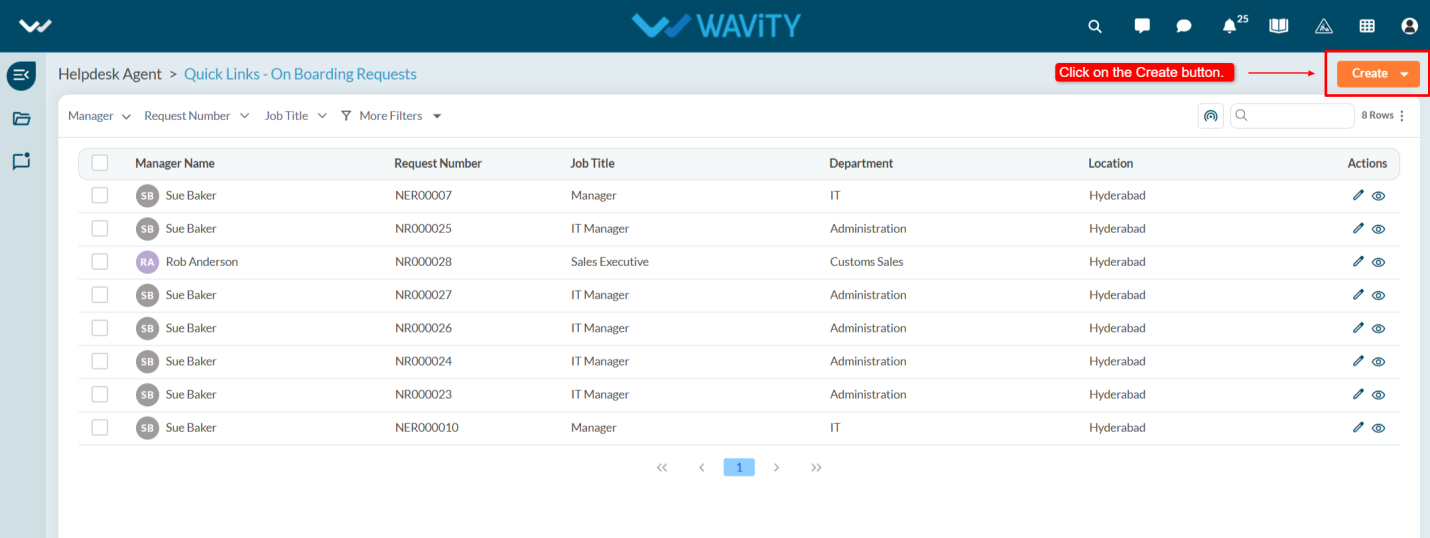
- Click the Create button to initiate a new On Boarding Requests.
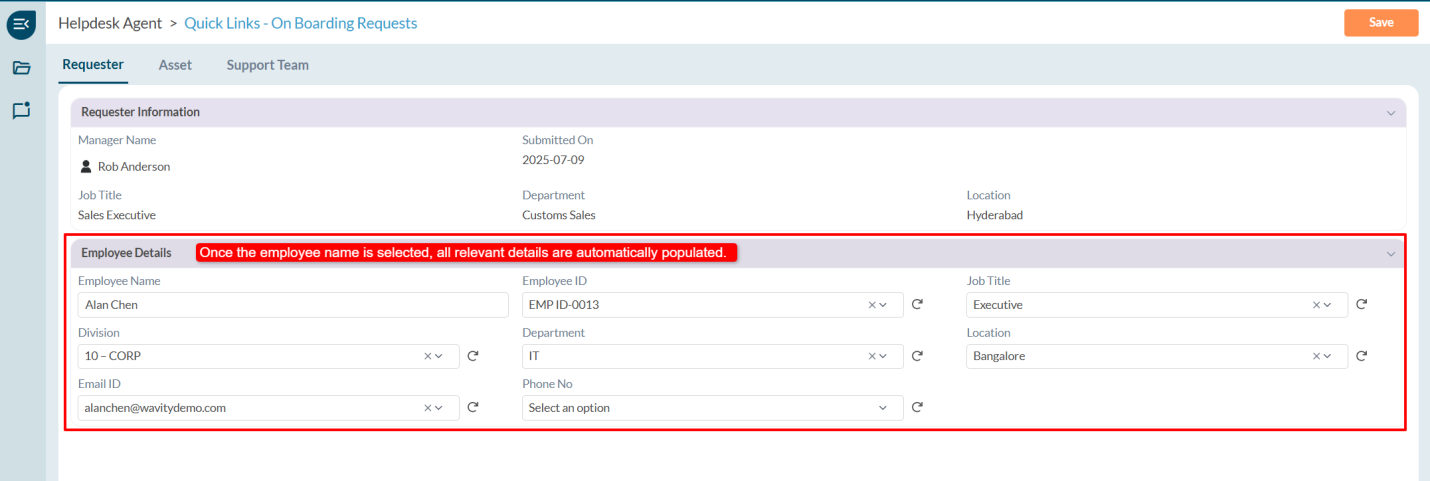
- You will be redirected to the Requester Information and Employee Details under the Requester tab.
- In the Requester Information section, the manager details will be fetched automatically.
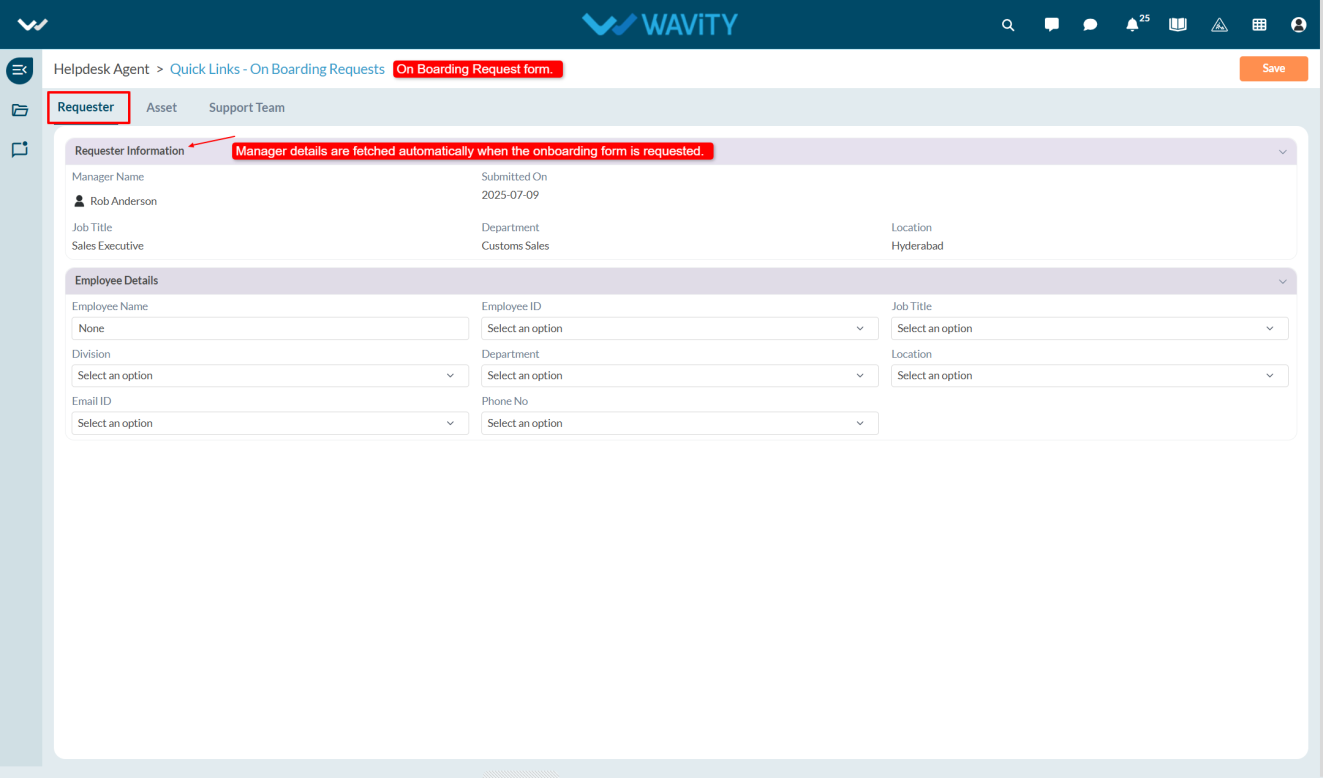
- In the Employee Details section, select the employee name from the dropdown list once selected, related details such as Employee ID, Email ID, and Designation will be populated automatically.
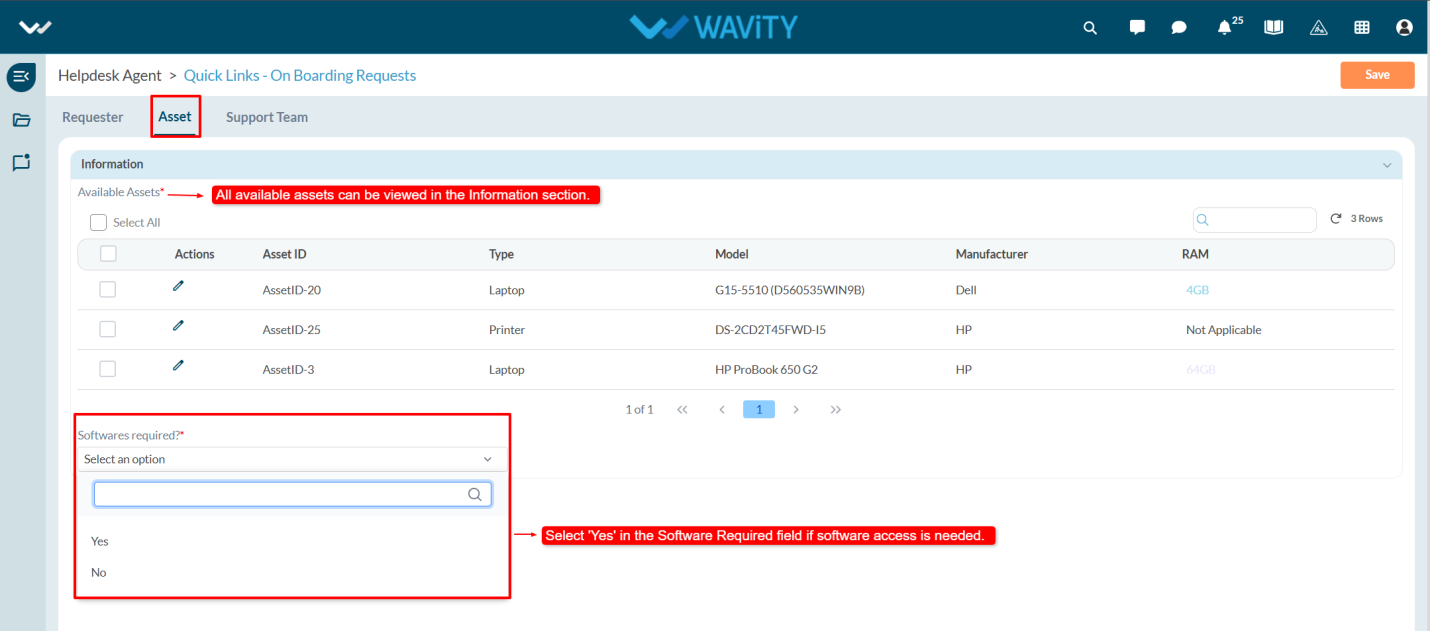
- In the Asset tab, you can view all available assets. If the agent wants to provide software access to the new joiner, they must set Software Required to Yes and then select the desired software from the dropdown list.
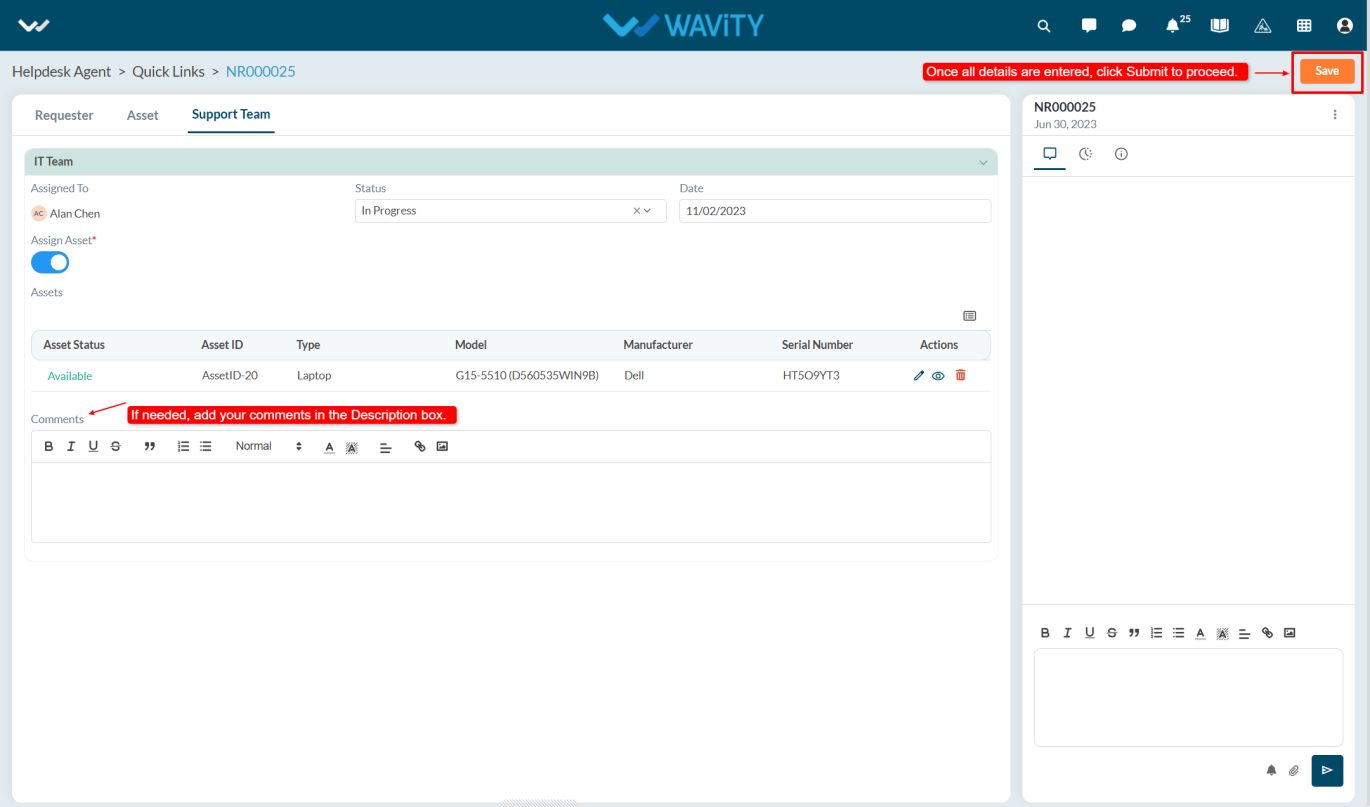
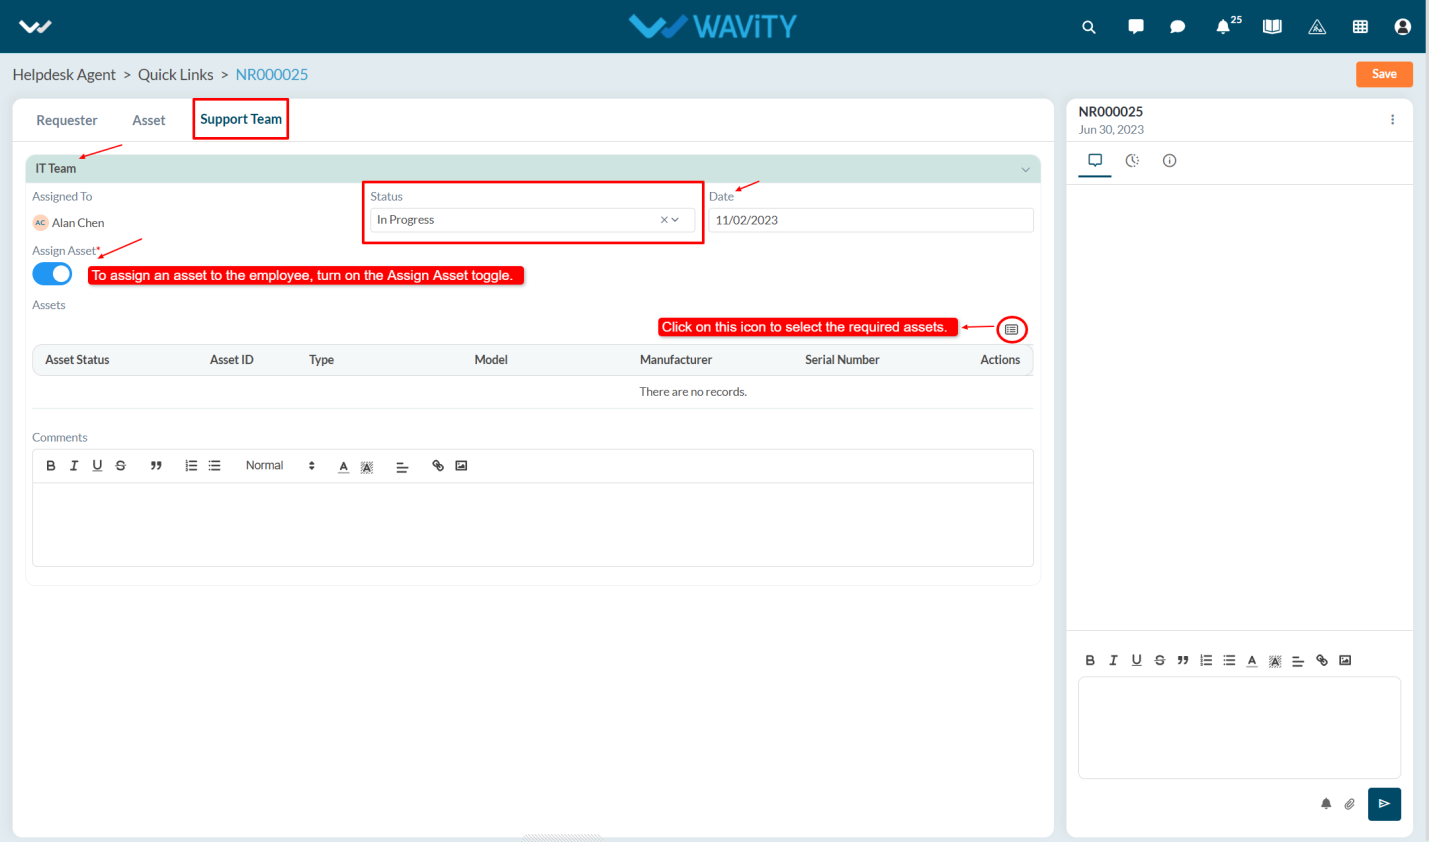
- In the Support Team tab under the IT Team, the agent changes the status, selects the asset assignment date, and enables the toggle Assign Asset. The agent must then select the required asset to assign to the employee by clicking on the Select More Records icon
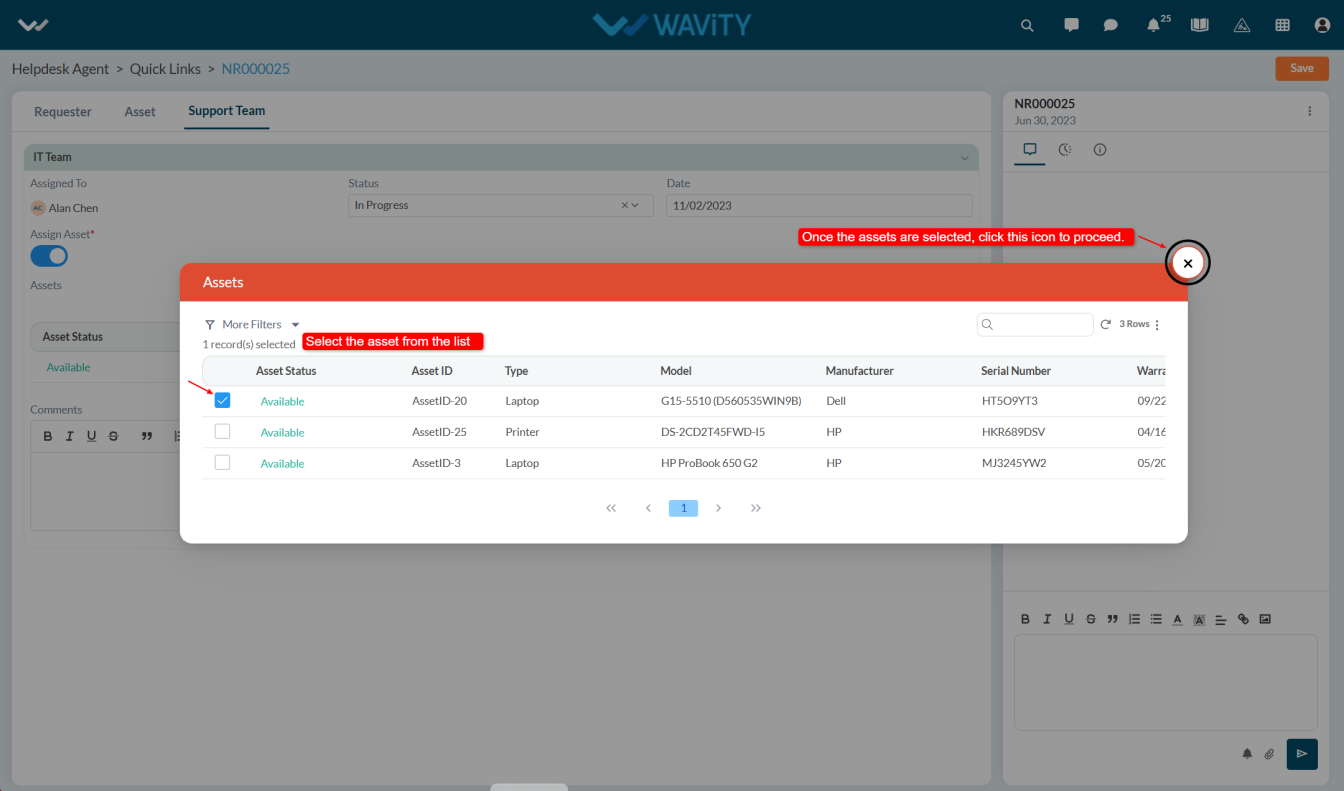
- Select the asset from the list to assign it to the employee.
- Optionally, the agent can add comments and click the Save button to apply the changes.