Employee Exit Clearance and Asset Return Process
Employee Exit Clearance and Asset Return Process
- The Wavity platform offers a simple and user-friendly process for returning assets during employee offboarding.
- An agent (with appropriate access) initiates the process by creating an Offboarding Request.
- Note: The following steps serve as a general guide and can be customized as needed. However, the core workflow remains consistent.
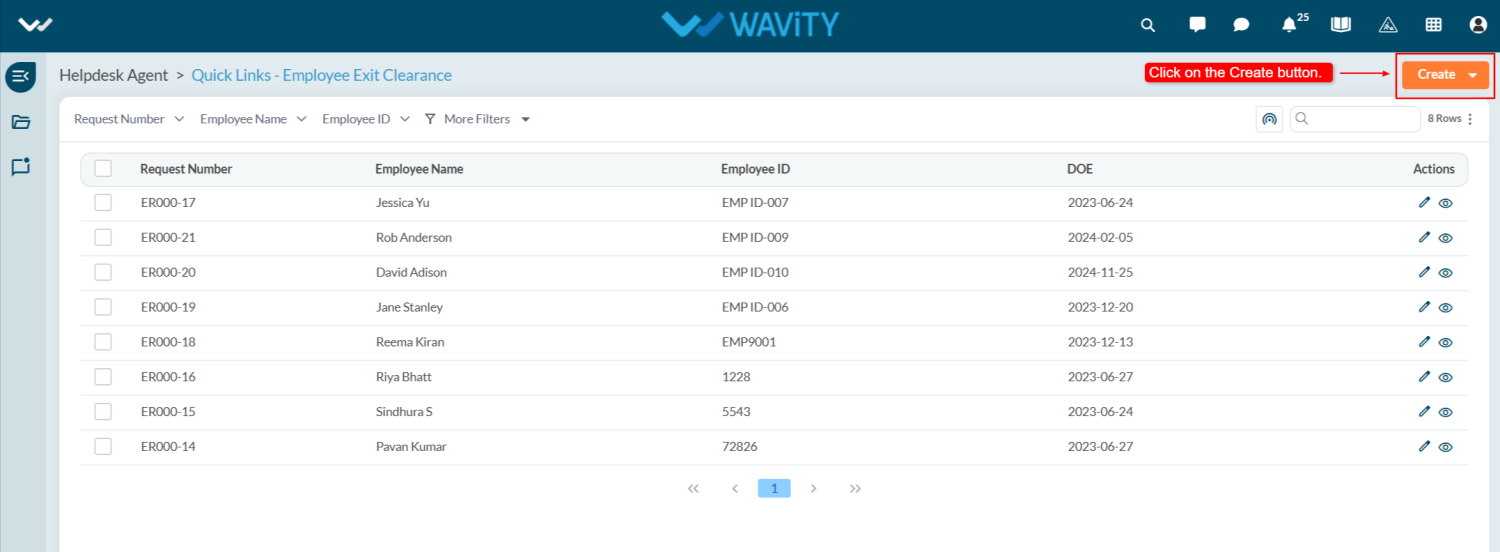
- In the Agent Persona, go to Quick Links and select Employee Exit Clearance.

- Click the Create button to initiate a new Employee Exit Clearance request.
- You will be redirected to the Return Form under the Request tab.
- Select the Employee Name. Once selected, details like Employee ID, Email ID, and Designation will auto-populate.
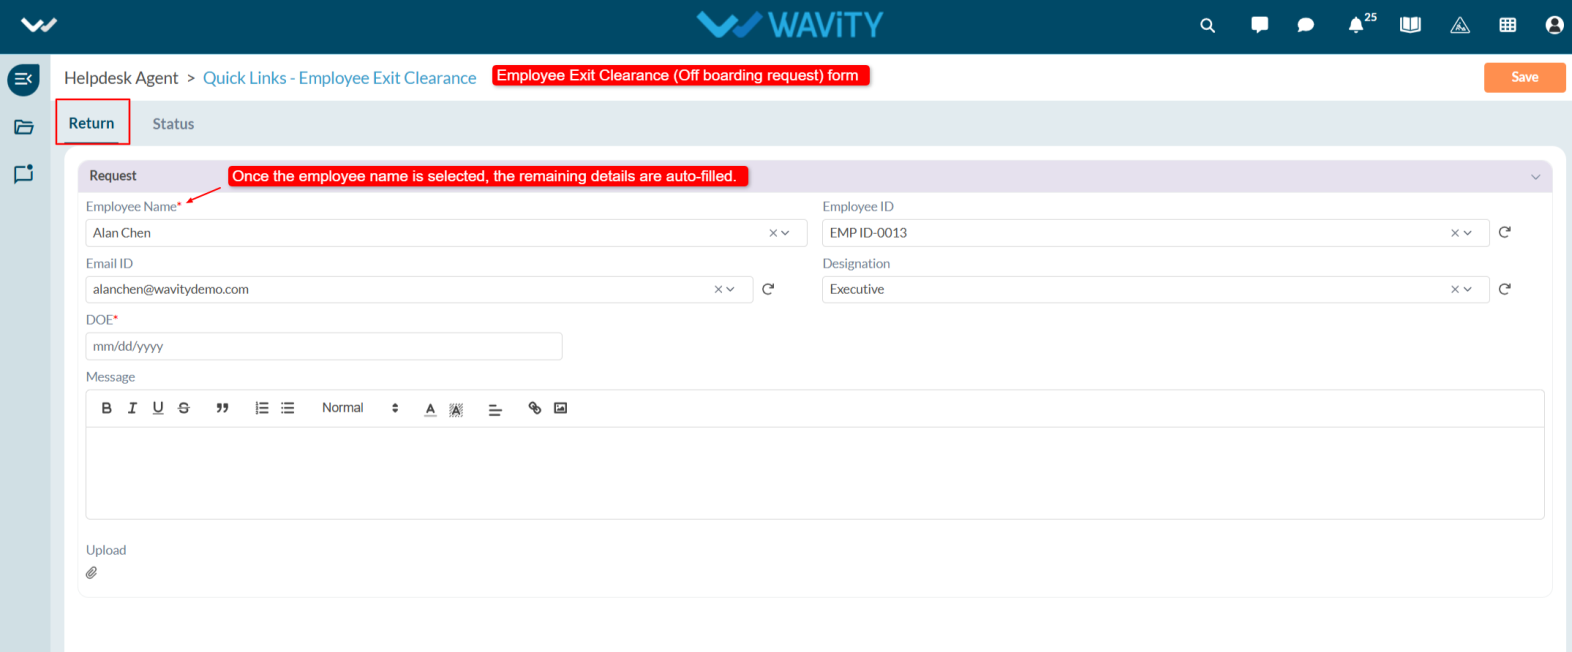
- Choose the Date of Exit (DOE), enter any additional notes in the Description box, and upload relevant attachments if required.
- Click Save to submit the request.

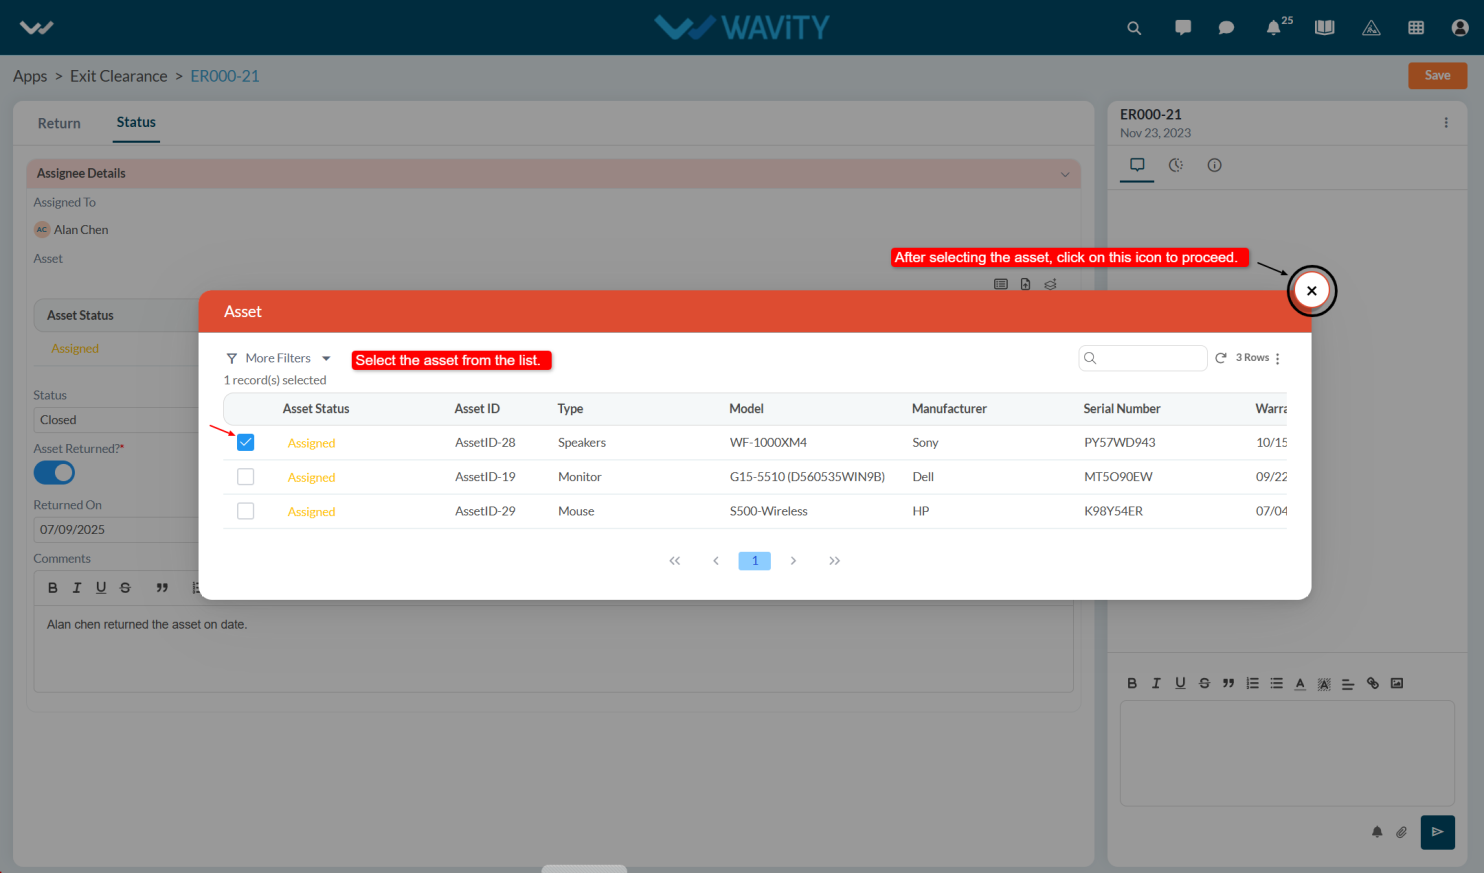
- In the Status tab under Assignee Details, the agent selects the asset(s) assigned to the employee in Asset field. Click on the select more records icon.

- Select the asset from the Asset list.
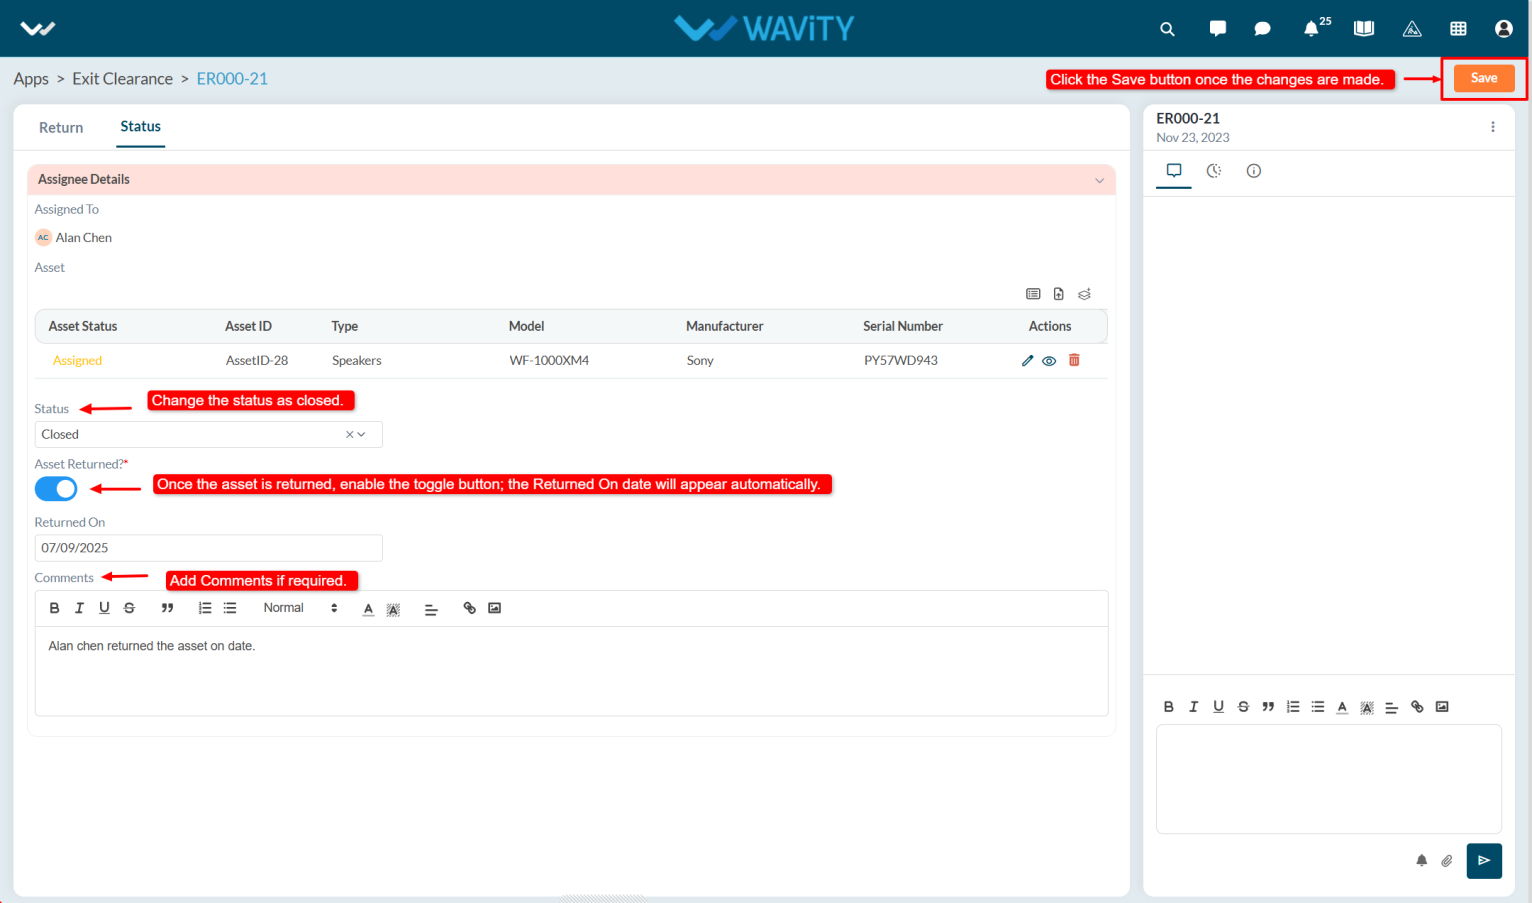
- Change the status, set the Asset Returned toggle to Yes the Return Date will populate automatically
- Agent can add comments and click Save to update the record.
- The asset's status in the Inventory will automatically update to Available.
- All asset history and assignment history will be logged and viewable under the History tab in the Inventory.