Agent Guide: How to Manage a Repair Request
Agent Guide: How to Manage a Repair Request
- Managing repair requests on the Wavity ITSM platform is designed to be a simple and intuitive process for agents.
- Note: The steps outlined below serve as general instructions and can be customized to meet specific organizational needs; however, the core workflow remains the same.
- Agents with the appropriate access can log in using their credentials and will be directed to the Agent Interface.
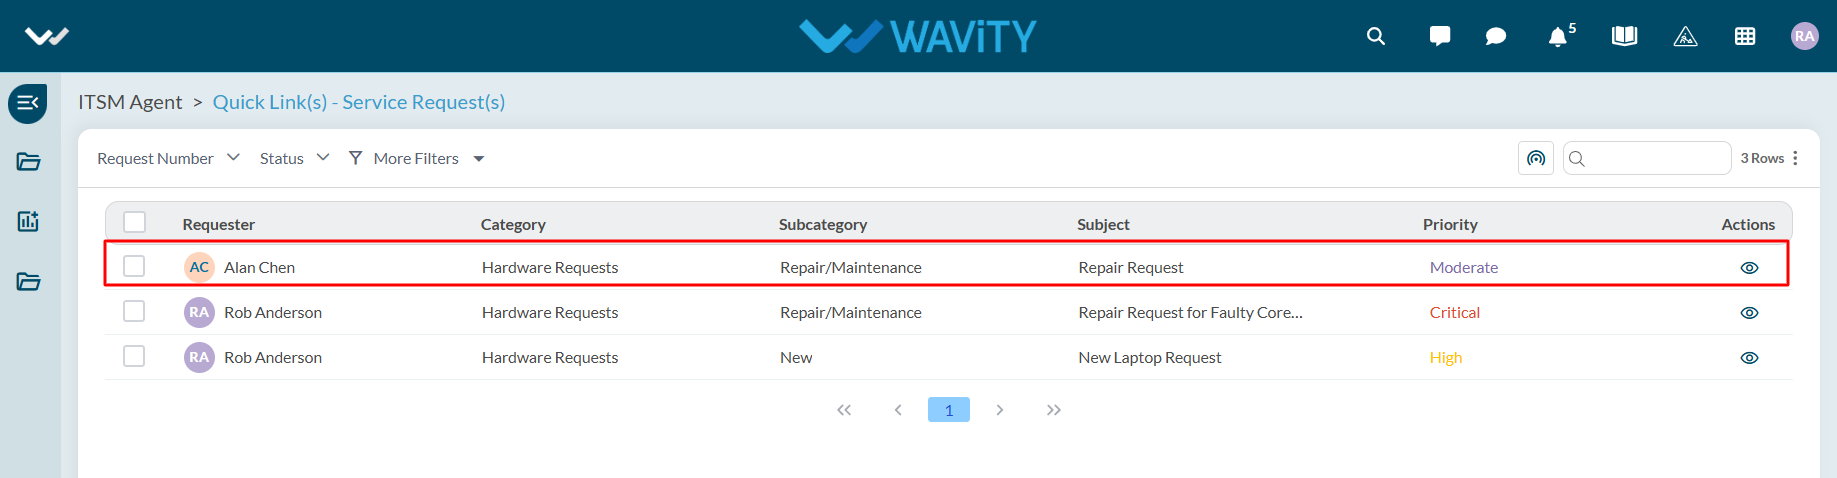
- From the Agent Interface, Click on ‘Service Requests’ from the quick links widget.

- Select the relevant repair request from the list to begin managing it.
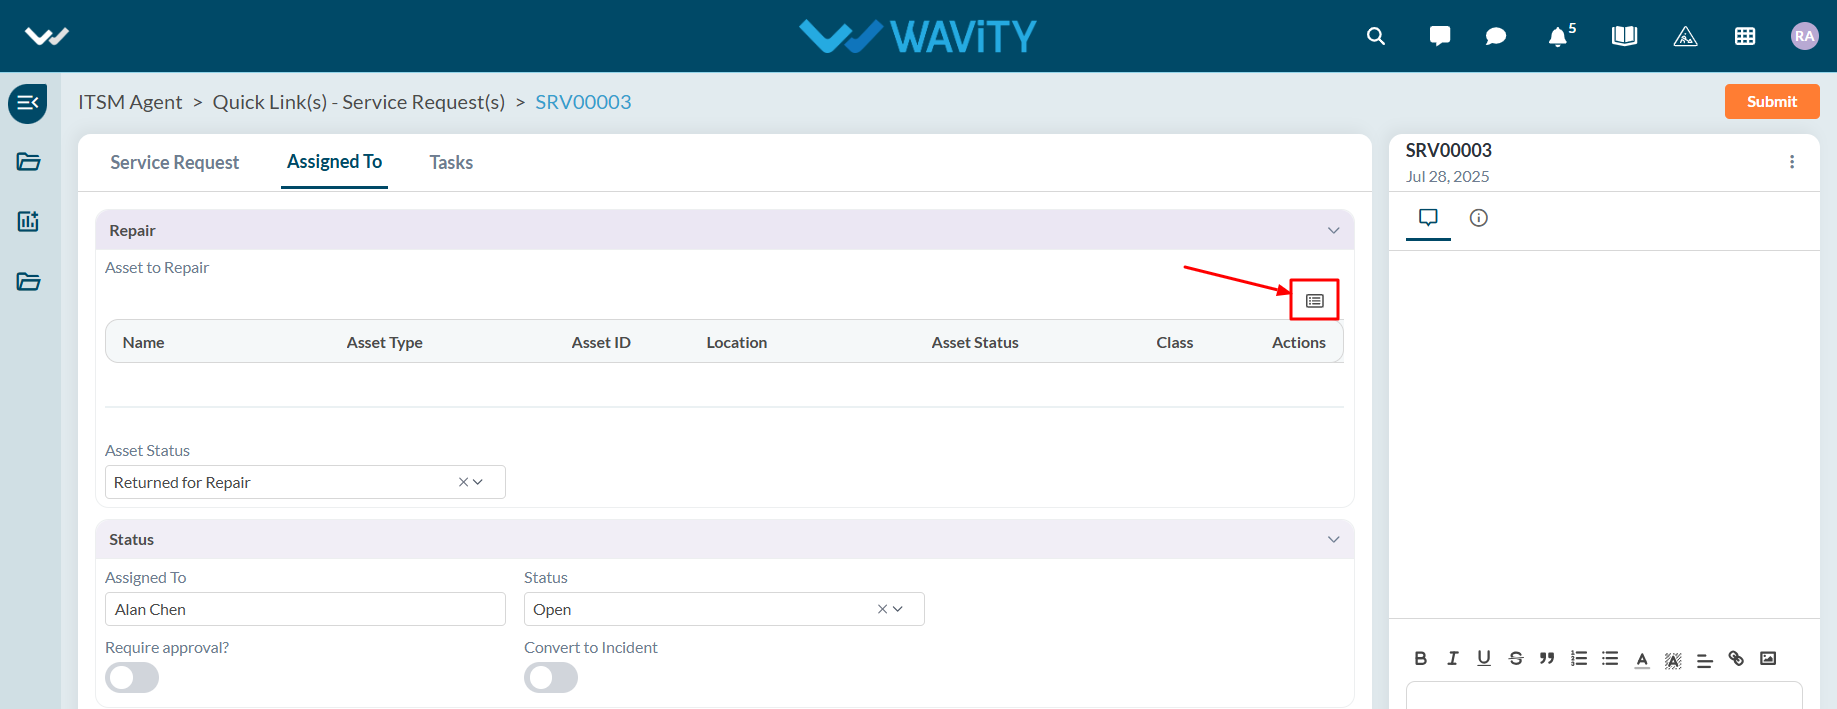
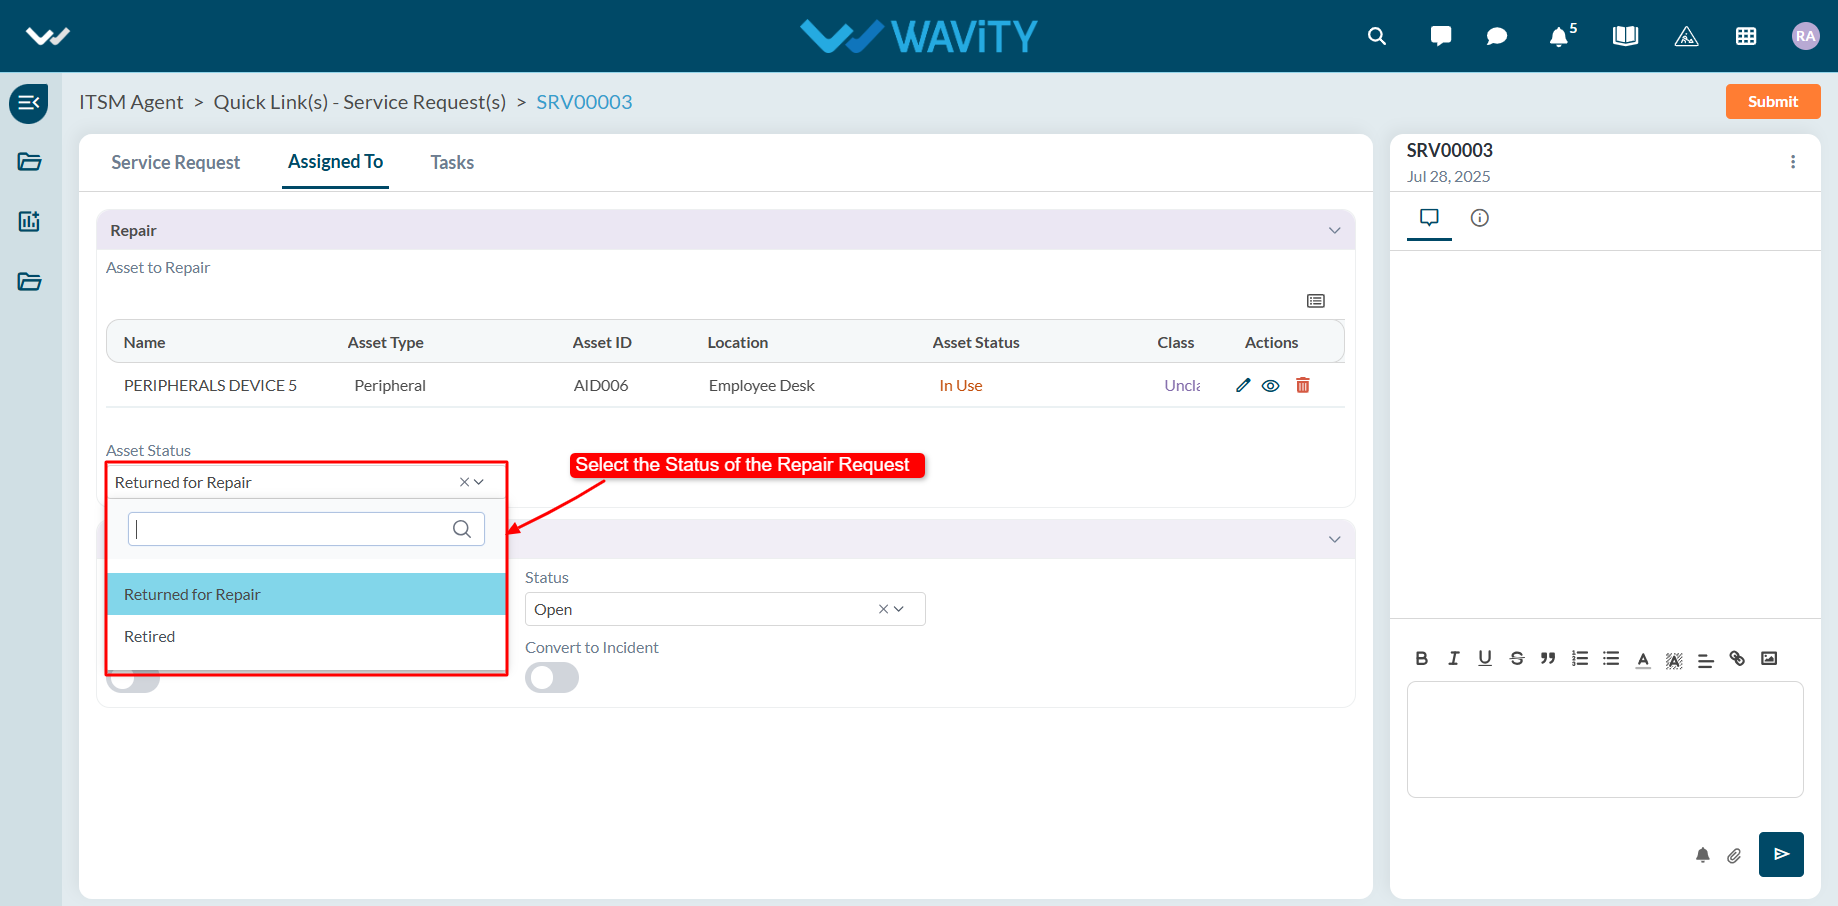
- In the ‘Assigned to’ section, click the ‘link’ icon to associate the request with the appropriate asset belonging to the end user.
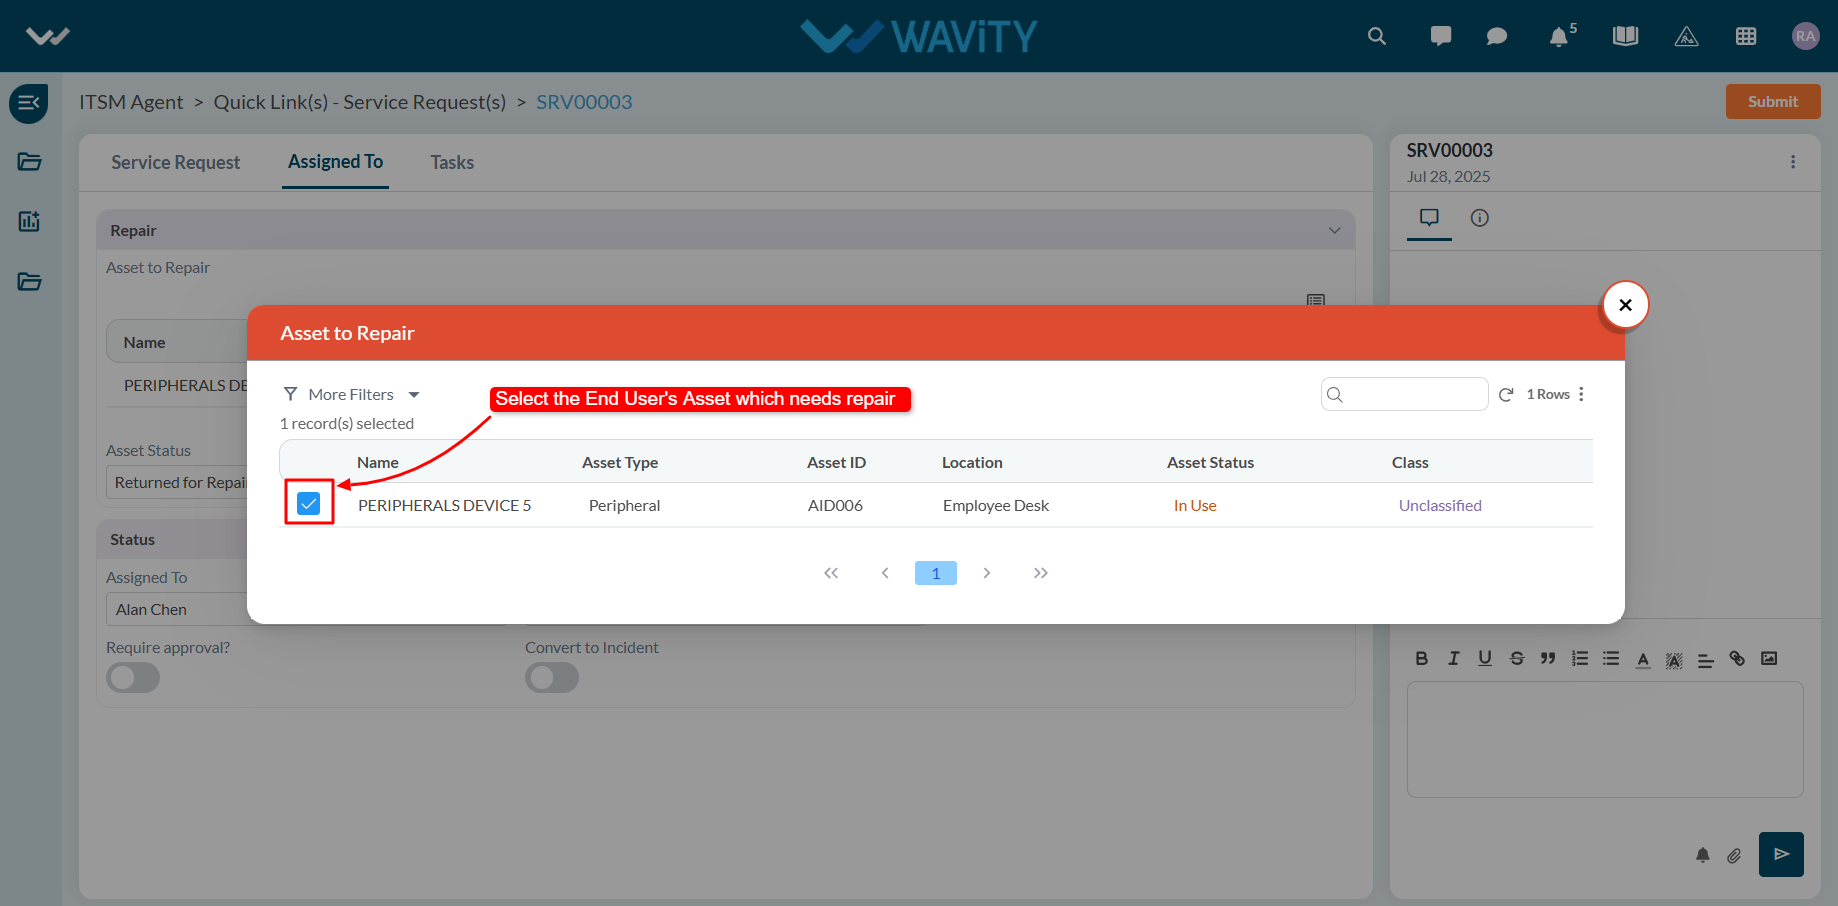
- A list of the end user’s current assets will be displayed. Choose the asset that requires repair.
- If the asset has been returned by the user for servicing, update the asset status by selecting ‘Returned for repair’ from the dropdown.
- Use the status dropdown to update the repair request. The end user will receive an email notification reflecting the updated status.
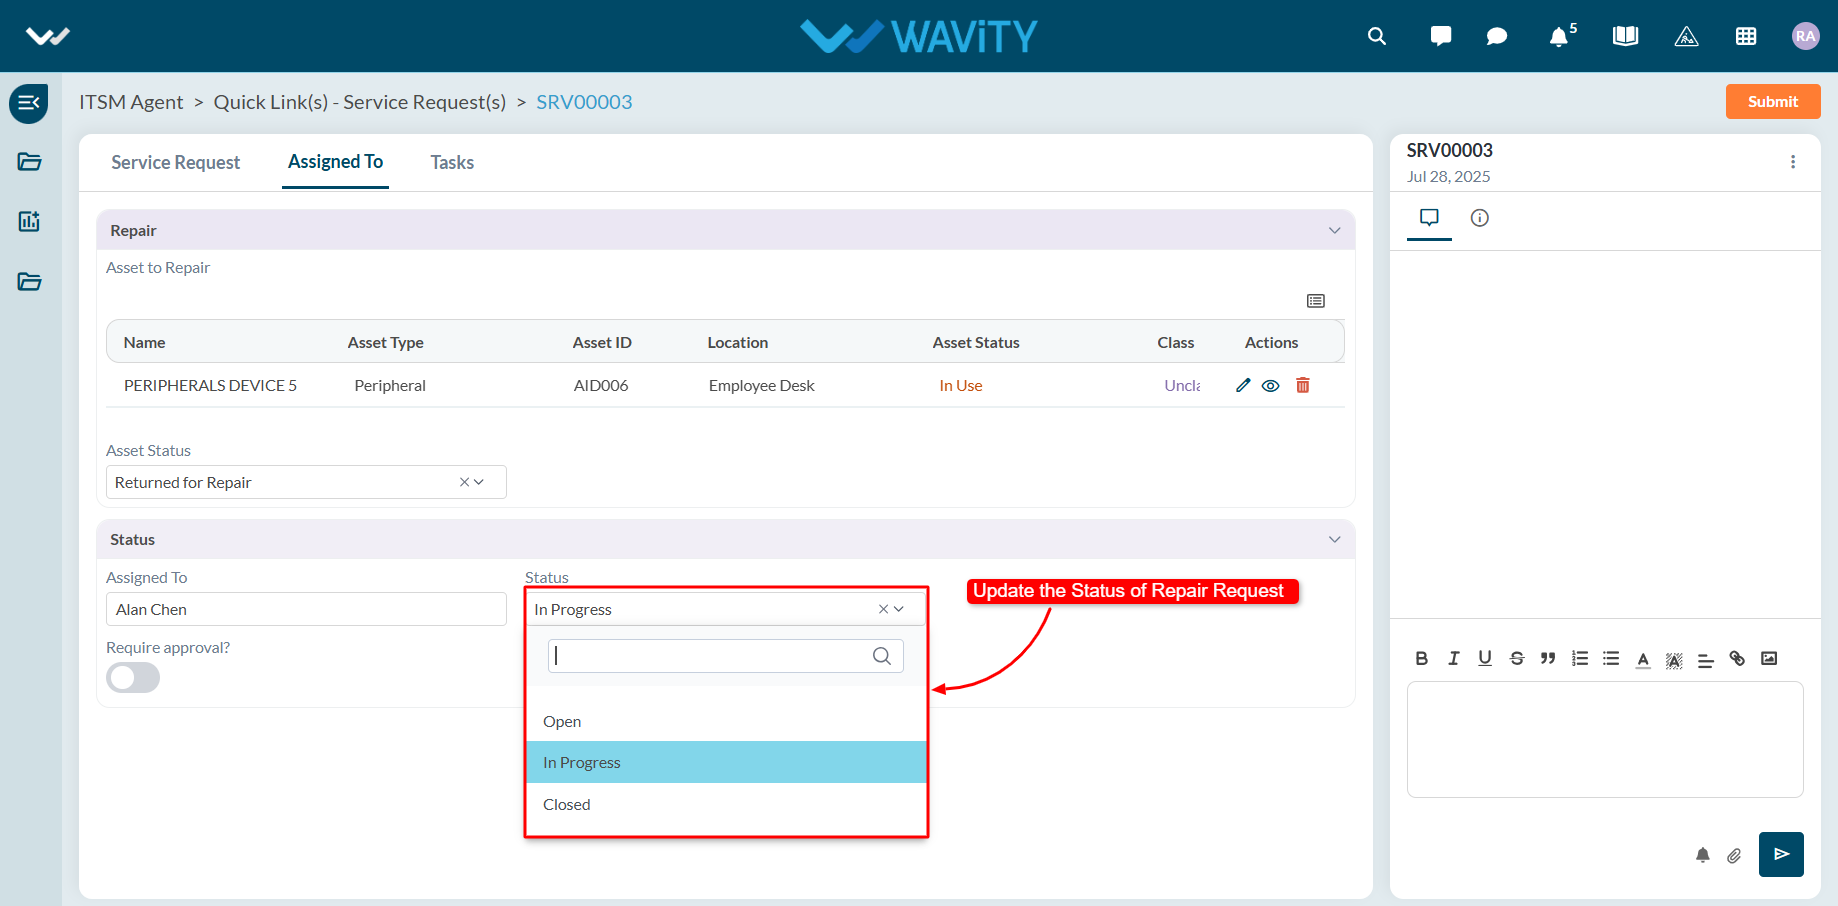
- If the request requires approval, toggle the approval switch to ON. Additional fields will appear for the approval workflow, allowing a manager or authorized user to update the approval status.
- Agents can use the comment box to communicate with other users regarding the repair request.
- Once all updates are made, click on "Submit" to save changes and complete the process.