Agent Guide: How to create a new P.O
Agent Guide: How to create a new P.O
- Creating a new Purchase Order (P.O.) in the Wavity ITSM platform is designed to be a simple and intuitive process for agents.
- Note: The steps outlined below serve as general instructions and can be customized to meet specific organizational needs; however, the core workflow remains the same.
- Agents with the appropriate access can log in using their credentials and will be directed to the Agent Interface.
- From the Agent Interface, Click on ‘Create a PO’ from the quick links widget.

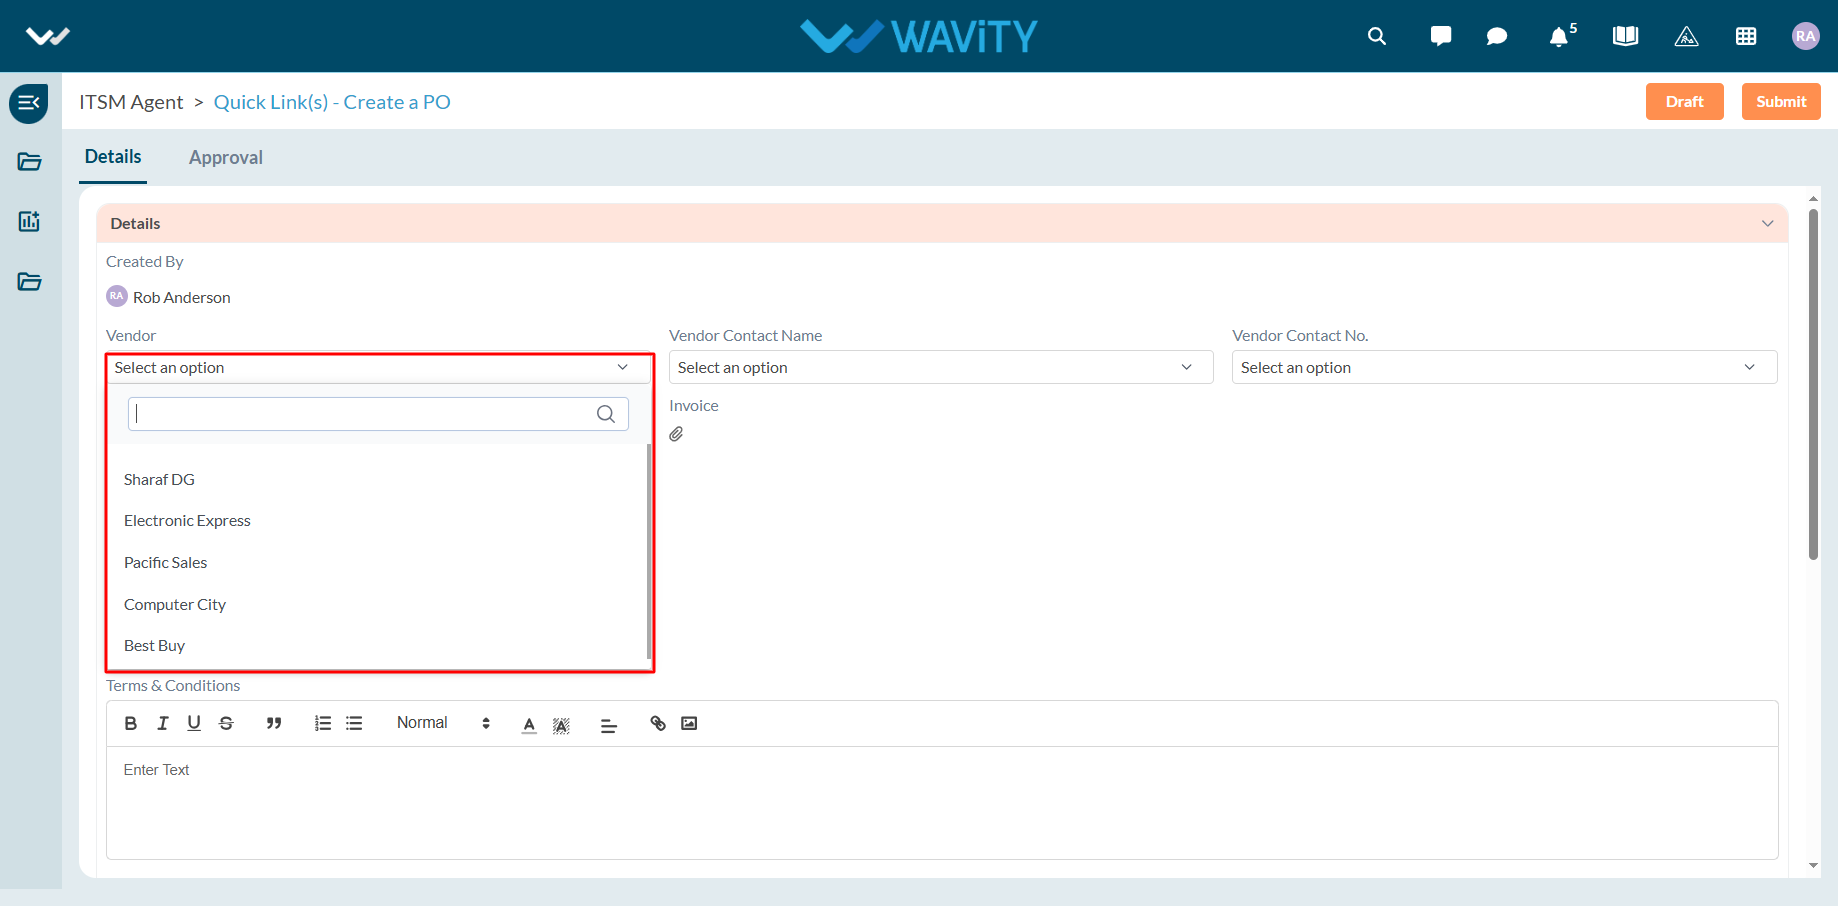
- Select the vendor name from the dropdown menu. The vendor’s contact name and phone number will automatically populate based on the master data.
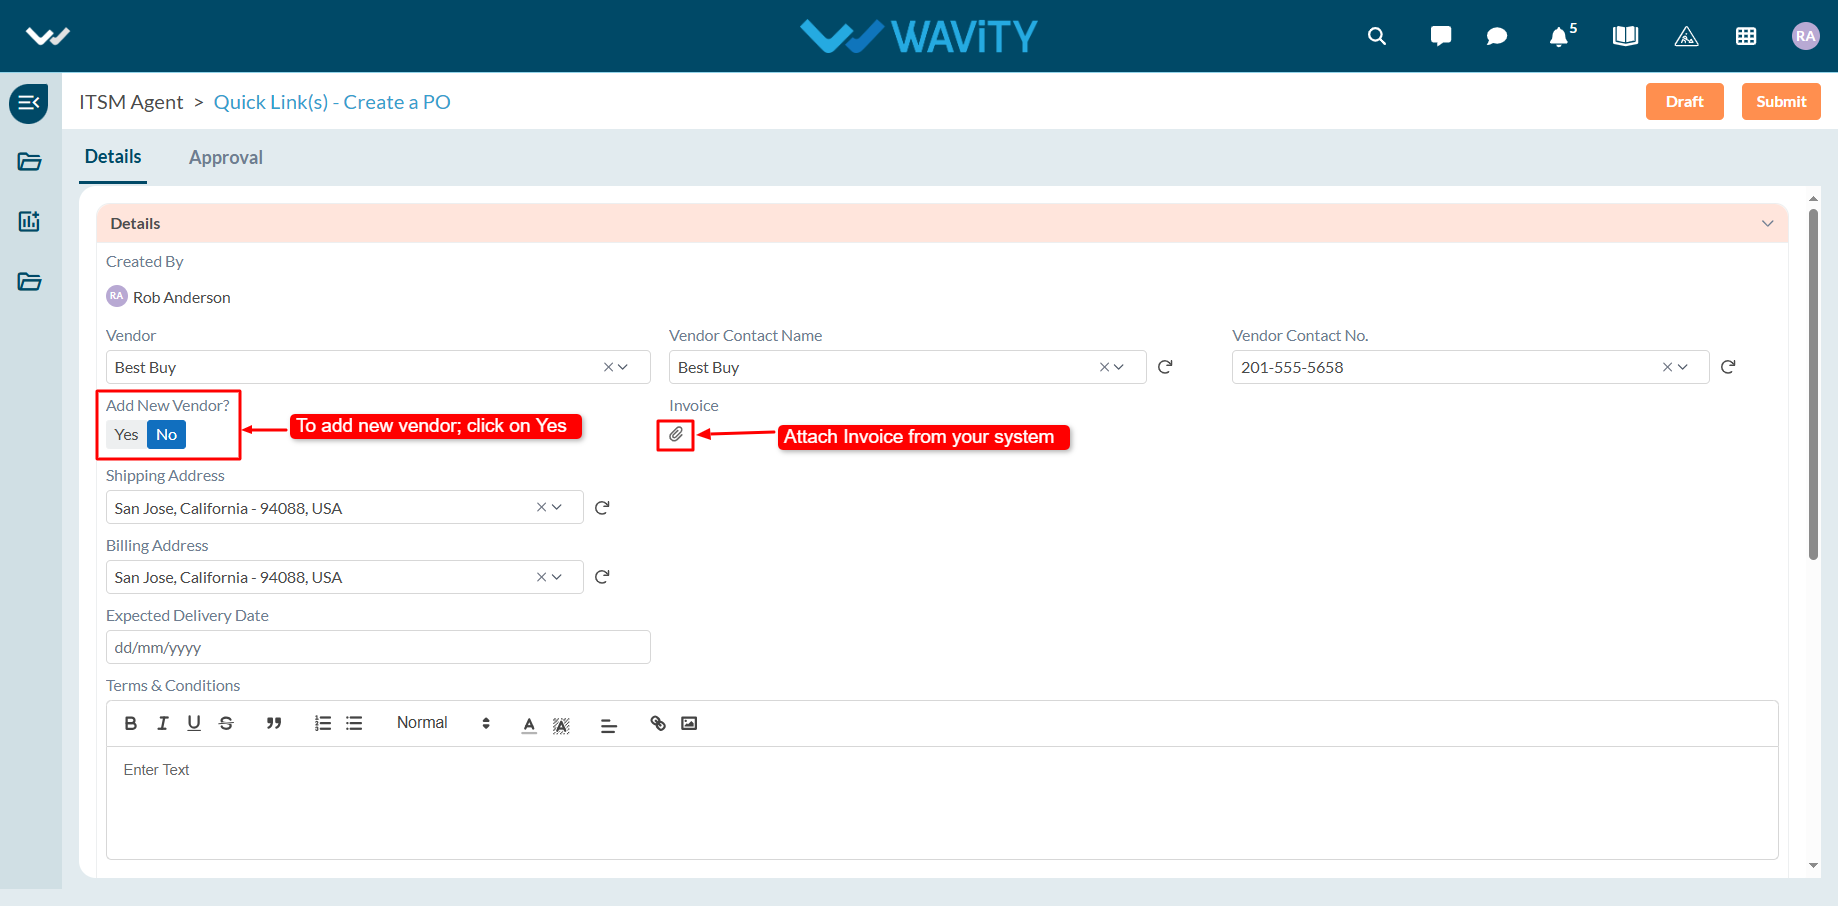
- If the vendor is new, select ‘Yes’ in the ‘Add new vendor?’ field. You can attach an invoice copy from your local system or connect through cloud storage services like Google Drive or OneDrive.
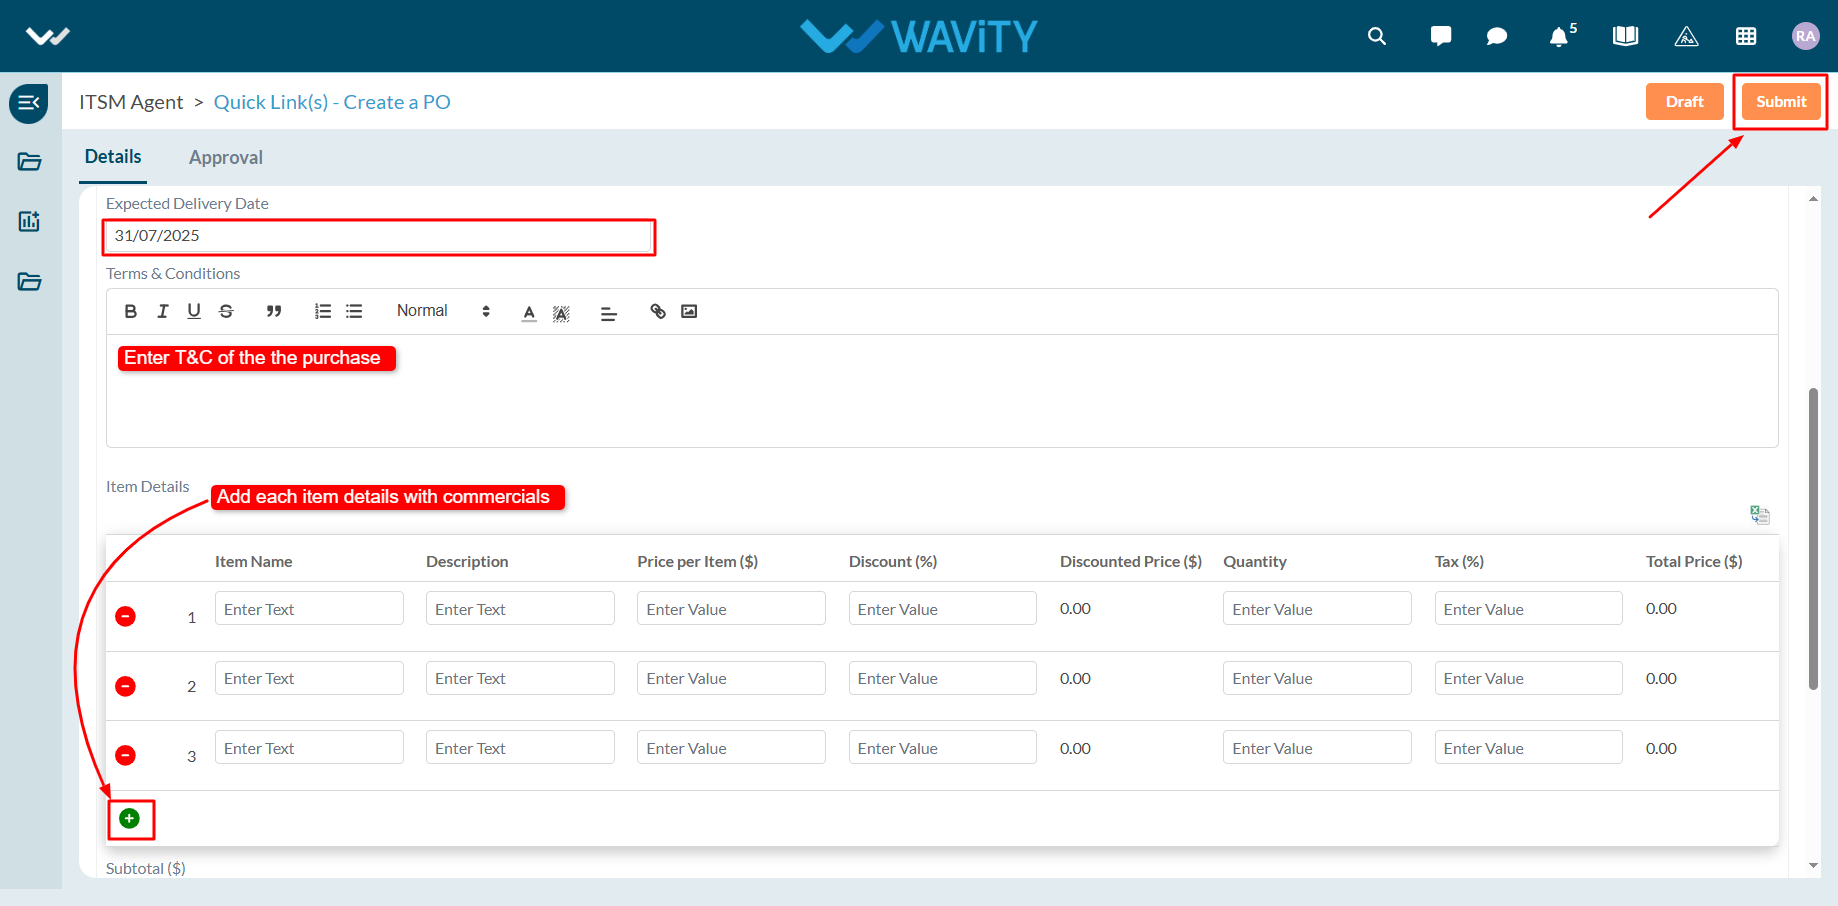
- Choose the expected delivery date for the order and enter the terms and conditions in the description box.
- Add item details along with their commercial information by clicking the plus (+) symbol for each line item.
- Once all the required details are entered, click "Submit" to generate the new Purchase Order.