Admin Guide: Setting Up Custom Auto ID Numbers
Admin Guide: Setting Up Custom Auto ID Numbers
- In the Wavity platform, users can configure the Auto ID Number as needed, and the setup process is simple and user-friendly.
- Only Admin have permission to configure the Custom Auto ID.
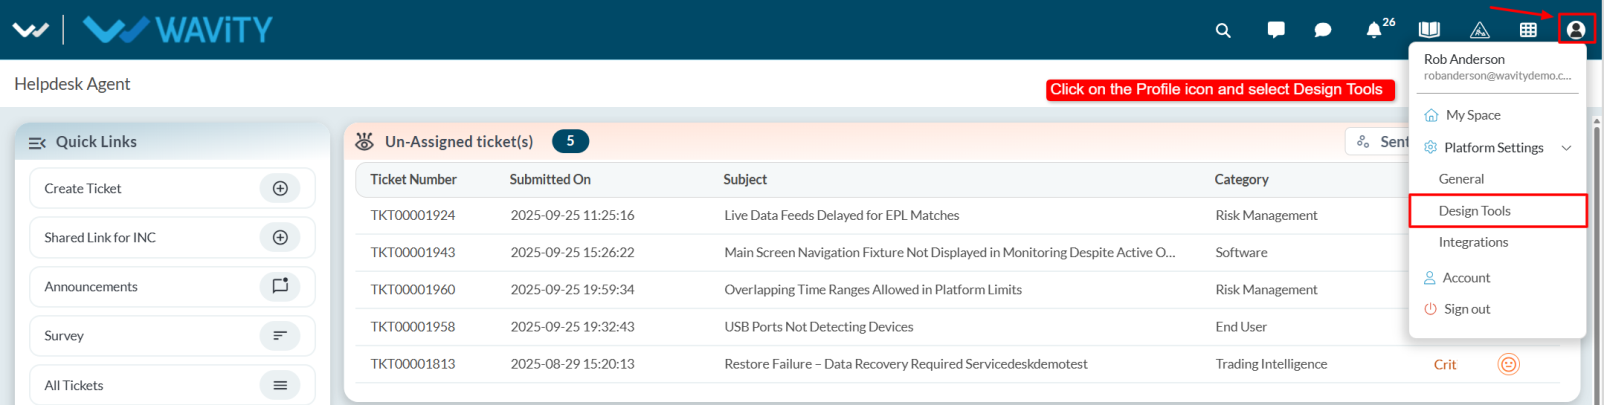
- Admin must log in with their credentials and navigate to their respective interface.
- Click on the Profile icon and select Design Tools from the dropdown menu.
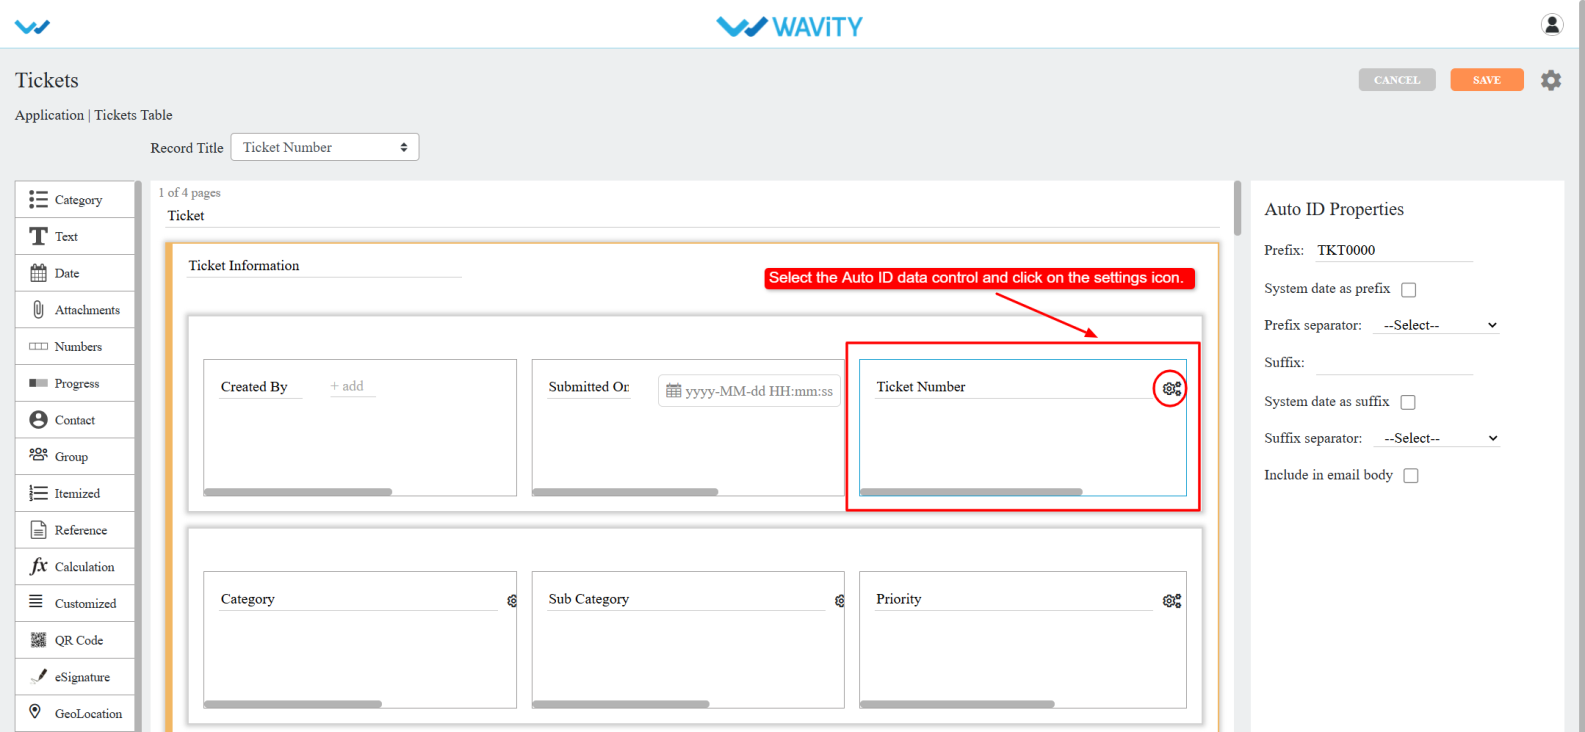
- Choose the desired application, click on the three dots (⋮), and select Open in App Designer.

- Select the Auto ID data control and click on the Settings icon.
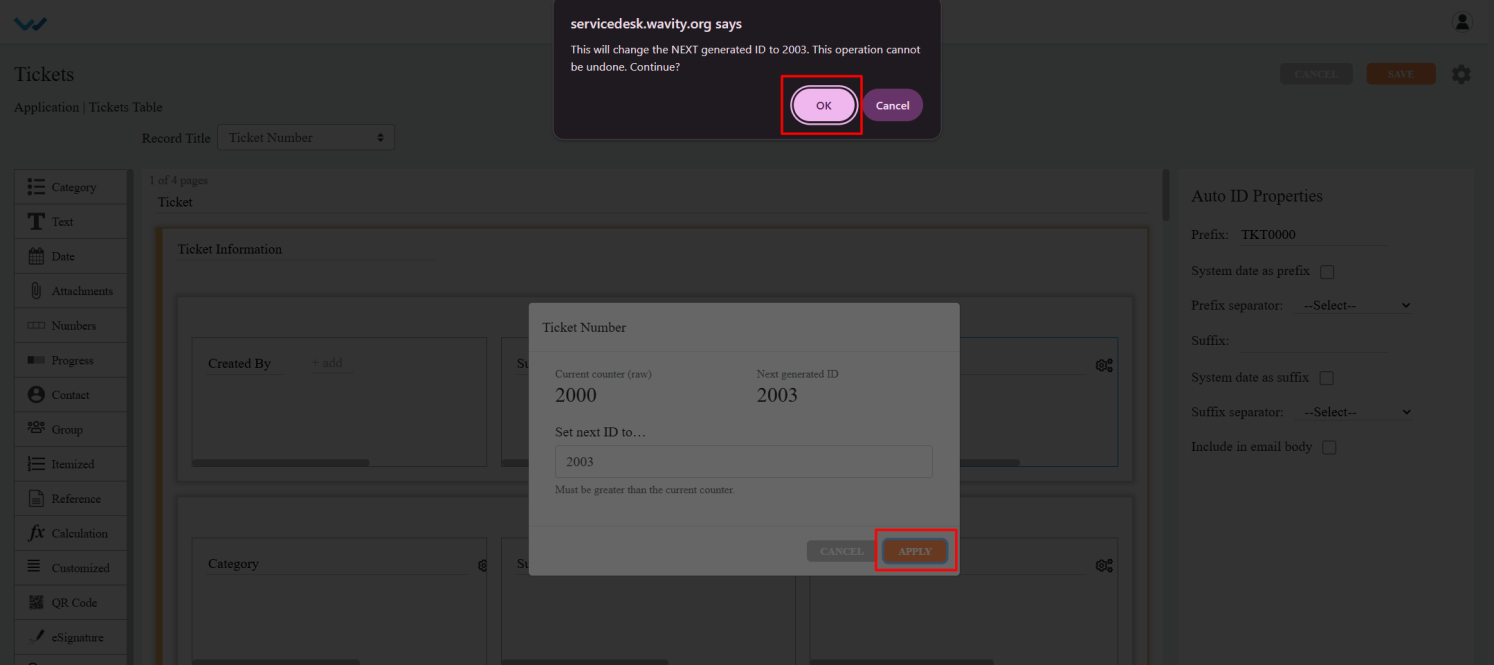
- The Current Counter (raw) displays the current ID number, while the Next Generated ID shows the next ID number that will be generated.
- In the Set Next ID field, enter the desired number (it must be greater than the current counter). After entering the custom number.

- Click Apply. A confirmation popup will appear, click OK to confirm.
- Save the designer. The Ticket ID will now be generated based on the custom number entered in the Set next ID to field.