Adding Custom Attributes – General Settings
Adding Custom Attributes – General Settings
- Custom attributes are user-defined fields added to customer details within the Wavity platform to capture specific information retrieved from external systems through integrations such as Open APIs and Rest API’s.
- Adding custom attributes in Wavity is a straightforward process and can be easily configured based on business requirements.
- If you need to move custom attributes from external systems, they can be added and retrieved in Wavity using Open API and Rest API integrations.
- Only admin will have access to add and manage custom attributes in the Wavity platform.
- Click on the Profile icon and select General from the available options.

- You will be directed to the General Settings page.
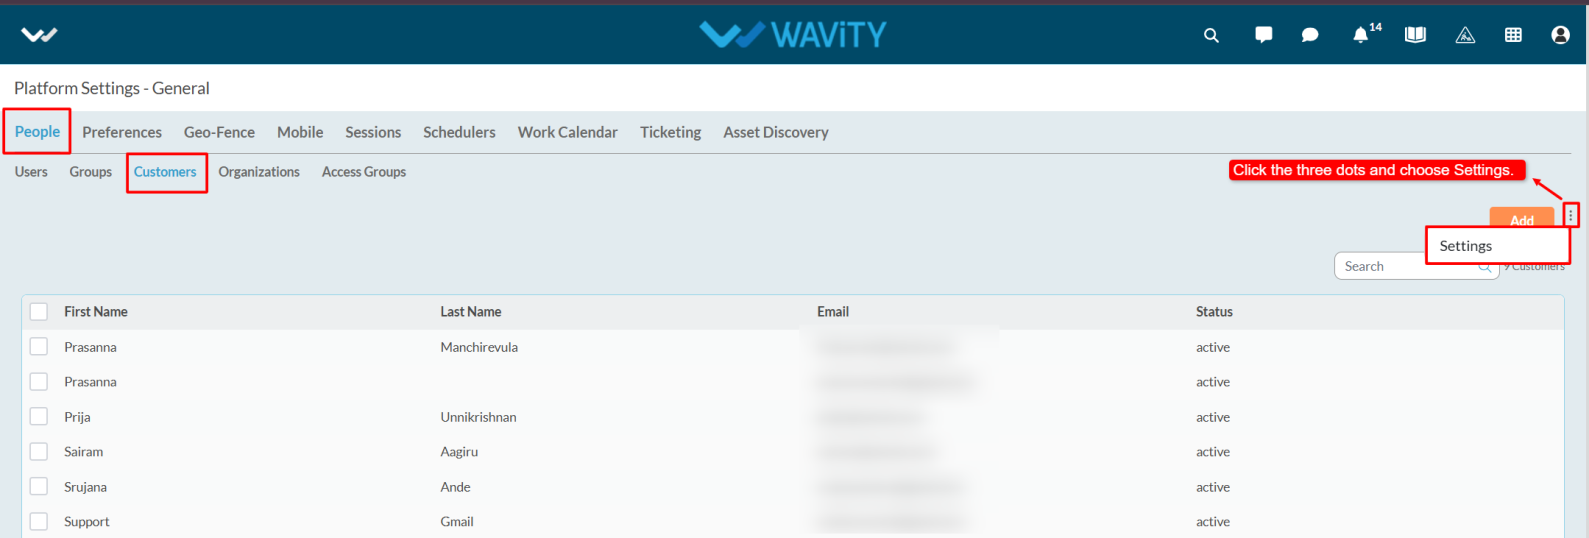
- Navigate to the People tab, select Customers, and click on the three-dot menu and select settings next to the Add button.
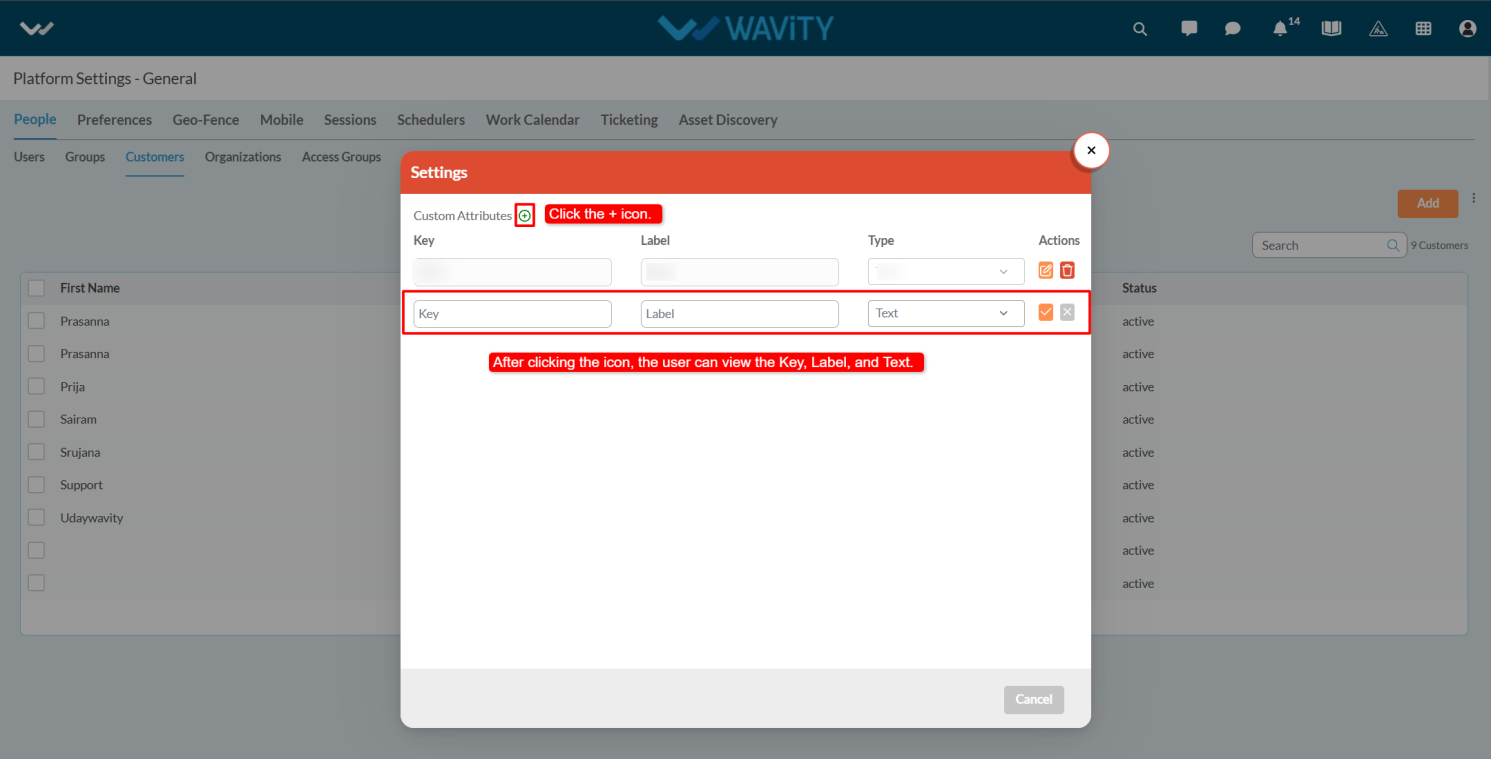
- Click on the Add icon.
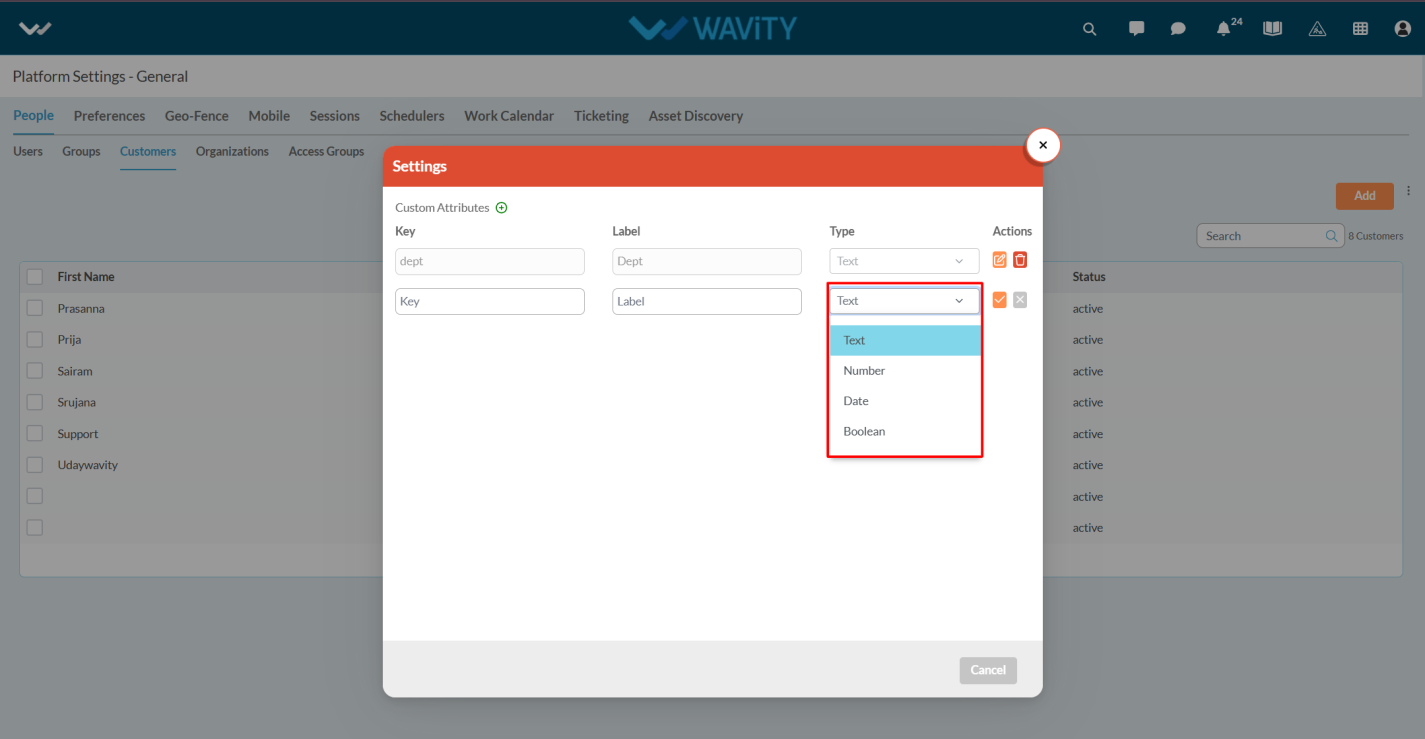
- We can view the Key, Label and Type.
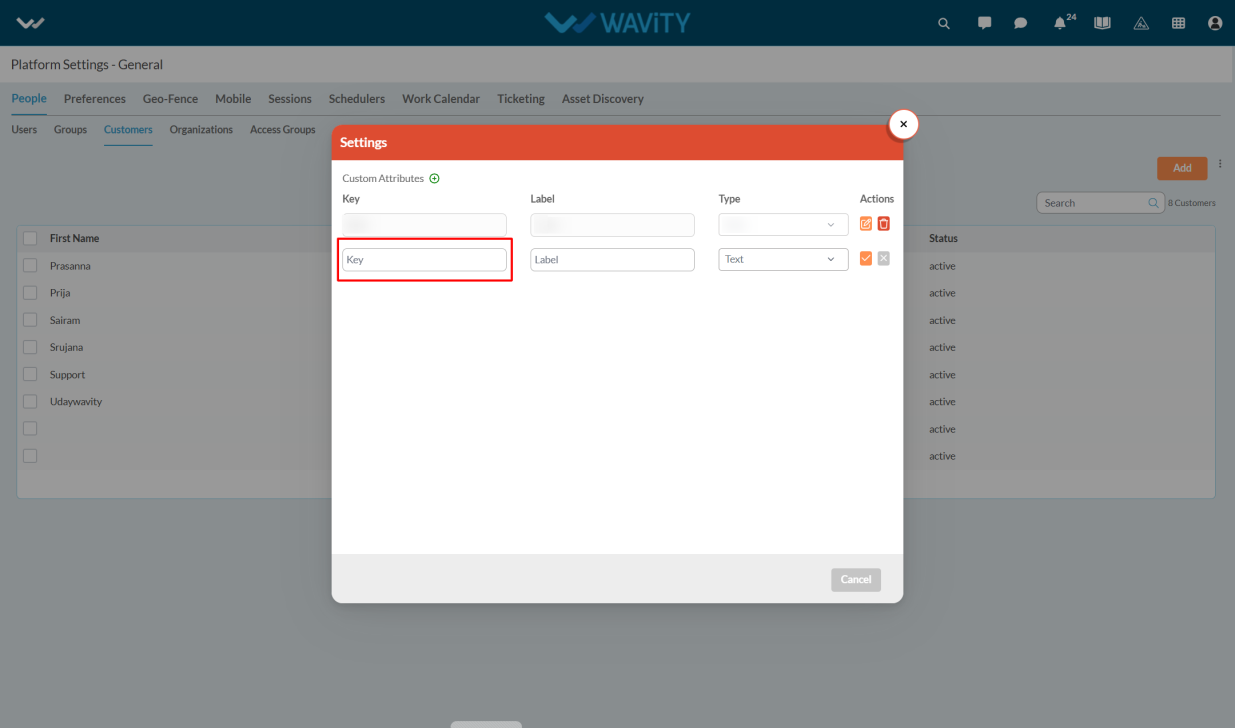
- Key is a unique identifier used internally to reference the custom attribute. It should follow a consistent naming convention (e.g., customer_type, contract _end date) and must not contain spaces or special characters.
- Enter the Label, which is the display name shown to users on the interface. It should be clear, user-friendly, and descriptive (e.g., Customer Type, Contract End Date).

- Enter the Type which defines the format or input method for the custom attribute. Common types include Text, Number, and Date, Boolean.
- Click on the save option to save the attributes.

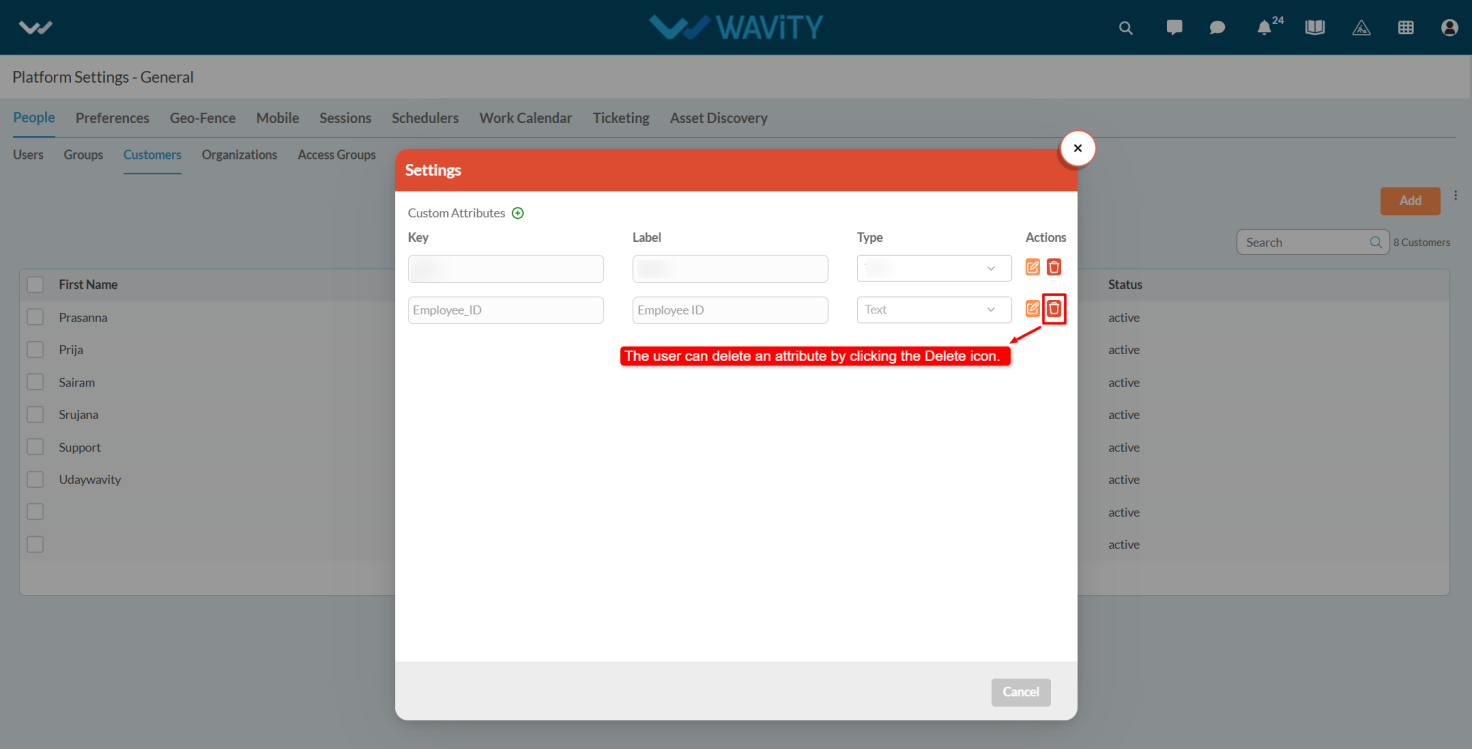
- You can delete attributes by clicking the delete option.
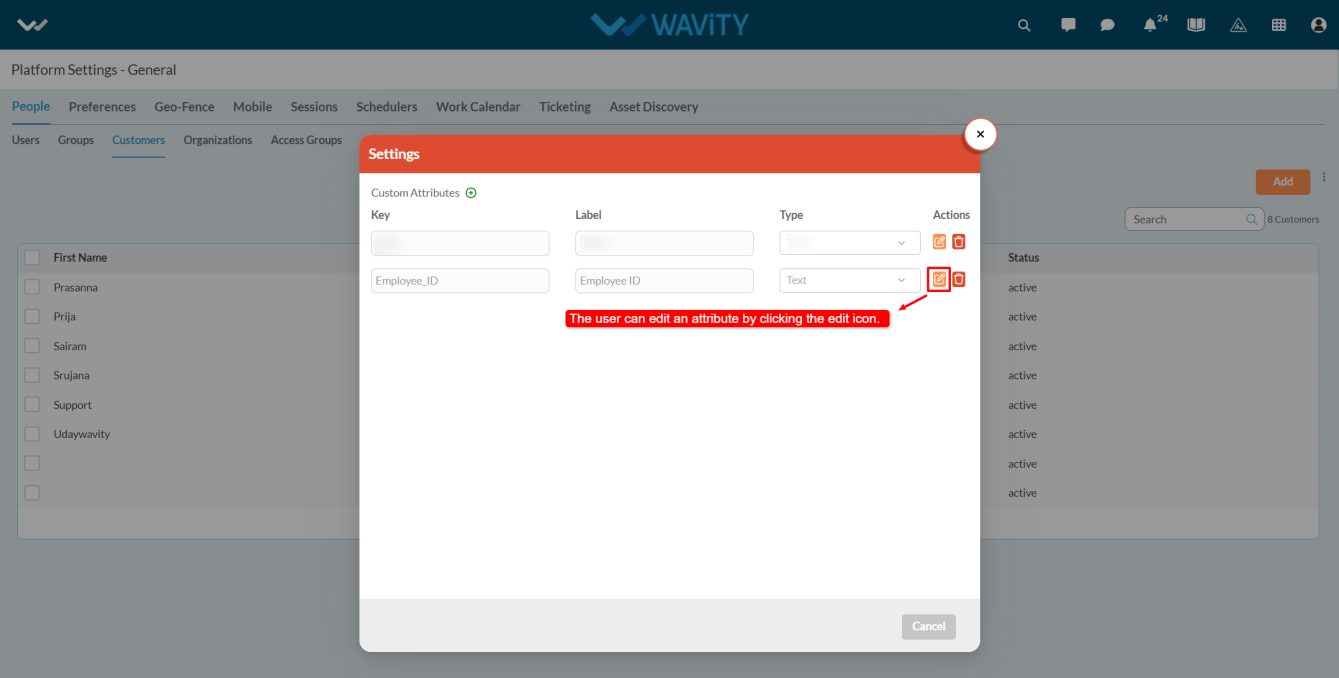
- If you want to edit the attributes click on the edit option.
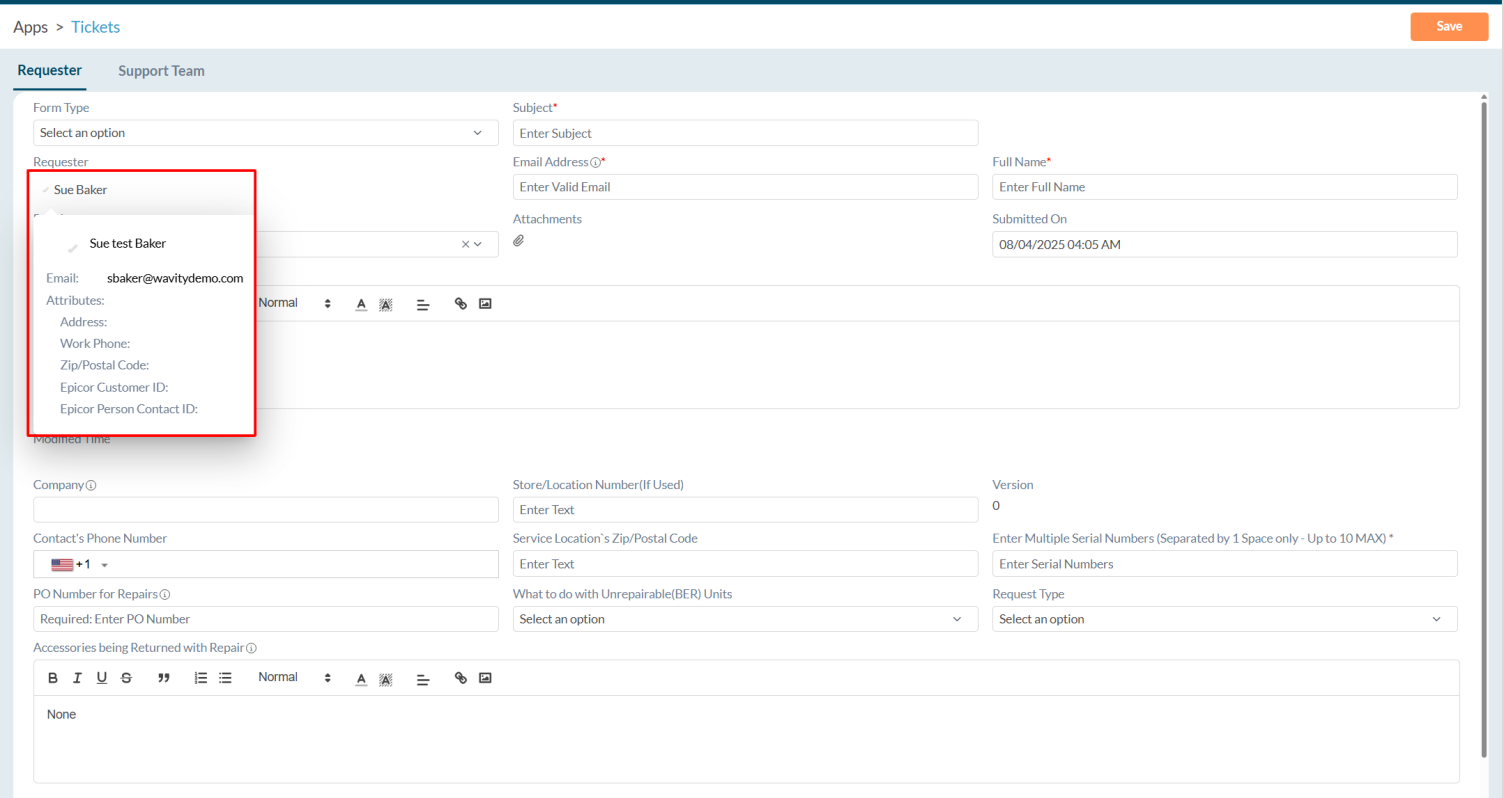
- After Adding custom attributes and integrated with Open API’s user can view the attributes whenever they click on the user’s profile icon.